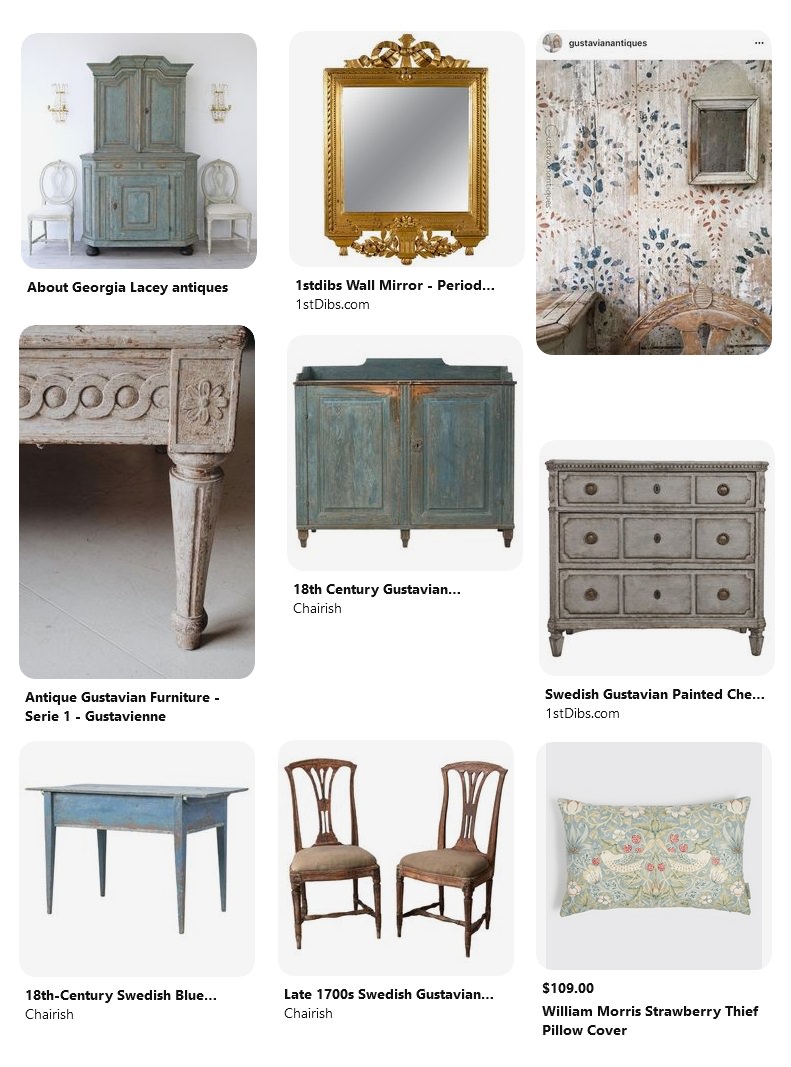
3 Swedish Must Haves – Decorating A Home Around Swedish Antiques
You love Swedish style but don’t know exactly where to start. Here are a few ideas for you to get going.
Swedish style is about simplicity, but it is anything but boring.
The look is centered around minimalism, but the furnishings can be very detailed. Have you ever considered working with rub on transfers? Use them on any sort of wooden item. Think of a stackable set of boxes, or a tray for your ottoman. Do up a showcase dresser. Add in hand painted details to blend the transfers into the distressed painted look.

Rub on Butterflies – Do it yourself “painted looks” – Amazon
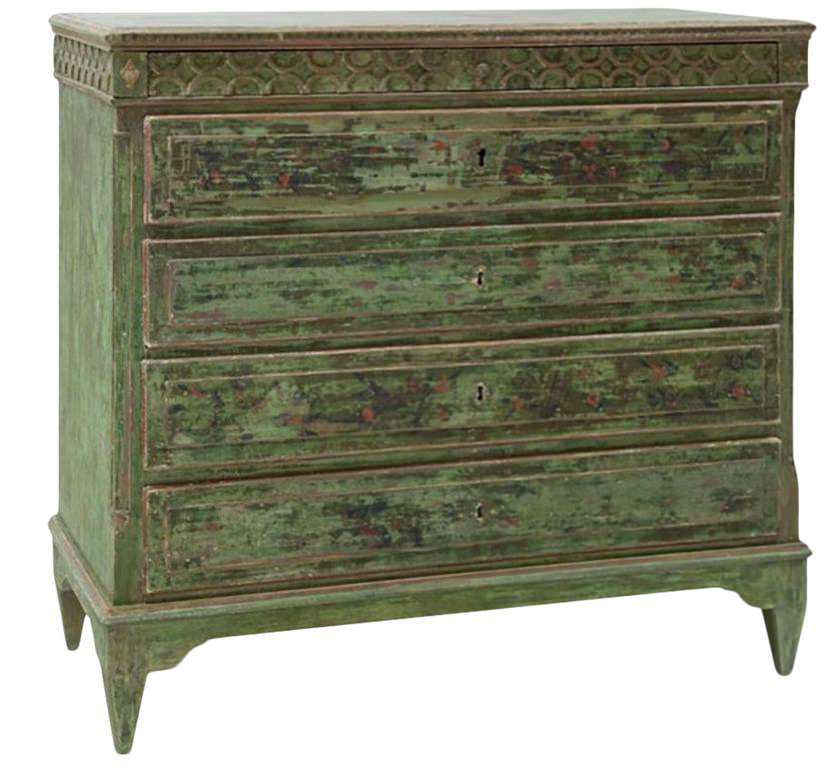
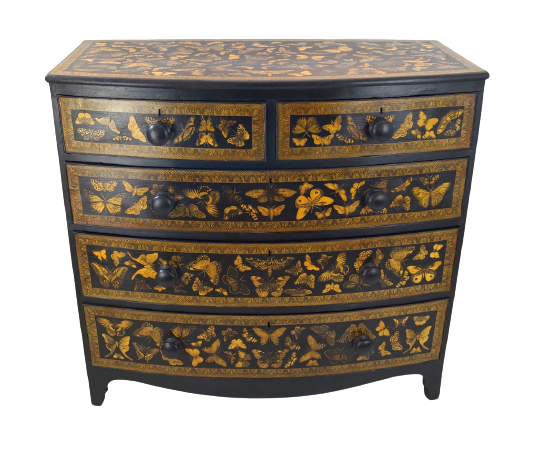 Butterfly Chest – antiques-atlas.com/
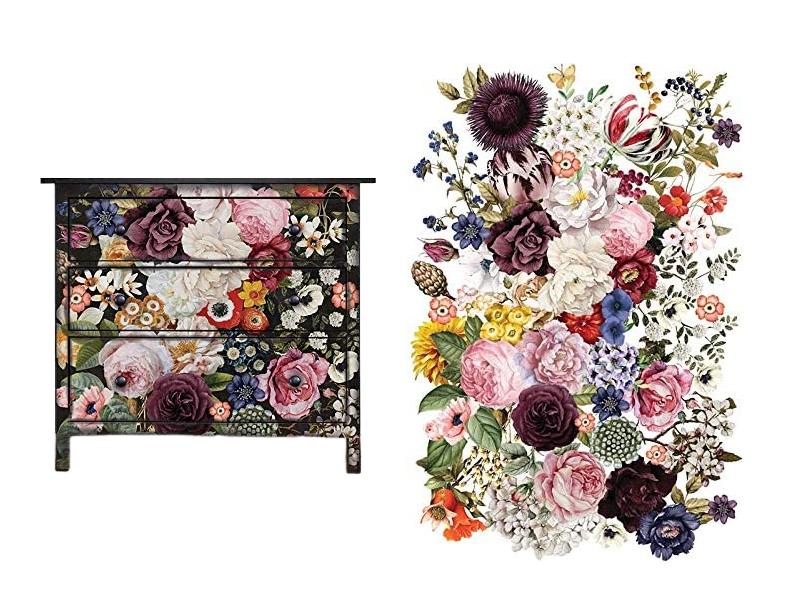
Floral Rub On Transfer – Amazon
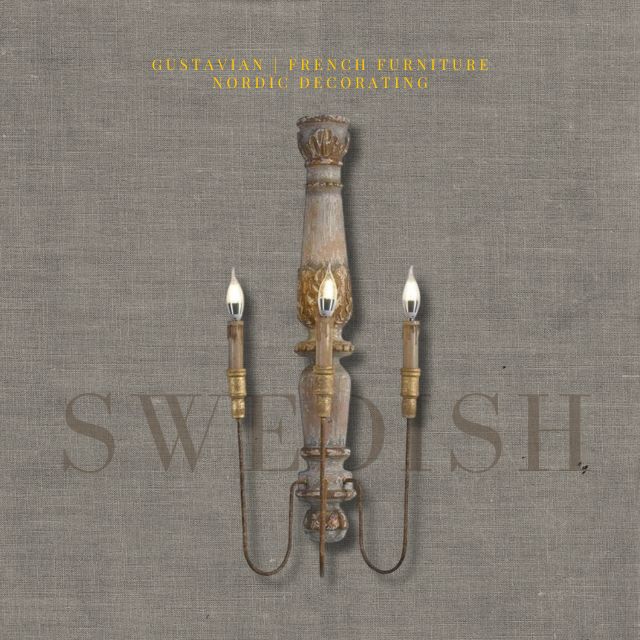
1. Swedish Must Have’s – Wall Lights
Mirrors, gilt brass and crystal chandeliers have also been used for centuries in the northern countries to capture light as the winter nights were long. The reflections created light which extended the days. Here is an exceptional light that looks like an antique, but doesn’t use candles, but real lights!
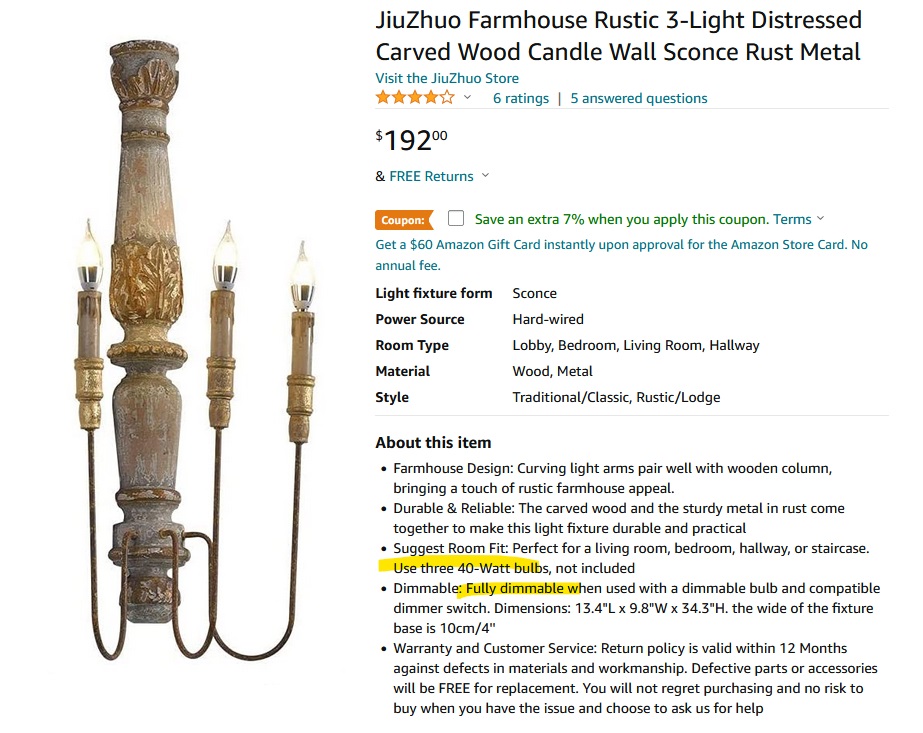
Distressed Wood 3-Light Candle Sconce – forget about candles. $192 Amazon
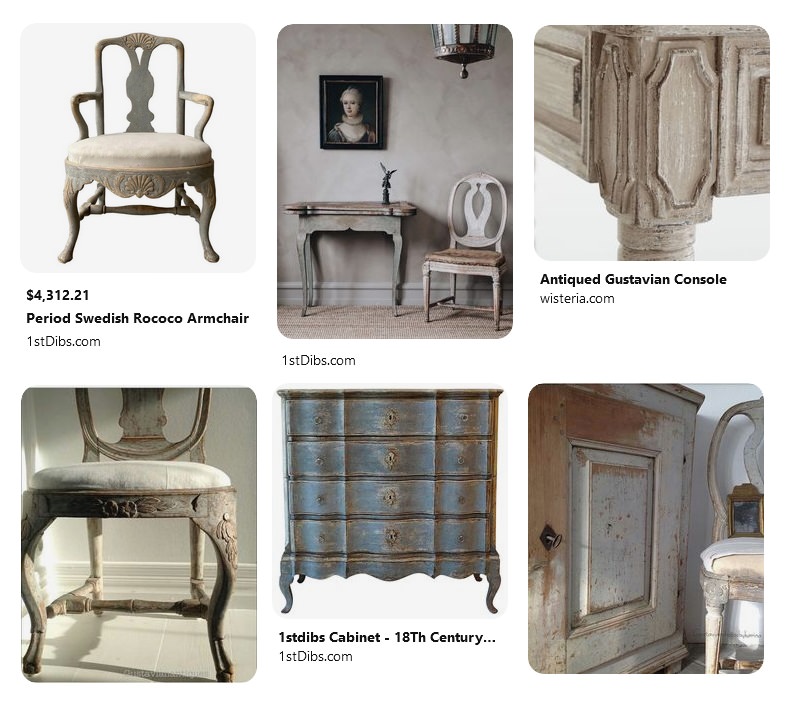
2. Swedish Must Have’s – Interesting And Detailed
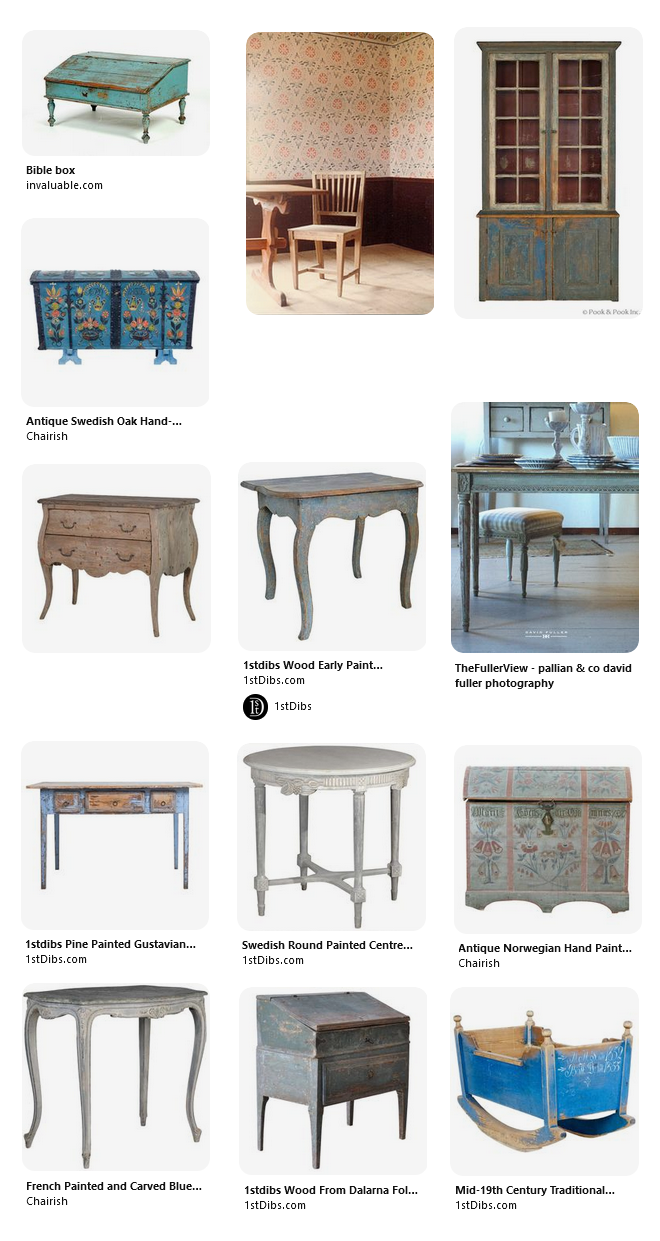
Captivating Swedish interiors have their emphasis on texture. A few detailed, distressed or hand painted pieces can go a long way in creating this look. Think about really worn wood looks. How to do this yourself? Beat up your wood, and paint over the wood, and wipe it away. The painted glaze will settle into the worn and distressed areas giving you the look of a worn antique.
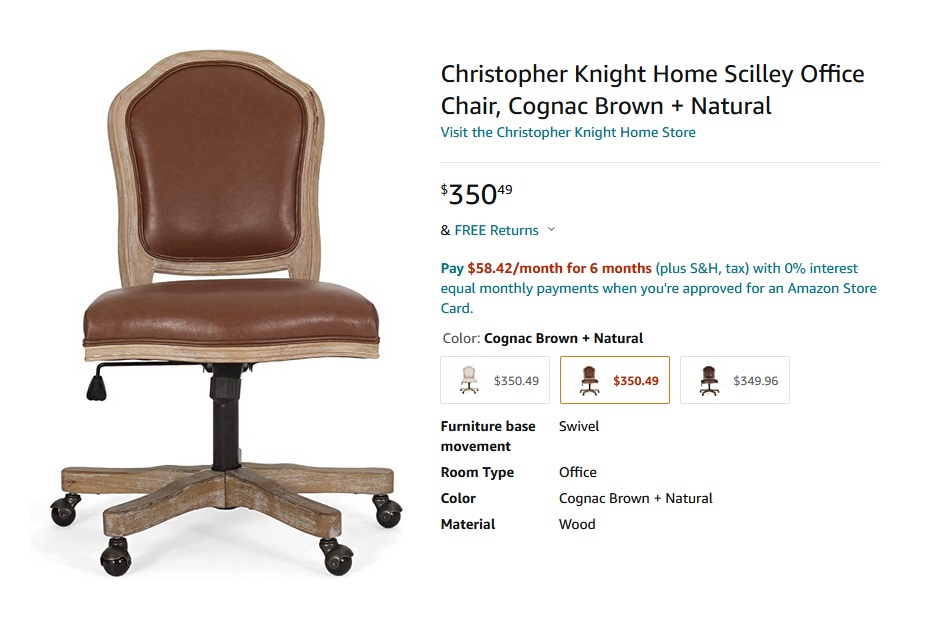
Cognac Brown Wood Office Chair – Amazon
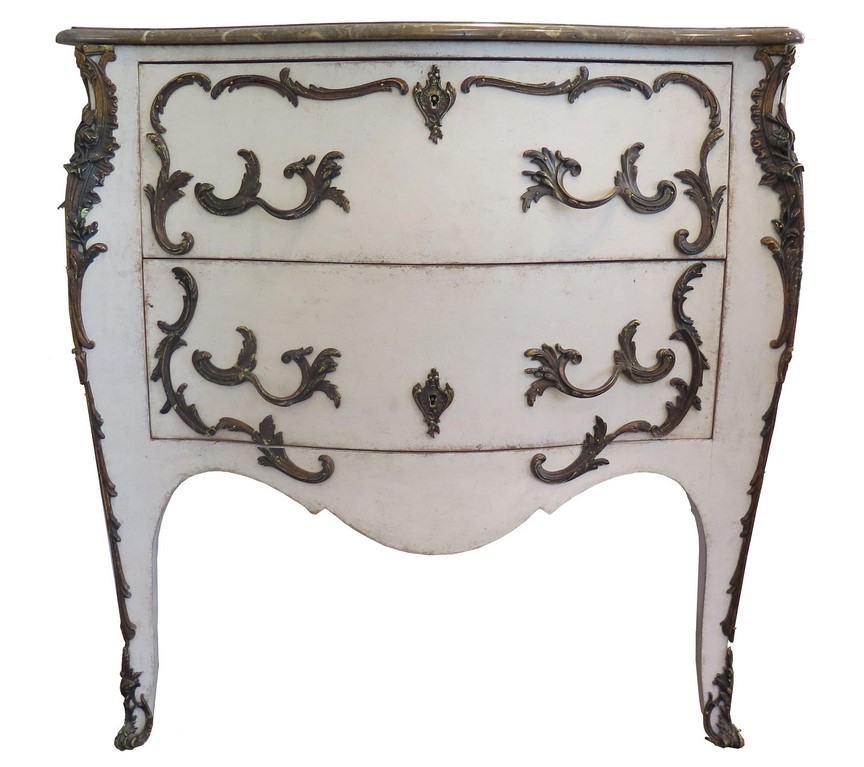
19th century Rococo Painted Commode – 1st Dibs
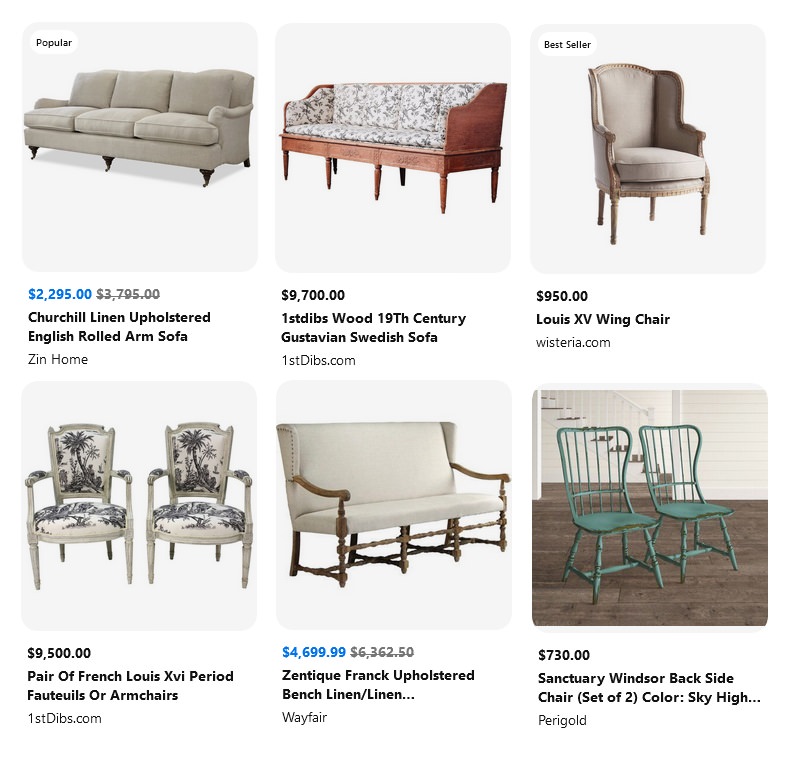
3. Swedish Must Have’s – Natural Fabrics
One really easy way of adding in color is doing it through pillow throws, or blankets. If you are wanting a particular color in your house, – get bedding, add some throws on your sofa.
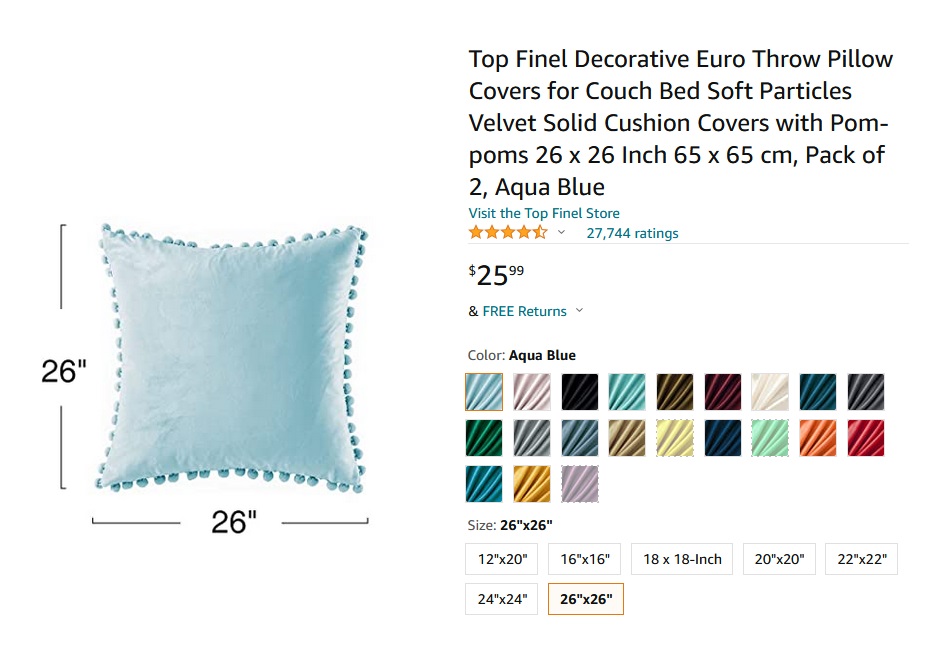
Velvet Cushion Covers In Sets Of 2 – Amazon
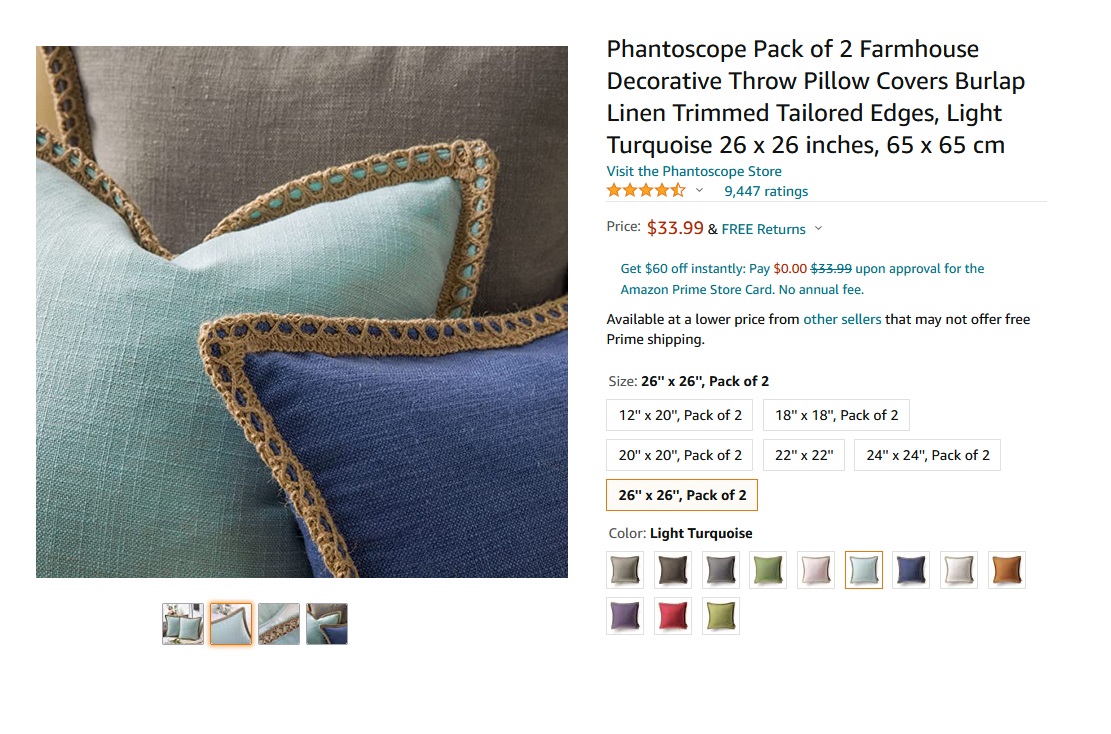
Linen Trimmed Tailored Edged Pillows Set Of 2 – Amazon
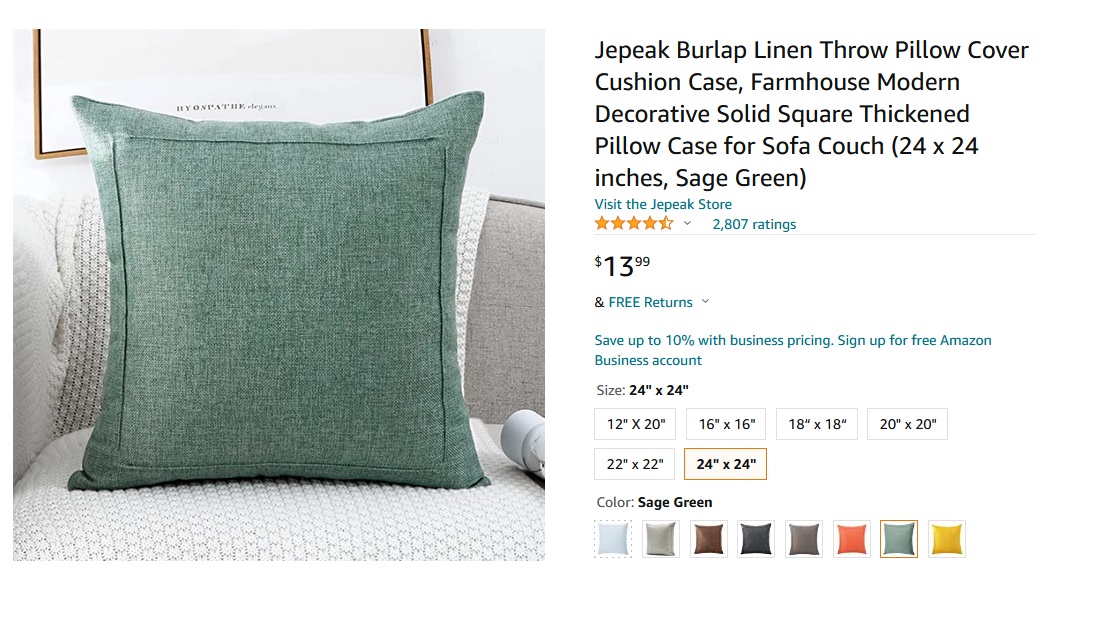
Jepeak Burlap Linen Throw – Amazon
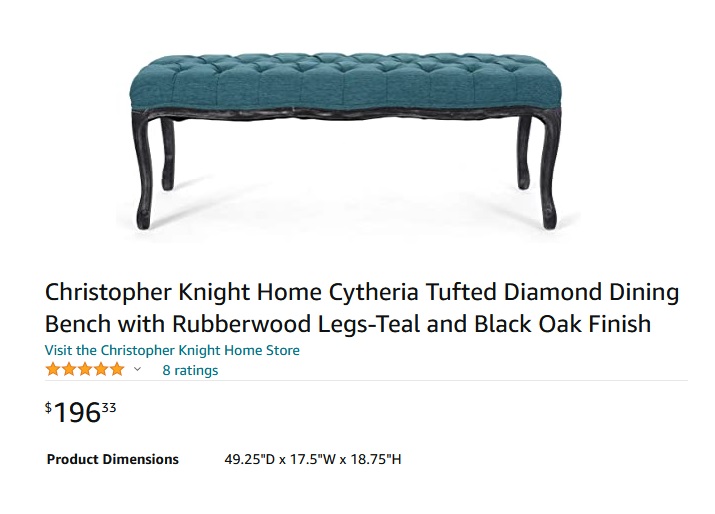
Teal and Black French Bench – Amazon
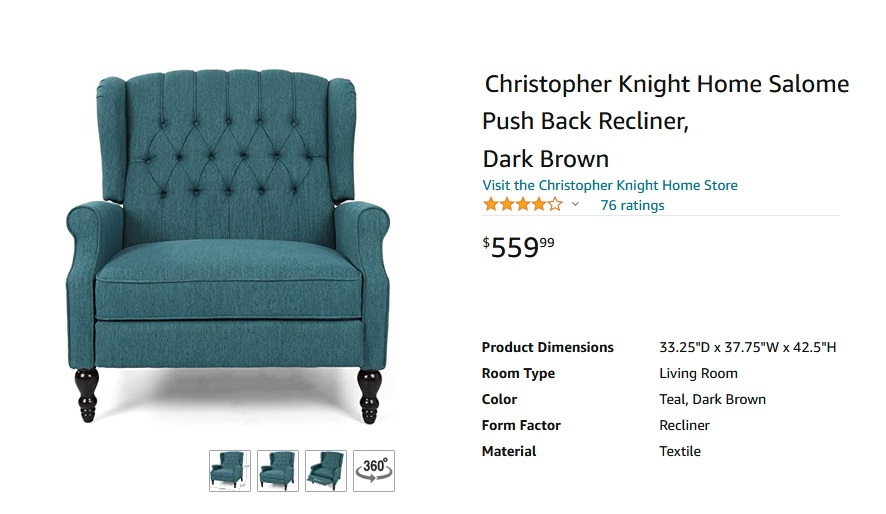 Spectacular Teal Recliner – Amazon
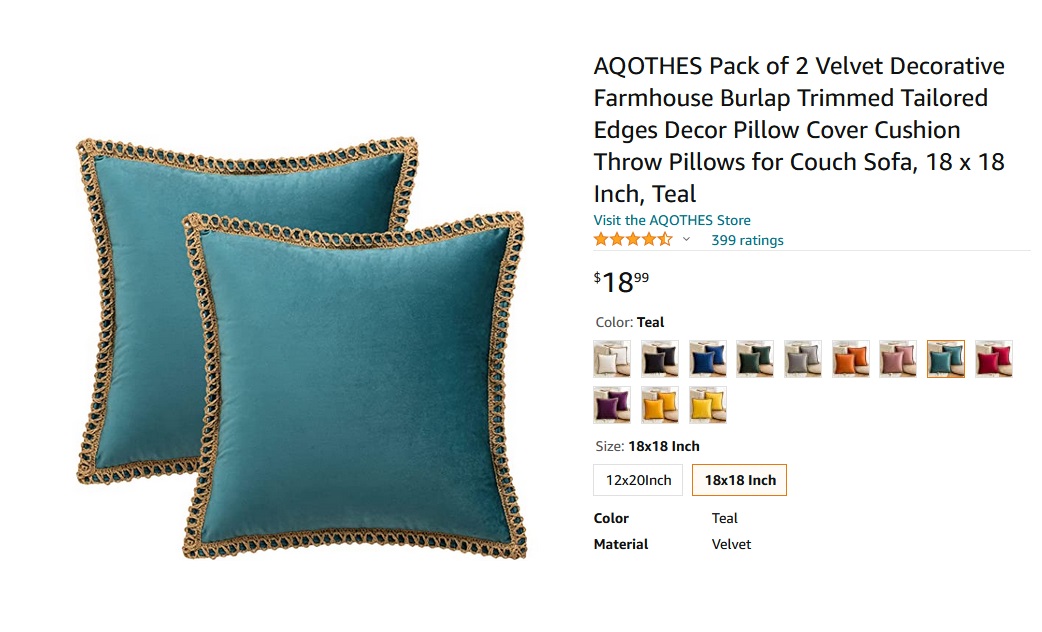 Velvet Trimmed Pillows – Set Of 2 – Amazon
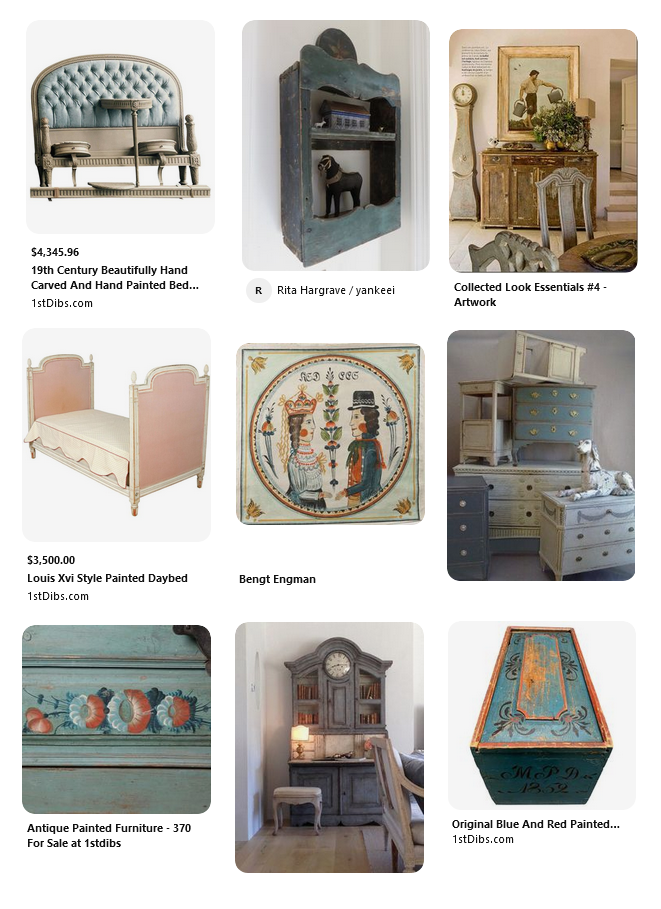 Notice the French pink upholstered bed above? It wouldn’t look the same without the gold painted details.
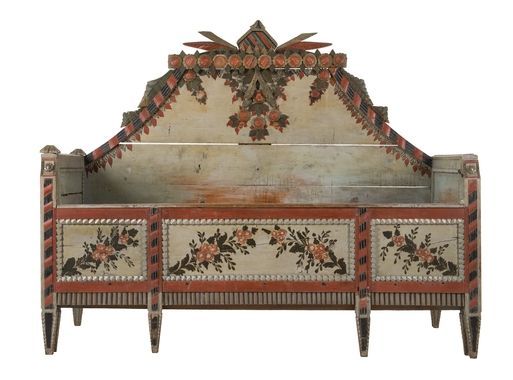 What a grand daybed – seen at digitaltmuseum.se
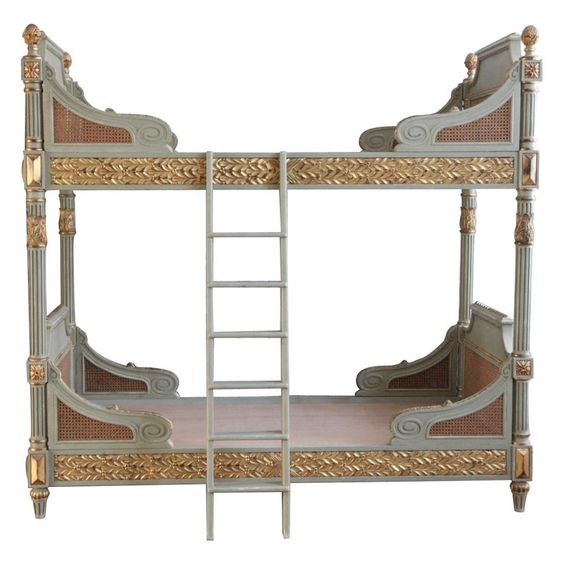
$12,057.62 Louis Xvi Style Bunk Beds/matching Pair Of Single Beds Made By La Maison London
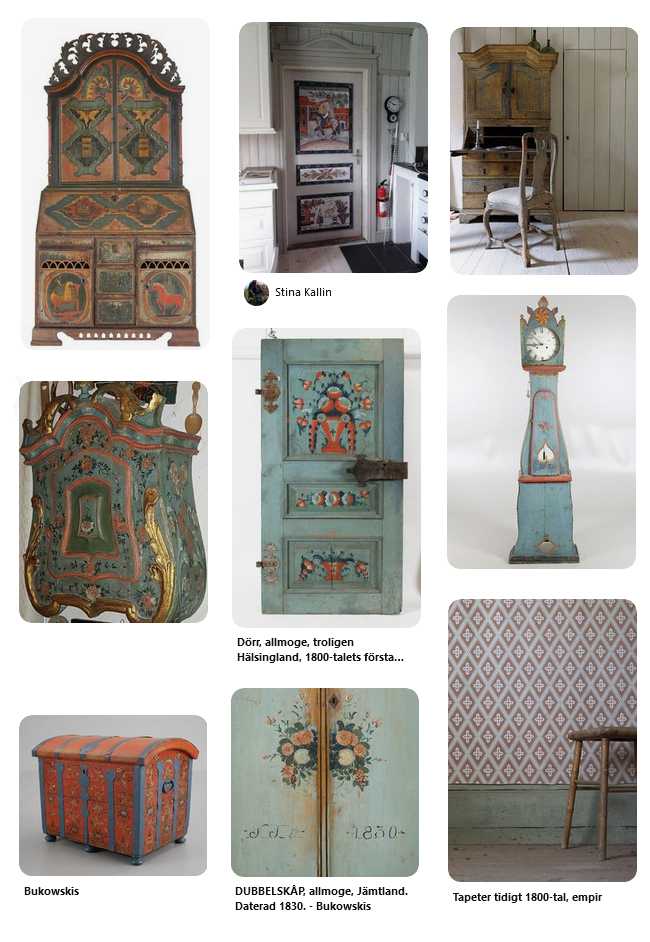
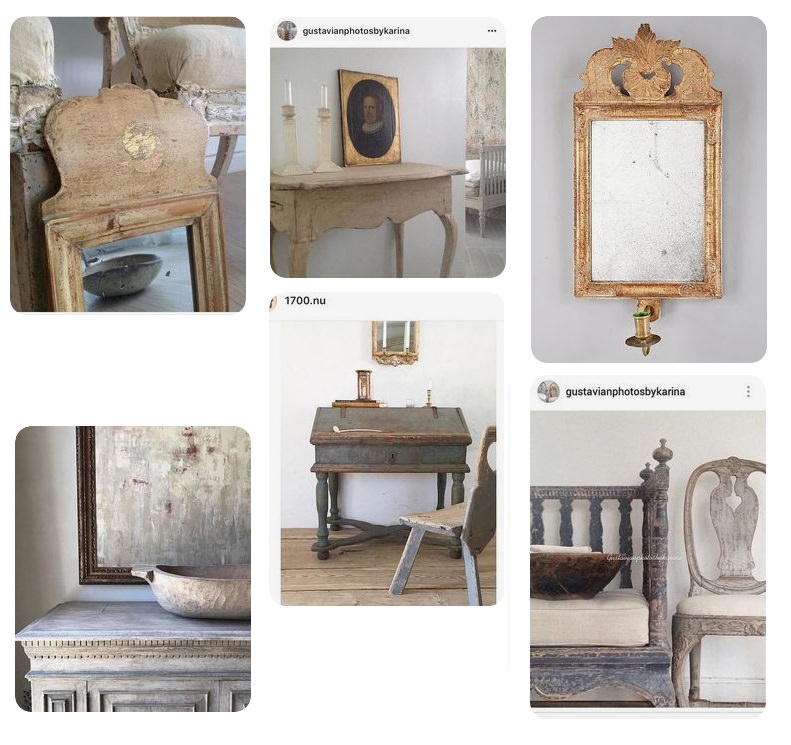
Intricate wallpaper often is a classic Swedish look.

Stunning Folk art styled antiques. Burnt Red is a color seen amongst Swedish antiques
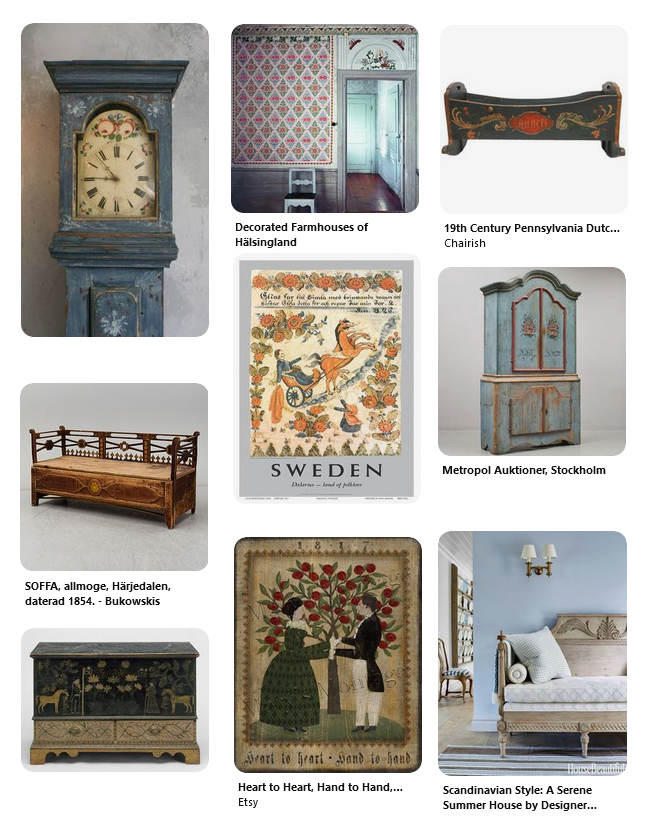
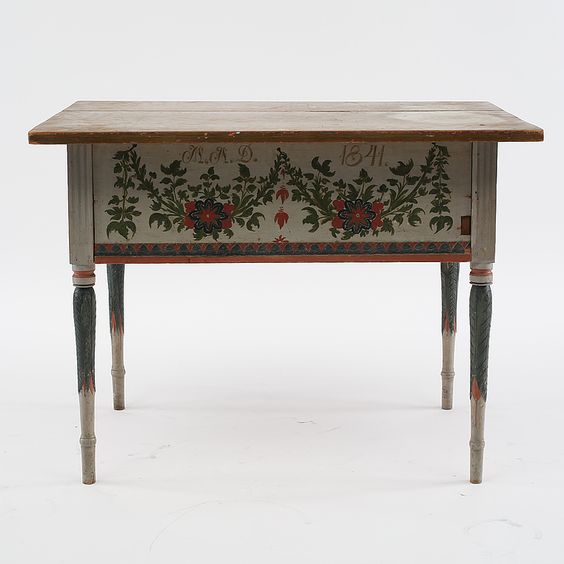
MÖSSBORD, Jämtland, daterat 1841. – Bukowskis
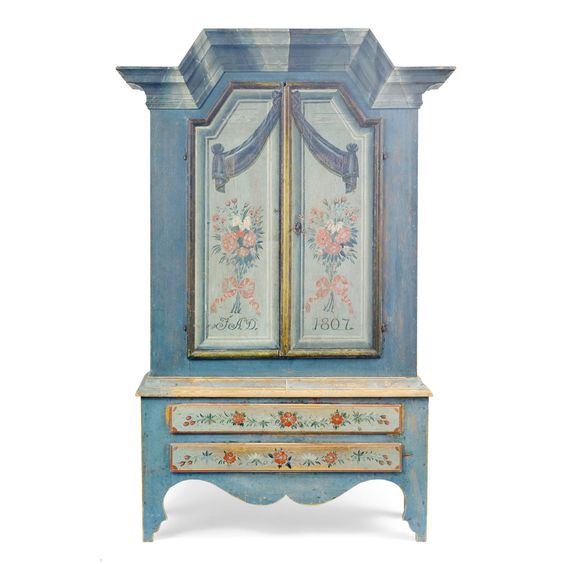
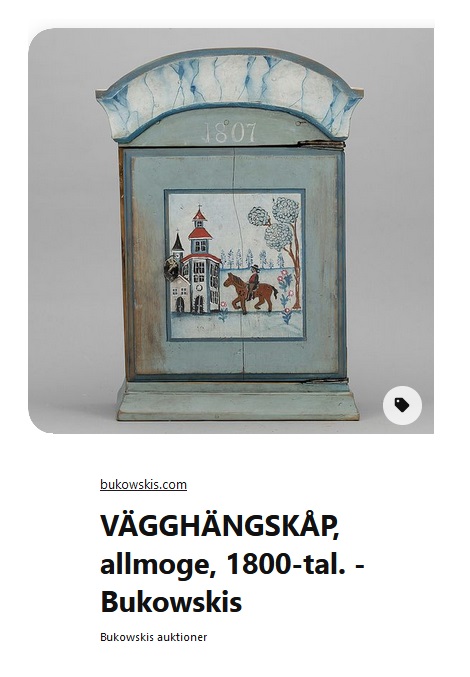
A Swedish cupboard dated 1807
Hand painted floral details stand out on this painted cupboard
 What colors do you like the best? If you were to invest in one piece today, what would it be?

400 Professional Designers Picked Green As The New Color To Watch
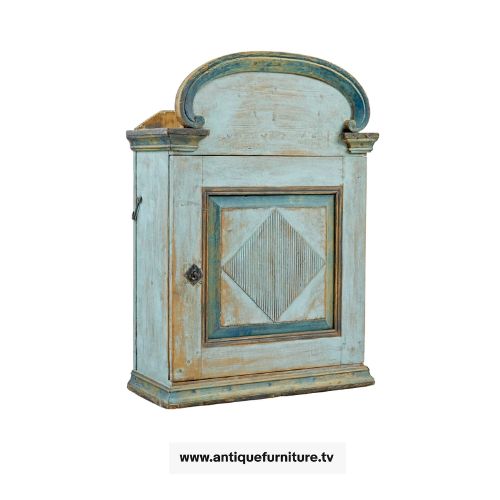
19TH Century Painted Pine Wall Cupboard – www.antiquefurniture.tv
HomeGoods Style Expert Beth Diana Smith predicts that, in 2022, many will go green by decorating around green-hued decor.
“Green [is] definitely the color of 2022!”
the owner and principal designer of Beth Diana Smith Interior Design tells SheKnows. “Six paint brands opted to choose green for their color of the year inspired by the latest fashion and home trends. Additionally, green has been trending in wellness as greens are associated with self-care, nourishment and zen energy. So, as consumers continue to prioritize mental health, we’ll continue to see green throughout our spaces as we look to infuse calming colors.”
Look at this:
A recent survey from Sherwin-Williams, which included more than 400 professional designers, found that emerald green was the top prediction for the most on-trend color in 2022.
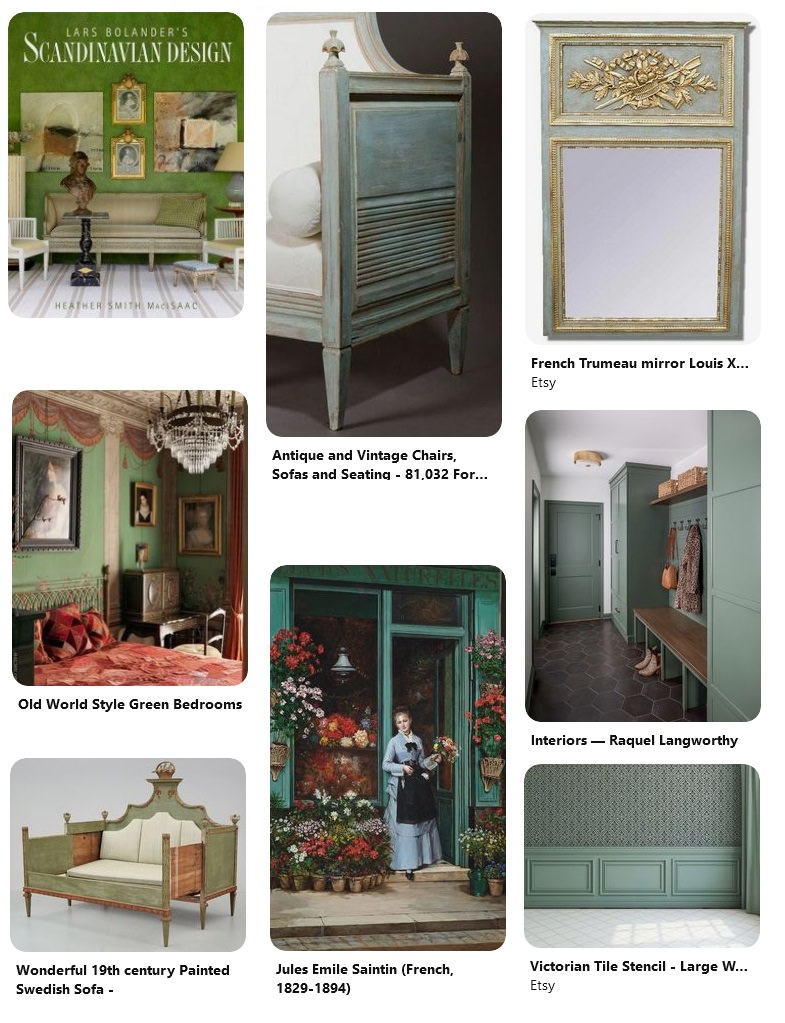
Interiors decorated around the color of green. Do you see anything here you love?
 Darker Green Inspired Interiors
 Gustavian Chest –chairish.com
Swedish Inspired Furniture
Swedish Inspired Furniture
Swedish Inspired Furniture
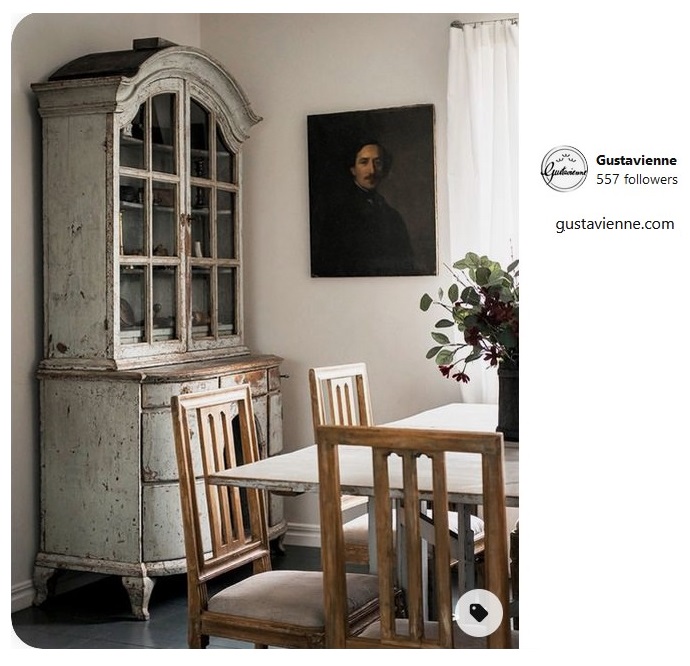 gustavienne.com
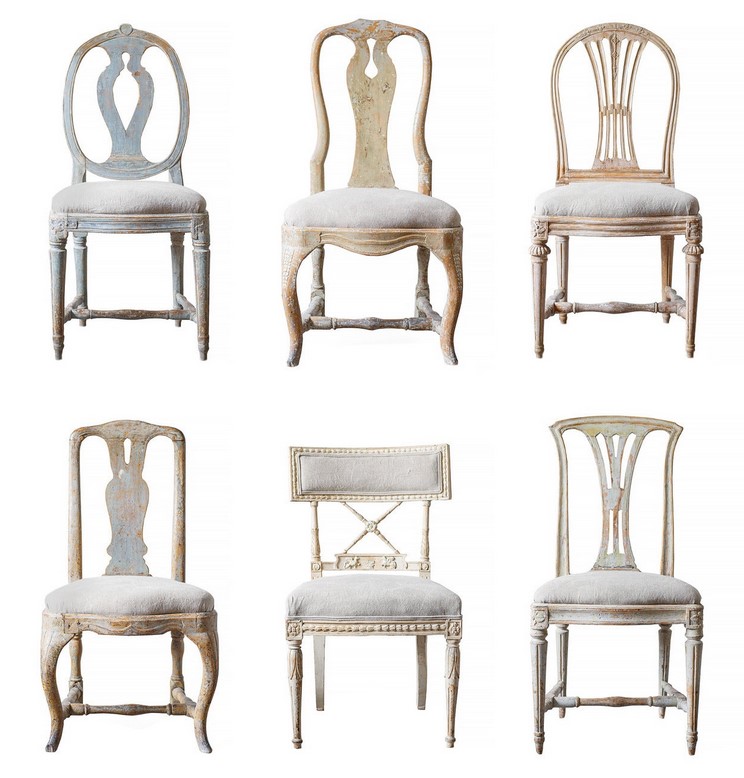
5 Scandinavian Interior Design Tricks – Megan Slack
Lighter Colors are used in this interior, whose picture appeared on the cover of Classic Swedish Interiors
 1. Use large windows to emphasize natural light
Thanks to the nation’s famously dark winters, Finnish designers are experts at emphasizing light in the most effective ways possible, and Villa Lumi is certainly no exception. The home uses large window panes and no window dressings to ensure the home is illuminated as efficiently as possible. While all homes may are not designed in the same way as Villa Lumi, we can still the architect’s technique with any kind of window, as Helsinki based Interior Designer Helena Karihtala shares:
‘Due to long winters, the use of natural light is considered to be important, and we usually prefer large windows. Keeping the windows bare or using light curtains helps make the space feel open and full of natural light. The walls are also almost always a shade of white, making most of natural light.’
Read more at livingetc.com
Mirrors are another classic Swedish design trick to add more light into a room. Face the mirror opposite of a window to bounce light off of.
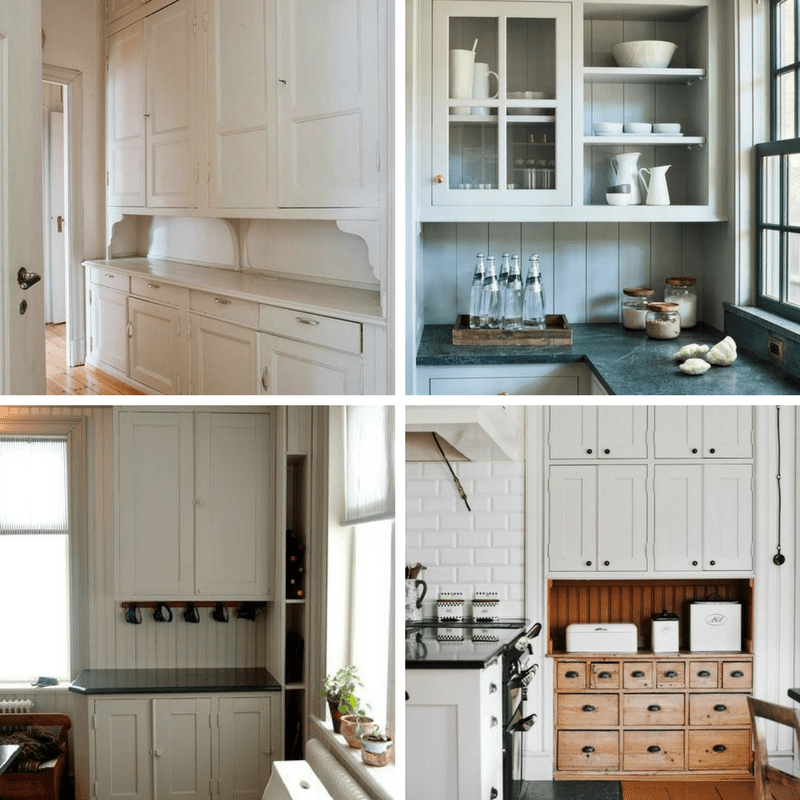
DIY Upper Kitchen Cabinets – Lindsay – White Buffalo Styling
You must see this step by step transformation of installing upper kitchen cabinets with a custom made patterned tile hood.
You will inspired by this makeover. I adore the color she picked out for the cabinets. Go check it out – thewhitebuffalostylingco.com
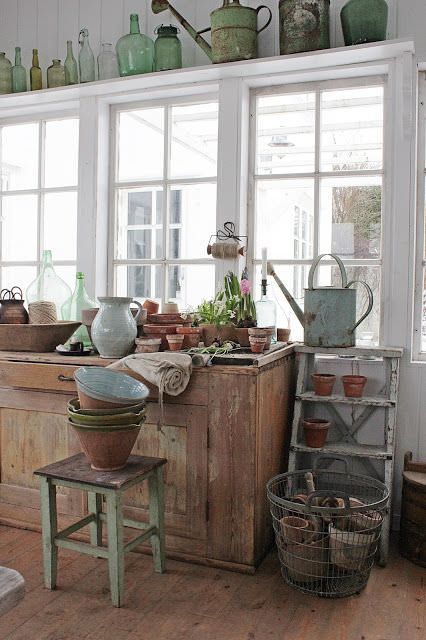
Bringing The Garden In For The Winter
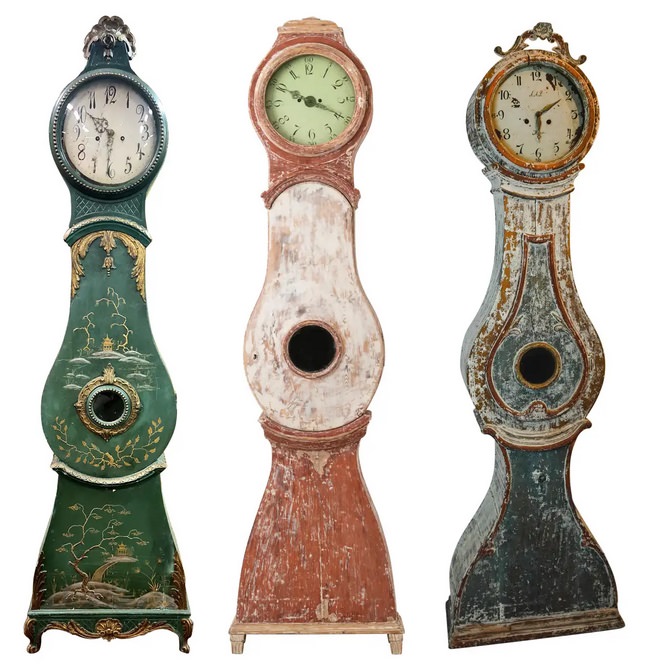
Chinoiserie Green Gold Late 1700s Gustavian Rococo Mora Clock – 1st Dibs
Swedish Long Case Mora Clock, Kramfors, Sweden, 1st Dibs
Swedish Mora Clock, In Texas – 1st Dibs
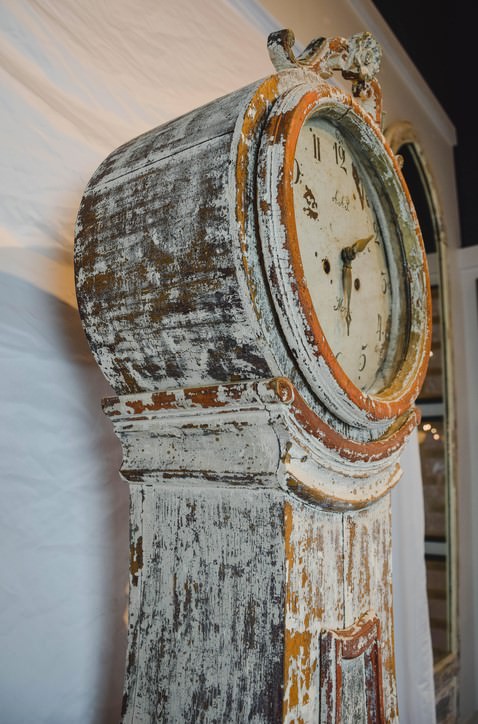
Beautiful distressing of old Swedish furniture
 Louis XV Style Bergère Chair – $1250 Chairish
Light and Airy Sunroom – Vibeke Design
vibekedesign.blogspot.com – Scandinavian Blog
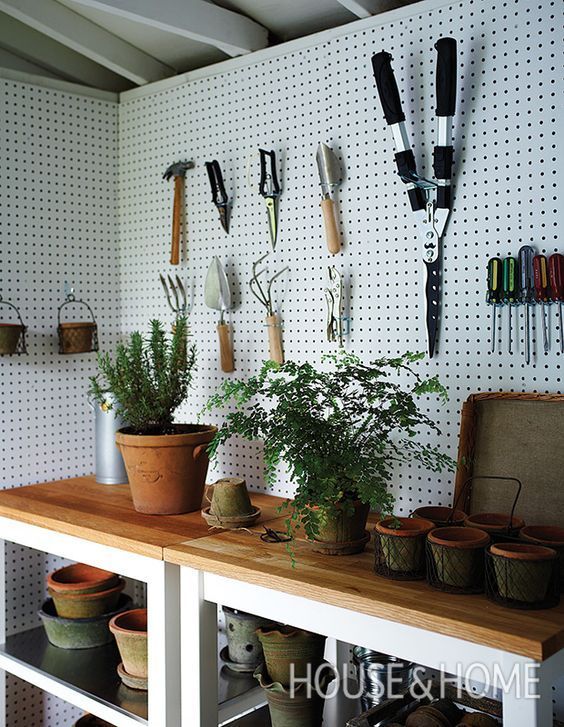
Have you ever thought about these peg boards as full walls? Its not a bad idea.
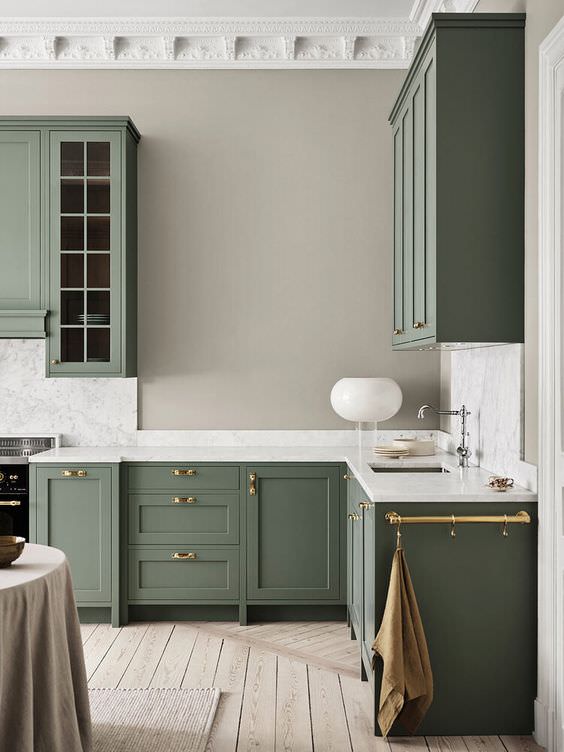
Scandinavian Kitchens – Classic shaker kitchen in green — Nordiska Kök
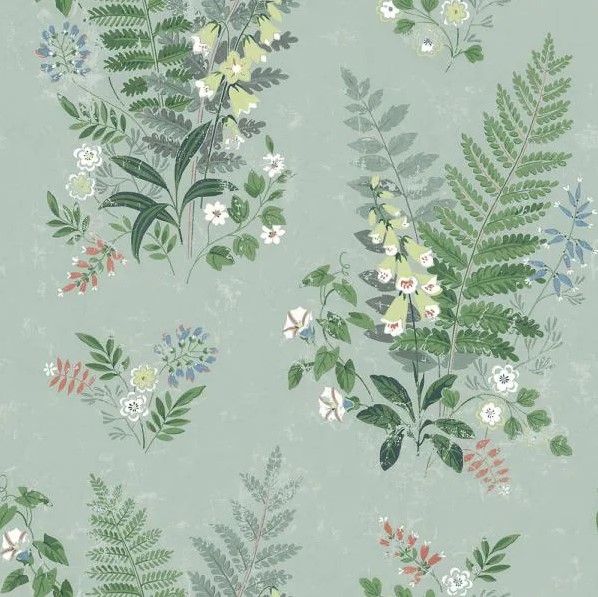
Foxglove Sage Botanical Sage Wallpaper – Home Depot
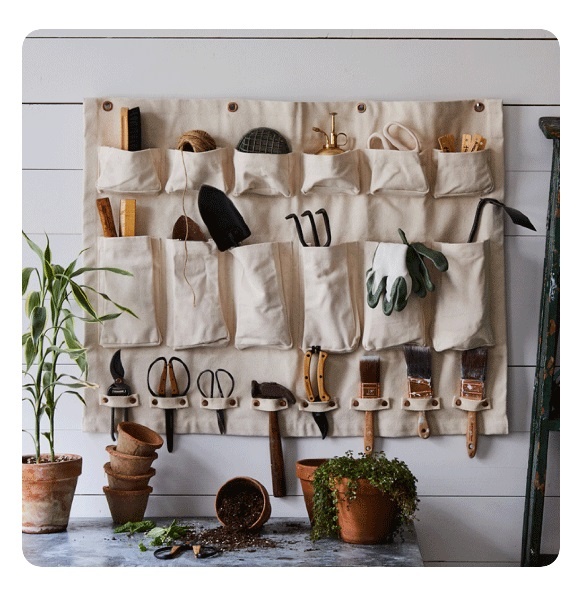 Canvas Organizer – food52.com

Thifty garden storage – bhg.com, Potato cleaner – Grit Magazine,
PVC Pipe Trellis – remodelista.com, Shoe container garden starts – almanaquesos.com

Image Seen On gucki.it
 7 Ways to Love Copper and Green
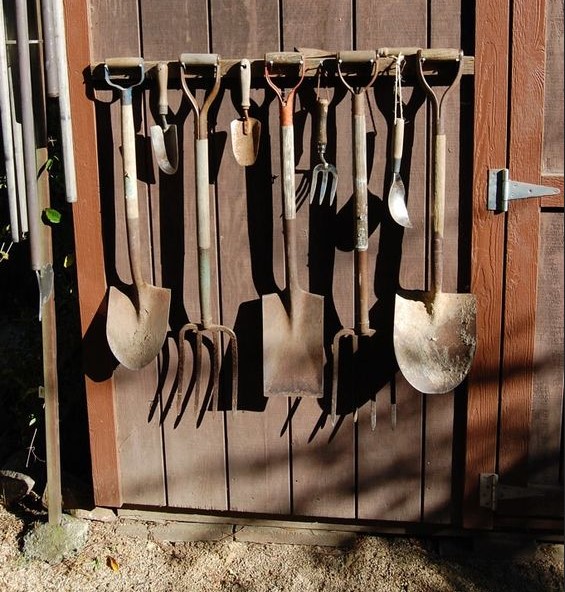
Rust on brown. Isn’t this a fabulous way of showing off your tools? –
Photo by JerBear2010 on Flickr
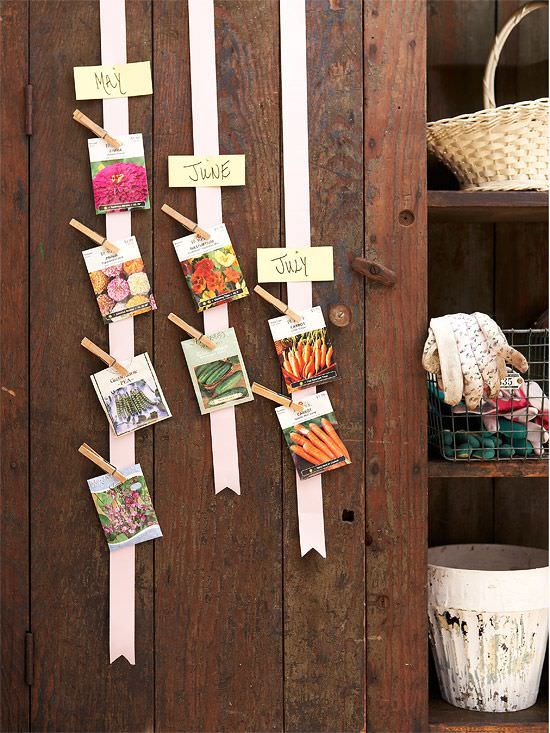
Isn’t this an interesting way of organizing your garden planting ?
Must-Know Storage Secrets for Your Garden Shed – Better Homes And Gardens
Spectacular Dream 19th Century Swedish Green Panted Chest From Chairish
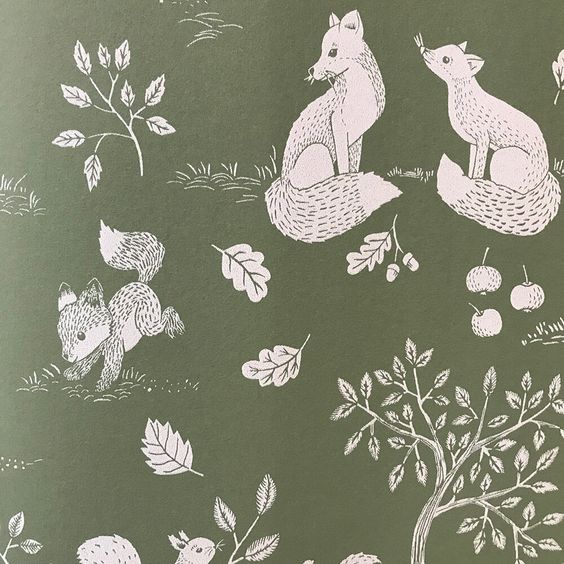
A pretty wallpaper with charming woodland creatures trees and toadstools. Swedish designer Hannah Wendelbo. – wallpaperdirect.com
Tones Of Green – johnderian.com
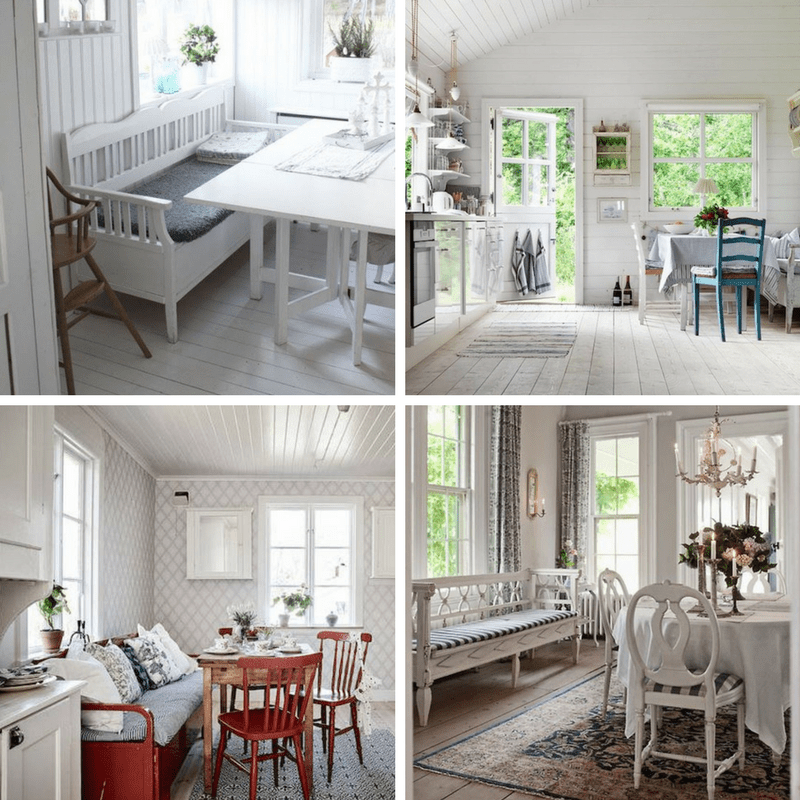
Slipcovers Have Always Been Popular Through Time – Swedish Decorating
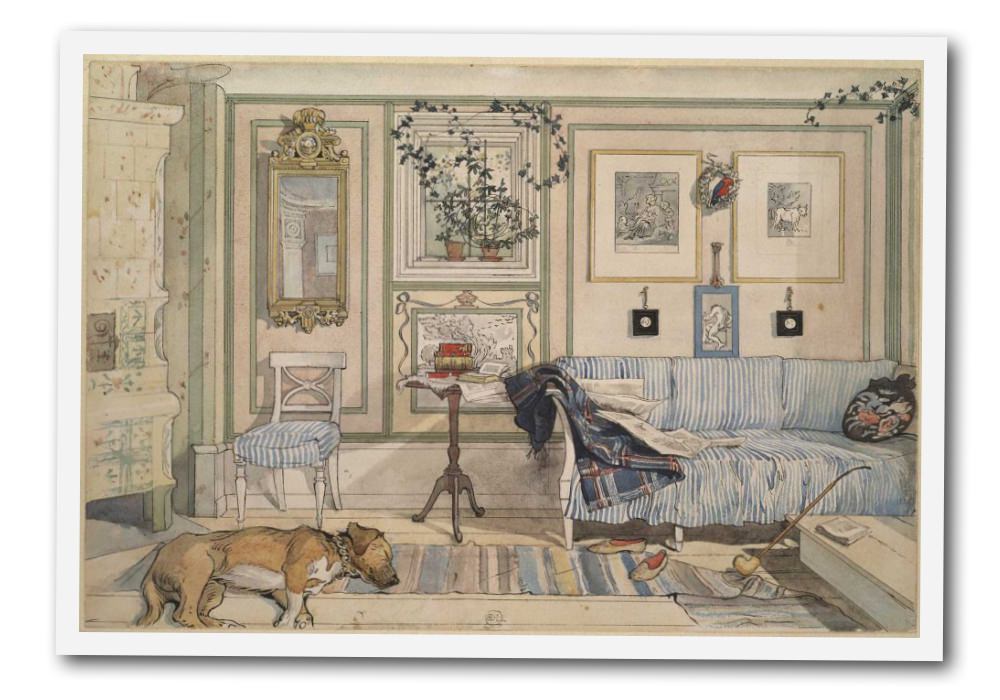
Larsson, Carl (1853-1919)
Among the Swedish artist Carl Larsson’s many watercolours of the house he shared with his wife, Karin, and eight children, is one of their sitting room that radiates a pleasing sense of domesticity — a discarded newspaper and shoes, a sleeping dog, a rug hung nonchalantly over the arm of the sofa. But it is the blue-and-white striped loose cover of the sofa that does most to enhance the relaxed feeling of this elegant space. Larsson painted it in 1895, a time when Victorians, such as the family of another artist, Linley Sambourne, were living among buttoned, fringed and tightly upholstered splendour at 18, Stafford Terrace that remains a monument to the Victorian decorative exuberance (both artists’ houses are open to the public).
As with so many of the key ingredients in classic decoration, there’s a deeply practical rationale behind the loose cover: namely, that it can be washed and changed at will. In the past, they were often fitted to protect furniture or changed according to the season. They also soften the look of a sofa or chair by hiding its legs.
Read more – countrylife.co.uk
5 Kitchen Design Lessons You Can Learn from Scandinavian Interiors
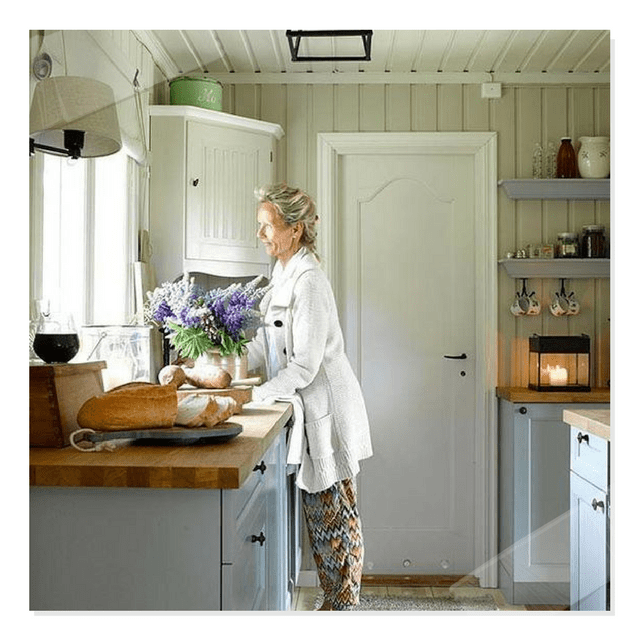 Picture Credit – ladyinspirationsblogg.se
Guest Post – Jason Phillips
Elegance and style along with a sense of simplicity and functionality, those are the words that describe the Scandinavian interior designs. More and more modern homes are seen to adopt this minimalist European design style mainly because of its modern and neutral appeal.
If you’re planning to renovate your kitchen or overall house, then choosing Scandinavian designs could offer you a vast and eclectic taste of design movement, unique, and minimalistic designs in your home.
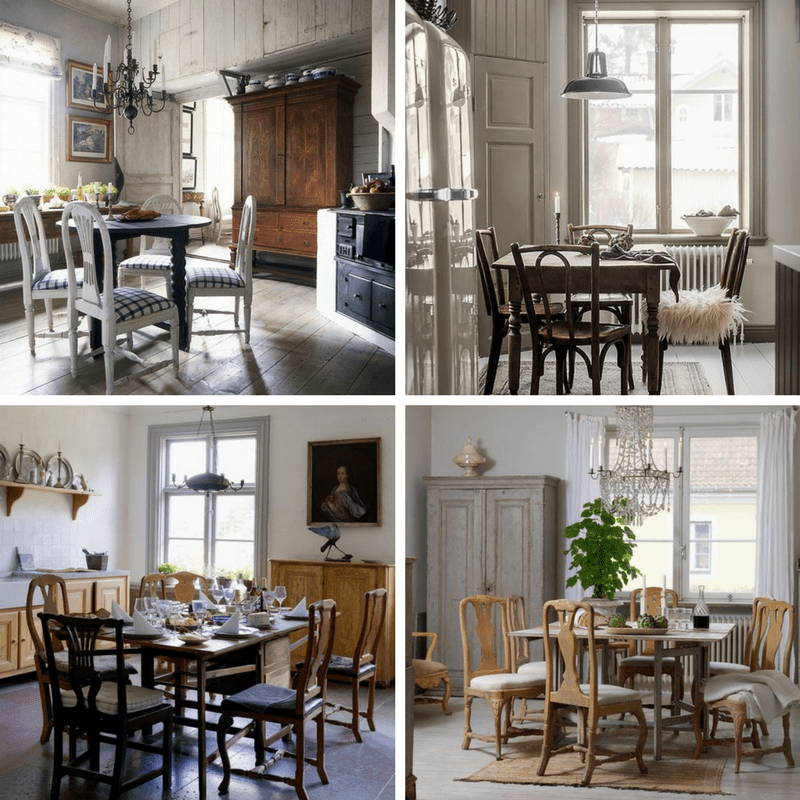 Picture 1 – godsochgardar.se
Picture 2 – lovelylife.se
Picture 3 – antikochauktion.se
Picture 4 – antikochauktion.se
Maintaining the natural light is very important
Being in the far north, the Scandinavian designs tend to flood the interiors with light. This determined the Scandinavians to enjoy, cherish, and appreciate the important factor of natural daylight in their life. Light is very important for our well-being which is why being illuminated by the environment tend to create more positivity in your life.
To adapt to this design, during the winter season you can get rid of the heavy curtains or throw away the silly ornaments that block the light. If privacy is the main reason for those covers, you might consider using wooden shutters or sheer fabric on windows in your kitchen or any rooms in your house.
Additionally, Scandinavian designs are mostly focused on white, clean, simple, and pure color. This is because the color reflects light and encourages it to bounce around the kitchen spaces and brightens them. You should also add mirrors in your kitchen in order to let the light to stay.
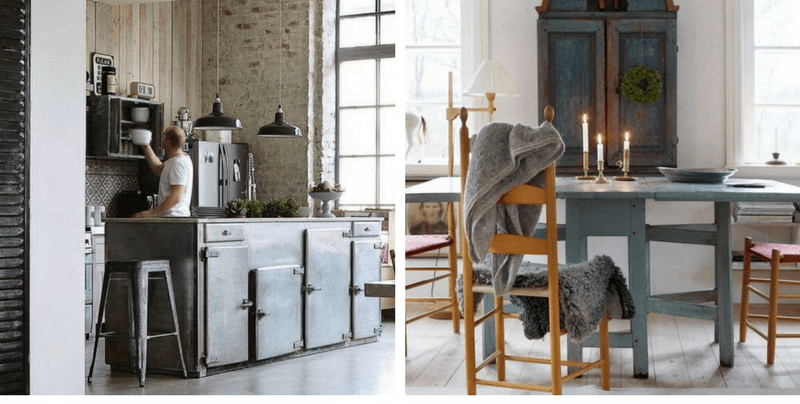 Picture 1 – mydesignchic.com
Picture 2 – lantliv.com
Cosiness and warmth
As you can see in the different Scandinavian designs, coziness and warmth are important. To adapt this, you should add more natural wood into your home, whether on furniture, floor, or wall panels or kitchen backsplash. Wood offers a welcoming feel and adds more coziness to the kitchen.
You could also add candles to produces the Scandinavian feeling of warmth and coziness. As fire is the natural source of light, placing simple stick candles on the tea holders around your kitchen or even in the living room will create a fairytale-like atmosphere.
 Picture 1- seventeendoors.blogspot.se
Picture 2 – feasthome.com
Picture 3 – snickeritallkotten.se
Picture 4 – linaostling.se
Lifestyle nature
Scandinavian designs also focus on nature as it is the heart of the design. Living the life with a healthy attitude is being cherished and practiced so to adopt this, you can add greenery and plants into your home to add more environment and natural feel. Plants are known to provide fresh air and it makes us feel better and beat the winter blues.
Rustic wood grain and interior plants and flowers is a great way to make the space more relaxing and vibrant. Remember, incorporating live elements into your kitchen space will make the interior look modern and fresh.
 Picture 1 – detvitadarhuset.blogspot.com
Picture 2 – myscandinavianhome.com
Picture 3 – bloglovin.com
Picture 4 – lady-gray-dreams.tumblr.com
White wood floors
As mentioned earlier, the Scandinavian design focuses on white and pure colors from floor to ceiling. So, if you want to adopt this style, renovating your kitchen floor and change it with white wood floors can make the room seem open, clean, and airy. Grey color and wood (pine or birch) are also alternative choices for keeping the interior flooring design simple yet elegant-looking.
Simplistic yet artful Scandinavian kitchen furniture
Aforementioned, Scandinavian design focuses on the minimalist designs in both exteriors and interiors of the home. Modern furniture took advantage of the innovative textiles which can be seen via antiques and current designs. Amazing craftsmanship with the use of high-quality materials will always be seen in the Scandinavian furniture designs. It is well seen and being adapted by the different kitchen designs throughout the world.
Choosing simple yet detailed and artful kitchen cabinets or countertops based on the Scandinavian design is a perfect way to adapt to this European modern design style. Adding antique components or materials with clear smooth lines and organic shapes can defy a simple and minimal design which could also add an aesthetic look to your home.
It is no wonder why more and more modern houses adapt the Scandinavian interior design because of its simplicity, functionality, minimalism, love of nature, and elegance. So, if you’re planning to renovate your kitchen, living room, or any area of your home seek for professional home renovator’s help to do this.
Jenny’s DIY Wide-Plank Plywood Flooring Studio Renovation
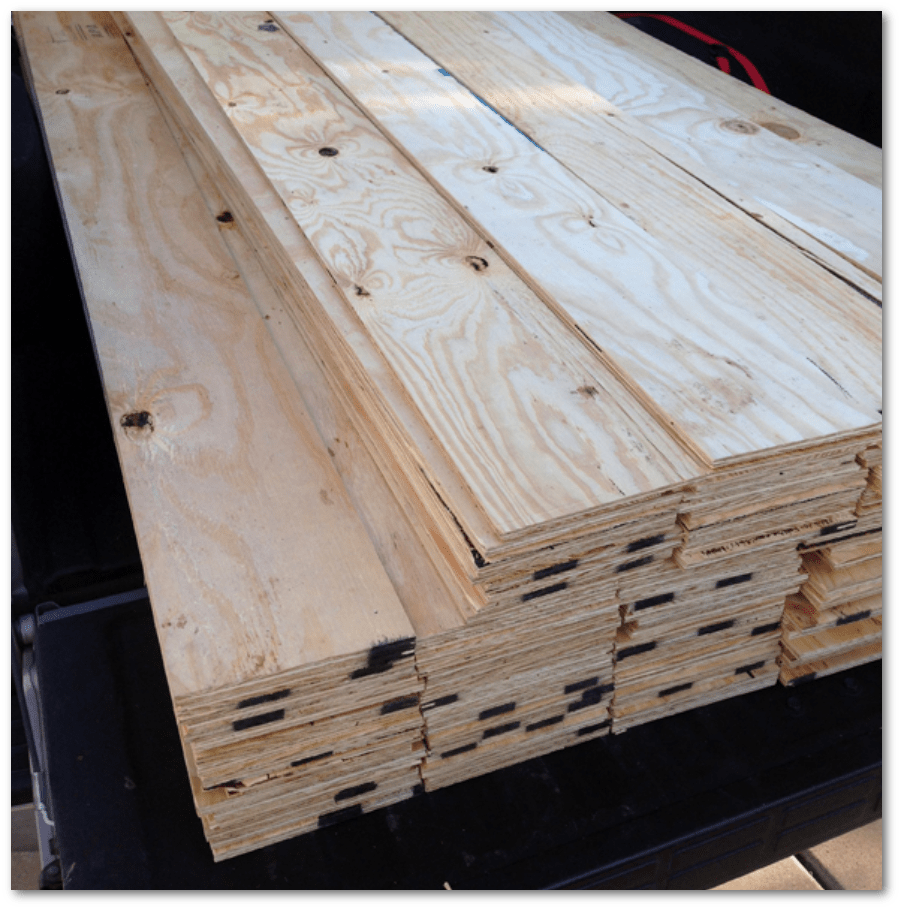
Check out these absolutely beautiful pictures of Jenny’s studio space made over with plywood cut into planks:
I found the plywood I wanted, took a photo of the price tag, and walked up to the customer service desk. I placed an order for 25 sheets and I asked for each sheet to be cut down into 8″ planks, lengthwise (which meant there was no waste – exactly six planks from each sheet). I’ll admit that I did get a few funny looks, but for the most part everyone at Home Depot was incredibly nice and accommodating, given the huge ask. I was more than prepared to pay 10 or even 25 cents per cut, like one of the guys in the lumber department suggested they might charge me at the order desk. I think I paid for cuts when I did the wall planking project in our mudroom, but this time there was no charge for all those cuts! I’m pretty sure it was because I was really flexible on timing and let them take as long as they wanted to get the order finished. And even then, it was less than 24 hours before they called to tell me my planks were ready to be picked up.
Once we had all the carpet removed and all the wood planks upstairs to the back porch, it was time to start the only tedious part of this project: all the sanding. It was actually pretty easy work, but it just took some time (actually about a minute and a half or two per plank, which really adds up). I asked Heather to sand while I was installing the planks, and usually the timing worked out well and we were able to keep a good pace.
Read more at littlegreennotebook.com
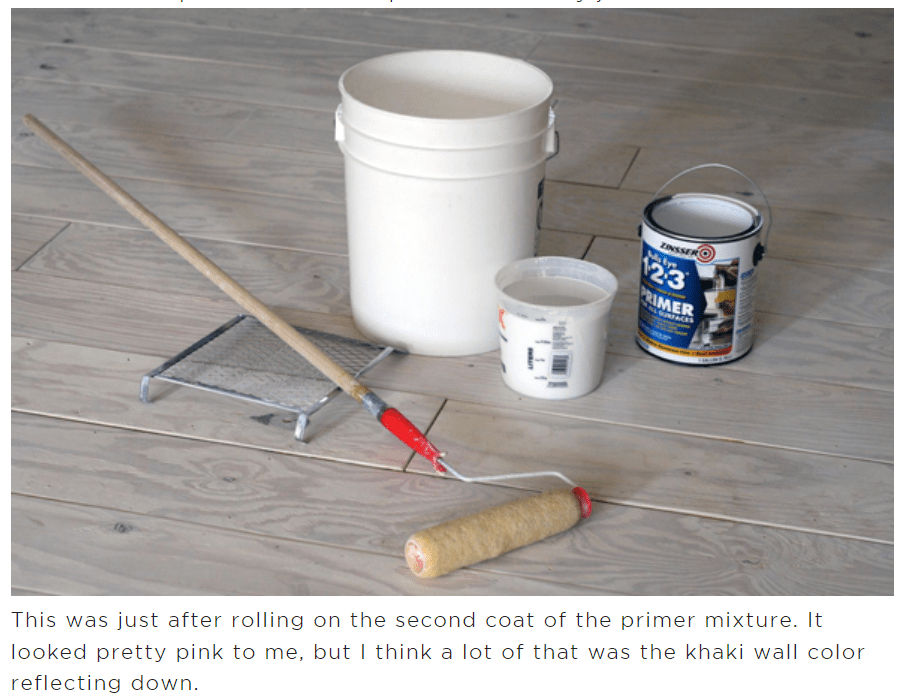

How To Avoid Yellowed White Painted Furniture With General Finishes Products
 Christine Adams
Wood Finishing Technical Writer at General Finishes
A TUTORIAL ON WATER BASED TOP COATS YELLOWING OVER BRIGHT WHITE PAINT
Many you may have noticed that the labels on our bright white paints, Snow White Milk Paint and Chalk White Chalk Style Paint now carry a warning label regarding the yellowing of topcoats. All bright white paint will yellow slightly with time, with or without topcoat. Water-based topcoat is reactive and more likely to draw out substances in the wood such as tannins or unknown substances in existing finishes causing the topcoat to yellow. This is an industry-wide issue. Don’t carry the cost of white paint yourself– pass the cost on to the consumer who wants it with a fair upcharge. White paints, even if they did not yellow, require more coats to achieve coverage.
General Finishes background was originally on the professional side, and the incidences of yellowing topcoat over white paint were almost nil, and when our sprayable professional finish, Enduro White Poly, is used, there have been no incidences. But as the use of our paints has increased in the up-cycling and furniture refresh markets, we have heard more reports of our topcoat yellowing. Our response was to teach about prepping, testing you finish schedule and finally creating Stain Blocker, our stain blocking primer, but this is not enough. Just as we advocate prepping all finishes, we are now advocating NOT using a clear water base topcoat over BRIGHT WHITE paint.
General Finishes is in the process of developing a brushable version of our professional Enduro White Poly (available only in gallons), but that will take some time and rigorous testing before we can release the product. Here is what you should know to protect yourself and also some immediate suggestions to decrease chances of yellowing.
There is no way to reliably predict yellowing ahead of time. Sometimes yellowing occurs, sometimes it does not. Every existing finish is different and we rarely know the finishing provenance on an existing piece. Every tree is different and every piece of wood is unique. Wood can bleed tannins immediately after the topcoat dries or months later with a change in temperature that comes with a change in seasons. Oak, pine, mahogany, and Douglass Fur are particularly prone to bleed-through.
As is true of most “water-white” topcoats, our High Performance Water-Based topcoat is a clear drying finish over a non-reactive substrate such as plastic. When paint is used over something as unpredictable as wood, all bets are off. Yellowing can be caused by the top coat activating the tannins in raw wood or aniline dyes, stains or contaminants in a pre-existing finish. This is most evident when using BRIGHT WHITE paint and most prevalent in the sculpted details of furniture, where the topcoat can collect, intensifying the color change to an unacceptable level.
To add to this issue, all bright white paint will yellow slightly with time, with or without topcoat. You have probably tried to touch up white woodwork in your home after several and noticed that the new paint is brighter.
Summary:
• Whites have a lower “hide” quality and are more transparent than most other colors. Most bright whites require additional coats to achieve the desired color and minimize color variation. This can increase cost of paint finishing. Always include a clause in your contracts addressing the need for additional coats to achieve coverage.
• Bright white paints can yellow over time with or without topcoat.
• The underlying finish or wood species can affect the final color of light paint.
• Details and inside corners are difficult to cover with any paint color, but this property tends to be more noticeable with whites. This is a naturally occurring phenomenon in paint application and does not necessarily constitute a defect in the paint finish or your technique.
TIPS FOR PROTECTING YOURSELF AND PREVENTING YELLOWING
1. Use a disclaimer in your contracts or recommend a softer white such as Antique White or Linen. Upcharge for the extra coats needed and ever guarantee a white finish over a piece that you cannot trace the provenance on. Here is a suggestion: Terms of Agreement and Warranties: ________ (Initials) I have been informed that more coats are required when painting with bright whites, reds, greens or yellow. I understand that white paint can yellow over time and that water based topcoats can occasionally react with the substrate or existing finish under white paints causing yellowing, even is a stain blocking primer is used.
2. If it is a low use project, use a premium white paint that is self-sealing and does not require a topcoat. A clear top coat is not required on our Milk Paint for increased durability, as it is a self-sealing, exterior rated coating with very high durability and performance properties. However, top coats provide a smoother surface that is easier to clean and boost durability for high use projects such as table tops and kitchen cabinets.
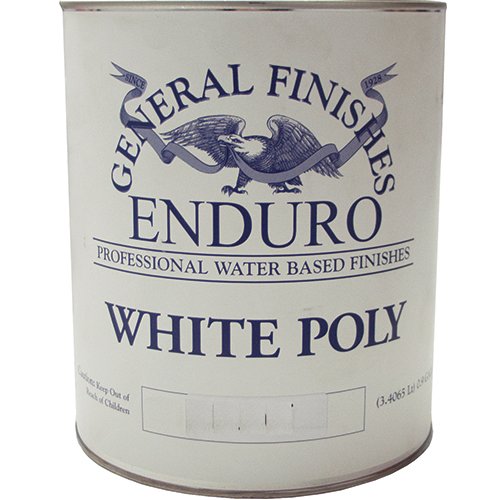
3. Get a spray gun and use a professional “white coat” such as our Enduro White Poly. It is a white paint with “increased topcoat properties”, is a stand-alone finish when 3 coats are applied and does not require sealing with a topcoat.
4. If you are still brushing, try adding 10-15% of the paint you are using to the first or second application of topcoat. The last layer of topcoat should not have paint in it, to maintain durability. We have had good reports of this technique from customers but have not tested in the lab over a long period of time.
5. Always test your project’s entire finishing schedule (from cleaning to topcoat) on an inside door or a more hidden area of the piece. This does not help if the yellowing occurs later but you will at least know if there is an immediate problem.
6. Always apply a stain blocking primer under white or light-colored paint such GF Stain Blocker or a shellac based primer. Always let any primer dry overnight. Some of the primers we have seen suggest a 3 hour dry time and that is not enough.
7. If you are working on period pieces such as a 1940’s serpentine mahogany desk which were often finished in stain containing aniline dyes that cast a pinkish bleed through under light paint, stay away from light colors. Not every piece of furniture is suitable for up-cycling with a light paint color. Pine, Mahogany, and furniture of the 1940’s and 50’s are a red flag.
8. Last, not all manufacturer’s topcoats are compatible with other finishes and may react with a color change. Always follow best practices by not rushing, and testing to your satisfaction first.
Hope this helps and wish us luck on our next paint endeavor- Chris
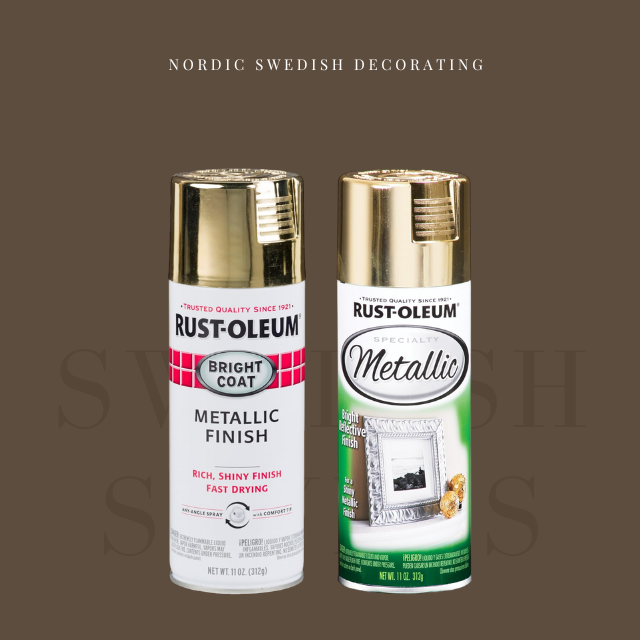
8 Brands Of Gold Spray Paint Were Compared To Find The Best Color
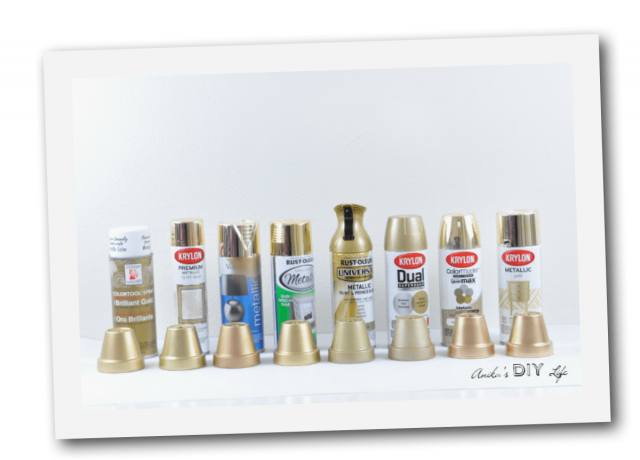 I bought a bunch of mini terracotta pots to use as the test vehicle and used my amazing Homeright spray shelter to spray each of the pots. I put the pots on a little piece of scrap wood so I could simply pick up the wood and move it out to dry while I painted the next pot.
This is the first time I have used Design Master’s and I have to say I was very impressed especially with the uniform coat and drying time. Design master’s and Rustoleum Metallic are pretty much identical in their “color”. I think they are the closest match to being “gold”. The Krylon Premium metallic which is on top has a very yellow almost artificial shine.
View more of her study at anikasdiylife.com
My Personal Favorite Golds : Rustoleum’s Metallic Gold, and Rustoleum’s Bright Coat.
My overall pick is the Bright Coat.