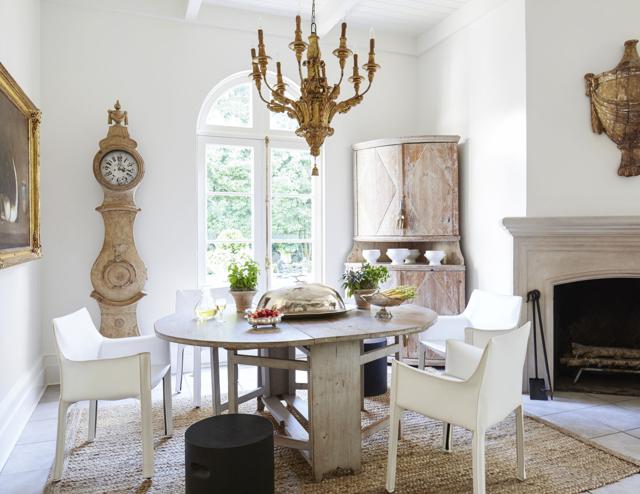
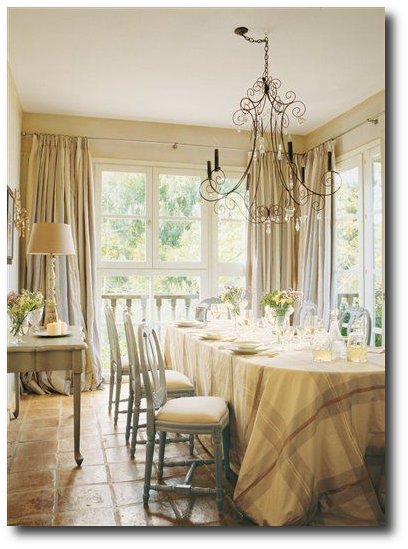
For The Love Of Collecting Antiques – A Swedish Interior
“After about seven years, I could buy a really nice piece of furniture once a year,” she says. “I was reading Architectural Digest, World of Interiors and every shelter magazine and design book I could get my hands on. I was just enthralled with design. The spectrum of collecting was appealing to me.”
She began what she calls “guerrilla hunting” for antiques to furnish her own living space. In New Orleans, she found a European ambience in step with her affinity for European antiques, renovated the first of two Victorian cottages and turned her collecting pastime into a wholesale business that immediately had legs via word of mouth. She sold her first container of antiques in front of a mini storage space in 10 minutes and quickly became a valued resource to well-known interior designers.
Along the way, she opened a warehouse on Camp Street, started her own line of European antique reproductions — Tara Shaw Maison — designed homes for a list of clients that includes celebrities, and inked a lucrative licensing deal with Restoration Hardware that allowed her to cut back on her travel schedule.
Read more at nola.com
3 Swedish Must Haves – Decorating A Home Around Swedish Antiques
You love Swedish style but don’t know exactly where to start. Here are a few ideas for you to get going.
Swedish style is about simplicity, but it is anything but boring.
The look is centered around minimalism, but the furnishings can be very detailed. Have you ever considered working with rub on transfers? Use them on any sort of wooden item. Think of a stackable set of boxes, or a tray for your ottoman. Do up a showcase dresser. Add in hand painted details to blend the transfers into the distressed painted look.

Rub on Butterflies – Do it yourself “painted looks” – Amazon
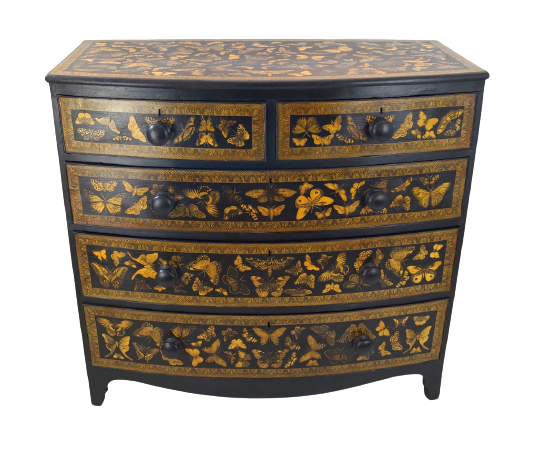 Butterfly Chest – antiques-atlas.com/
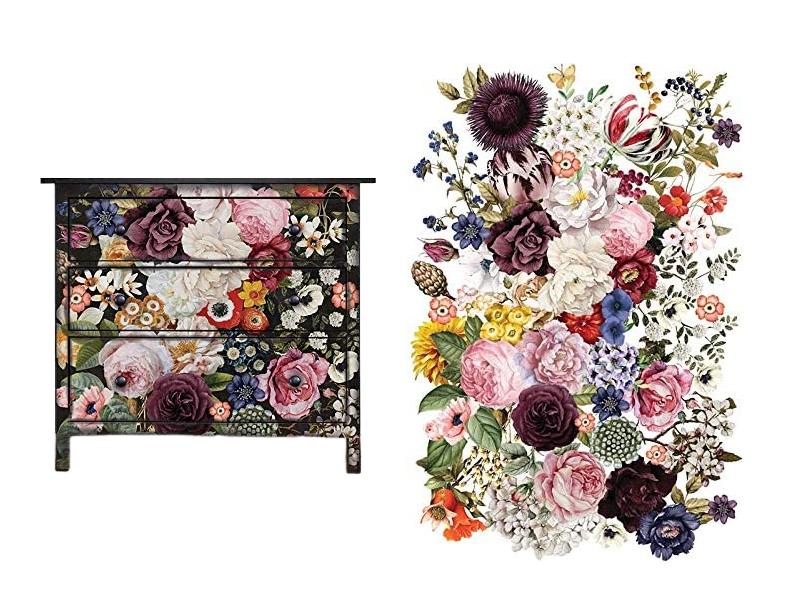
Floral Rub On Transfer – Amazon
1. Swedish Must Have’s – Wall Lights
Mirrors, gilt brass and crystal chandeliers have also been used for centuries in the northern countries to capture light as the winter nights were long. The reflections created light which extended the days. Here is an exceptional light that looks like an antique, but doesn’t use candles, but real lights!
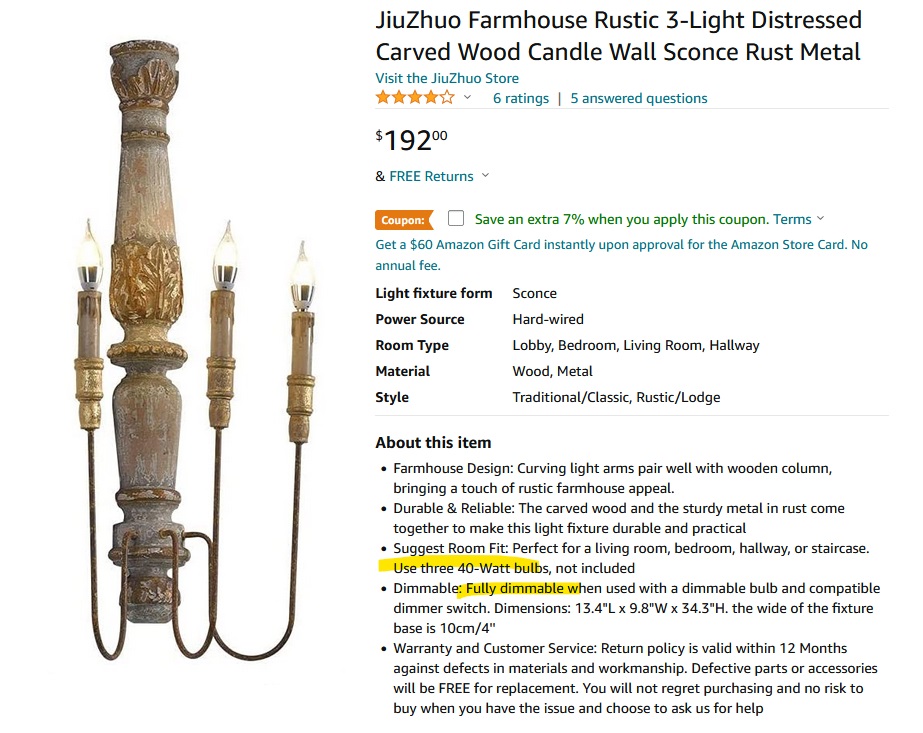
Distressed Wood 3-Light Candle Sconce – forget about candles. $192 Amazon
2. Swedish Must Have’s – Interesting And Detailed
Captivating Swedish interiors have their emphasis on texture. A few detailed, distressed or hand painted pieces can go a long way in creating this look. Think about really worn wood looks. How to do this yourself? Beat up your wood, and paint over the wood, and wipe it away. The painted glaze will settle into the worn and distressed areas giving you the look of a worn antique.
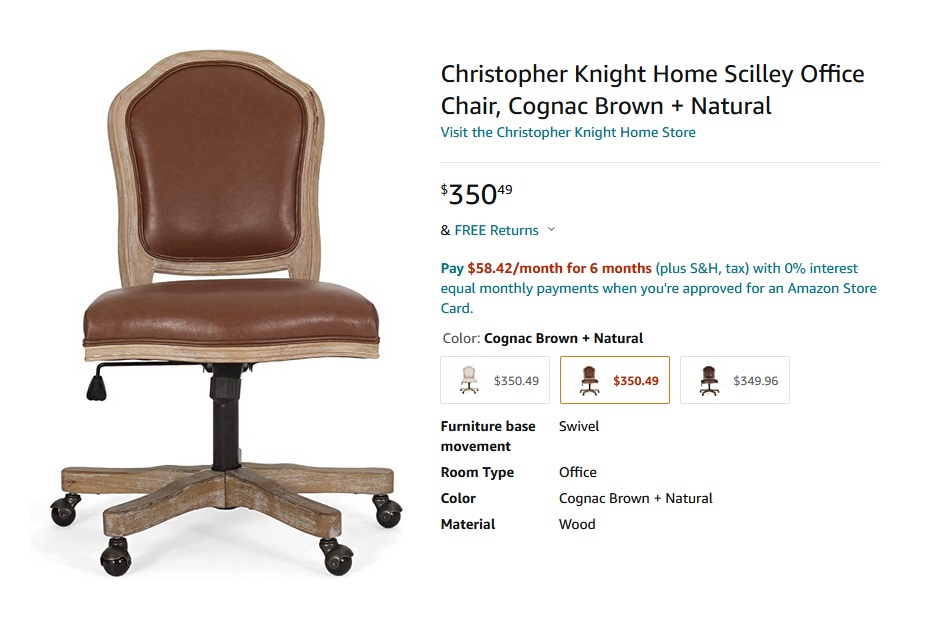
Cognac Brown Wood Office Chair – Amazon
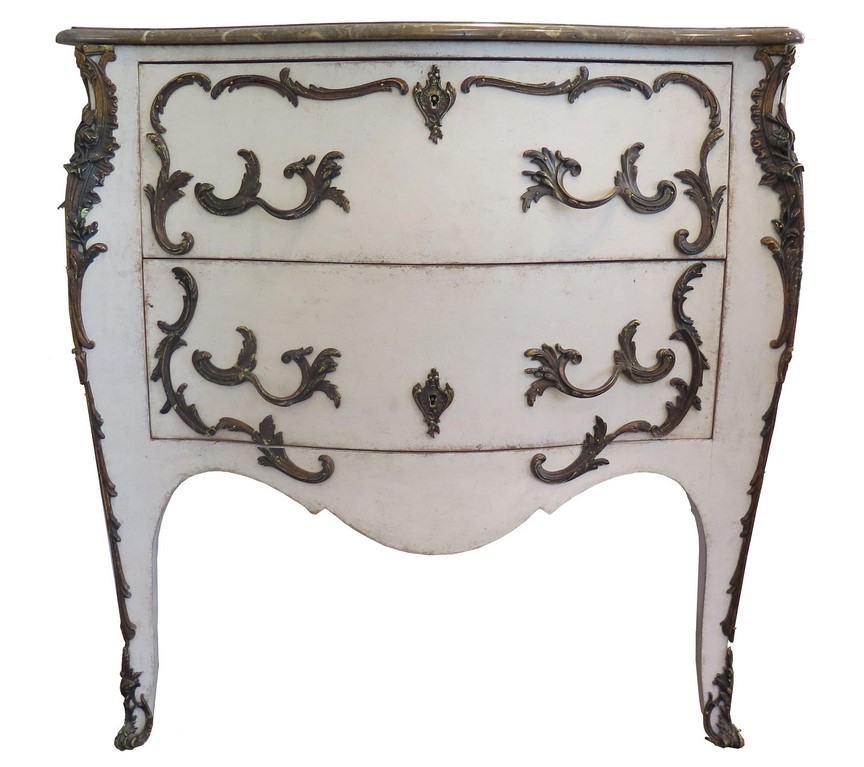
19th century Rococo Painted Commode – 1st Dibs
3. Swedish Must Have’s – Natural Fabrics
One really easy way of adding in color is doing it through pillow throws, or blankets. If you are wanting a particular color in your house, – get bedding, add some throws on your sofa.
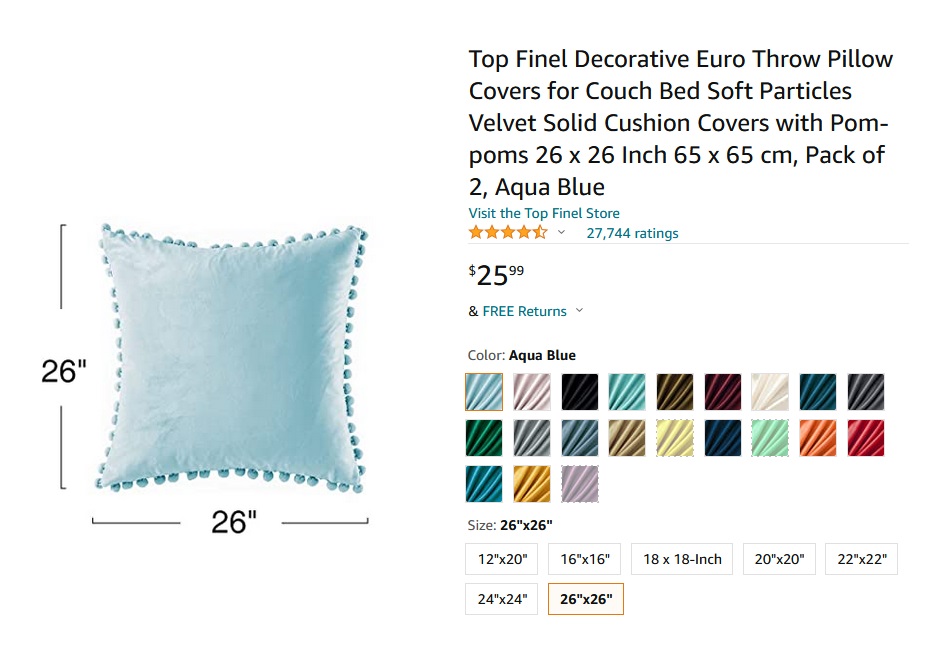
Velvet Cushion Covers In Sets Of 2 – Amazon
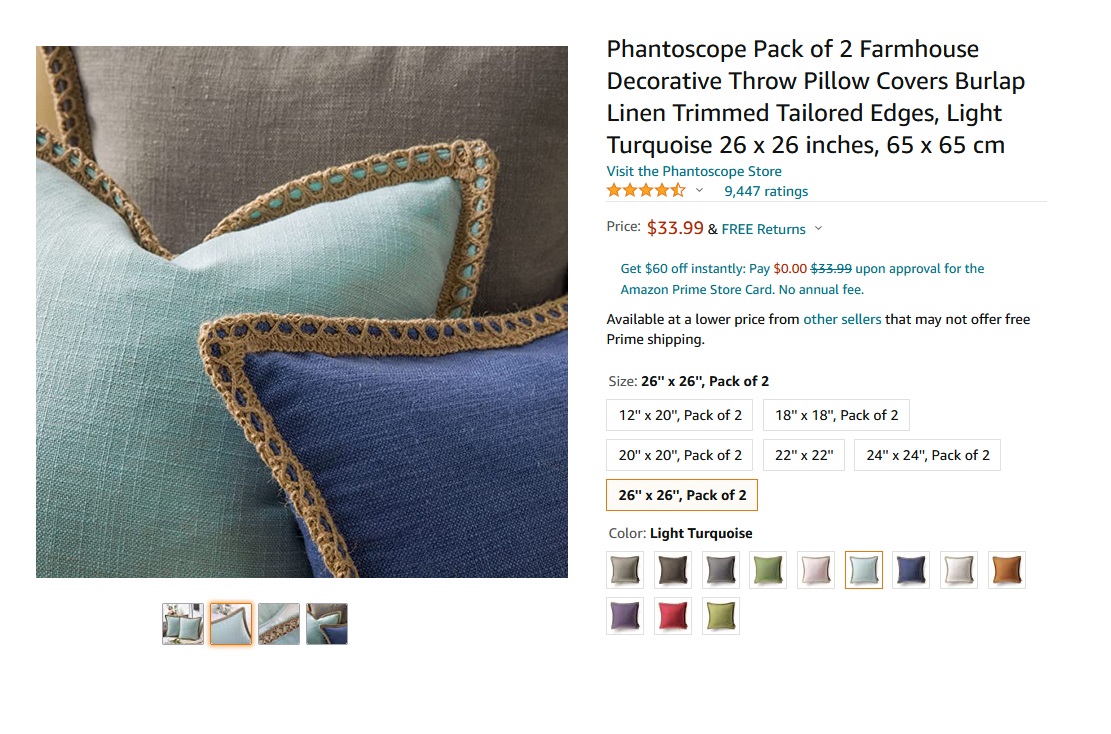
Linen Trimmed Tailored Edged Pillows Set Of 2 – Amazon
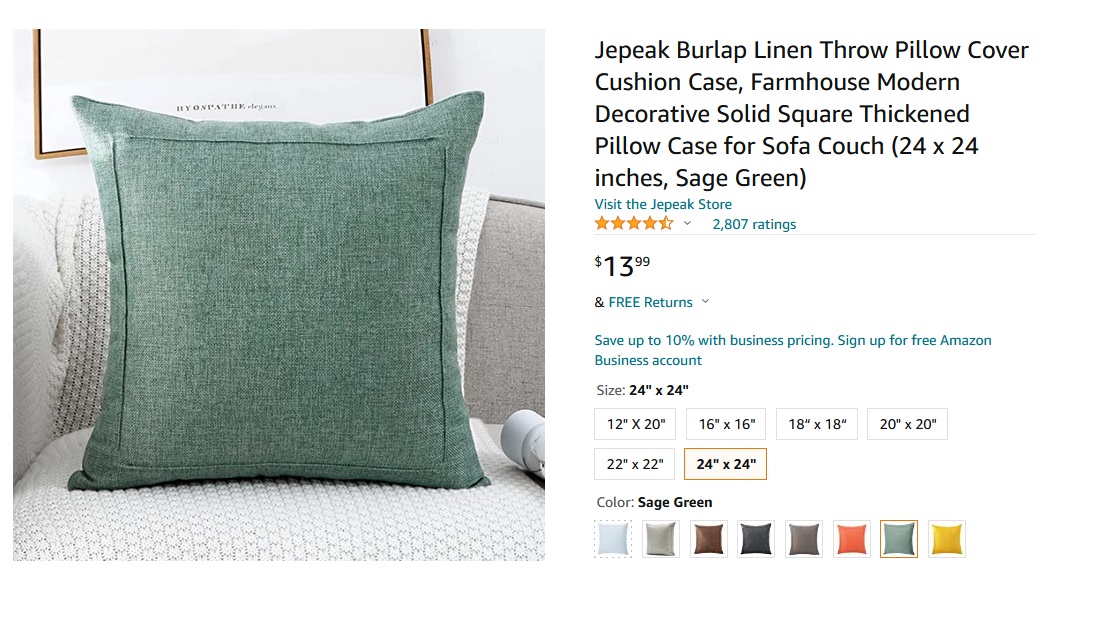
Jepeak Burlap Linen Throw – Amazon
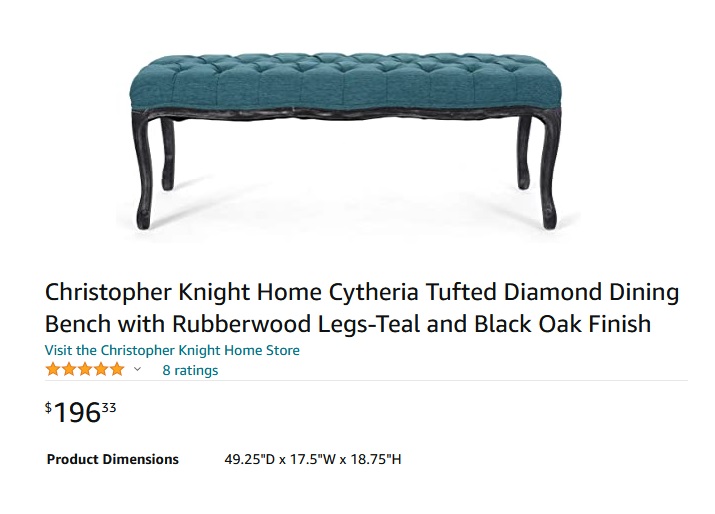
Teal and Black French Bench – Amazon
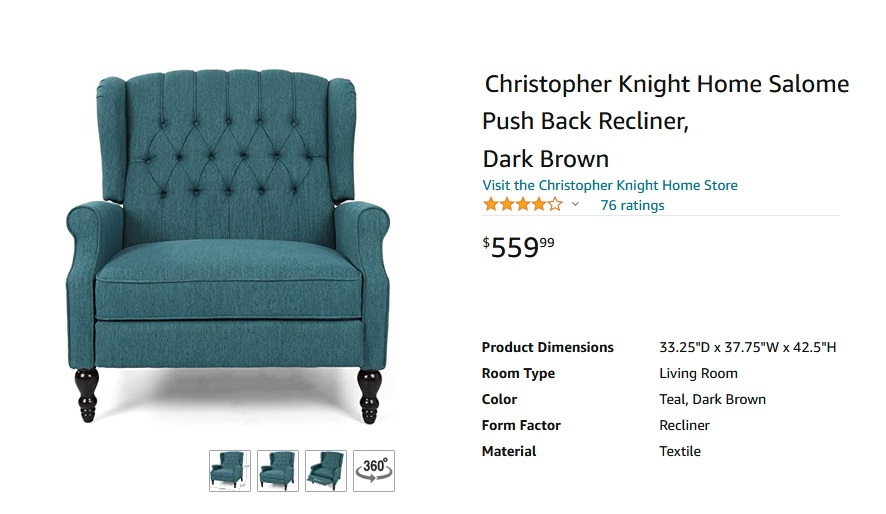 Spectacular Teal Recliner – Amazon
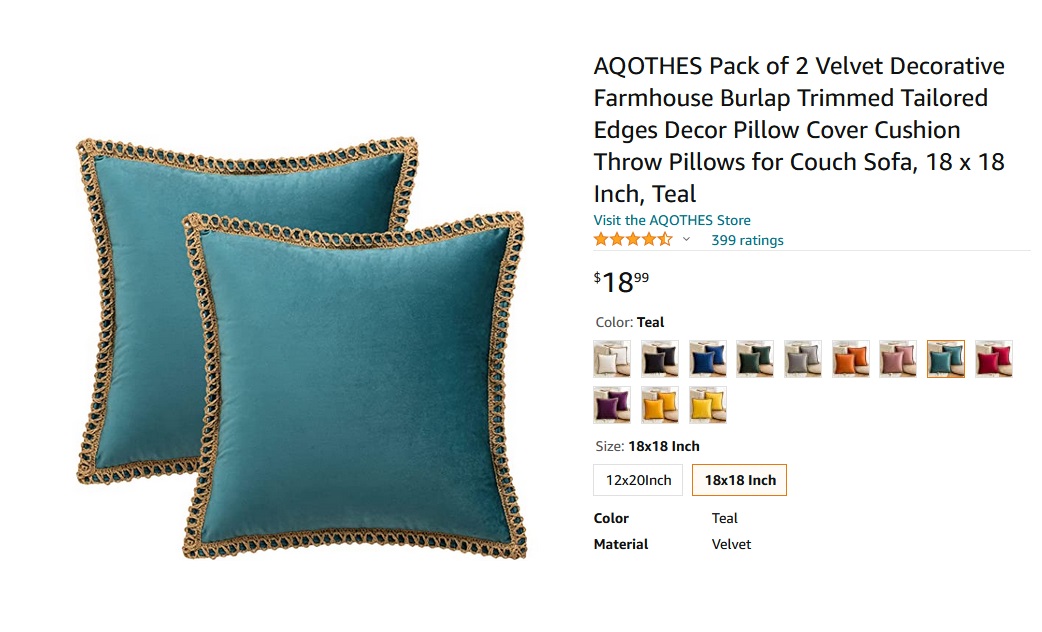 Velvet Trimmed Pillows – Set Of 2 – Amazon
 Notice the French pink upholstered bed above? It wouldn’t look the same without the gold painted details.
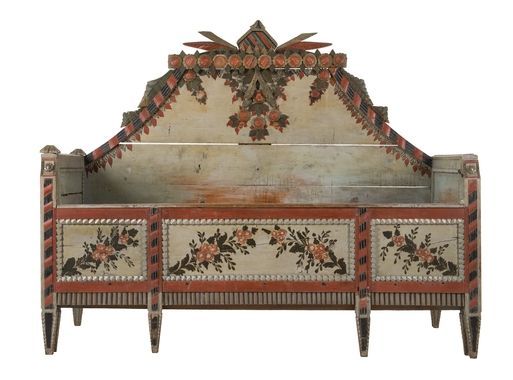 What a grand daybed – seen at digitaltmuseum.se
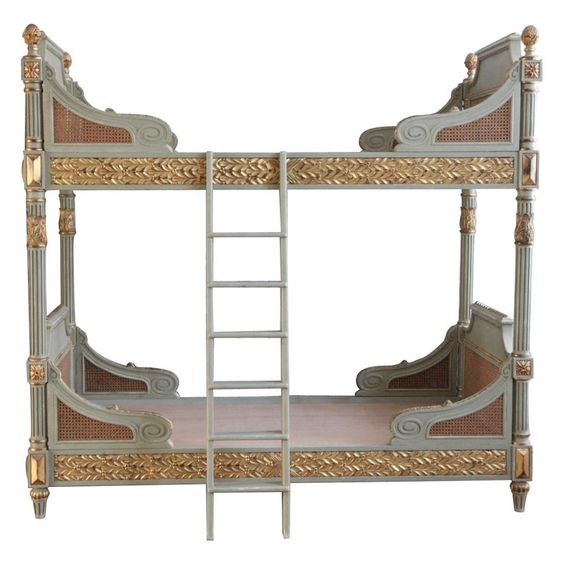
$12,057.62 Louis Xvi Style Bunk Beds/matching Pair Of Single Beds Made By La Maison London
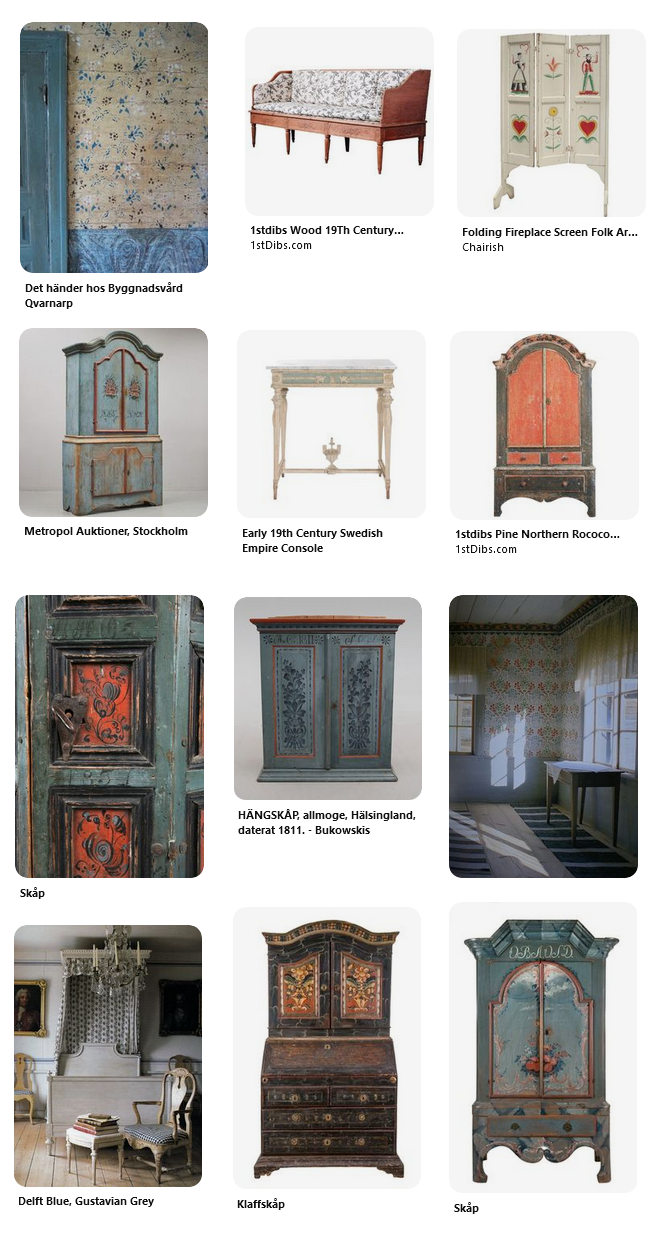
Intricate wallpaper often is a classic Swedish look.

Stunning Folk art styled antiques. Burnt Red is a color seen amongst Swedish antiques
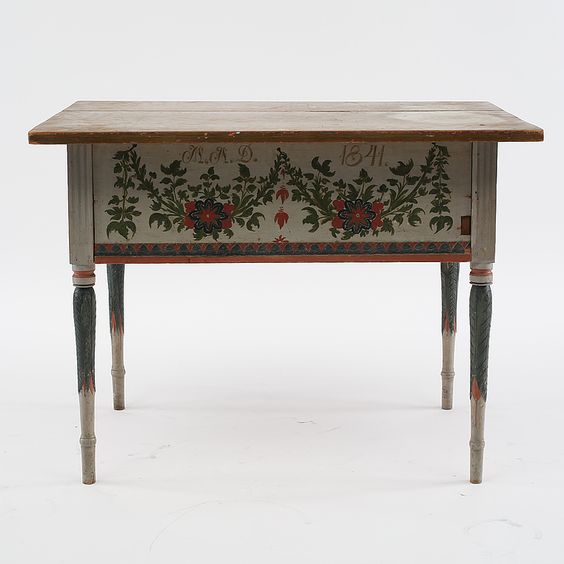
MÖSSBORD, Jämtland, daterat 1841. – Bukowskis
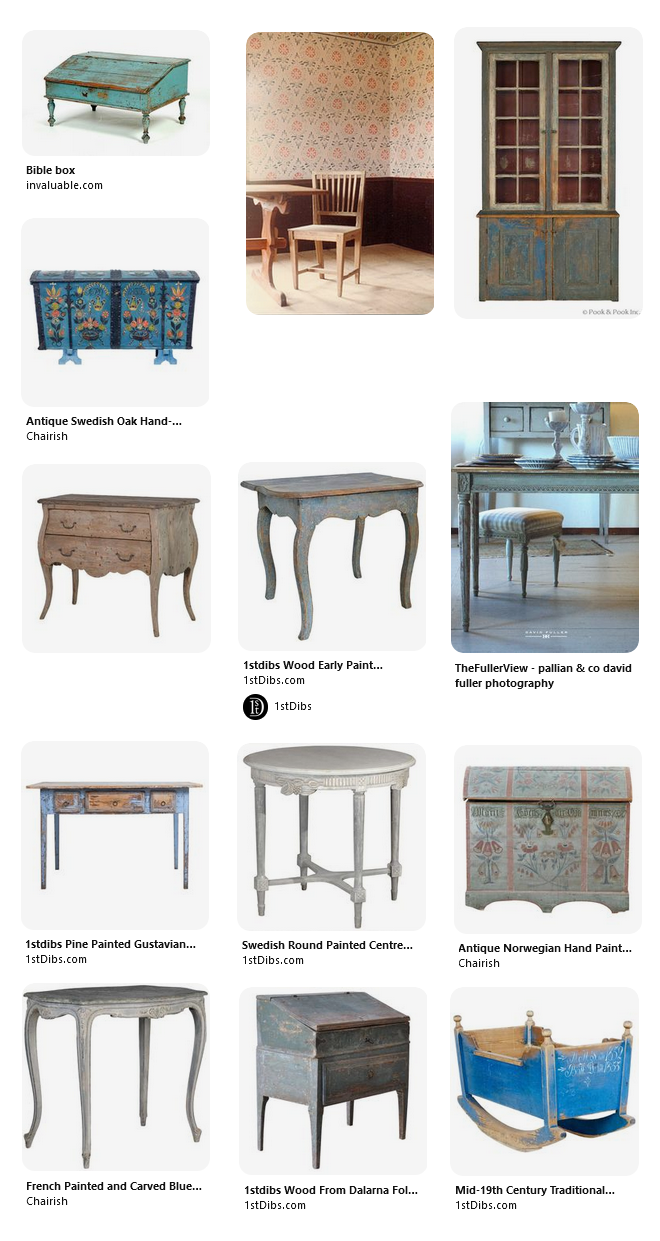
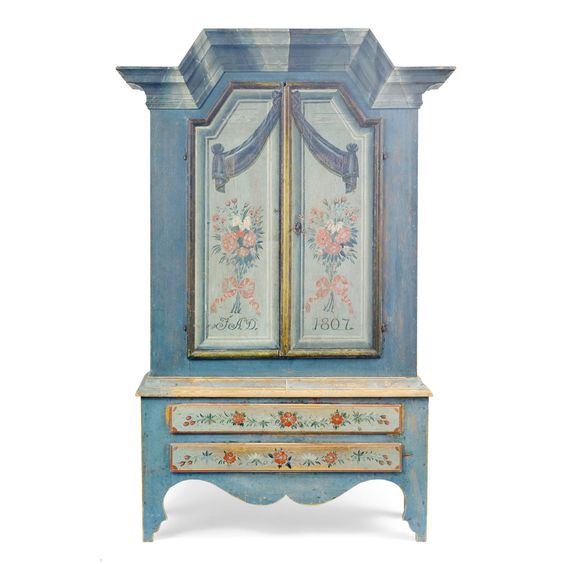
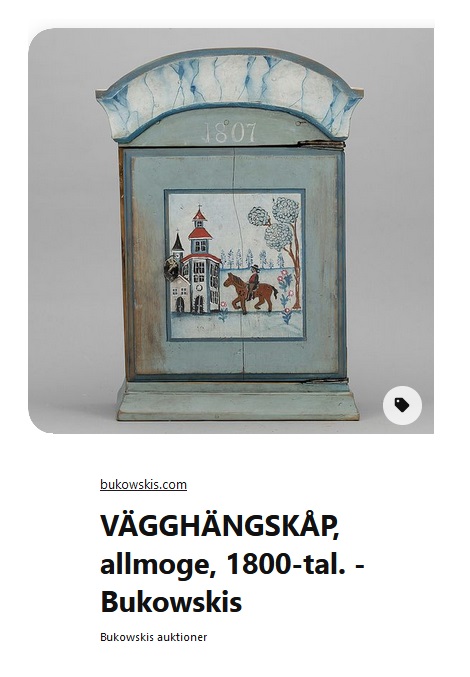
A Swedish cupboard dated 1807
Hand painted floral details stand out on this painted cupboard
 What colors do you like the best? If you were to invest in one piece today, what would it be?
5 Scandinavian Interior Design Tricks – Megan Slack
Lighter Colors are used in this interior, whose picture appeared on the cover of Classic Swedish Interiors
 1. Use large windows to emphasize natural light
Thanks to the nation’s famously dark winters, Finnish designers are experts at emphasizing light in the most effective ways possible, and Villa Lumi is certainly no exception. The home uses large window panes and no window dressings to ensure the home is illuminated as efficiently as possible. While all homes may are not designed in the same way as Villa Lumi, we can still the architect’s technique with any kind of window, as Helsinki based Interior Designer Helena Karihtala shares:
‘Due to long winters, the use of natural light is considered to be important, and we usually prefer large windows. Keeping the windows bare or using light curtains helps make the space feel open and full of natural light. The walls are also almost always a shade of white, making most of natural light.’
Read more at livingetc.com
Mirrors are another classic Swedish design trick to add more light into a room. Face the mirror opposite of a window to bounce light off of.
Expect To See More Warm Grays, Blues And Creams In Gustavian Decorating
 Christine Adams
Wood Finishing Technical Writer at General Finishes
2018 is here and it is BOLD. Designers and Brands predict that this year is going to be more vibrant than years before. Below are a few insights into the 2018 home design trends to help you get inspired.
Before we start, remember that CLASSICS ARE ALWAYS IN. Although it’s fun to have that end table glowing in bright red, whites and blacks are the safest colors as these would work for any customer’s home. GF’s top sellers are White, Black and Gray – check some out here in our design Center: http://bit.ly/
2018 IS RICH WITH COLOR. This year, it looks like a vivid start as Pantone named “Ultra Violet” its Color of the Year, while Sherwin Williams selected the striking Oceanside SW 6496. Other colors that appear to be trending are colors such as violet, wine, amethyst and even soft lavenders. You can find some bold colors in GF’s Color Lab here: http://bit.ly/
HEAVY CABINETRY AND STATEMENT STORAGE. The white cabinet trend has faded and Country Living expects to see more warm grays, blues, creams as well as wood grain tones to take purchase in kitchens in 2018. As for storage, Anthropologie’s customer styling director Christina Frederick says “gone are the days of sacrificing style for function… There seems to be a desire for high-end organization in our personal space, a desire for things – and life – to feel pulled together.”
BRASS IS BACK BABY. Whether it be an accent or the drawer pulls on a buffet, this aged finish is making its way back into our homes.
NATURAL ACCENTS. Natural wood, earthy materials and even color iterations of stone are being implemented into designs. Ryan Turf, managing director of CB2 says, “These beautiful, natural materials add texture and depth to any design. Timeless yet very modern and fresh.” Include wood stains in your furniture designs to meet this trend. All GF stains can be compared here: http://bit.ly/
WABI-SABI. Wabi-sabi is the Japanese art of finding beauty in imperfection. For furniture refinishing this means handmade or hand-painted items that retain a deeply personal, organic aesthetic.
GRAY IS THE NEW BLACK. According to Linda Holt, it looks like the cool blue-grays have been replaced with warmer tones of gray, taupe and neutral colors such as brown. REMEMBER: don’t overuse too much neutral or your furniture or it may become so neutral you’ll miss it! Check out GF’s grays at http://bit.ly/
To read more about 2018 predictions, please go to the following links:
Architectural Digest: Sherwin-Williams Reveals its 2018 Color of the Year – https://
Country Living: 10 Trends That Are Taking Over Homes in 2018 – http://
Country Living: Pantone Color of the Year 2018 – http://
Linda Holt: 2018 Color Trends You Want to See Now: https://
Maria Killam: Colour Trends You Need to Know Right Now for 2018: http://
Nordic Style Kids Bedroom Decor Ideas
The design of your children’s rooms should feel like a natural extension of your home and your personal style. A playful space doesn’t require cartoon characters splashed across every wall to prove you’re a fun mom. Thoughtful design can feel youthful, imaginative, and beautiful all at once.
Below are a few simple tips for decorating a child’s room in a way that feels lively yet timeless.
Limit the Number of Pieces in the Room
Create breathing room. Choose just a few well-made, thoughtful pieces and leave open space for play. Many modern homes don’t offer large secondary bedrooms, so prioritize furniture that works hard for you—dressers with ample storage and beds with built-in drawers are invaluable.
Add Dedicated Storage for Toys
Teaching children to put their toys away in a designated space makes a world of difference. We updated all the closets in our home using simple bracket systems from Home Depot and lined the shelves with baskets. One row is reserved for clothing, while the remaining shelves house toys. A cleaner room means far less daily stress.
Use Wall Shelving to Elevate the Space
Everyday toys can live in the closet, while more decorative or antique toys can be displayed on wall shelves. If you love design, use vertical space to your advantage. Painted and lightly distressed wood shelves add charm, and floor-to-ceiling bookcases maximize storage while drawing the eye upward. Thrift stores often carry porcelain dolls for very little—I’ve found beautiful ones for as little as $5 that can be enjoyed now and played with later.
Invest in the Right Fabric
Fabric can set the tone of a room instantly. Printed textiles add warmth and personality, whether through bedding, curtains, or pillows. If sewing isn’t an option, look for comforters that achieve the look you love, then echo that fabric in smaller accents like throw pillows or an upholstered chair.
Choose One Standout Antique
A single antique—whether it’s a toy on a shelf or a beautifully crafted bed—can anchor the entire room. You don’t need excess furniture or décor. Nordic-inspired interiors thrive on restraint, so focus on a few functional, high-quality pieces paired with subtle accents.
Mix Old and New
The Swedish look is all about balance. Combine modern furniture with classic patterns like checks or stripes, and layer in color through textiles, ribbon details, or small accessories. New pieces can feel timeless when styled thoughtfully.
Enlarge a Vintage Print
Large artwork doesn’t need to be expensive. I’ve found frames at yard sales and replaced outdated prints with enlarged vintage images—one even came from an old calendar my grandmother gave me. Printing them at a local shop like Staples is an affordable way to fill large frames with beautiful, meaningful artwork.

Melissa and Doug Plush Dogs – Amazon
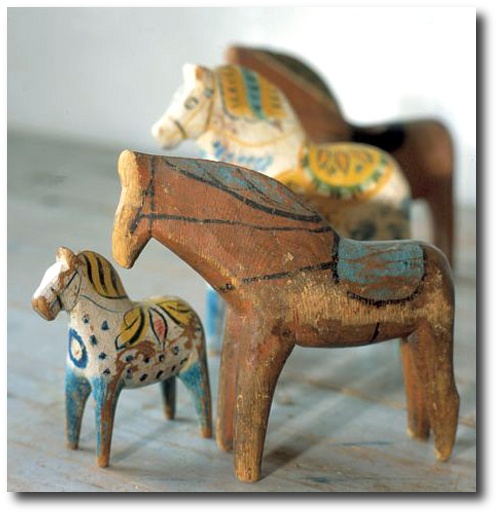
The tiny horses originated in Dalarna hundreds of years ago. They were made from scrap pieces of wood and used as toys and first mentioned in writing from 1624. In the 1800s, this horse became famous and internationally known as the dala horse. Add one of these into your children’s room for a Swedish flavor.
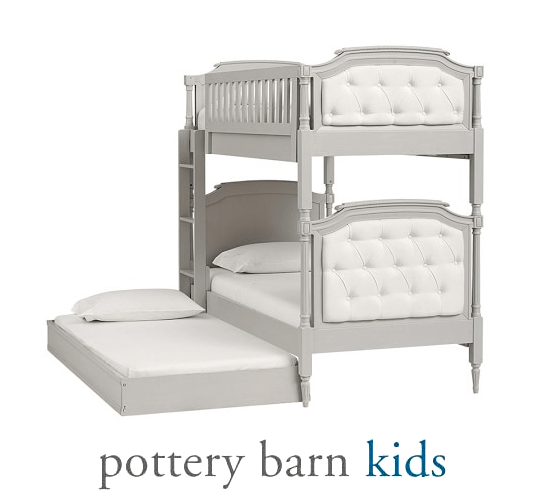 This grand bunk bed sleeps two children in comfort and style. They are quite expensive…. however don’t discount trundle beds which can house an extra bed quite nicely. Create your own beautiful bed by tufting the head board, or upholster your headboard for an updated look. Here you can see, gray always looks classy. From Pottery Barn
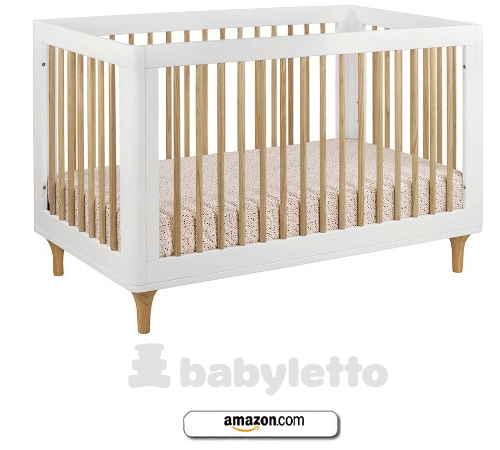 Modern can be fun! Look at this bed from Babyletto! Don’t you love it?
Babyletto Lolly 3-in-1 Convertible Crib with Toddler Rail, White/Natural – Amazon
babyletto Skip 3-in-1 Convertible Crib with Toddler Rail, Chestnut and White- Amazon
Babyletto Origami Mini Crib, Amazon
Found on architecturaldigest.com
Babyletto Lemonade Playset- Amazon
Painted garland is a classic Swedish look.
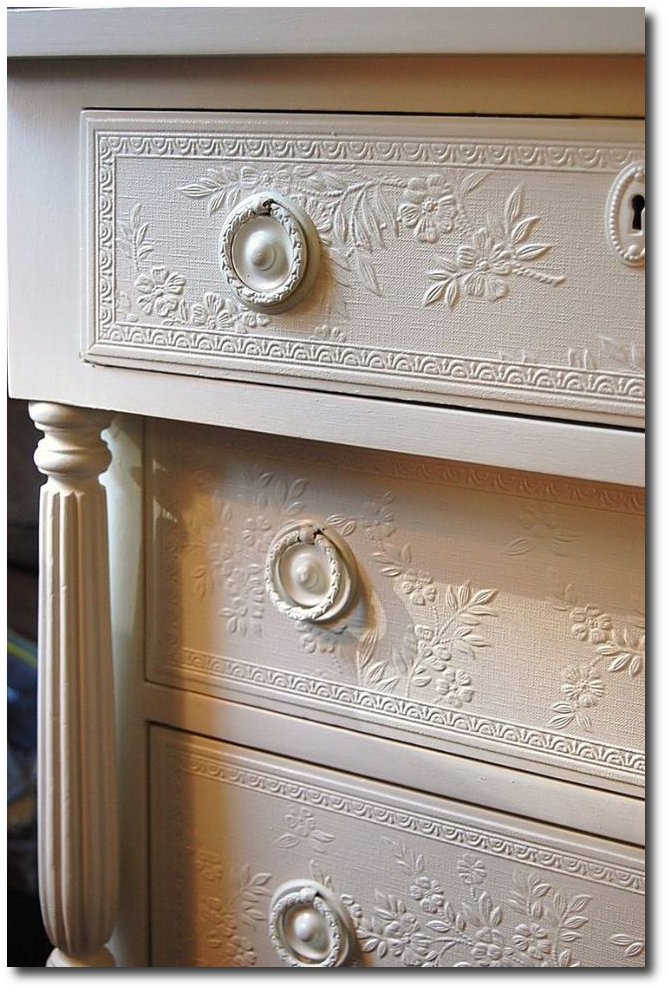
Get some ideas from this delicate and intricate design by using embossed wallpaper to decorate a chest. Seen on A Changing Nest Daniella Burnett , Found on etsy.com
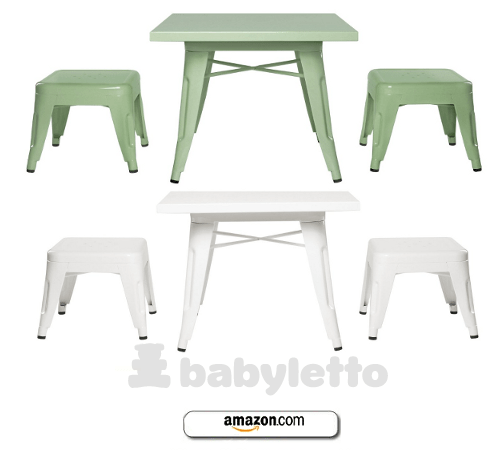
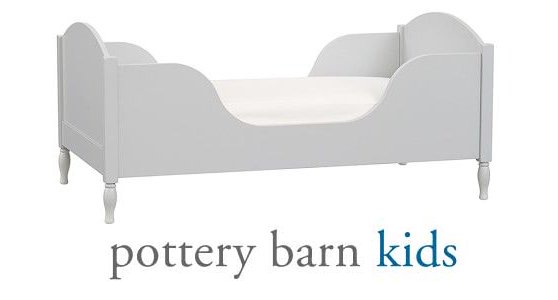 This bed from Pottery barn has the classic looks seen in Swedish kids antique beds
Shelter Toddler Bed, Found on potterybarnkids.com
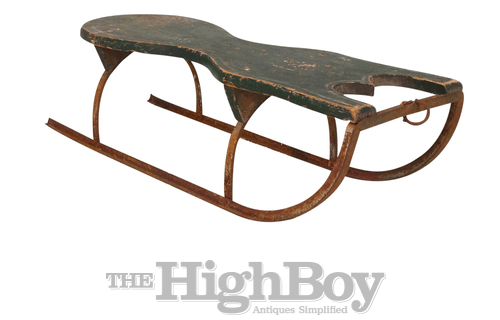
A very charming 19th century Swedish sled from Dalame, Sweden- Highboy Antiques
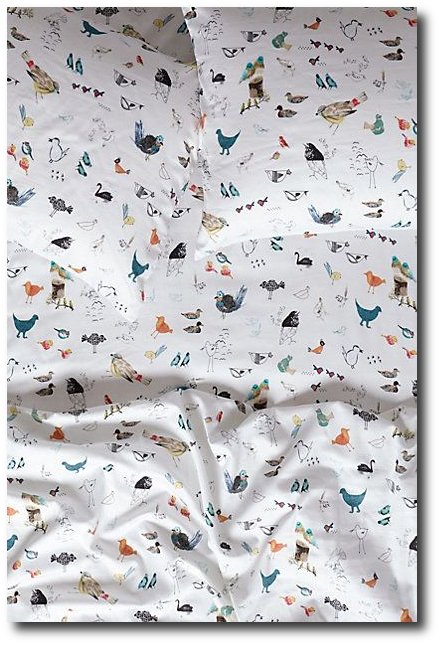
Paths Of Flight Sheet Set Found on anthropologie.com

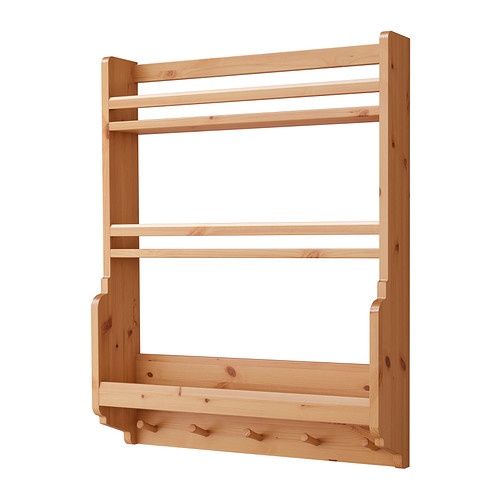
GAMLEBY Wall shelf IKEA, could double up as a book shelf

Counted Cross Stitch Pattern Chart Graph – Vintage Mother & Baby 1930s By Vintage Home Arts – $12 On Amazon
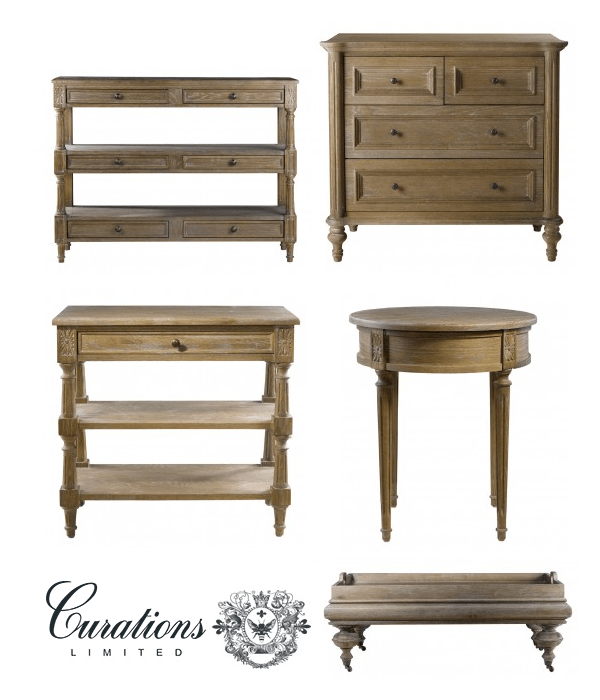
Furniture From Curations Limited.com
he Highboy Antiques

Swedish 19th century wooden soldier Found on bukowskis.com
Gustavian Officer, Kostymskisser | Atelje Alenhall
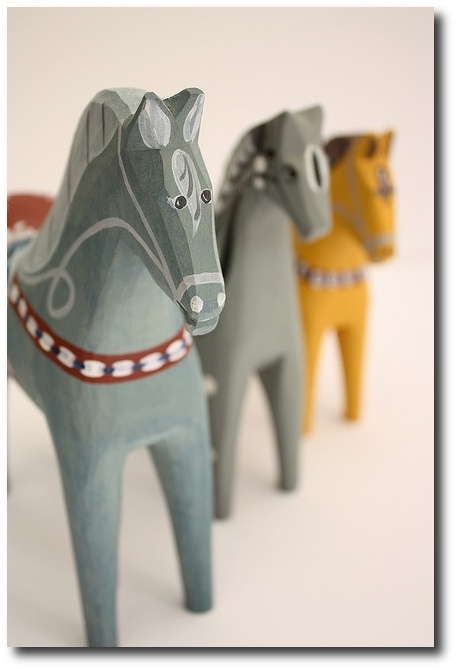
Dala Hast (swedish wooden horse) by Hart Interior photo on Flickr
Find similar images to this one on google images
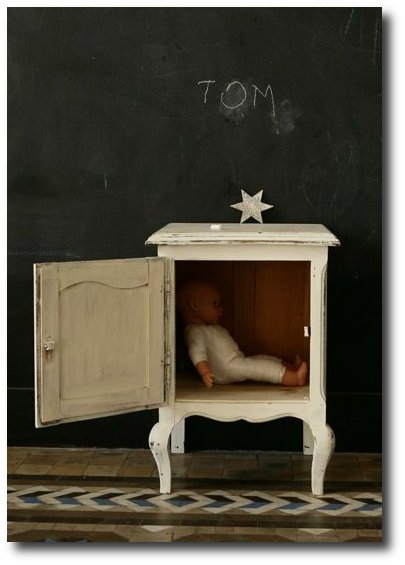
 Decorate With Antique Toys- Ideas For Your Kids Room Decor
 Art Minds ArtMinds™ Wood Castle Dollhouse – Michaels
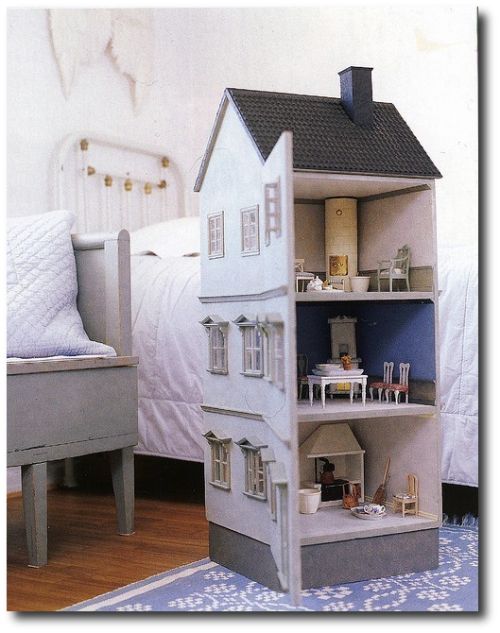
Decorate with old wood painted doll houses. As you can see this photo actually contains Swedish doll house furniture!
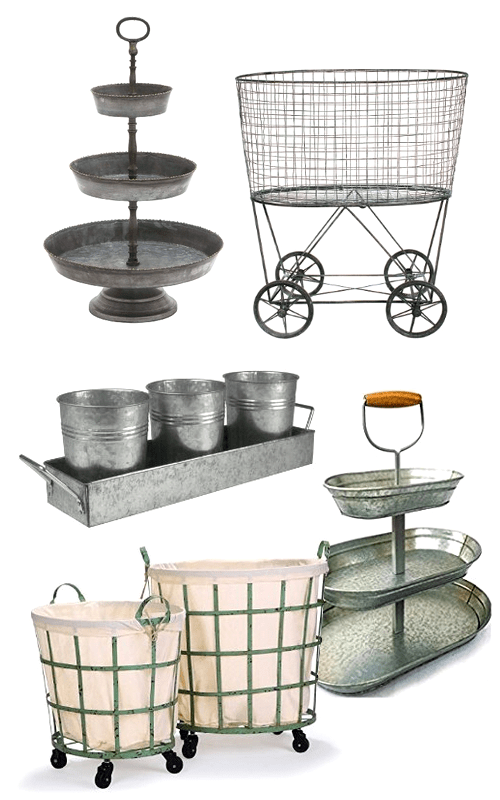 Deco 79 Metal Galvanized Tray, $81.84
Oasis Picnic Caddy & Planter Set, Galvanized Toy Buckets? $14
3 Tier Galvanized Metal Stand $52
Metal Vintage Laundry Basket with Wheels $124
Adeco Round Rolling Laundry and Storage Baskets $99+ $32 Shipping
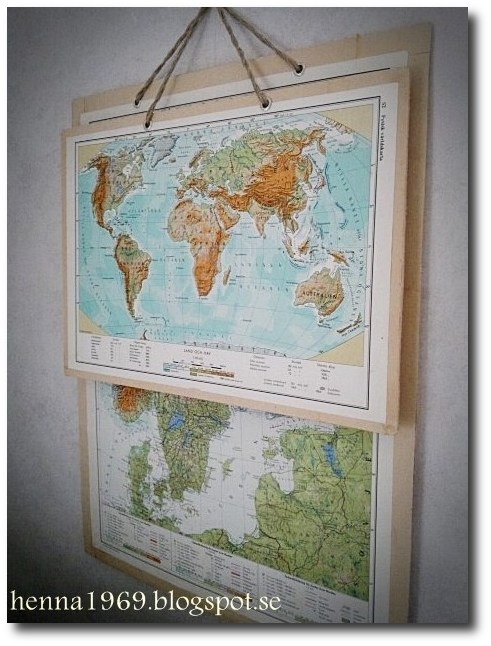
Consider layering maps on the wall by using thin plywood.
Read more on henna1969.blogspot.se
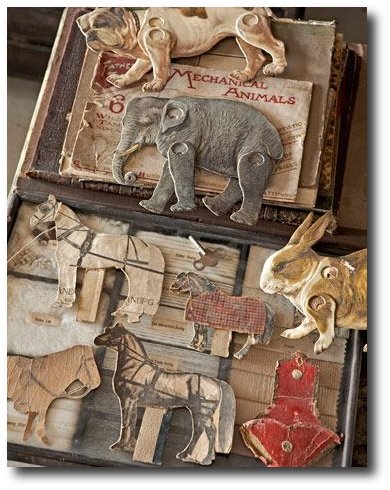
19th-century English paper animals-Found on countryliving.com
Based in Barcelona, is owned by Kathleen Boonen and Jan Dönhardt, a couple with Belgian, Dutch and German origins – Found on pirouetteblog.com
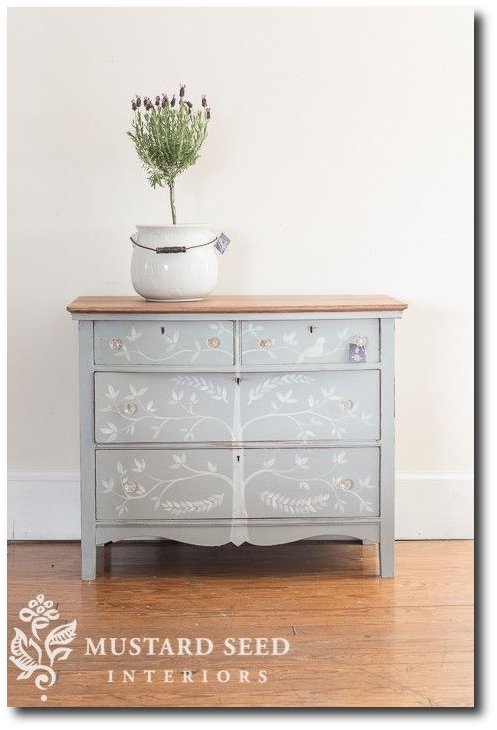
Dresser With A Tree – Found on missmustardseed.com
 Real Living November 2010
Bring color into the room with a white based knitted blanket
All Things Beautiful Blog: Marburger Farms Antique Show
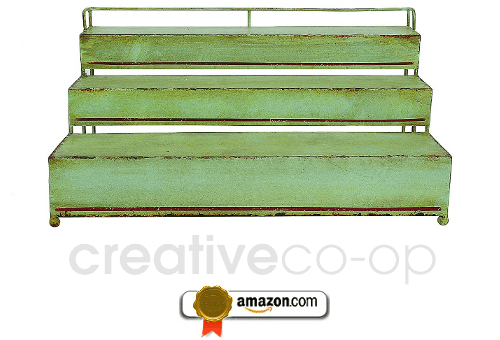 Creative Co-Op Metal Three-Tier Rack, Green $49
Perfect for displaying toys
Swedish “slagbaenk” by Live Bohemian on Flickr
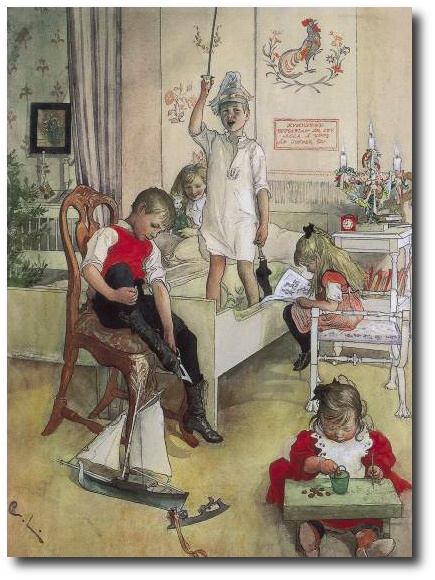
Carl Larsson 1894
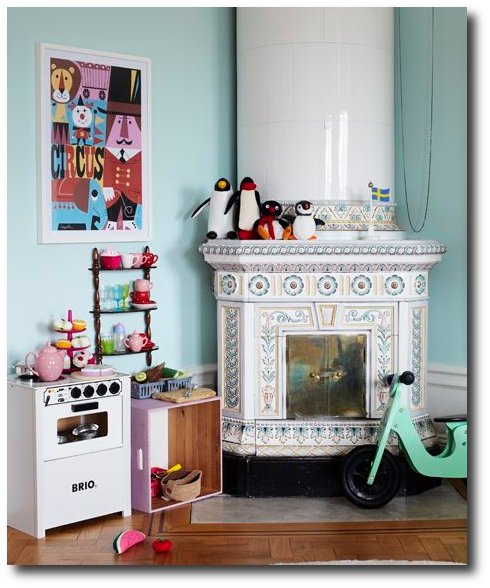
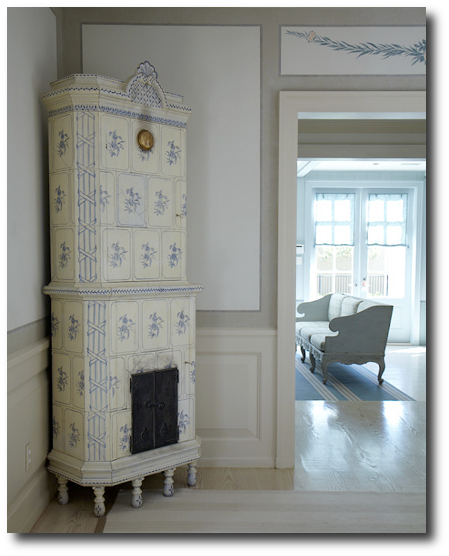
Children’s toys featured with a Kakelugn tiled stove- Found on familyliving.se
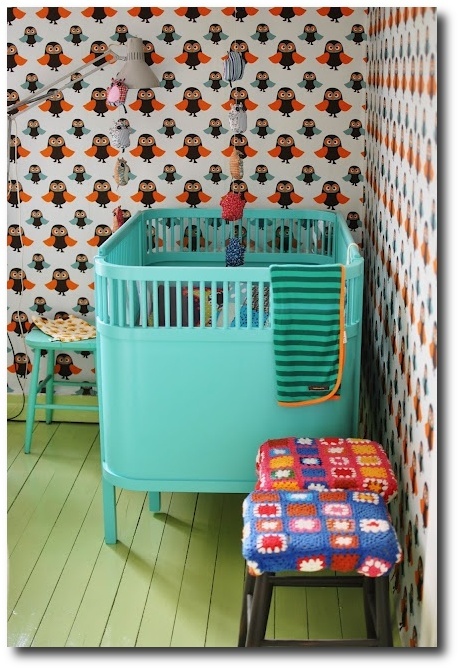
Turquoise crib – Found on in-myhouse.blogspot.se
Decorators Who Have Embraced The Nordic Style – 30+ Pictures
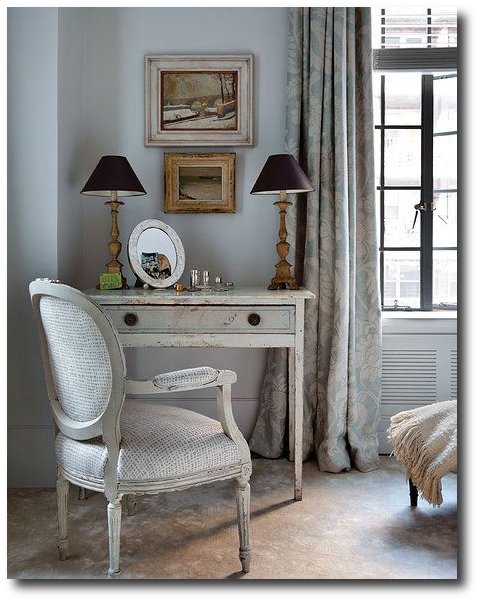
Here are a couple modern day interiors which incorporate many of the elements found in the Swedish style. While we all enjoy looking at historical manor homes, modern day homes can give us a better feel of how we can bring this style into our own homes. Whether it is rooms based around white, or Swedish antiques used, see how the top designers around the country have used this style in every day residences.
Picture Credits:
- Jocie Sinauer’s Home Of Red Chair Antiques
- Designer Shannon Bowers, featured in the Spring 2014 issue of Milieu-mag.com
- Buffalo Check Twin Beds Seen On Harry Norman
- Michael J Siller Interiors
- Alexander Doherty Design
- Timothy Corrigan
- Cathy Kincaid
- Shannon Bowers Designs
- Jeffrey Bilhuber- His Book The Way Home– Seen At Quintessence Blog
- Designer Susan Anthony
- Lucas Allen Designs
- Taarbæk Strandvej 24, 2930 Klampenborg, lutzau.dk
- Jeannette Whitson
- A New Nashville House With an Old Soul – House Beautiful
- Julie Nightingale Design
- Jeannette Whitson, Architect Bethany Puopolo
- Frank Babb Randolph
- CarolEgan Interiors
- Seaside-style dining room – House to Home
- At Home with May and Axel Vervoordt- Buy The Book On Amazon
- Ornate Wall Shelves – Featured In Nicky Haslam Design
- Featured on Katherines Blog Auction Decorating
- Designer Julia Alvarez de Toledo Seen On Zoë Design
- Designer Brian J. McCarthy
- Designer Leta Austin Foster
- Home Of Jewelry Designer Mish Tworkowski- Elle Decor
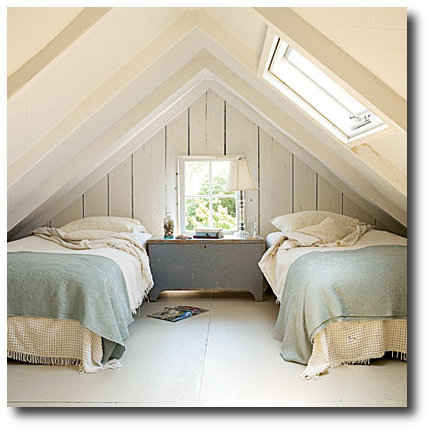
Attic Bedroom Seen on Coastal Living.com
Frank Babb Randolph
Designer Ken Fulk, Seen In House Beautiful
Interior Designer Candida Taylor
Brunschwig & Fils New York Showroom The tented café at the revamped Brunschwig & Fils showroom in Manhattan, Seen In Architectural Digest, Designer Michael S. Smith


Swedish Decorating Inspirations In Yellow, Ivory And Beige- 50+ Pictures
Decorating in the Swedish Style: Light, Function, and Timeless Beauty
The Swedish style of decorating is defined by light, simplicity, and a sense of calm. For centuries, Nordic interiors have embraced pale colors and restrained design to create peaceful, livable homes. Light-painted walls, softly finished furniture, and bedding in whites or gentle pastels were not only aesthetic choices, but practical ones—designed to maximize brightness during Sweden’s long, dark winters. The result is an interior style that feels serene, welcoming, and enduring.
1. Light-Painted Walls Give You Greater Design Freedom
A Swedish-inspired interior often begins with light-colored walls. Soft gray, pale green, muted blue, or warm creamy white create a gentle backdrop that allows furnishings and accessories to shine. Neutral tones such as ivory, beige, or light gray offer flexibility, making it easy to layer in warmer accents like soft yellow or subtle gold.
For added character, consider decorative wall details such as stenciled ribbons, scrolls, or wheat motifs in soft pinks or deeper reds—elements historically seen in Gustavian interiors.
Floors should remain just as light and airy. Blonde woods, pale finishes, or lightly painted floors help reflect natural light and open up a space. For added charm, subtle stenciling or painted designs can bring interest without overwhelming the room.
Floor coverings also play an important role. Natural fiber rugs—such as jute, sisal, or berber—offer a neutral foundation that complements nearly any palette while adding warmth and texture.
Wallpaper is another beautiful option. Look for neoclassical patterns with soft colors on white backgrounds. Florals, swags, ribbons, and bows are common motifs, often accented with a touch of gold for elegance and refinement.
2. Add a Settee to One Side of the Dining Table
If space allows, a settee placed along one side of a dining table creates a relaxed, European feel. This seating style has deep roots in Swedish design. The traditional köksoffa, or kitchen sofa, dates back to the 1700s and was designed as a multifunctional piece—used for seating during the day and as a sleeping surface at night. Painted finishes and aged patina are common, reflecting both practicality and charm.
3. Rotate Collections Throughout the Year
Nordic interiors often lean toward minimalism, emphasizing thoughtful display over excess. Invest in furniture that doubles as storage, allowing you to tuck away everyday items while showcasing your favorite pieces.
Leave armoire doors open to display collections, and consider painting the interior a contrasting shade for visual interest. Cabinet interiors, drawers, and bookcases can also be painted in warm tones—buff, vanilla, apricot, or saffron—to add depth against creamy exteriors.
Rotate decorative objects seasonally, keeping displays fresh and intentional. Mount collections on the wall and use lighting to highlight special pieces. Edit frequently—keep only what you truly love and allow each item room to breathe.
Group decorative objects in pairs or curated collections. Use matching frames for artwork and keep images cohesive by working in black-and-white or sepia tones. Shelving, cabinets, and bookcases elevate collections when styled with restraint.
Storage boxes can also become part of the décor. Painted boxes, neatly stacked on shelves, add structure and sophistication while keeping clutter hidden.
4. Push Chairs and Side Tables Against the Walls
A classic Swedish layout places chairs and side tables along the walls, opening up the center of the room. This arrangement creates a sense of spaciousness and was common in historic Nordic homes. Position furniture in small groupings or allow a single chair to stand alone for a simple, balanced look.
5. Rethink Your Closet Space
Closets offer an opportunity to bring both beauty and order into everyday life. Adding painted wood shelving instantly elevates a space and makes storage feel intentional. Use wall space all the way up to the ceiling and consider incorporating double hanging rods to maximize functionality.
Organize clothing by color, and display special pieces rather than hiding them away. Closets can be both practical and visually pleasing when designed with care.
Closets can also be repurposed as display spaces. Painting the interior a darker shade, such as gray, allows collections—like tableware or glass—to stand out while remaining neatly contained.
6. Use Neoclassical Lamps and Wall Sconces
Lighting plays a crucial role in Swedish interiors. Wall sconces add romance and ambiance while freeing up table space. Candles mounted on walls create a warm glow and are often safer than tabletop arrangements.
Choose sconces that suit your style—simple or ornate—and place them in pairs on either side of mirrors or artwork for balance. Table lamps can be elevated by recovering plain shades with upholstery fabric that coordinates with accent chairs or slipcovers.
Chandeliers and lamps enhance the natural brightness of a room, while mirrors amplify light and create the illusion of more space. Finish the look with reflective accents such as blue-and-white china, silver, and glass for subtle shine and timeless elegance.
Picture Credits –
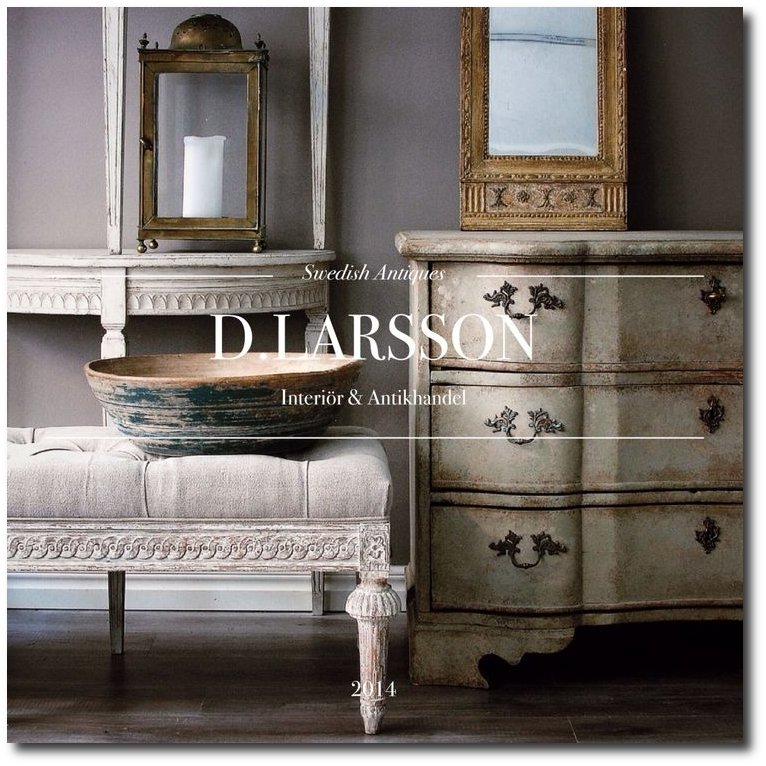
- D.Larsson Swedish Antiques
- French Wall Sconces On Ebay
- Huge Gustavian Hutch Desk , Sweden C. 1800 From Galerie Half
- Farrow & Ball Decorating with Colour- Buy This Book On Amazon
- A gorgeous tablescape. Photography by sandrafazzino.com, Planning by italyinstyletrave… & myspecialguest.co…,
- Floral & Event Design by foodartgroup.it
- 18th century Swedish Secretaire Appley Hoare
- Chelsea Textiles
- Eleish Van Breems Antiques
- Atelier de Campagne
- Augustus Brandt Antiques
- Gustavian Secretary From Lief
- Gustavian Secretary From Lief
- Ironstone Molds Seen On Cote de Texas Blog
- Ralph Lauren Home 18th-century Swedish-Inspired Design
- Carol Raley Interiors
- Stadsauktion Auction Catalogue #59
- UK magazine Livingetc. From Auction Decorating Blog
- Vicki from French Essence
- 19th Century French Woman on Canvas
- Lars Sjoberg- The Style Saloniste
- Court Mantua Kensington Palace 1750-1760 From ArtFund
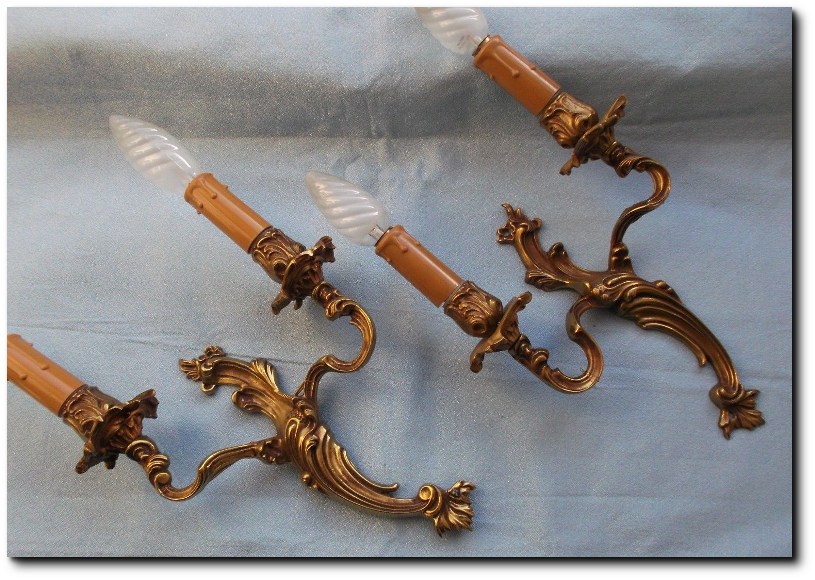
- Vintage Views Consigment is selling a very attractive pair of gilded bronze sconces
- Manor of Skogaholms- Stockholm Town Blog
- Kristinehovs Malmgård – Söder – Stockholm, Sweden- skarn.se
- Hoby-Kulle Manor, near Ronneby, Seen At En.konstantik.se
- Swedish Gustavian Swedish Decorating Ideas
- Collecting White Dinnerware Haute Design By Sarah Klassen
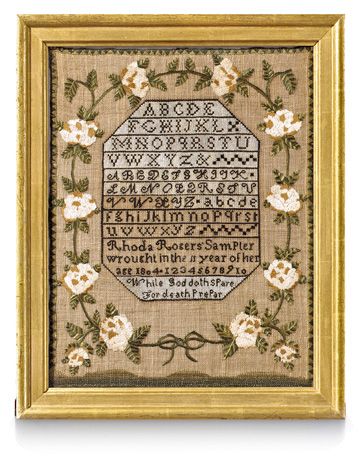 Sampler, 1804, Country Living.com
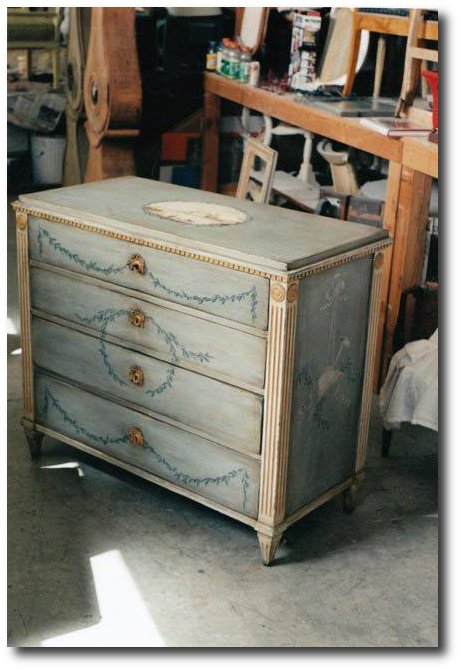
A Swedish Rococo Chest Rococo Period 1750-1775 A beautiful Rococo chest of drawers with amazing inlays and construction. All original hardware and locks, Laserow Antiques
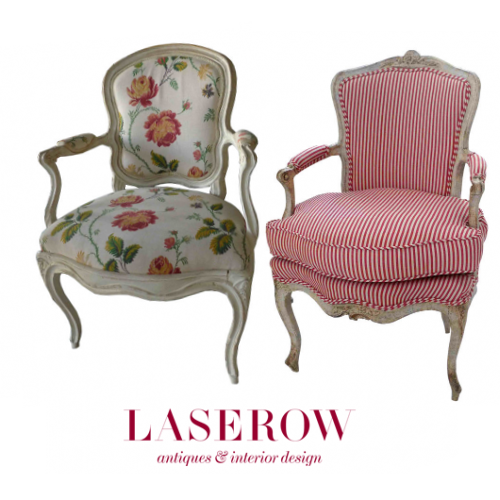 Swedish Rococo Armchair from the Rococo period 1750-1775 A Swedish Rococo armchair with cabriole legs and curved armrests and back. Laserow Antiques, Armchair Rococo period 1750-1775– A lovely armchair from the Rococo period with amazing carvings and curved shapes. Frieze and back splat is decorated with carved flowers and leaves. The scrolled legs and armrests are typical for the Rococo period featured at Laserow Antiques

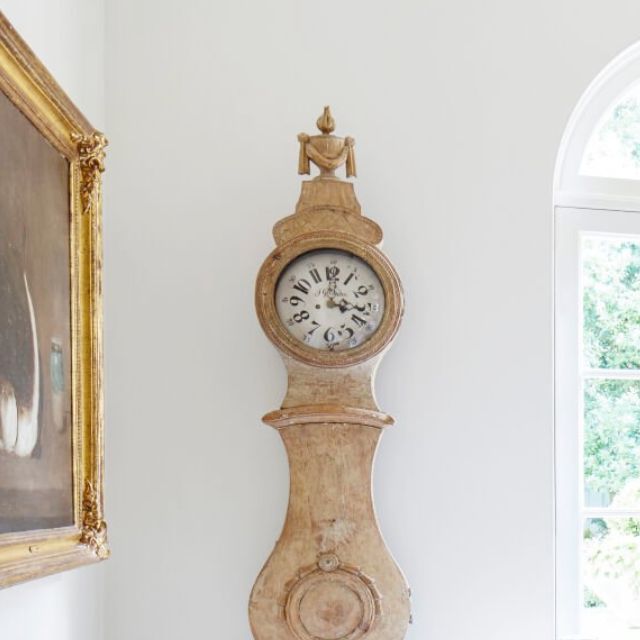
Mora Clock, from Real Gustavian and the Creamy White Mora Clock with orange detailing is from The Nordic Place.
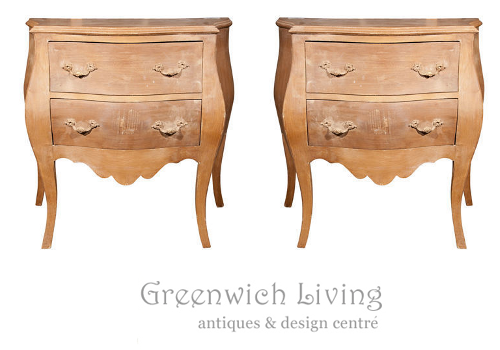 Pair of Bombe Swedish Commodes 102-4870 Greenwich Living Ebay
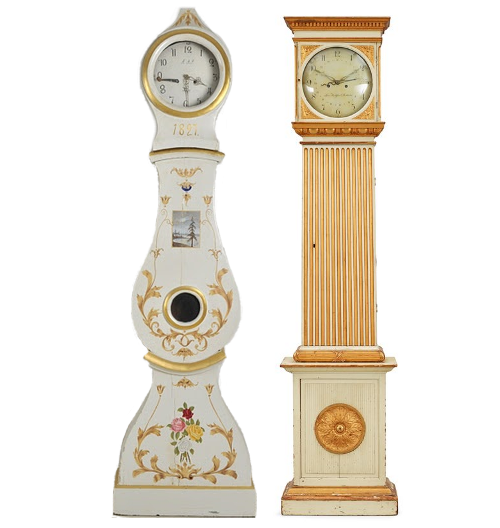
A Gustavian late 18th century longcase clock From Bukowskis, A Swedish Mora Clock From 1820-40, from Lauritz
Nordic Style Furniture Collections
Swedish Interior Seen On Inredningshjälpen Blog
Drink Cabinet $807.75 From Guild Master On Amazon
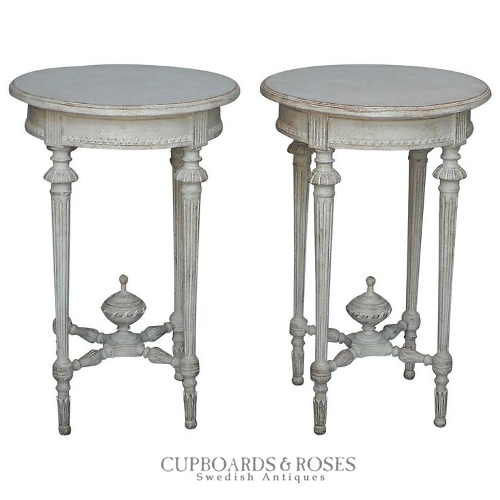 Pair Of Gustavian Side Tables- Cupboards & Roses Antiques
 The Best Designer Paint Suggestions Seen In House Beautiful Magazine
Antique Swedish canape – Augustus Brandt
Found on augustus-brandt-antiques.co.uk

A Passion for Collecting: Decorating with Your Favorite Objects- Caroline Clifton Mogg
We are all born collectors. In childhood we hoard all manner of knick-knacks-marbles, ribbons, toy soldiers-and experience an instinctive thrill in finding the next and even better one. This book explores the ways in which collectibles as diverse as antique maps, ceramics, and seashells can be used in interior design. With lavish illustrations of interiors that make wonderful decorative use of collections, A PASSION FOR COLLECTING reveals the secrets for display that can make an incredible visual impact on the décor of any collector’s home.
 Decorating With China and Glass By Caroline Clifton-Mogg
Caroline Clifton-Mogg is a writer and journalist who specializes in interior design and gardens. She is a contributing editor to both Harpers & Queen and Christie’s Magazine and also contributes regularly to magazines and newspapers such as House & Garden, Country Life, and The Financial Times. Her many books include Textile Style (Bulfinch, 2000), The Curtain Book (Bulfinch, 1998), Decorating with Antiques (Bulfinch, 1999), Passion For Collecting (Bulfinch, 2002) and The Bedroom Book (Bulfinch, 2003).


The Best Designer Paint Suggestions Seen In House Beautiful Magazine
Graham and Green’s Vienna Petite Four Drawer Chest, mango wood chest of drawers with brass accessories and a putty grey wash finish.
Graham and Green opened their first shop in Notting Hill in 1974, and since then Graham and Green has expanded from humble beginnings to a delightfully identifiable, British establishment. Today, Graham and Green have 2 beautiful shops, four catalogues each year and their online store.
 Pair of carved wood Swedish stools. Upholstered in Rubelli silk. Eighteenth Century.
An Old House in Whitechapel | Spitalfields Life
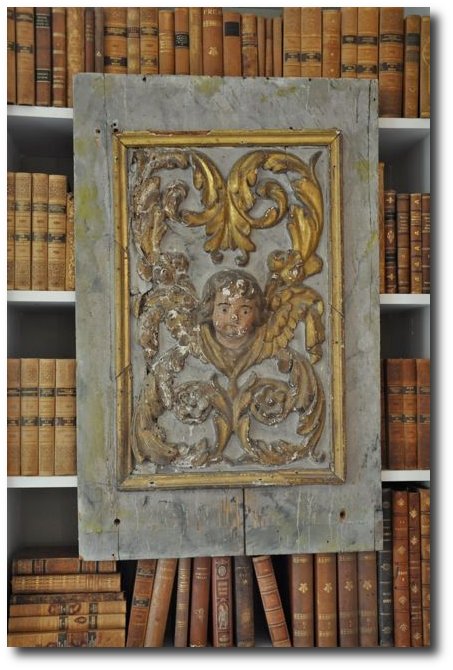 Swedish Panel – Giannetti Home Visit Providence lt Ddesign
61 Leather Bound Decorative Swedish Books, Debenham Antiques EBAY
70 Swedish Books, Debenham Antiques EBAY
Via Svenska Flicka (Swedish Girl)
Tussah Flower wallpaper from Zoffany

The Best Designer Paint Suggestions Seen In House Beautiful Magazine
Royal Palace, Stockholm. Chimneypiece graces the Blue cabinet in Queen Louisa Ulrika’s study.
The Best Designer Paint Suggestions Seen In House Beautiful Magazine
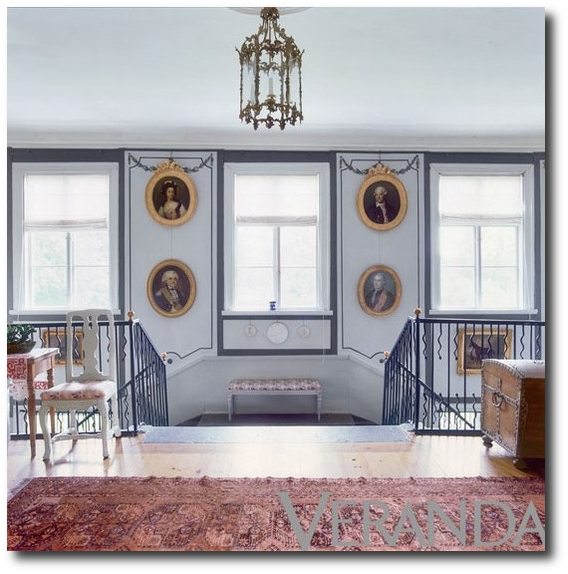
Swedish Medallion Seen In Veranda 2011
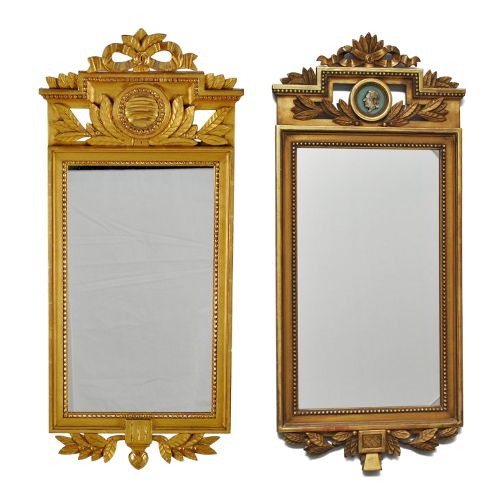
Gustavian Mirror, 1, 2 – Auction Catalogue From Live Auctioneers
More Pictures – Credits In The Article


Decorating Around The Color Green – Swedish Style
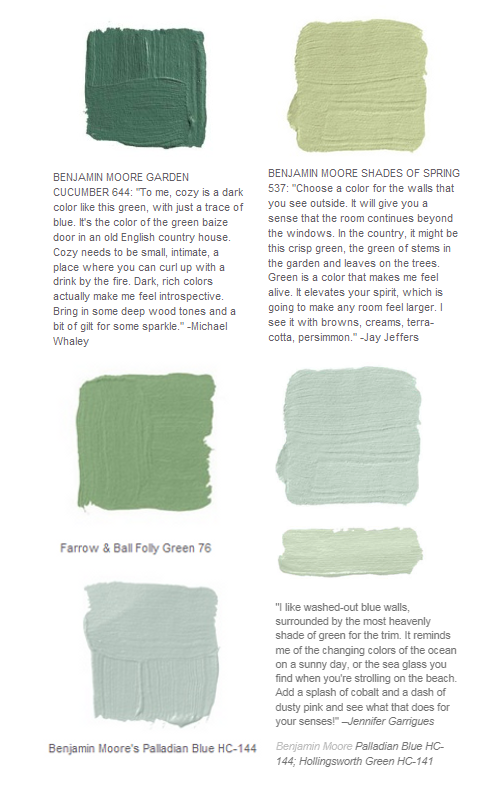
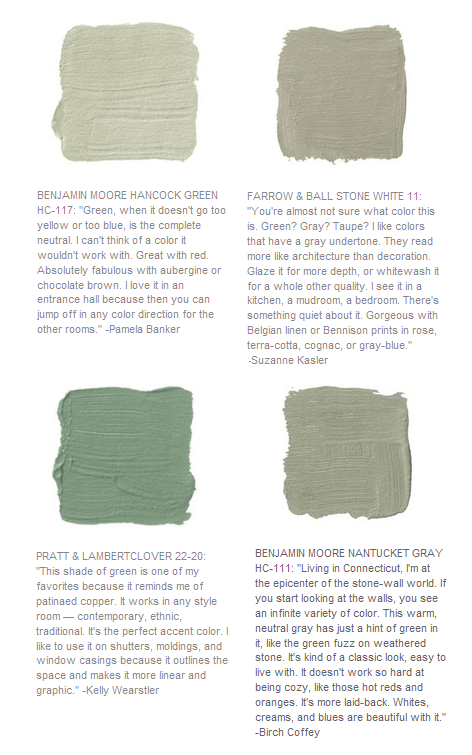
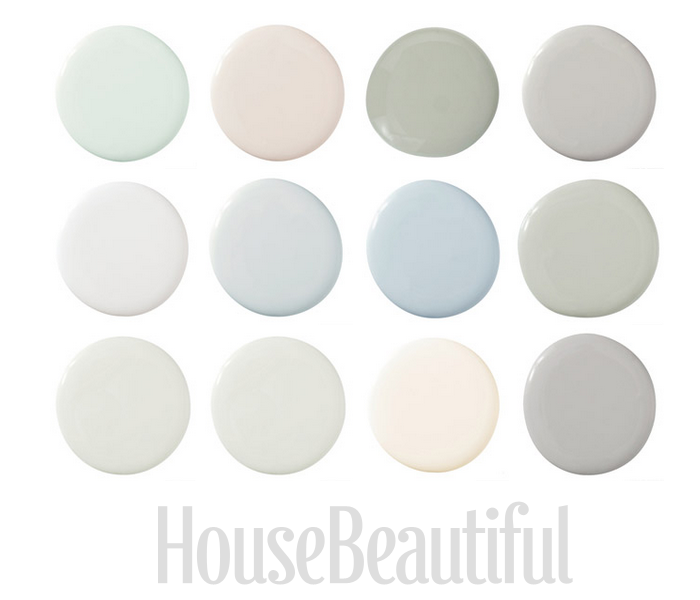
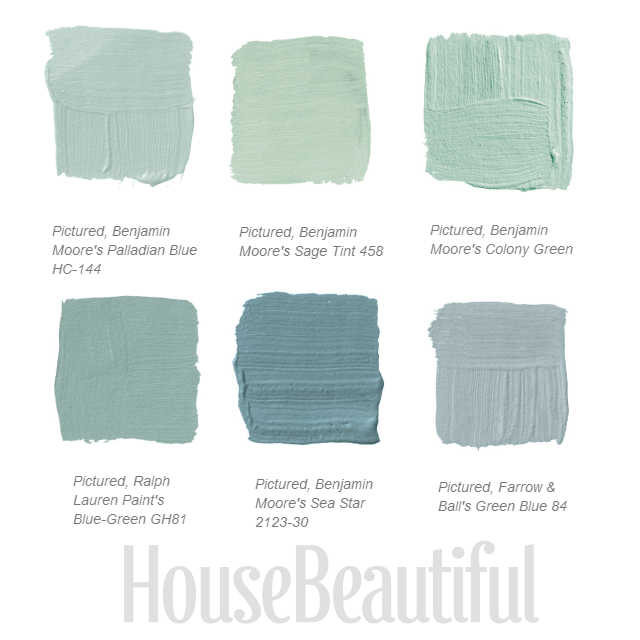 House Beautiful- 26 Designers Share Their Favorite Grays
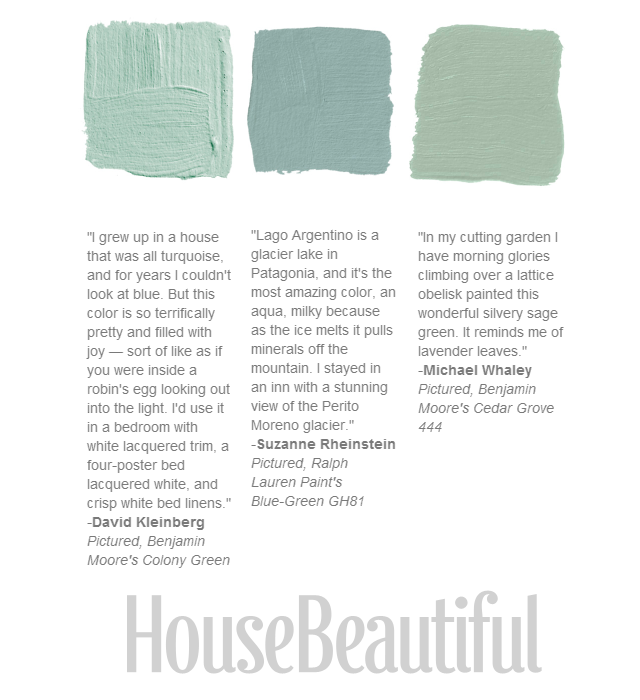
House Beautiful Designer Grays 3: Top Row, 1-Pratt Lamberts Argent 1322, 2-Farrow Balls Light Blue 22, 3- Farrow Balls Green Blue 84 Middle Row, 1- Benjamin Moores Cedar Grove 444, 2-Ralph Lauren Paints Blue-Green GH81, 3-Benjamin Moores Colony Green Bottom Row, 1-Benjamin Moores Heavenly Blue, 2-Benjamin Moores Palladian Blue HC-144, 3-Benjamin Moores Sage Tint
 House Beautiful- 26 Designers Share Their Favorite Grays
Benjamin Moore’s Colony Green, Ralph Lauren’s Blue-Green GH81, Benjamin Moore’s Cedar Grove 444
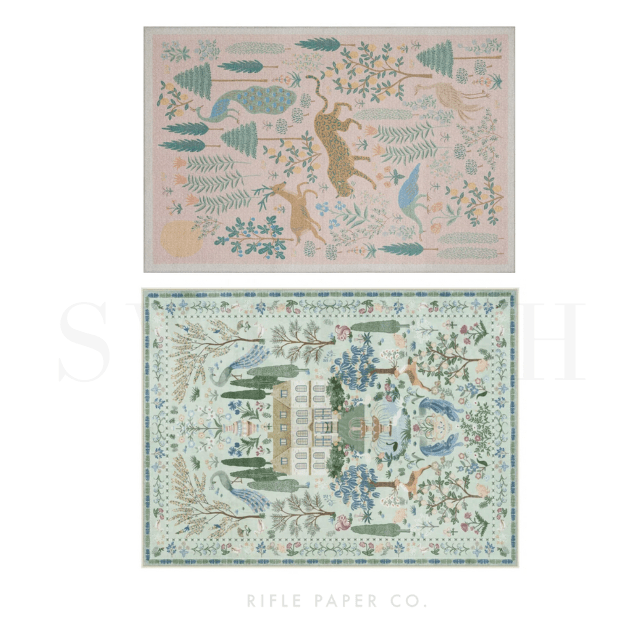
Rifle Paper Co On Wayfair
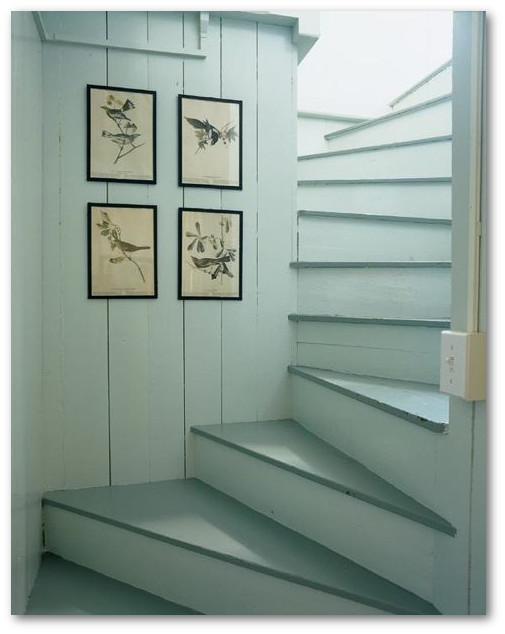
Tricia Foley {staircase} by recent settlers on Flickr
 Designer Paint Color Picks Seen At House Beautiful
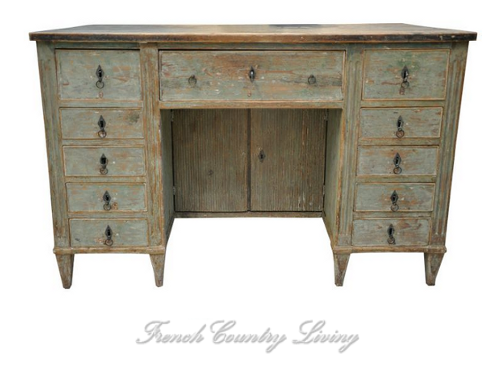
A Swedish 18th Century Writing Desk From French Country Living Antiques, UK,
A Swedish campaign secretary filled with white pottery- Henhurst Blog
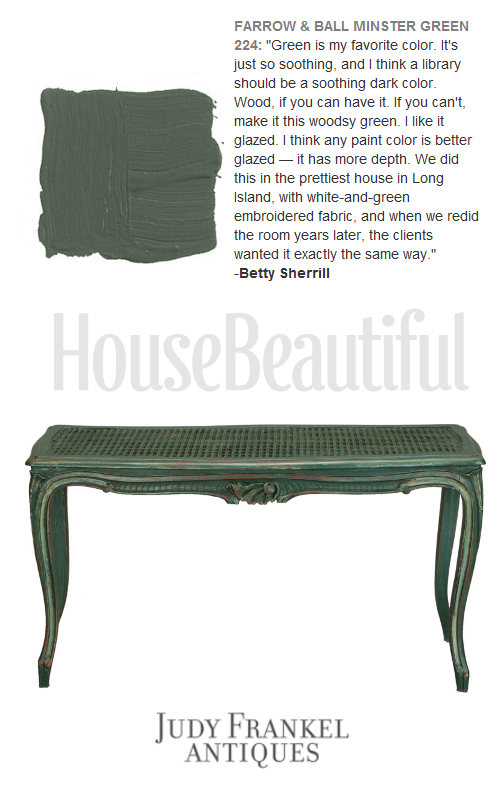 Judy Frankel Antiques, House Beautiful Paint Colors
 Designer Paint Color Picks Seen At House Beautiful
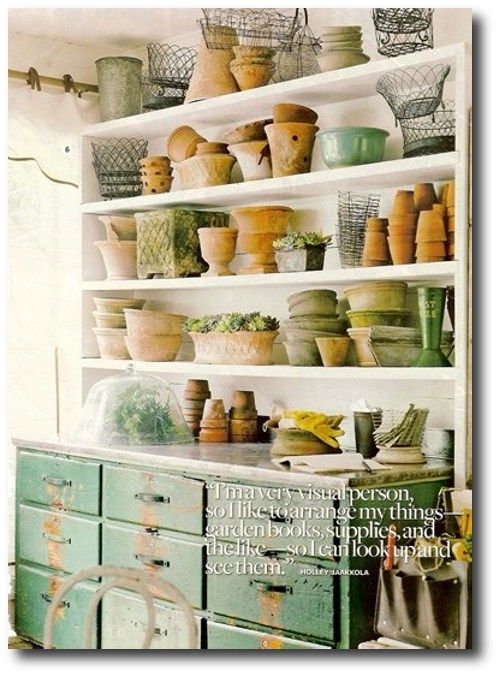
Better Homes and Gardens – Painted Potting Bench
Designer Paint Color Picks Seen At House Beautiful
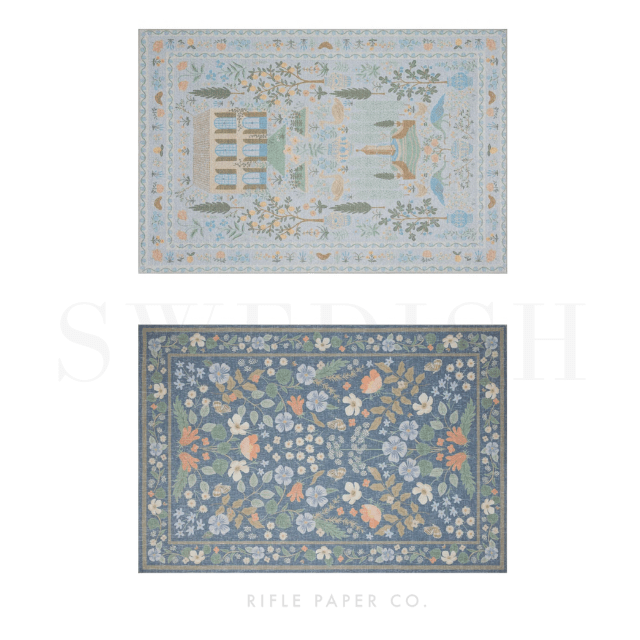
Rifle Paper Co On Wayfair
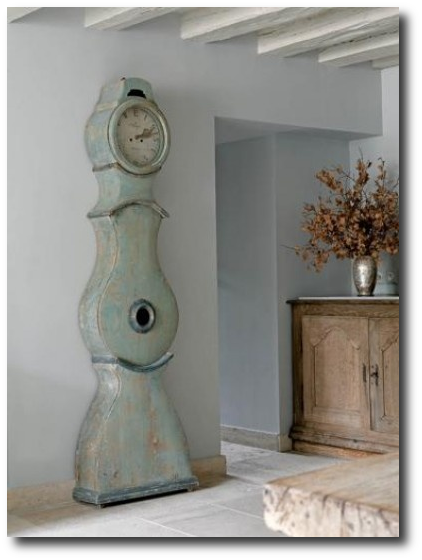
Swedish Mora Seen At Weranda.pl
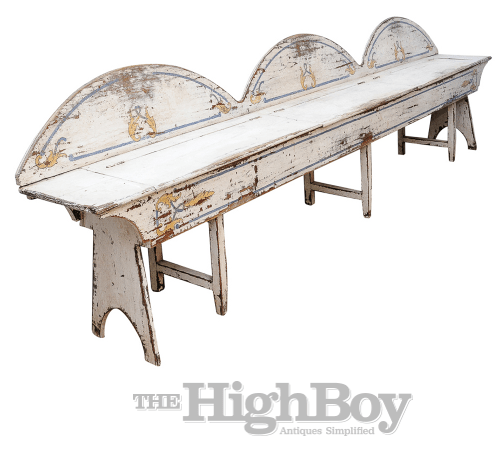
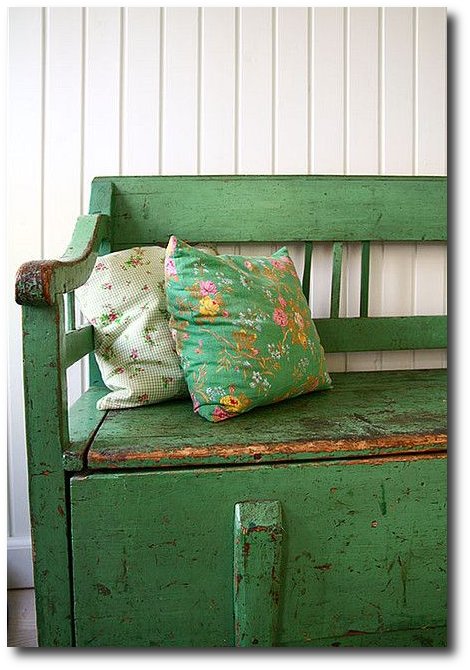
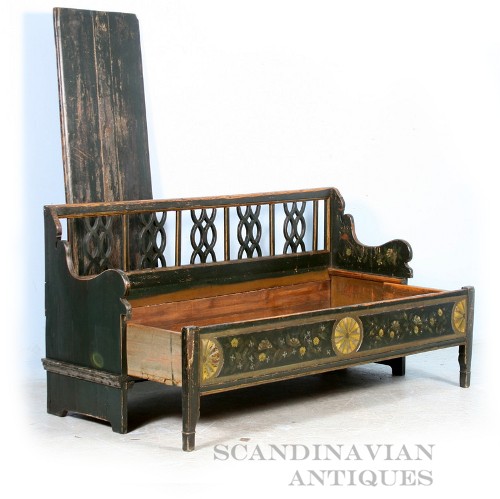 Antique Original Green Painted Swedish Bench, circa 1840-60 – Scandinavian Antiques
Buy The Swedish Style For Less
Extra Links
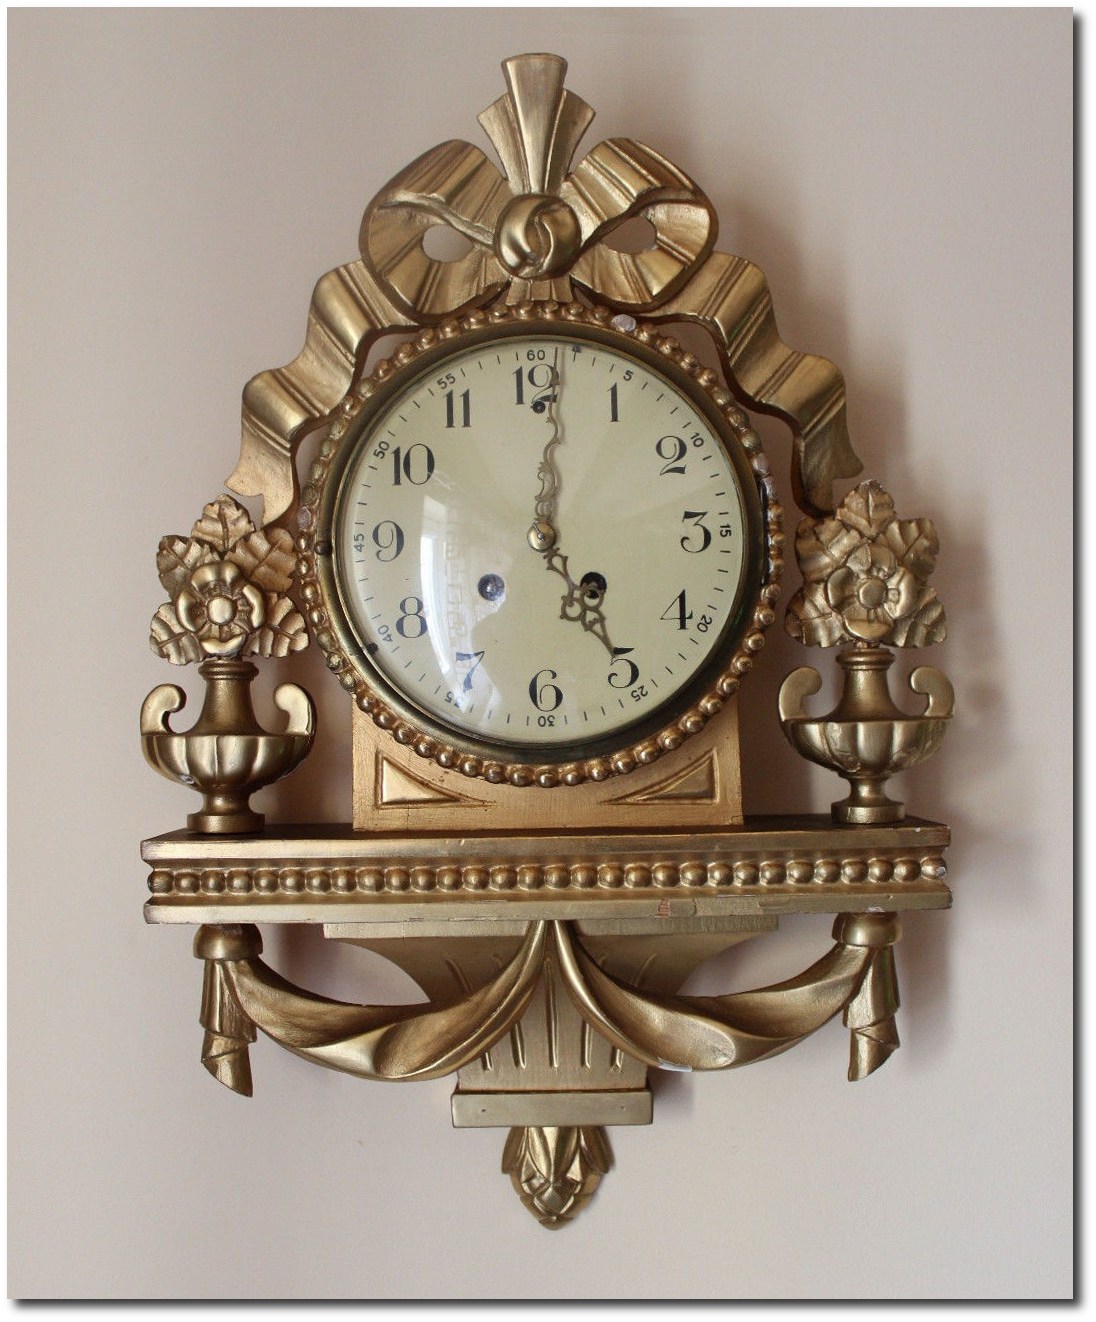
- 19th Louis XVI Gilt Wood Cartel Clock- On Ebay
- Skalin Bell Chime Swedish Gustavian On Ebay
- Hau Junghans Rare 19th Cartel Clock $199 From Arek631 On Ebay
- Porcher sells a terrific stone top black granite bathroom vanity
- Small Antique French Bronze My French Touch On Ebay
- Hardware Antique French Brass Hook CoverMy French Touch On Ebay
- French Bronze Embellishment My French Touch On Ebay
- French / Swedish Looking Emmanuel Georges On Ebay
Designer Loveseat Emmanuel Georges On Ebay
- Designer Chair Emmanuel Georges On Ebay
- Swedish Looking Bow Mirror On Ebay UK
- Empire Pewter Bulged Footed Baby Cup $59.95 Amazon
- Candelabra Sconces Newport Treasure On Ebay
- Wood Carved Gilt Pair Plaques Sconces Panache1000 On Ebay
- Antique French Fabrics Loody Lady On Ebay
- Greenland Home Lorraine Quilt On Amazon
- Keyhole Drawer Pull The French Rooster On etsy
- Swedish Accessories- Buy From Extra Chic On Ebay
- Swedish French Antiques –Antiques Super On Ebay
- Swedish French la Maison Blanc On Ebay
- Bronze Furniture Crest On Ebay
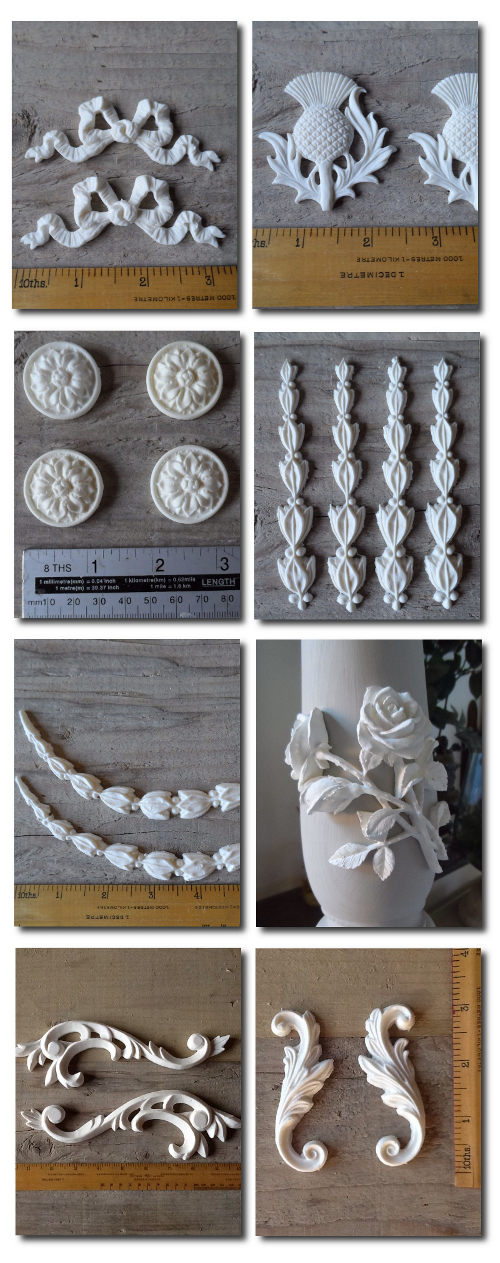
- Efex Furniture Appliques
- Appliques Sold At Robyn Story Designs
Gustavian Furniture Seen In French Elle Decor

-Martha Stewart Larsson Desk in Black, $399
-Martha Stewart Living Larsson Cabinet $199

Martha Stewart Living Desk- $399- Amazon
Red Striped Cotton Linen Table Cloth By Creative- Co-op

3 Pcs Round Bowl with Fleet – Antique Silver Finish, $12.95 + $10.49 shipping Amazon
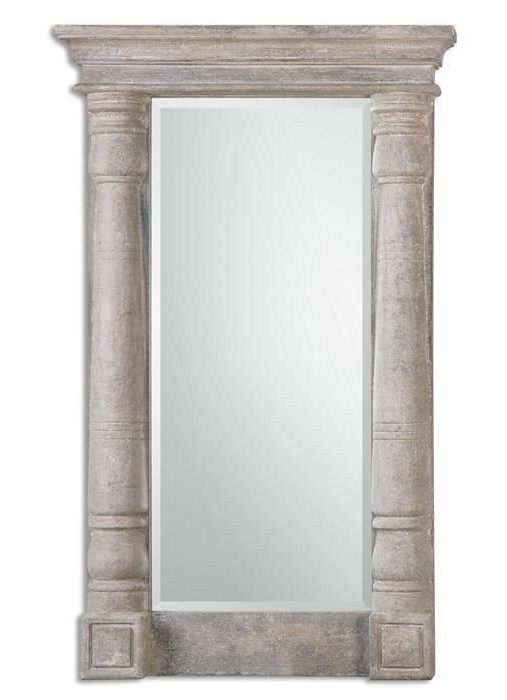
Uttermost 13918 Castelvetere Mirror $653 From Bling And Company On Ebay
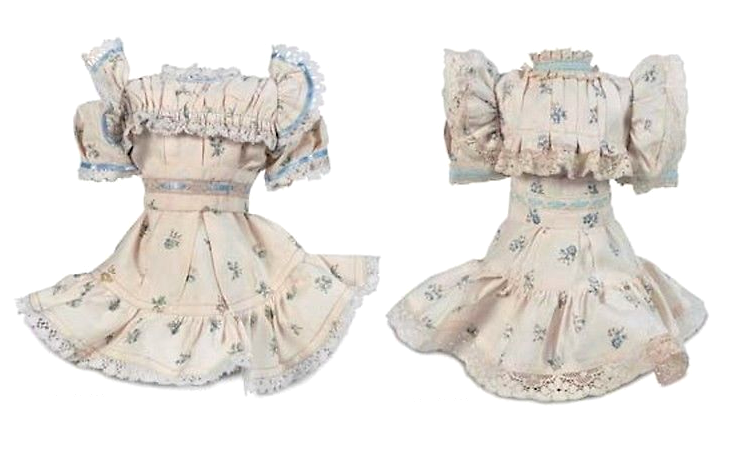
Reproduction Dolls and Doll Clothes From Mostly Dolls $44 On Ebay
Swedish Looking Furniture Appliques On Ebay UK
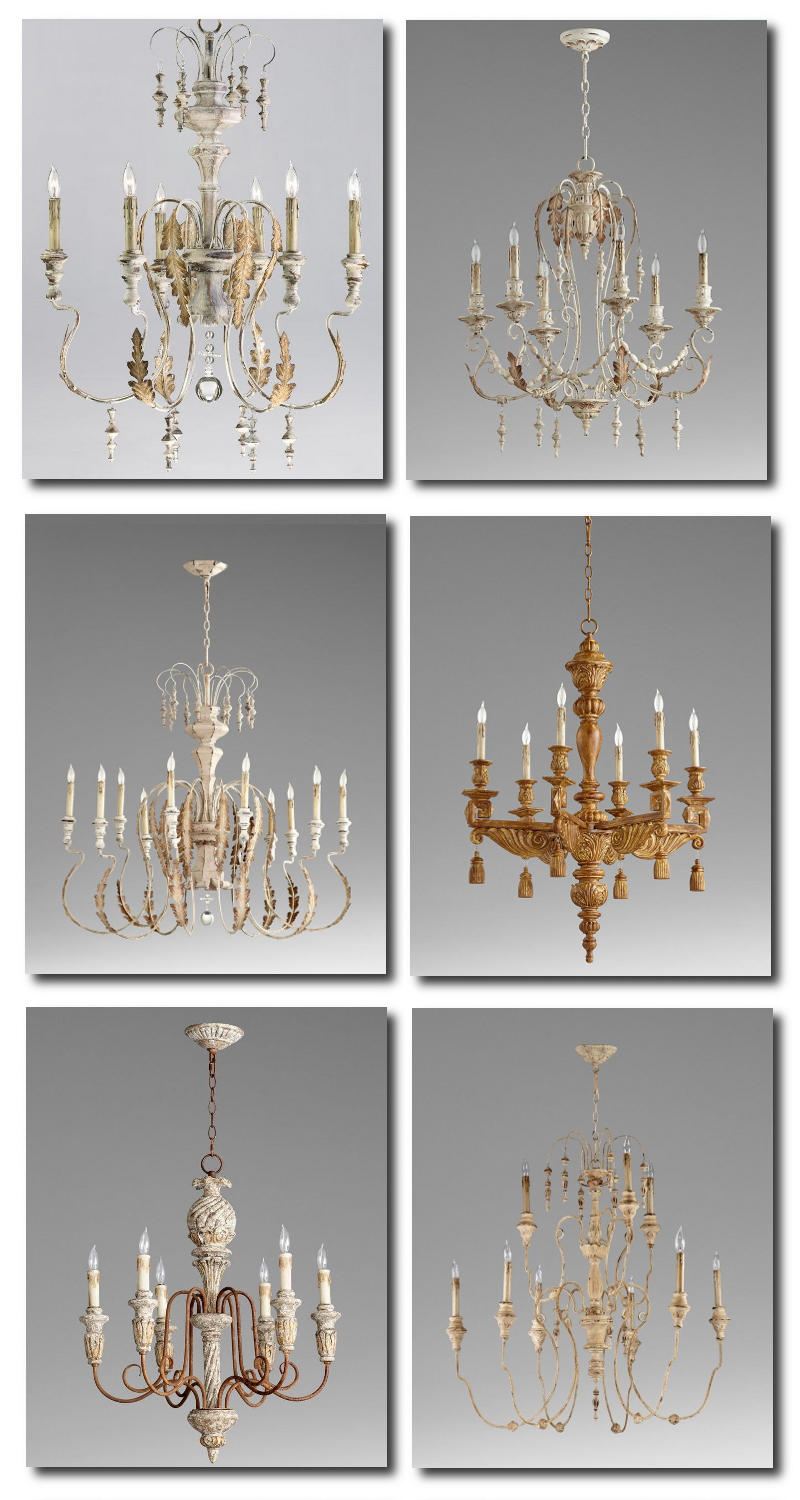
French Wood and Iron Chandeliers On Ebay

Symphony Crystal Footed Centerpiece Bowl $30+ $8 Shipping Amazon
Symphony 11″ Crystal Footed Bowl $24+$8 Shipping Amazon


3 Swedish Style Homes Featured In Magazines
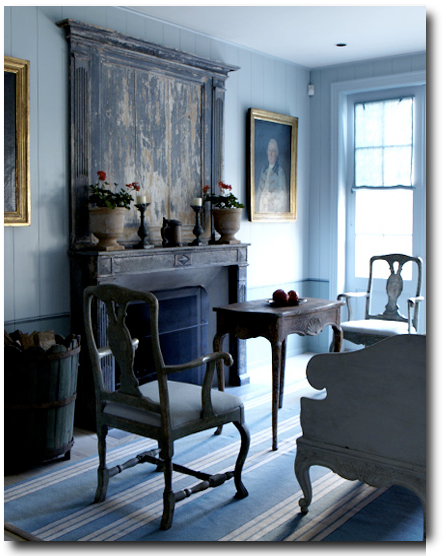
I have been holding on to Veranda’s November / December 2011 issue which featured an 18th century manor situated in Sabylund, 2 hours west of Stockholm. Built in 1780’s in the Gustavian aesthetic, the house has stayed virtually intact as it was back in the 18th century.
In the red room, chalky white finished chairs with gilt wood embellishments are covered in Chinese red damask. A Swedish day bed functions as a sofa and a bed, and is accompanied by a table surrounded by Gustavian white painted chairs. A Swedish Kakelugn stove has gold painted garlands on the tile. A number of small rectangular portraits hang on the wall.
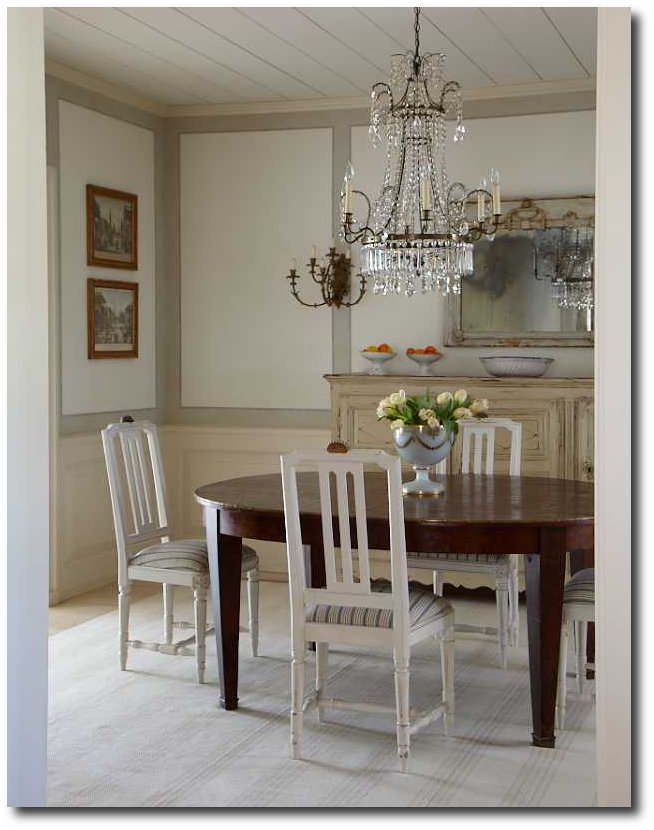
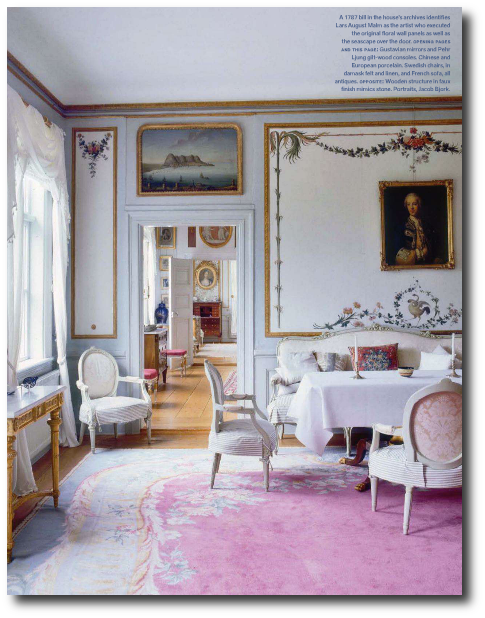
In the main room, light blue painted walls are framed with wall moldings, and hand painted garlands add a romantic feel to the walls. Sheer drapery allows the light to come into this room. A settee and Louis XVI chairs with a blue and white stripe slipcovers form a seating area with a Empire table and crisp white tablecloth. A pale light blue and white scheme pull together a soft, yet delicate look for this room. A pink rug, and lighter pink upholstery seen on the backs of the chairs offer up a subdued, yet tender room to lounge in. Large gilt oval portraits add a historical feel to the room.
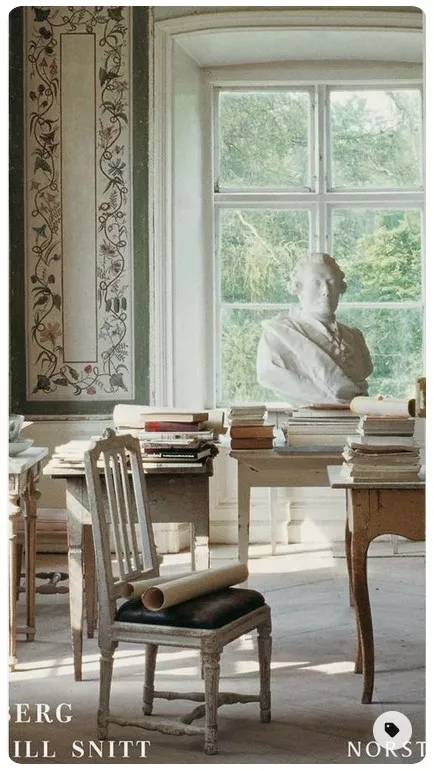
A grand library filled with the owners original books offered a taste of the high life. Books were so much more valuable in the 17th and 18 century, and having a library filled with them, suggests the owners were well off. A 1799 white stucco medallion mounted on a simple wood frame depicts the houses first owner. A Dutch or German table centers the room, with English cane chairs backed to the books. Swedish pewter candlesticks sit on the table, along with a brass telescope for viewing nature. The shelves are painted in a blue/ gray, houses natural leather books adding such rich contrast. Furniture is left in it’s natural wood, which adds a rustic effect.
“The most interesting thing about this house is that it has actually been lived in all these years” says Johan who owns the house. His wife Ingrid Lagerfelt and their two children live in this home currently. Their ancestor inherited the house from the original brother and sister who built the home. Johan is a doctor, and his wife Ingrid farms the estates 2,500 acres of land.
More from Veranda:
- Swedish Design Inspiration – Veranda.com
- Eugenia’s Swedish Shopping Resources – Veranda.com
- Swedish Country Interiors -Book Review – Veranda.com
- Swedish Antique 18th Century Daybed – Juan Montoya
- Winter Warmth – Veranda.com
Johan and Ingrid Lagerfelt’s Home In Veranda
Johan and Ingrid Lagerfelt’s Home In Veranda
An Up-close and Detailed Look At The Wall Painting

House Beautiful first captured our interest in this Swedish styled home decorated by Carol Glasser and Katrin Cargill. The home bathed in blues with Swedish-style home by Carol Glasser Interiors.
This home was originally decorated around an English country style, and featured in Country Living magazine in the 1990’s.
Later the homeowners decided their taste had changed, and they wanted an 18th century look focused on the styles found in Sweden.
To start this process, everything in the house was sold, as they started the process of decorating their home, completely from scratch. It wasn’t just a change of furniture and a little bit of paint, but rather the house’s walls were taken down to their studs and every thing was given a new facelift, -the roof, floors, windows and walls.
Carol Glasser decided to work with Swedish Style expert Katrin Cargill who brought the eye for authenticity.
In the living room sits a classic style Swedish painted sofa, while on the other side of the room gives the room a modern twist with a Charles sectional from B&B Italia. Walls show off a rustic look with painted planks with a faux chair rail. Antiques in this room are beautiful in their original paint. A French Directoire mantel and Swedish tea table and armchair make the perfect 18th century sitting area. These pictures came from Katrin Cargill’s website and are updated shots of the home.
More From House Beautiful
- Furniture Now — Swedish Fantasy – House Beautiful
- Gustavian Corner Cupboard – Island Decorating Style
- Decorating in Antique Blues – House Beautiful
- Swedish Paint Colors – House Beautiful
- Swedish Country Style – Swedish Cottage – House Beautiful
- Hamptons Beach House – Swedish Design Home
- Scandinavian Design Advice – Swedish Style
- Swedish-Style Kitchen – House Beautiful


Swedish-style home by Carol Glasser Interiors.
View all the details behind these Swedish Paint Colors at Home Beautiful
The Devoted Classicist featured the country manor home of Baron Henric Falkenberg, which is located in western Sweden on the shore of Lake Vanern in Varmland province. The property was featured in an article by Miguel Flores-Vianna with photos by Fernando Bengoechea in the April, 2000, issue of Elle Decor magazine.
The house itself was completed in 1774 by master carpenter Johan Georg Reincke, and has been in the Baron’s family since the late 19th century. It has been mentioned that this estate to has over 1,000 acres of property! In the photo below of the billiard room, a portrait gallery features of the baron’s ancestors, and portrait paintings of the original owners of Varmlands Saby hang above a Dutch armoire in the dining room. See more at The Devoted Classicist Blog
More From Elle Decor
- Modern Swedish Style – Elle Decor
- House Tour: Modern Swedish Style – Elle Decor
- Swedish Revival – ELLE DECOR
- Cottage Industry: Architect Gert Wingardh’s Gothenburg Home
More From The Devoted Classicist
- The Devoted Classicist: New Library of Reclaimed Pine
- The Devoted Classicist: Mellon-White Townhouse
- The Devoted Classicist: Roger Prigent’s Paris Pied A Terre