The Home Office – Why Not Make Yours Unique ?
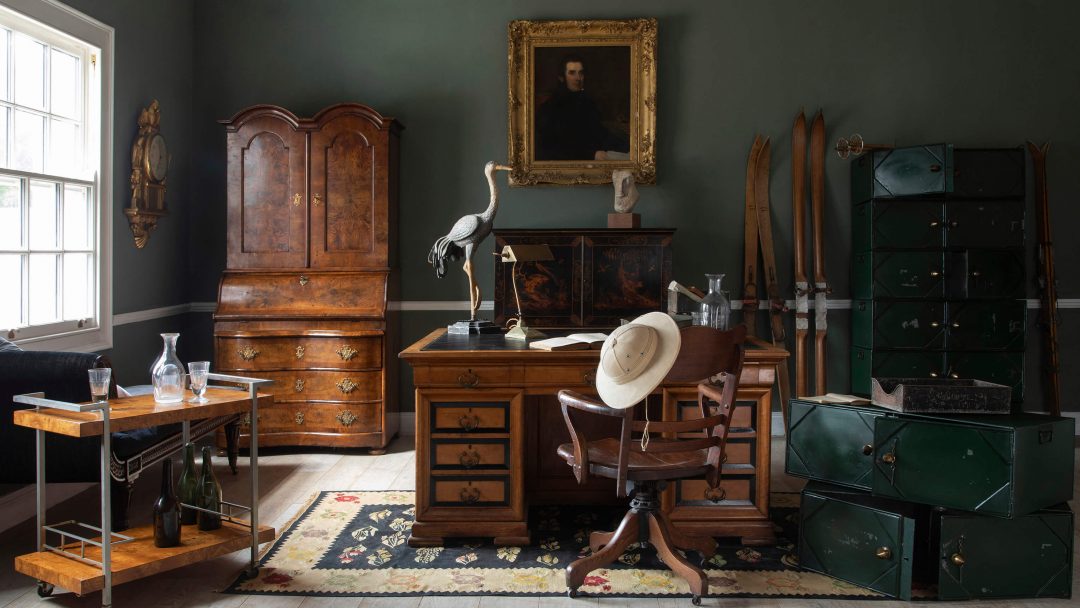
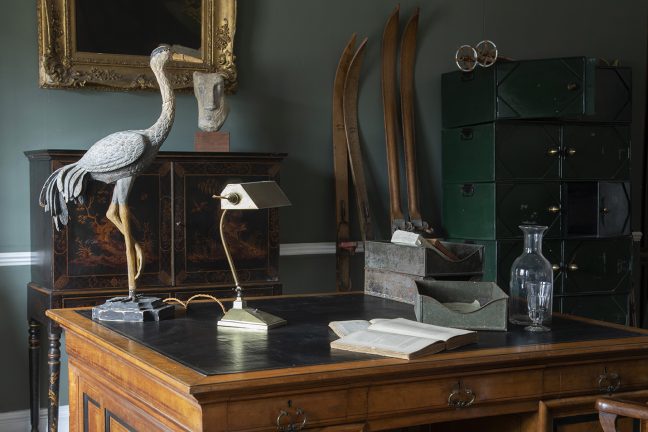
The Home Office
When the country was instructed to work from home if possible, there were some happy novelties- namely endless cups of tea and waking up ten minutes before your first meeting of the day. But then Zoom calls became exhausting, interrupted by children or pets, and the home WiFi cracked under the pressure. The line between working life and free time became increasingly blurred.
Love it or loathe it, working from home for lots of professions is going to remain prominent. Creating the perfect home office space is vital for the most productive and aesthetic work environment. A study ought to provide an oasis of calm amidst the chaos. Technical equipment is the interior designer’s worst nightmare and the key to reconciling cables and screens with attractive furnishings is storage and clever use of space.
Read more at lorfordsantiques.com
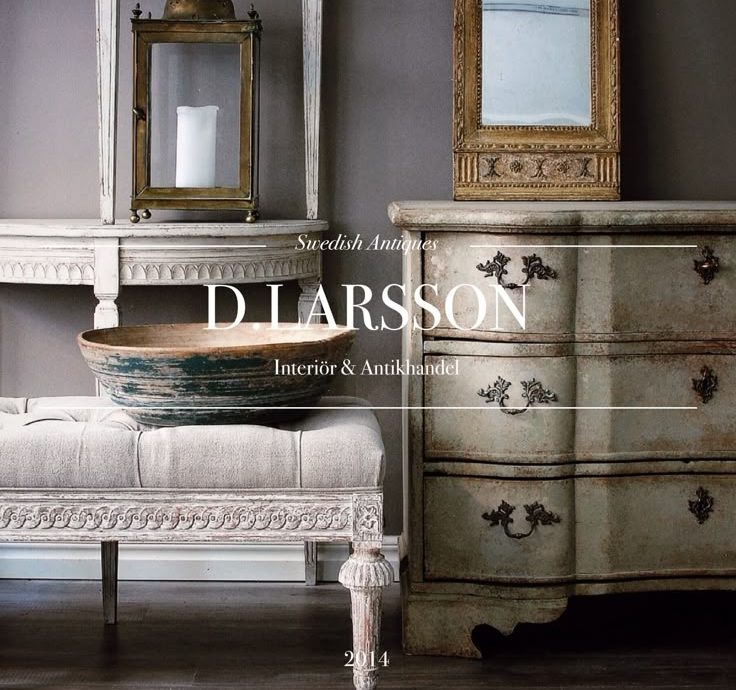
The Couple Behind D. Larsson Interior and Antikhandel – Swedish Antiques

In the nine years since they founded D. Larsson Interior and Antikhandel, Daniel and Cristina Larsson have become among the world’s leading purveyors of 18th- and 19th-century painted Swedish antiques. Yet just 12 years ago, they were both on very different paths.
D. Larsson Cristina and Daniel Larsson
Married couple Cristina and Daniel Larsson, of D. Larsson Interior and Antikhandel, specialize in 18th- and 19th-century Swedish antiques, which they mix with vintage and modern pieces in their own home. Top: Their living room features an 18th-century Swedish Baroque table, a 1970s coffee table and a ca. 1775 Gripsholm armchair. All photos by Francisco Caires
Swedish-born Daniel was in Amsterdam working in customer relations for KLM airlines and dealing in vintage modern furnishings on the side. This was a hobby he picked up while living in Stockholm. Finding inexpensive pieces at Swedish flea markets, he would finish them himself — “Woodshop was my best subject at school,” he says with a laugh — and then drive to England to sell them at the country’s open-air antiques markets to British and American dealers.
Read more 1stdibs.com
6 Colors You’ll Find In Every Scandinavian Home – Laura Barry
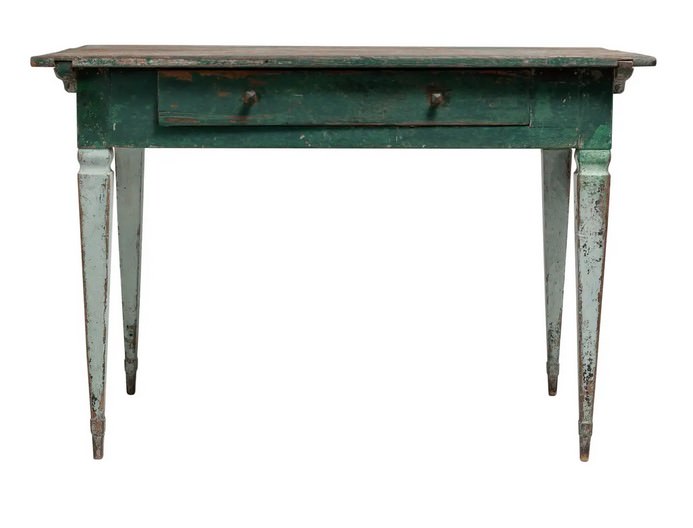
Swedish 18th Century Gustavian Pine Desk –1st Dibs
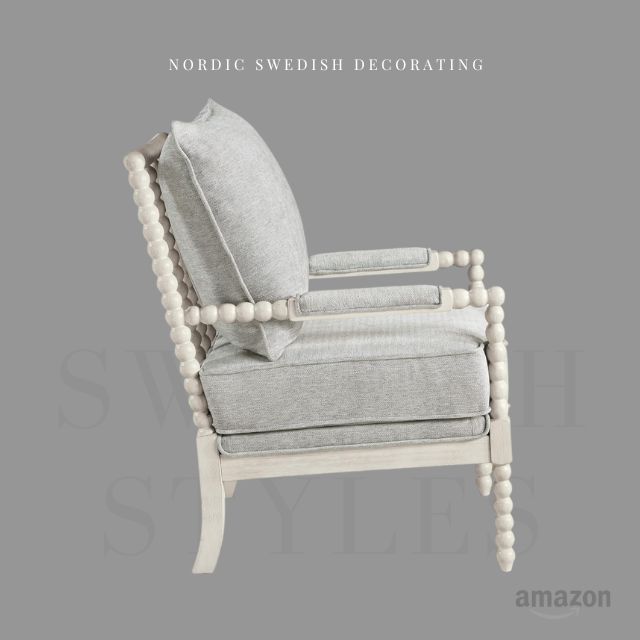
Kaylee Spindle Accent Chair – Amazon $340
The regions fondness for natural materials, muted color palettes and fine craftsmanship set the standard high when it comes to interior design, however achieving the same look in your own home isn’t that hard.
Scandinavian interior design is about embracing what nature has already presented us with. Using timber for furniture, buttery soft leather for upholstery or soft furnishings and looking to wool, linen and cotton for bedding and accessories. But it isn’t just the use of natural fibres that demonstrates the Scandinavian love of nature, it’s the color palette that’s entirely inspired by the naturally occurring shades found in forests and landscapes.
If you’re trying to inject a little bit of Scandinavian style into your home the first thing to do is rethink your color palette, and try using these six colors that appear in all Scandi-inspired interiors.
1. Forest Green
This rich shade of green offers a home the perfect balance of on-trend color that still feels timeless. Work a forest green cushion, throw blanket or linen duvet set into your interior scheme and finish off with a dark green foliage plant to complete the forest transformation.
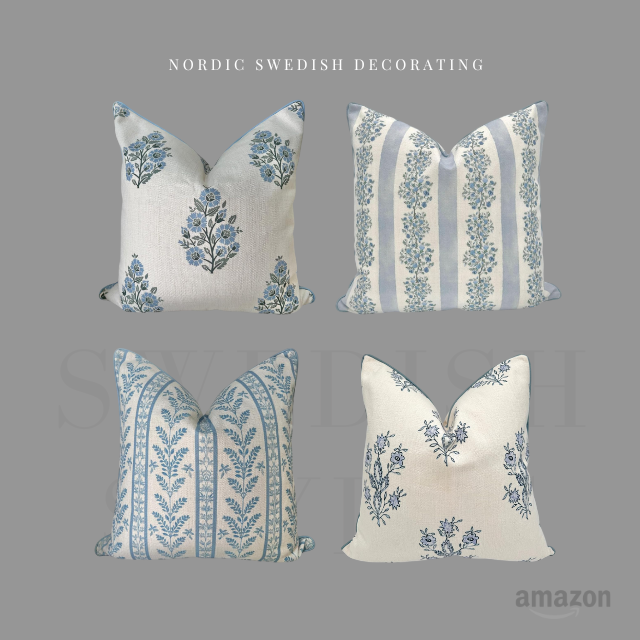
The Mary” Periwinkle Floral Block Print Pillow Cover –Amazon
“The Camille” Floral Block Print Pillow Cover – Amazon
“The Juliet” Floral Block Print Pillow Cover – Amazon
“The Hazel Bright Blue White Floral Pillow Cover – Amazon
“The Louis” Blue Floral Block Print Pillow Cover – Decorative Throw Pillow Cover –Amazon
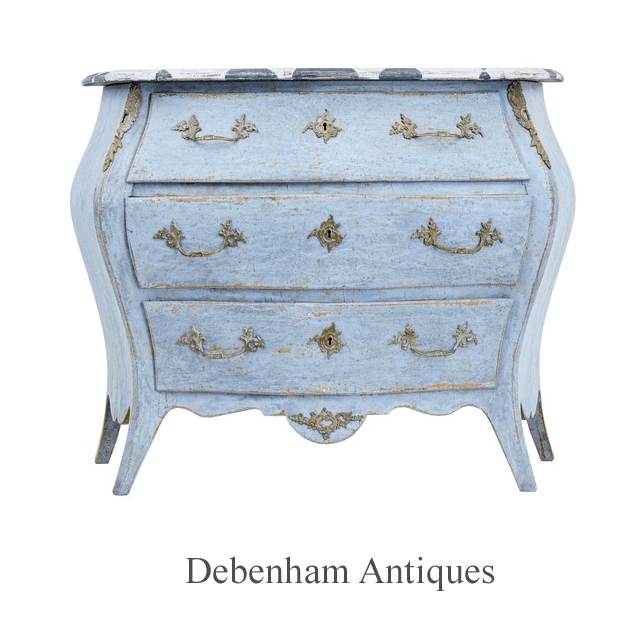
Swedish Antiques From Debenham Antiques

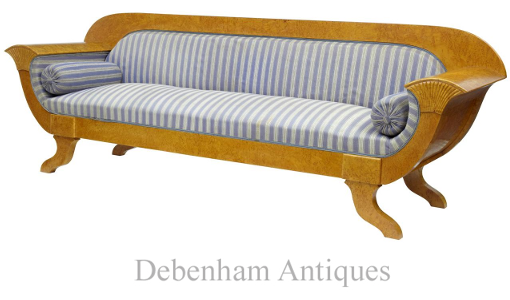
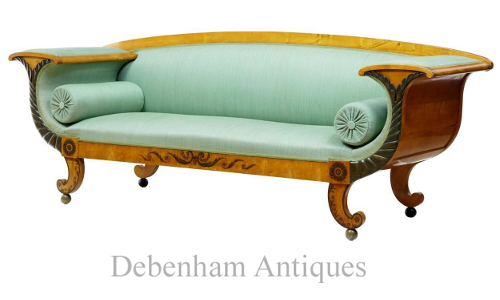 19th Century Swedish Birch Neo Classical Sofa US $5,540.37 On Ebay
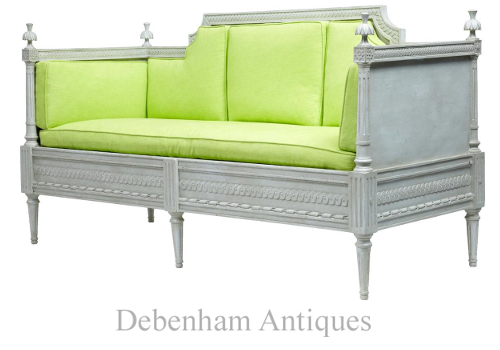
Early 19th Century Painted Gustavian Sofa -US $4,477.83 Beautifully carved, re-upholstered with fitted cushions- On Ebay
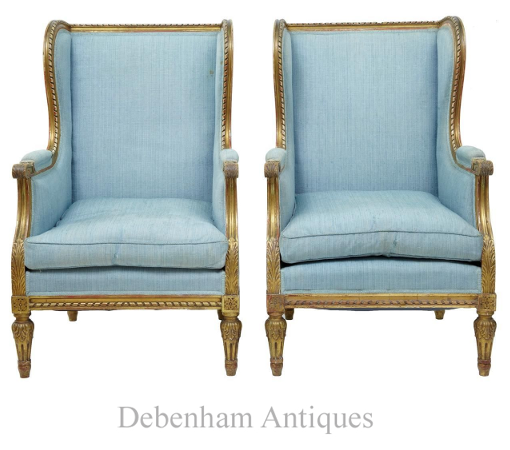 Pair of 19th Century Carved wood French Armchairs US $3,718.88 On Ebay
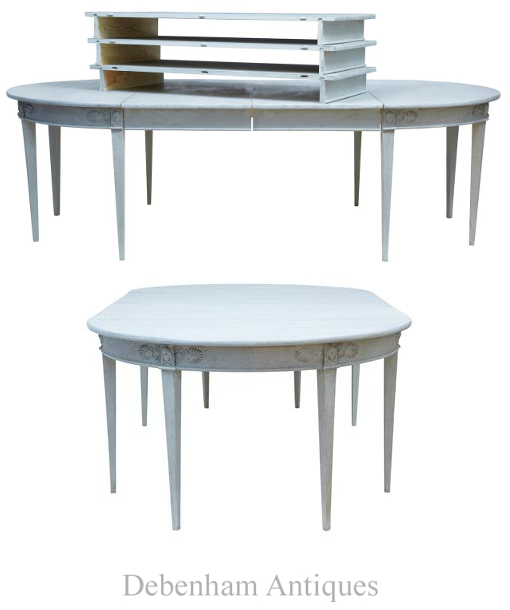
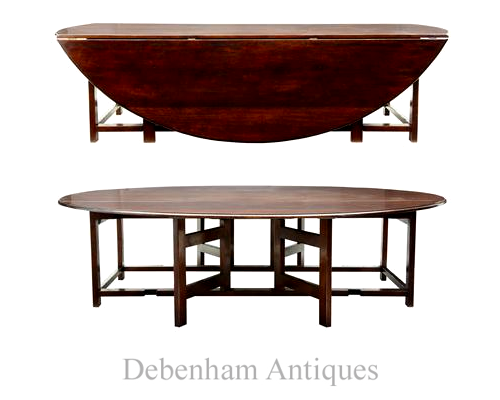
19th Century Massive Extending Swedish Painted Dining Table US $12,702.51 On Ebay
This table has been adapted to form many scenarios of use and size. Can be used as a round dining table, and comes complete with varying bearers to allow housing of 5 leaves. Fully extended at 167″ in length which is just short of 14FT. Could also be used as a pair of demi lune side tables when not in use for dining.
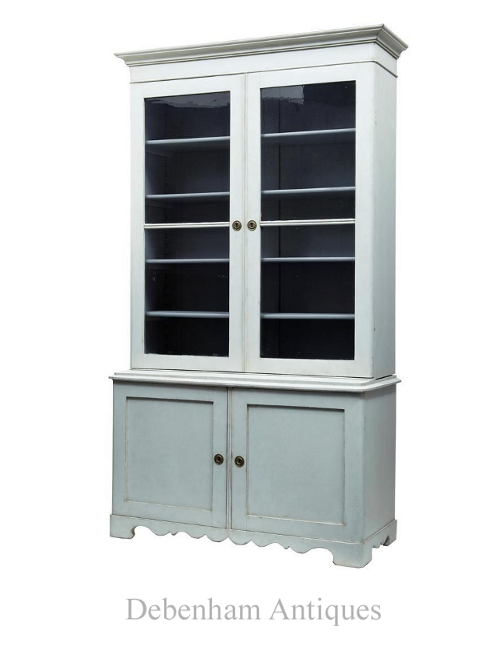 19th Century Painted Pine Bookcase Cabinet US $6,151.53 On Ebay
Circa 1880. Fine piece of Swedish rustic furniture which could lend itself to many uses such as a desk, kitchen table or dining table
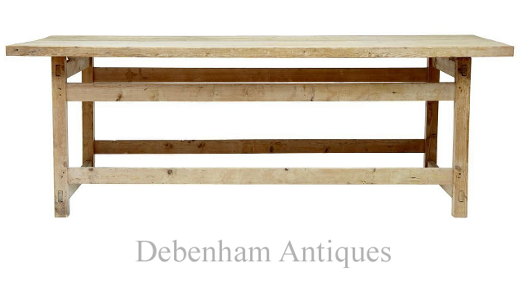
Rustic 19th Century Pine Table From Debenham Antiques US $1,510.32 On Ebay
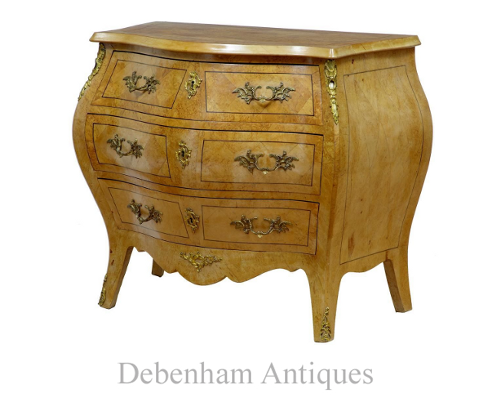
Early 20th Century Birch Root Swedish Bombe Chest Of Drawers- US $2,796.15 On Ebay
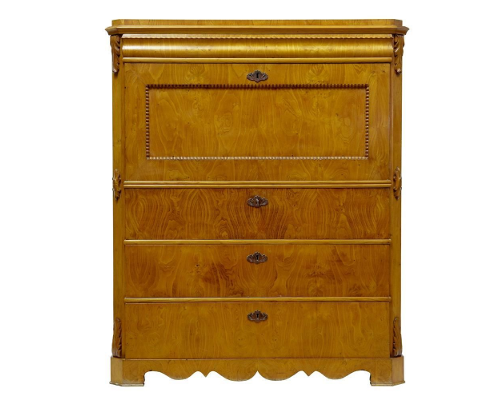
19th Century Swedish Elm Secretaire Chest Of Drawers- US $2,504.55 On Ebay
Massive 19th Century Biedermeier Birch Sofa Settee, US $5,236.79 -Length: 108 3/4″, On Ebay
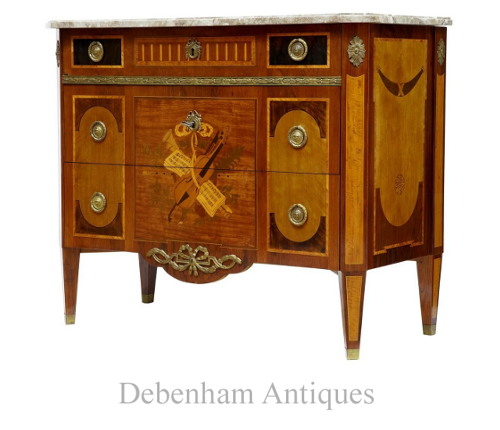
19th Century Inlaid Swedish Kingwood Commode US $2,959.92 On Ebay
Profusely inlaid and decorated with various woods such as satinwood and walnut. Detachable marble top with ormolu handles and decoration. 3 drawers which open on the key- circa 1870
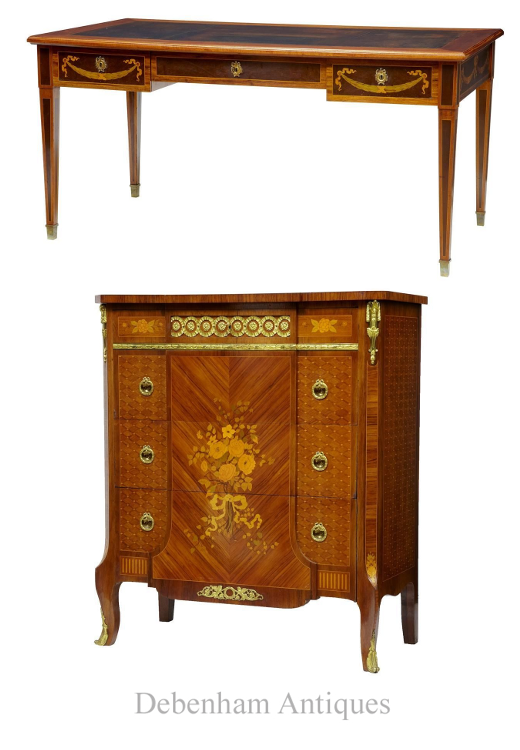 19th Century Mahogany and Satinwood Inlaid Desk $4,477.83 On Ebay
Early 20th Century Mahogany Inlaid Commode- US $3,718.88 On Ebay
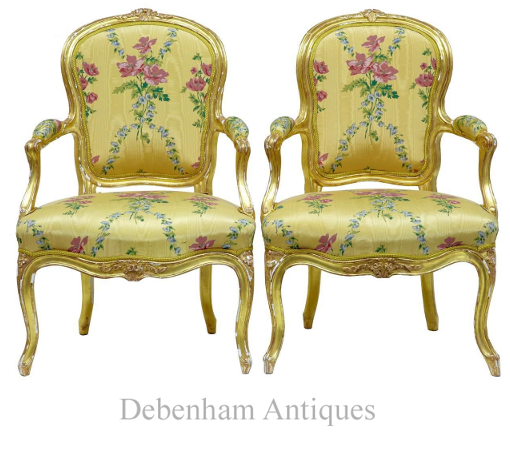 Pair of 18th Century Louis XV French Gilt Fauteuil Armchairs By Michard US $7,513.65 On Ebay
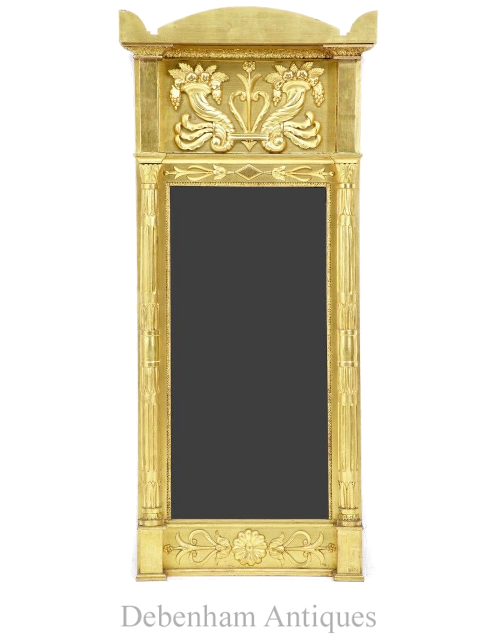
19th Century Antique Swedish Carved Wood Gilt Pier Mirror -US $3,718.88 On Ebay
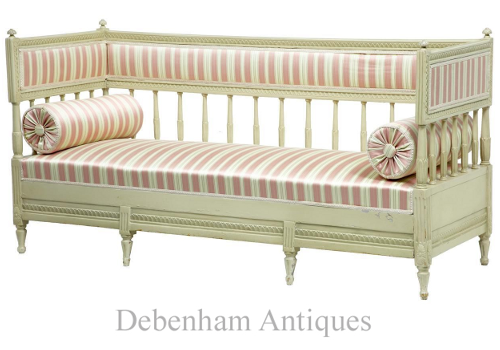
19th Century Painted Swedish Day Bed Sofa, US $3,263.51- On Ebay

19th Century Antique Biedermeier Birch Commode Chest of Drawers -US $2,504.55, On Ebay
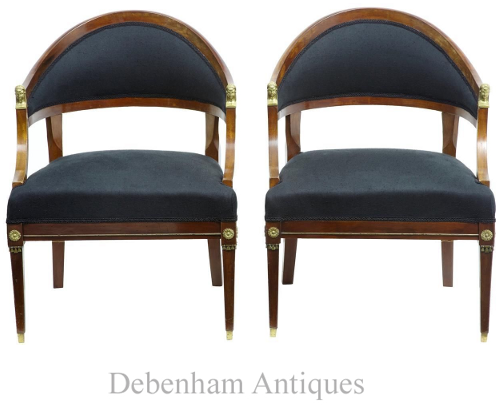 Pair of 19th Century French Empire Mahogany Armchairs US $3,718.88 On Ebay
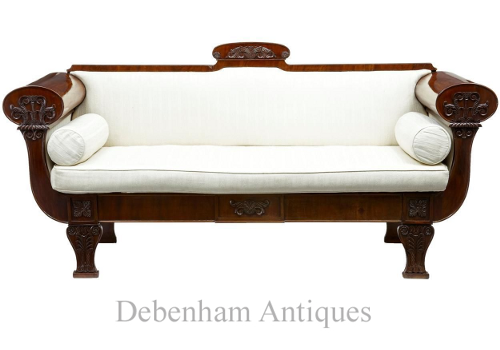
Early 19th Century Antique Carved Scandinavian Mahogany Sofa US $3,415.30 On Ebay
Massive Mahogany Cherrywood Gateleg Table Seats 16- Can be made up to 18 feet, 9FT 6INCH X 8 FT On Ebay
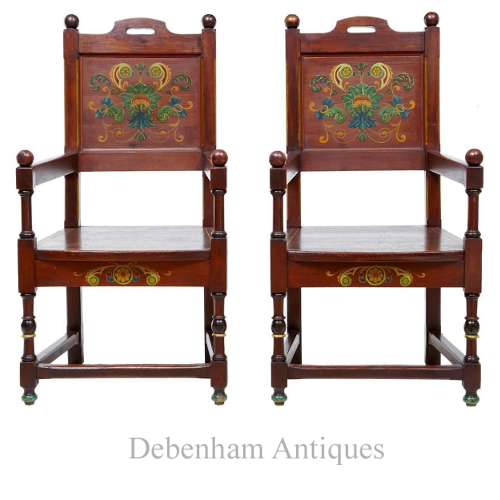
Pair of 19th Century Painted Pine Swedish Armchairs- US $1,510.32, On Ebay
Swedish arts and crafts influenced. Made from pine, painted with floral decoration to the back, gold lining to the seat, continued with painted elements to the freize and turned legs
 Early 19th Century Swedish Occasional Side Table US $1,176.38 On Ebay
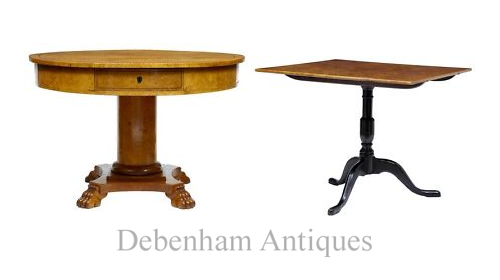
Early 19th Century Biedermeirer Birch Drum Table US $4,326.04, On Ebay
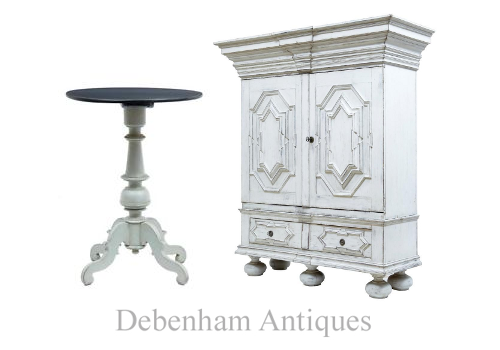
19th Century Swedish Birch Square Tilt Top Table – US $1,897.39 On Ebay
19th Century Painted Gothic Swedish Cabinet US $6,311.31 On Ebay
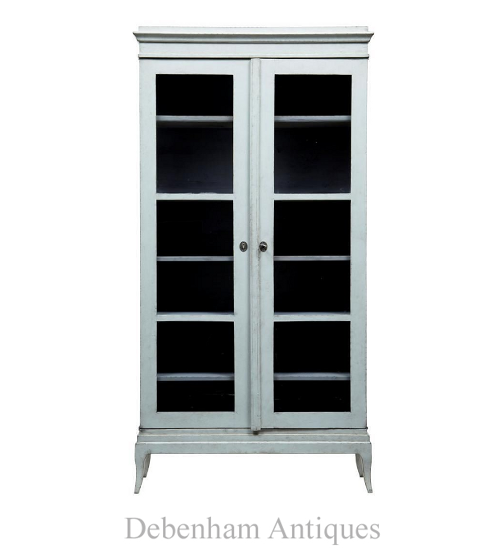 19TH Century Swedish Painted Pine Bookcase- US $3,507.17 On Ebay
 Rare set of 12 -19TH Century Queen Anne Influenced Painted Swedish Dining Chairs US $12,702.51 On Ebay
70 Swedish Furniture Pieces That Sell For Less- Swedish Decorating On A Budget
 White Lacquer Finish Round Accent Table $321 From Overstock On Ebay
17th and 18th century furniture is still tremendously popular today. One of the biggest draws to Swedish and Nordic styles is the wood, the carvings and depth of detail. In a typical home in Sweden centuries ago, you would find almost everything made from wood. Wood furniture, plank flooring, wood walls, and decorative accessories made from wood. Each piece would be individually carved, and often painted, and overtime would endure natural distressing.
Gustavian Looks
Gustavian style drew a lot of attention from around the world, so much that they became known throughout Europe as the “Paris of the North.” Gustavian style embraced all the grandeur that Paris had to offer, but without the money that France was able to spend. Instead of marble, they brought out their paint brushes, and learned how to paint faux marble. Instead of mahogany woods, they made their furniture from the white blonder woods found in their native land. Silk and satin was exchanged out for linen. Painted swags replaced the costly hand carved garland-like swags found on the walls in France.
Sweden’s vast forest industry made it possible for citizens to be skilled in some sort of trade that involved wood. So, as the trends came out from France and England, the latest looks would be crafted inexpensively. Woodworkers could modify the designs, change out the distinctive English or French designs, and add or change the look to suit their taste. Furniture feet, leg style, color, wood was all modified for what they found most desirable in their communities. From region to region different styles of furniture and accessories were made, which also had their own character trait, and color palette.
France and England heavily influenced Europe at that time, and so it was natural that Sweden also followed suit. They adopted the Louis XV and Louis XVI styles founded in France, but made them their own. Over time, with the excavations from Pompeii, Gustavian style also incorporated the classical looks that circulated around Italy, and Greece.
How To Get The Look On A Budget
I used to paint furniture as a hobby, spending most of my days hunting through thrift stores, estate sales, and I always had my eye on craigslist for the best finds in Virginia. My husband worked full time, which allowed me the ability to shop for worn out pieces which I then updated and sold. We moved away from the city, and into the country, where blogging is now my day to day life. Over the years, I have found some pretty amazing finds second hand, but I also have come to know, they just don’t compare to what you can buy new. I find I am always running across great pieces of furniture around the net which are sort of hidden away. I have come to realize that you can find really nice furniture for under $500 dollars. When you add up your valuable time, and gas- buying online simply just makes sense, especially if you are pretty particular in what you are after.
Here are 70+ links to great pieces from a couple big sellers on Amazon and ebay to give you the Swedish and French looks on a budget.
Here are just a few tips to pulling your look together…..
![]()
Arrow Ormolu Mounts From Ari Luxury On Ebay
1. Use Ormolu Mounts– If you have a pretty simple table, dress it up using decorative appliques. Europe embraced the use of gilt-bronze mounts, brass inlay and quintessential gilded enrichments that we all admire to this day.
Articles:
-Affordable French Furniture Appliques- Hersite
-How Decorate With French Empire Antiques- Hersite
-Architectural Molds- French Style Authority
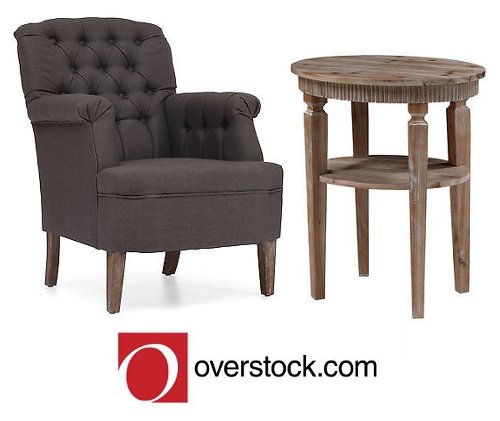
2. Look For Straight Leg Furniture– If you live in America, look for the straight legged shaker style table and chairs. Straight legged tables, chairs, benches will give you the Swedish look and they are pretty easy to find in America.
Additional Articles:
– Amazingly Affordable Swedish Looking Furniture- The Swedish Furniture
-Swedish Furniture And Decorating On A Budget- Mora Clock Reproductions And More – The Swedish Furniture
 Turn this unfinished international concepts table, sells for $42 dollars into a thousand dollar table with an additional marble top and some paint. Consider white paint with gold accents for a classic Swedish style. The Second table, sold by International Concepts features straight legs with a round round table top with Drawer- $104
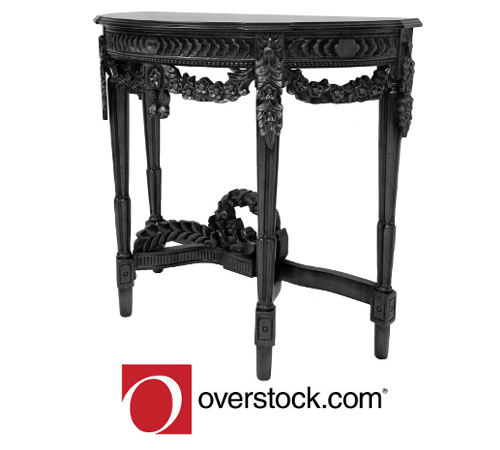
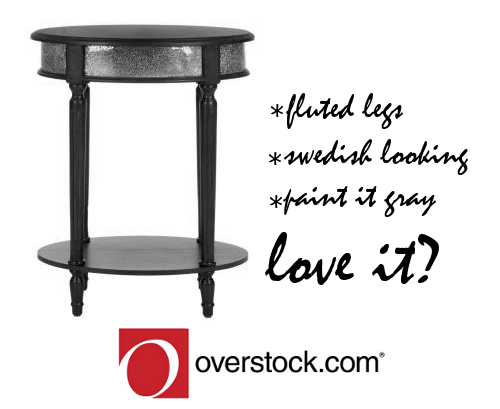
3. Look For Fluted Legged Furniture -Gustavian furniture is well known for their use of fluted leg tables, square back chairs, and demi lune tables. If the legs are right, often times, you can add to the look to make it Swedish.
– This dark brown side table needs some color. Gray, pink, or blue, it would look prettier painted. It has spectacular legs, and a round table top that looks like it belongs in the Louis XVI collections. Only $133 On Ebay
-This 3-piece nesting table set sells for only $110 Dollars On Ebay I would strip off the existing paint, paint it, and then heavily distress it. Or, paint it a muted pastel and gold leaf the details. What a great price!
– Another pretty Console Table $418 On Ebay Gold leaf the details, or use white paint on the details, and a pretty color on the other features.

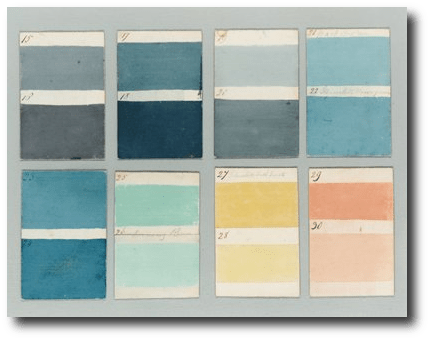
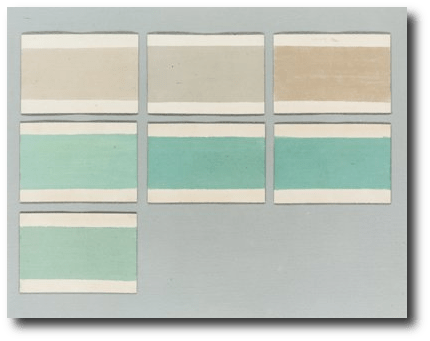
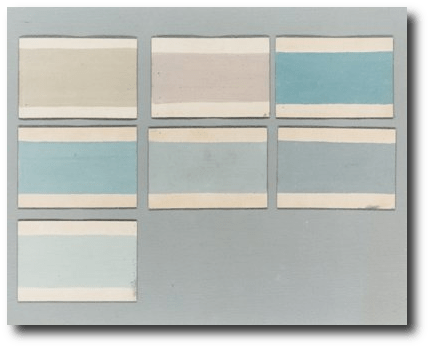
4. Use The Right Colors– Paint has always been my best friend. Typical ‘Gustavian’ colors include gray, pale blue, and pale green colors. Consider accenting your home with light pink and pale yellow.
Additional Aricles
– The Shocking History Behind “Emerald Green Paint-The Swedish Furniture
-Top Designers Pick The Best Furniture Paint Colors- The Swedish Furniture
-Swedish Paint Finishes -How To Wash Wood-The Swedish Furniture
-Salmon Paint Shades- Decorate With Apricot, Peach and Terracotta –Hersite
5. Paint With Matte or Chalk Paint – Swedish furniture tends to have a matte, chalky or powdery look. Limewashes were once used to brighten furniture and saturated colors were used along with glue or oil to make paint.
Chalk paint sold through distributors can give the look that is commonly seen on Swedish furniture. Or, consider adding in a bit of un-sanded grout to your paint. I tend to buy it in an off white color at the local hardware store, and a tablespoon goes a long way. It will give you chalk like finish. Use brown glaze to add an antique appearance. What I tend to do is brush it on, and after 2 minutes, I wipe it off using a facecloth. It can add a tint to your overall paint finish, and give your paint a look that doesn’t appear to be so new.
Additional Articles:
– Furniture Painting, Distressing & Glazing Examples-The Swedish Furniture
-What’s With Chalk Paint? 80+ Pictures Of Annie Sloan Chalk Painted Furniture – Painted Furniture Online
-How To Paint French Provincial Furniture A Perfect White –French Provincial Furniture
-Priming Furniture- French Provincial Furniture
-Staining And Re-Finishing Furniture- 40+ Pro Tips- Hersite
-What We Are Not Being Told About Furniture Strippers – Hersite
-DecoArt Chalk Paint Line Sold At Home Depot – Hersite
-50+ Pictures Of Great Painted Pieces- Painted Furniture Online
-56 Greige Pieces- Exceptional Painters And Their Furniture Painted Furniture Online
6. Work With Blonde Woods- Swedish style generally only features the lighter woods, because that was what was available in the surrounding regions. Swedish country homes contain a lot of birch, white pine, beech, and alder. It is used for furniture, floors and walls, and either left natural, bleached, or painted in pale colors.
If you have a piece of furniture that is stained, consider investing in a heat gun, to remove the existing finish. By doing this, when you go to paint and distress the piece, the lighter wood color will show through than the mahogany or darker stains. It will give your pieces a more authentic appearance.
Safavieh American Home Collection Concord Console Table $112 on Amazon
Safavieh American Home Collection Brigg White and Dark Brown Console Table $196 on Amazon
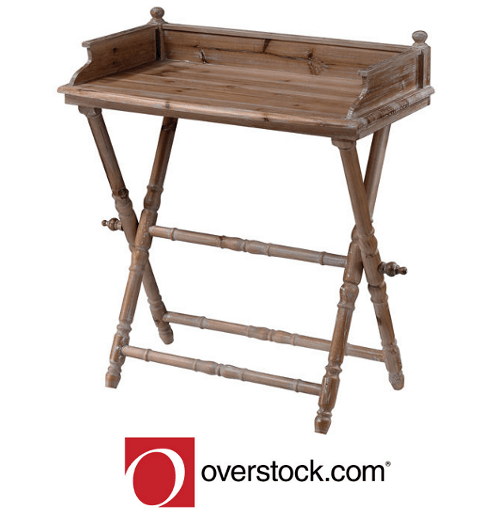
Natural Washed Tray Accent Table $381 Overstock On Ebay

Solid Oak Paola Arm Chair $863 From Overstock On Ebay
Safavieh American Home Collection Lexington Console Table $125 on Amazon
Safavieh American Home Collection Newburgh 6-Drawer Storage Unit, Vintage Grey $184 on Amazon
Safavieh American Home Collection Newburgh 3-Drawer Storage Unit $242 on Amazon
Safavieh American Home Collection Orford Off White Low Bookcase $208 On Amazon

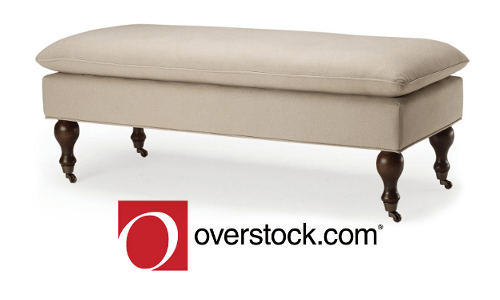
Victoria Padded Bench with Distressed White Legs ONLY $70 From Overstock On ebay
Stratton Linen Side Chairs with Nail Head, Beige, Set of 2 $413 On Amazon
Safavieh Ashton Carved Side Chairs – Set of 2 $436 On Amazon
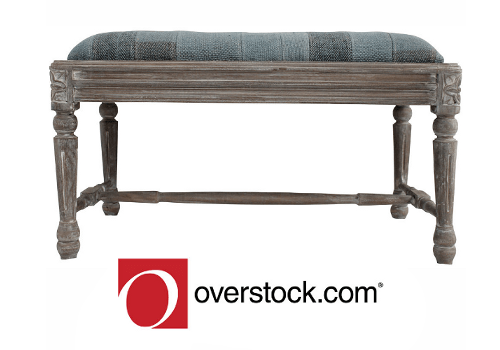
nuLOOM Casual Living Vintage Patchwork Blue Bench $275 Overstock on ebay
15.7 inches high x 31.5 inches wide x 15.7 inches in length
Cleopatra Solid White Oak Bench $182 Overstock on ebay
Safavieh American Home Collection Emma Four Drawer Storage Cabinet $204 Amazon
Safavieh American Home Collection Barnet Wall Shelf $148 On Amazon

Tabouret 24-inch Metal Counter Stools (Set of 2) $72 Dollars From Overstockon ebay
Tabouret Furniture From Overstock On Ebay
Safavieh Hudson Collection Johnny Linen Side Chair, Beige, Set of 2 $479 on Amazon
Safavieh Chloe Linen Club Chair $447 On Amazon

Safavieh Nottingham Taupe Nailhead Club Chair $360 at Overstock on ebay
Safavieh Mansfield Linen Pillowtop Ottoman Free Shipping $211 Overstock
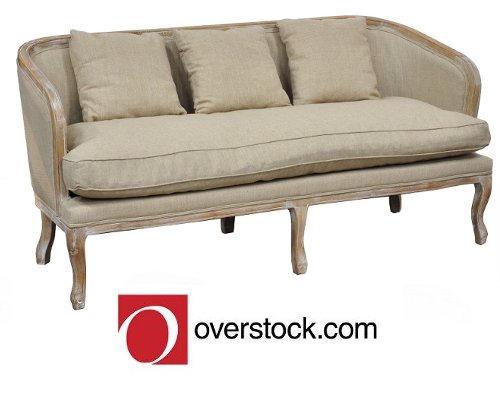 Angelie 3-seater Sofa $1149 Overstock On Ebay
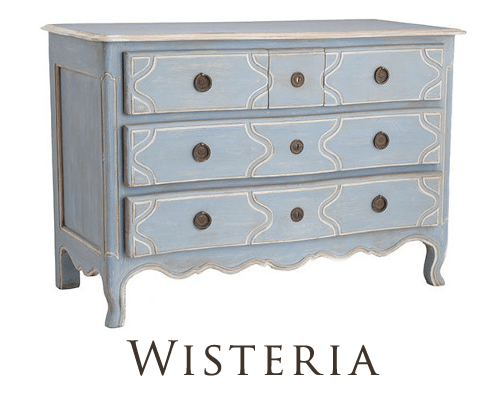
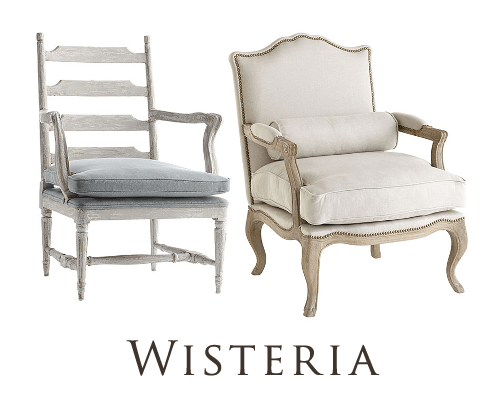 Ladderback Armchair $699 Wisteria
Lounge Armchair $799 Wisteria
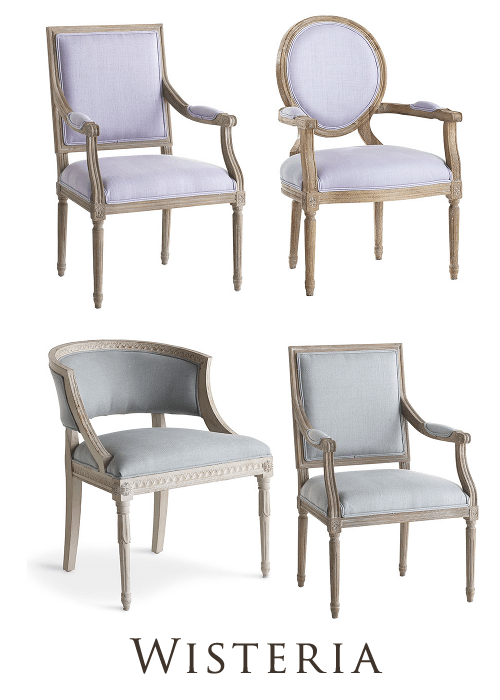 Gustavian Tub Chair $799 From Wisteria
Louis XVI Dining Chair in Royal Blue$299 Wisteria
Chateau Arm Chair in Lavender $389 Wisteria
 Camille Premium Linen Down Wrapped Sofa $1433 Overstock On Ebay
Lexington Oval Swivel Storage End Table $159 On Amazon
Remiremont Antique White Upholstered Bench $76 on Amazon
Cherry Wood Side Chair, Set of 2, Cream $479 On Amazon
Safavieh Mercer Collection Heather Linen Nailhead Dining Chair, Set of 2- $346 on Amazon
Safavieh Mercer Collection Stella Velvet Side Chair $305 Amazon
Featured above is the Ivory and Taupe chair sold for $270 Amazon
Becca Side Chair Finish: Upholstery: Leather- Clay with Nickel Nailheads $261 On Amazon
Alexia Contemporary Fabric Dining Chair $246 On Amazon
 Sean Sofa $1393 Overstock On Ebay
 Marie Curved Grey Settee $1094 From Overstock on ebay

Eddie Black Onyx Club Chair $569 on Overstock On Ebay
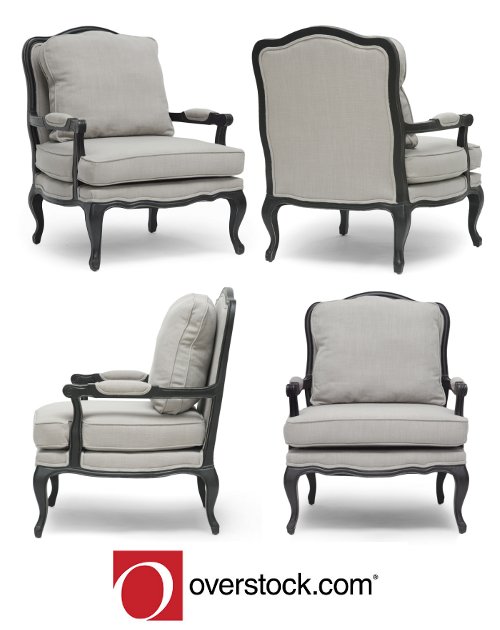
Baxton Studio Antoinette Classic Antiqued French Accent Chairs (Set of 2)
Buy them on OverstockOn Ebay
for $1050
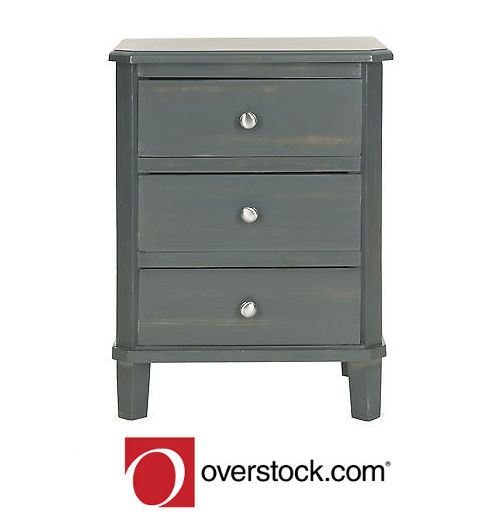 Joe Dark Teal End Table $147 On Ebay
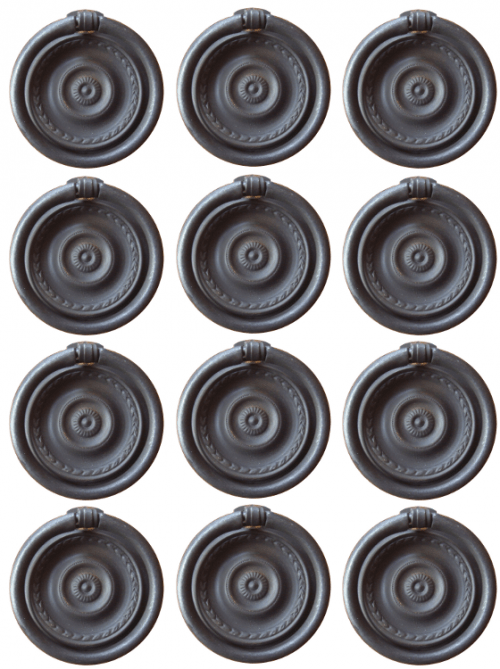
Swedish Style Pulls – 12 Pulls For $24 Dollars On Ebay
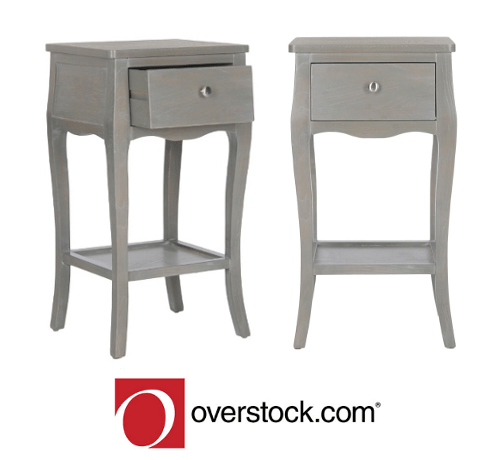 Thelma Ash Grey End Table $140 On Ebay
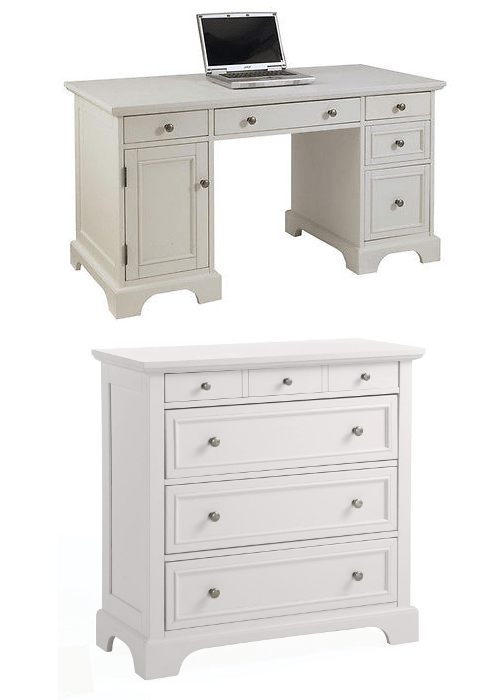
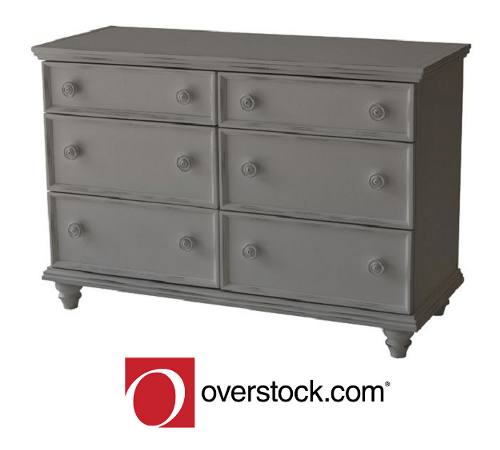 Notting Hill 6-Drawer Dresser $654 at Overstock On Ebay
Notting Hill Collections From Overstock on ebay
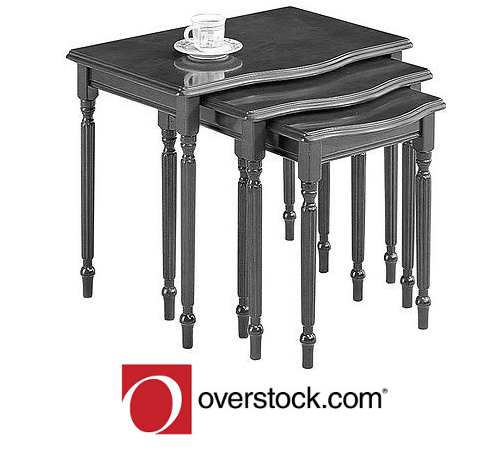 3-piece Nesting Table Set Only $110 Dollars On Ebay
 Wood Console Table $418 On Ebay
 Safavieh Bernice Dark Brown Side Table $133 On Ebay
Andrew Carved Oak Side Chairs, Set of 2 $514 On Amazon
Nara Side Chair (Set of 2) $494 on Amazon
Safavieh Mercer Collection Randy Linen Bench $343 On Amazon
 Charcoal Grey Castro Armchair $570 Overstock On Ebay
Oval Accent Table $307 From Overstock On Ebay
nuLOOM Casual Living Weathered Vintage French Upholstered Linen Ottoman $269 On Overstock
Safavieh Pecos Reclaimed Wood Stool in Brown$272 On Amazon
Swedish Storage Bench $1149 Wisteria
Lisa Cradle (Free Shipping) $164 On Amazon here
Orbelle Trading Ga Ga Cradle (Free Shipping $164 on Amazon here
White Naples Media Chest $256 on ebay
Search out the rest of the furniture collection on ebay
Simply replace the hardware…..
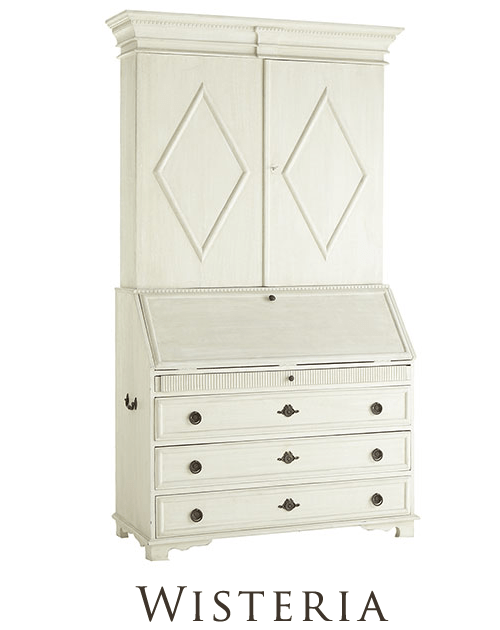 Swedish Secretary $1999 From Wisteria
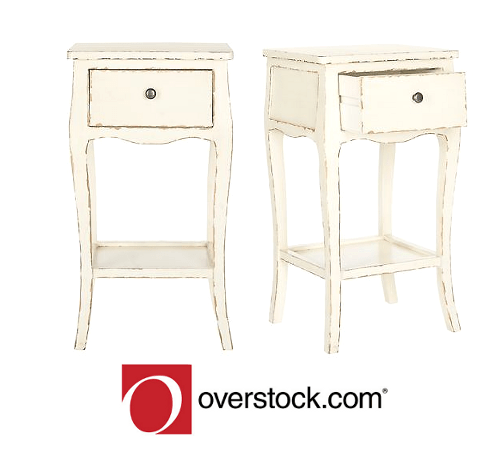 Thelma Distressed Vanilla End Table $140 On Ebay
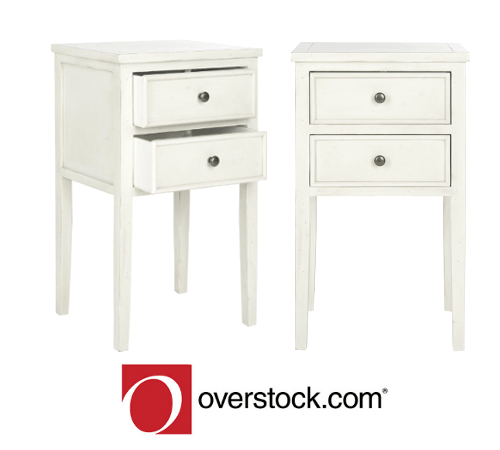 Toby Eggshell End Table $135 On Ebay
Safavieh also sells a lovely set of nesting tables that have a Swedish look to them. The dimensions are 35″ H x 20″ D x 20″ W.
Chelsea Textiles Demi Lune Table– here
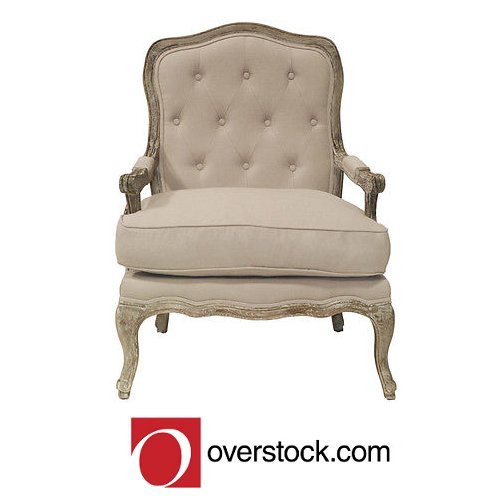
Oxford Beige Linen Arm Chair $179 From Overstock On Ebay
Lauren Upholstered Queen or King Canopy Bed Only $319 From Overstock on ebay
Check out other canopy beds from Overstock here on ebay
Naples King Canopy Bed $638 From Overstock on ebay
Wooden Nightstand $219 From Overstock On Ebay
 Louis XV Chest $999 From Wisteria
Safavieh Mercer Collection Danni Side Chair with Nail Head, Beige and Antiqued Oak $417 On Amazon
 Eddie Camel Club Chair $754 On Overstock On Ebay
Safavieh Abram Dark Teal Console $130 On Ebay
Safavieh Andy Ash Grey Shelf Unit $147 From Overstock on ebay
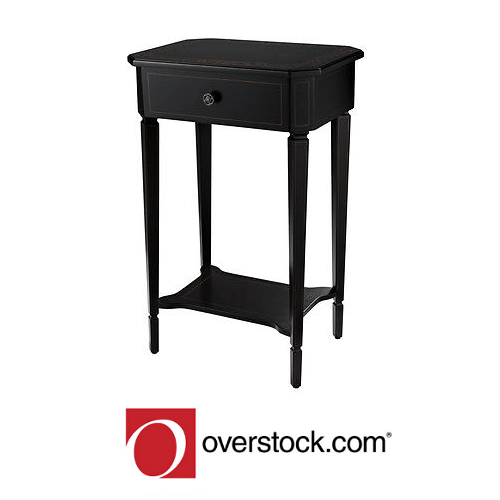 Hand Painted Black Finish Rectangular Accent Table $401 Overstock On Ebay
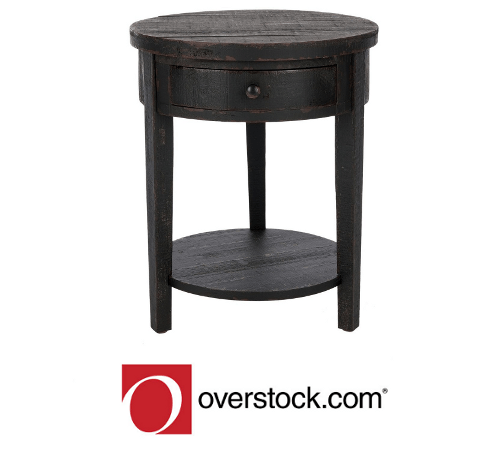 Safavieh Doris Black Round End Table $105 On Ebay
Safavieh American Homes Collection John Side Table, Antique Black $173 On Amazon
Safavieh Suncoast Arm Chairs – Set of 2 $283 on Amazon
Safavieh Dolan Sideboard, Light Oak $311 on Amazon
Safavieh American Homes Collection Susan Side Table, Dark Brown $190 On Amazon
4-Foot 6 by 6-Foot 6 Handpicked Argentinian Cowhide Area Rug, Natural Brown and Off-White $201 On Amazon
Safavieh American Home Collection Devon Walnut and Antiqued Pewter Etagere $281 On Amazon
Safavieh American Homes Collection Simon Console Table, Natural $208 On Amazon
Safavieh American Homes Collection Alexander Bookcase, Natural $195 on Amazon
Ossett Antiqued Pewter and Light Ash Wooden Storage Bench $214 On Amazon
Safavieh American Home Collection Leyton Writing Desk $342 on Amazon
Safavieh DHU205B Dhurrie Collection Handmade Wool Area Rug, 4-Feet by 6-Feet, Ivory and Green $128 On Amazon
Safavieh American Home Collection Howden Sideboard $263 on Amazon
Natural Fibers Collection Sisal Area Runner, 2-Feet by 10-Feet, Natural and Rust $75 On Amazon
Safavieh American Home Collection Sussex Light Brown Console Table $167 On Amazon
Retford Medium Oak Finished Dining Table $194 On Amazon
Safavieh Jethro Honey Natural Console
$113 at Overstock on ebay
Safavieh Amos Honey Natural Console
Safavieh Abram Eggshell Console
 Thema Honey Table $140 On Ebay
 Deniz End Honey Nature Table $156 On Ebay
Safavieh Coby Honey Natural End Table $126 On Ebay
Midwest CBK Marquetry Print Accent Table
This product has been dis-continued
Inlay Cherry Veneer Accent Table $289 On Ebay
Safavieh Tami Night Table $165 On Amazon
Auckland White Washed Console Table $194 On Amazon
AA Importing 18243 French Wall Clock $112 here
Winfrey Hutch Cabinet $2340 Overstock on ebay
Gustavian Console Table $399 Wisteria
 ‘La France’ Round Distressed Dining Table $1389 On Ebay
Cosmo 4 Door/3 Drawer Buffet $1232 on Overstock On Ebay
Chael Distressed Pine Bookcase $1716 From Overstock on ebay
 Hamshire Round Dining Table 60 inch $1400 On Ebay
7 Scandinavian Country Decorating Books

Of all the European country home styles, none is more universally popular than Scandinavian Country. These fresh, light-filled northern interiors have an effortless grace that never fails to delight the eye.
JoAnn Barwick and the editors of House Beautiful lead us on a tour of more than twenty exceptional residences in Sweden, Norway, Denmark and Finland that show this immensely appealing look at its very best.
These interiors are both steeped in tradition and utterly contemporary. Scandinavians have a passion for color and an abiding reverence for nature: stippled, spattered and even faux-marble painted finishes enliven even the most humble country furniture; and an abundance of rich woods, crisp tiles and robust textiles embody the pleasures of natural materials.
With nearly 300 full-color photographs and an extensive directory of sources for Scandinavian furnishings and accessories, this engrossing and seductive book encapsulates this most inviting of country styles.
JoAnn Barwick was editor-in-chief of House Beautiful magazine for more than a decade, and is acknowledged as a pioneer in the development of American and international country style. She was the founding editor of Country Living magazine and has been an editor at Good Housekeeping and Modern Bride.
Norma Skurka is the former Home editor of the Sunday New York Times Magazine. She has taught at Parsons School of Design, lectured at the Cooper-Hewitt Museum, and is the author of several books, including The New York Times Book of Interior Design and Decoration.
Scandinavian Country by , JoAnn Barwick On AMAZON
Scandinavian Country by , JoAnn Barwick On Ebay
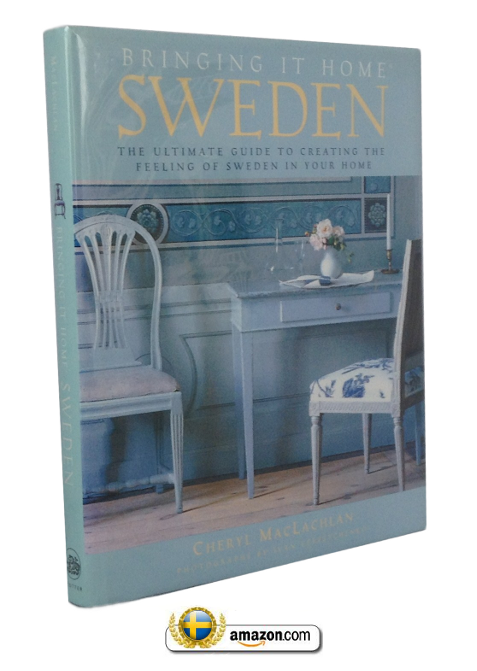
Bringing It Home Sweden by Cheryl Maclachlan- Buy It On Amazon Starting at $12
Bringing It Home Sweden by Cheryl Maclachlan Buy it on Ebay
Renowned for its lovely blond woods and delicate color palette dominated by pale blues, Sweden is a country of simple and elegant interior design. In a bright, well-photographed presentation, lifestyle writer Cheryl MacLachlan beautifully captures the essence of Swedish design: clean lines, pale hues, natural materials, a powerful sense of light and space, and fresh folk-art charm. The living room, bedroom, dining room, and kitchen each merit a chapter filled with ideas about walls, floors, windows, colors, fabrics, lighting, and furniture. Scattered throughout are tips on decorating, such as transferring a decorative motif to a wall, setting an attractive table, and mixing your own paints for an authentic look. You’ll also find a chapter on Swedish foods (complete with tempting recipes), and a source list.
From the Inside Flap
Is it possible to bring home the best of an entire country?
This is the question that came to author Cheryl MacLachlan when she fell in love with the charms of Sweden–its pristine landscapes, its warmhearted people, and above all, its delightful homes. What was it that made her visits there so memorable? And how could she replicate those pleasures back home?
In Bringing It Home–Sweden, Cheryl MacLachlan reveals the secrets of Swedish decorating and entertaining and explains how to capture those charms anywhere. After spending much time visiting homes and conversing with families in towns and cities throughout Sweden, she became familiar with the subtle but unmistakable qualities of Swedish life: how furniture is chosen for its pure, fine lines; how simple fabrics are used to great effect; how soft, delicate colors are layered to create rooms full of light and elegance; how the freshest ingredients are combined to prepare delicious meals. Now in this book, she offers the essence of Swedish style, with an abundance of practical information, handy how-to projects, and colorful inspiration to enrich any home.
Bringing It Home–Sweden explores the full range of life in this beautiful country. From the finer points of Gustavian furniture (now available in reproduction everywhere) to the exquisite choices offered by Swedish crystal, from the secret to buying the perfect down comforter to the ultimate recipe for Swedish meatballs, the best of Sweden is shared with readers. Richly illustrated with more than two hundred color photographs by Ivan Terestchenko, Bringing It Home–Sweden also includes recipes, resources, and a useful buying guide. Learn what makes Swedish life so welcoming–and then bring its best qualities back to your own home!
Review By Amy K -Her books on each country are so wonderful-not just for viewing the photos for decorating ideas, but to get an all-around feel for that particular country’s lifestyle and how to create it yourself. These are not just your average home decorating books, they make an excellent read as well. You won’t be disappointed.
Review By M. Carlson If you’re into swedish country, you have to get this book! It’s been my decorating bible! I love the beautiful photographs, but the text is even better. It explains the origins and purpose of the color palette, flooring, furniture, window treatments, room layouts, fabric and accessories used in ths style. It also discusses the influence of King Gustav, Carl Larsson and Josef Frank. The only part of this book I don’t find useful is the recipe section. Other than that, I use this book constantly! It stays on my coffee table so I can browse through whenever I want.
By Horsey Knitter -This is the first Swedish design book I’ve found that I can clearly understand and put to use when I redecorate a farmhouse in Swedish Country within the next couple years.
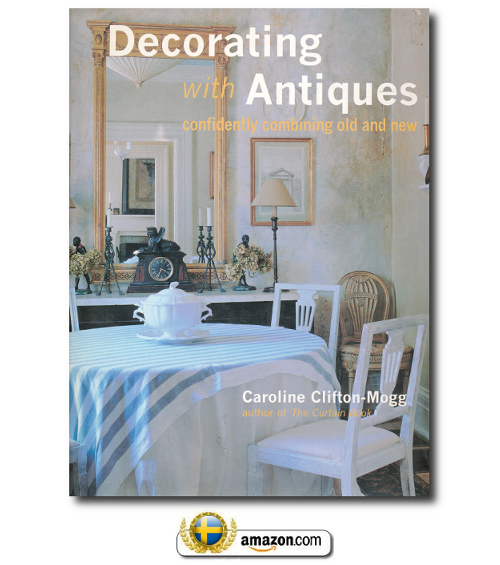
Even though Decorating With Antiques, is several years old, (published in 1999), it is far greater than some of the newer 2013 books I have spent money on. It contains over 400 color photographs, and I honestly have to say every photograph is of high quality. Many books, you end up spending money on just a handful of photographs that you enjoy, but this book I have found myself looking intensely at each photograph, gathering ideas for my own home. Check out my book review, along with some of the details that I found most interesting on my new flagship blog- Her Site.
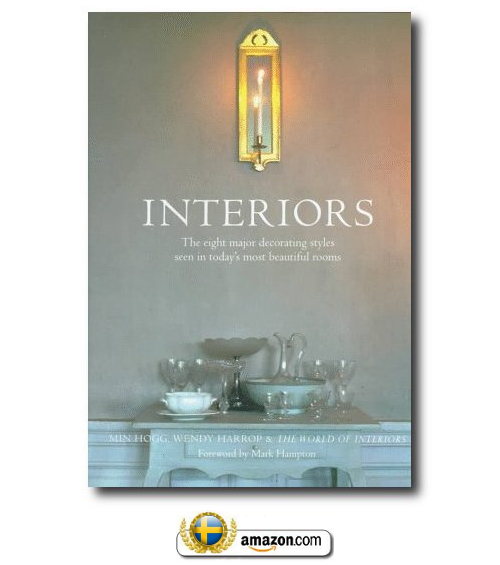
Interiors By Min Hogg- Buy it On Amazon
This book contains stunning photographs hand selected by The World of Interiors Archives. The eight major decorating styles seen in today’s most fabulous rooms, presented by the most acclaimed magazine of interior design. More than 300 full-color photographs. This book contains breathtaking images, and remains to be one of my favorite books ever. This book features a ton of beautiful antiques. Get ideas for decorating, staging, what to buy for accessories and color themes.
The book is divided into 8 sections. 1, Cluttered Interiors, 2, Hot Climate, 3, Designer Decorated, 4, Minimal, 5. Ancestral, 6, Simple, 7 Shabby Chic 8, Eccentric. The book is 255 pages long.
Reviews:
By A Customer -“One of my all time favorite books on interior design. I have bought this book a number of times to give as gifts. Great photos & great selection of homes shown.I’ve never tired of flipping through this book.”
By Lynne in San Francisco-“I read and re-read this book so much I had to buy a 2nd copy. Lots of gorgeous pictures of unusual interiors!”
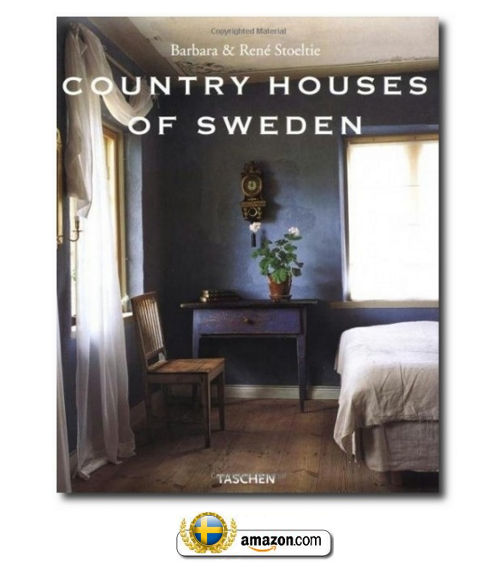 Part of Taschen’s Country Houses series, Country Houses of Sweden by author Angelika Taschen illustrates the magnificence of castles and manor houses of Sweden. Barbara and Rene Stoeltie journeyed through Sweden in search of exceptional houses to write about and photograph.
With captions in English, Swedish, and French, this collection of handsome photographs will appeal to world travelers searching for the perfect resting place. Here a reader can get lost in placid lakes reflecting unthreatening clouds; a white sunlit room of peeling paint and alluring bookshelves; a dusky bedroom in which the walls are papered with botanical illustrations.
Some of these Swedish country houses have been turned into museums, and some are private homes. Painter Anders Zorn’s studio has been preserved exactly as he left it when he died in 1920–his “Zorngarden” is a marvel of gilt-framed mirrors and stunning, somber portraits.
Reviews:
No particular aesthetic prevails in this coffee-table book. Some homes have been modernized, replete with Martha Stewart-style amenities. And the images aren’t only distant shots of interiors; a photograph from the Varpet estate near Stockholm shows jars of freshly made jam on a chipped white counter top. What’s constant throughout Country Houses of Sweden is a sense of delicious luxury and relaxation. Like a Merchant-Ivory film, it’s the kind of book that makes you want to get dressed up. –Emily White
By A Customer “This is a beautifully presented publication. Its padded hard cover and thick paper quality are matched by excellent color photographs. The choices of homes is good: from palaces to simple country cottages. The text for each home is limited because of space for translation into French and German, but its gives a personal background to each building and interior. It has none of the frilly interiors or silly text that often accompanies the English versions of Scandinavian interior books. It is an excellent companion to The Swedish Room, which gives a more comprehensive historical perspective”
By K. Casey –“Not long after I checked this book out from the library, I was wild to own it! The first reviewer is right — these are not “cutesy” or “quaint” old houses. In poring over the many, many rooms and homes included in this volume, I felt I gained some understanding of Scandinavian design in general. Many of the styles represented can be described as spare, simple and unpretentious. The clean lines of this aesthetic seemed to me to border on the exquisite. Not just “form follows function,” though. Ranging from an artist’s colorful, almost eccentric home to the all-white interior of a flat in a centuries-old stone building: almost all of the examples chosen show a strong sense of place and time, and a sensitive and respectful response to the design and nature of the house”
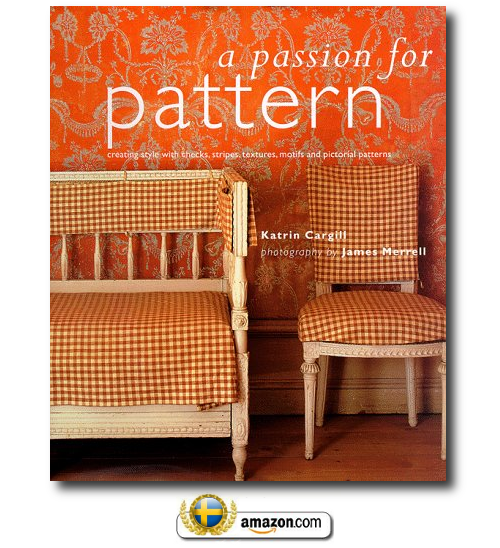
A Passion For Pattern By Katrin Cargill- Buy It On Amazon
This book was a surprise for me. I have loved it, and even though it is a bit dated, I am so glad I own it for my library. The contents is divided into 5 sections. 1, Texture, 2, Stripes, 3, Checks, 4, Motifs, and 5 Pictorial.
On page 40 she shows you how to create a painted striped room. On page 86 she shows some beautiful pictures of slipcovers in a Gustavian setting. On page 90, she shows you how to put together a patchwork bedspread using check fabrics. On page 100, she shows you how to paint a check wall. On page 130, she shows you how to paint a Greek Key pattern on a rug. For a classic Gustavian Interior she shows how to paint a garland wall panel on page 142. On page 166 she shows you how to apply fabric to the walls.
Even though this may be an older book, all of the pictures that are in the book are either Gustavian, French, or Classical in nature. There isn’t any modern pictures in this book. She shows a wide variety of antiques, and how to beautify your home with the styles I mentioned above. I love this book, and for the price I bought it, it was a steal. One of my favorites for sure.
About The Book:
Lavishly illustrated and organized by type of pattern, A Passion for Pattern provides hundreds of useful tips on working with pattern throughout the home. Complete instructions for 12 sophisticated projects are accompanied by step-by-step illustrations, and a resource directory lists important sources. 300 full-color photos, 60 illustrations.
 Great Houses of Sweden
Impossible to locate, and listed on Amazon for $400 Used, $500 New
The 22 homes which include palaces, castles, and manors as well as a couple of rural residences exemplify the refined simplicity of the “Gustavian style” implemented by Sweden’s King Gustav in the latter 1700s. The King worked with the country’s leading architects and artists to assimilate the “ancient sculptures of the Vatican and archaeological objects at the sites of Pompeii and Herculaneum” which inspired him on a trip to Italy. Besides the order of such classical forms and motifs, the King’s style favored light colored wood and light colors, particularly white, making for a play of light in the rooms, spaces, and facades. This latter distinctive feature of the style is attributed to the special Swedish appreciation of light from being in a northern area with long winters. Photographer Listri and art and travel writer Rey, who have collaborated before, capture in photos and words the beauty of this Swedish architectural style in rooms, hallways, fronts and other angles of homes, wall and other furnishings, and the design of surrounding grounds.
Book Reviews By Others:
“This is a book about Swedish castles and mansions and mentions several from the 18th century. The photos in the book are really beautiful, but other than that I was pretty disappointed with this book. Every castle or mansion gets a chapter, but there is very little real information. There are mostly anecdotes and speculations and pretty much nothing about historical architecture or interior decorating. Another big problem with the book is that there are no captions, nothing is told about the beautiful rooms and buildings in the pictures. I’m glad I have the book because of the photos, but I would not recommend it if you actually want to learn something”
“Great Houses In Sweden is a wonderfully beautiful book. Although it does indeed feature truly great houses, the title may have suffered in translation. Presented here are palaces, castles, museums, public buildings, and, yes, even some houses. The photographs, all in color and very handsome, often fill a whole page and sometimes a two-page spread. The text, though brief, is interesting none-the-less”
“After a Forward by the King of Sweden and an Introduction, each chapter features a building, a group of buildings, or a part of a building. Starting with the 14th century (and later) Gripsholm Palace which was given improvements by Gustav III inspired by his admiration for French classicism, it ends with the classically-inspired modern interiors of the Stockholm City Hall completed in 1923. This book will be greatly appreciated by connoisseurs of Swedish neoclassicism.”
“This is another journey through the centuries of Swedish interiors. From the renaissance to the early 20th century. Very similar to “The Swedish Room” published some twenty years ago. But the houses are grander and fewer. If this is in your taste this is a very good buy. The photography is almost flawless but the text is just a short introduction to each site. What is depicted on the
spreads that follow is not commented, a pity i my opinion. That, together with a minor reservation about the selection of houses, renders this book 4 stars instead of five”
here is a very interesting book on ebay called Scandinavian 1700-years furniture w/drawings for DIY Norwegian Swedish furniture. The book features furniture from the 1700’s and is illustrated with pictures and drawings in the scale 1:5. Chairs, tables, drawers, shelves, dollhouse, mirrors and much much more. The drawings are made after the original furniture, so if you are interested in wood working, then this book might be right up your alley.
This book is a hard bound with 192 pages from 2003, written in Norwegian. This book would be shipped from Norway. Sold from ebay seller Estescon. This is a one of a kind book, and may be sold quickly, although, if you are interesting in building Swedish Furniture, consider Making Swedish Country Furniture & Household Things By Hans Keijser, Lars Sjoberg and R Willick which has 35 classic Swedish projects that can be built.
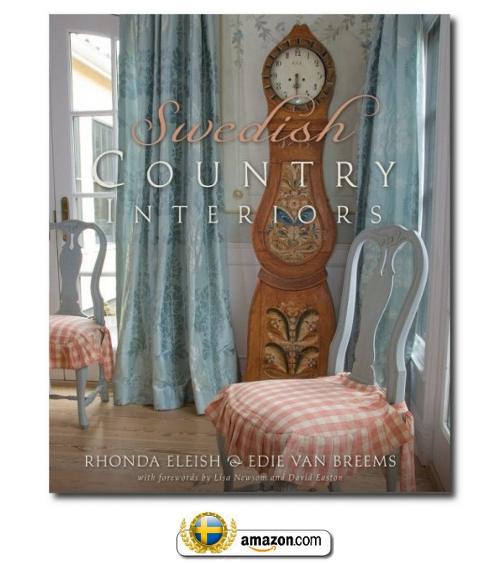
With two books under their belt, Swedish Interiors, and Swedish Country Interiors until this year when their newest book was published. Reflections on Swedish Interiors a book with not only Gustavian furniture, but modern furniture from Sweden.
Swedish Country Interiors By Rhonda Eleish, Edie Van Breems, published in 2009, includes the very best of Swedish country furniture and decorating. The style has gained tremendous popularity as more people are drawn towards the natural elements such as wood, marble, natural linens, but also want the luxuries as well. Swedish decorating combines both for a relaxed yet sophisticated look.
Rhonda Eleish and Edie Van Breems combine years of experience as interior designers and Swedish antique dealers into a guide of how-to decorate and design in Swedish country style and decorating.
Eleish Van Breems Antiques was opened in 1998, located Woodbury, Connectict by both women. The store was set up in an 18th century house rather than a commercial building to give customers the genuine feeling of walking through a historic Swedish residence instead of a store front. The house was totally made over, – floors were stripped, and pickled, the walls were painted, giving the overall feeling of genuine Swedish. The location served them well for over eleven years until the business grew and a larger showroom was needed for photographing antiques and office space which lead them to a larger showroom in Washington Depot, Connecticut.
Get a wide pre-view of the book at Google Books
Swedish Country Interiors on google books includes a generous 27 page preview including glossy pictures and text of the book.
Swedish Country Interiors showcases 15 homes from across the United States that vary in style but all have Swedish elements that unite them.
The book breaks down into 15 homes which are as follows
– Swedish Mediterranean- Page 21 Features the home of Cherie and Michael McKinney.
– The Swedish Mill House – Page 33
– New Hampshire Island Living Page 47
– Farmhouse Romance Page 57
– A Swedish Inspired Cabin Page 69
– Lanuna Light Page 75
– Neoclassical Living in Atlanta Page 85
– Seaside: The Swedish Dream Page 95
– Woodstockholm : The Artist Cottage Page 105
– Daisyfields: Swedish Splendor Page 119
– The Swedish Pool Pavilion Page 135
– White Wisteria Page 143
– Northern Treasure Chest Page 159
– A Swedish Country Retreat Page 171
– Dawn Hill Antiques Page 181
Gustavian alder wood veneered table holds a pewter platter filled with pears
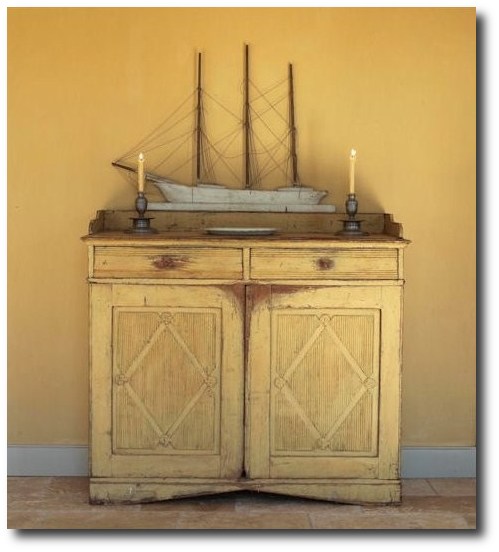
A ship Model sits on top of a Swedish early nineteenth century yellow orche Buffet with fluted diamond panels- From Richard Hershner’s Home
Dawn Hill Antiques Located in New Preston Connecticut- From Swedish Country Interiors
Dawn Hill Antiques Located in New Preston Connecticut- From Swedish Country Interiors
Dawn Hill Antiques Located in New Preston Connecticut- From Swedish Country Interiors
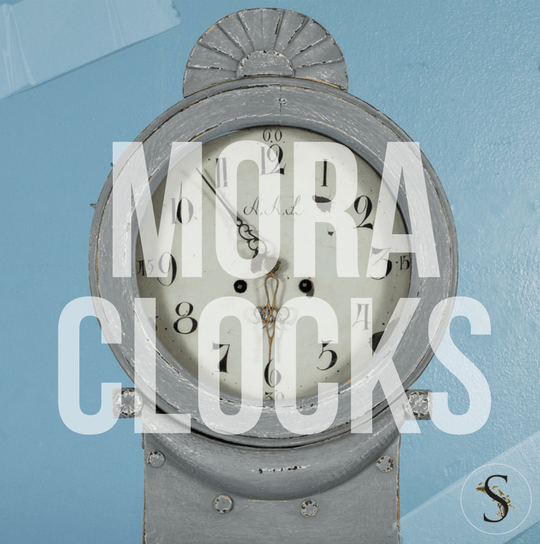
Mora Clocks: Investing In Swedish Heritage
Mora clocks are breathtaking to look at, and have become tremendously popular over the last 10 years. Swedish tall clocks are commonly called “Mora clocks” however, it is known that only clocks and cases produced in the Mora municipality can accurately bear the name of Mora. The mora clock began in around the Mora municipality in Dalara provence in a small town called Ostnor during the late eighteenth century. According to Wikipedia, Mora clock faces are often marked with the inscription “A A S Mora”—the initials of Krång Anders Andersson (1727-1799) of Östnor, traditionally known as the first clockmaker in the district of Mora.
The clock works were crafted by farmers, the first being Krang Anders Anderson (1729-99) , who needed to find additional income during the winter months. The iron mines of nearby Sala made iron affordable for the farmers to work with, which allowed the clock industry to grow. It started with a few farmers who needed extra money, but by the end of the nineteenth century the clock making business in Sweden thrived. More than 50,000 clockwork motors were produced during this time.
Each family around the region would specialize in producing one or more of the parts required for these clocks. A finished clock would often be sold without a case, in which the buyer would then have to arrange for one to be made locally. As many as 1,000 clocks were being made each year. Clock cases evolved from a straight case in the eighteenth century to a curvier form in the nineteenth century. Within 80 years, the competition from inexpensive German and American clocks put an end to this cottage industry.
Jo from Swedish Interior Design, shares some ideas on what you should look for when you want to buy a Mora Clock.
Many people’s first time with a Mora comes from the movie ‘Somethings Gotta Give’ where there is a mora clock prominently displayed in the living room scene with Jack Nicholson. Original 1800s Mora clocks are very rare now so here’s a few pointers to help you find the right one.
They are most worked in pine but very occasionally built in oak and they measure height wise from 180-250cm and feature a great wealth of decorative carvings and original paint finishes.
Each Mora clock is a unique handmade object dreamed up by the imagination of its maker so every clock has a different the hood, clock face decoration, belly shape, plinth etc .
1800s Swedish Mora clocks generally come in a number of types –
Fryksdall: These clocks have a pinched waist, wider belly, curly scroll decoration on the waist and neck and extravagant hood carvings. They come in a variety of whites & greys and would be owned by wealthier individuals.
Bridal: The most unusual of mora clocks, often from Jamtland, these pieces have the finest levels of decorative carving. They exhibit the finest level of craftsmanship in the Mora clock world.
City: a catch all phrase to describe Mora clocks that have fine levels of decoration or beautiful painted finishes that set them apart from the simpler country clocks.
Country: the country clocks are usually plainer in appearance with less decoration. Often given as wedding presents, they would be a prized possession in poorer families. Normally they have simpler hood crowns and less use of glass. They may have no face glass at all or pendulum viewing port for example. Painted in earthier folk art colors in the Swedish Kurbits folk art tradition, they show with yellows, oranges, deep russets, browns and ochres.
There seem to be 3 schools of thought in terms of paint finishes.
Some people strip the clocks back to the bare wood and repaint but that doesn’t make sense to me. Every clock has lived a history and by over restoring, you strip away its special ‘aura, it becomes just a clock body made of old wood devoid of personality making it not much different from a repro one in reality.
Also many clocks have ‘scraped back’ paint. But this is just a paint effect really. Originally the paint would have been a rich chalk paint in perfect condition, and the scraped paint ‘effect’ is just that – an interior design effect similar to ‘shabby chic’ that you see on lots of restored Swedish furniture. It looks nice but its not real!
At Swedish Interior Design, we prefer to keep the paint whenever we can as it is and only repaint where the original coat is in poor condition or it has been repainted at some later time. When we do it is sensitively done to allow the mora clock to live and breathe so to speak.
Finally you need to think about whether you want to use the original clock mechanism or fit a battery powered electric one. This may seem a strange question but mora clocks have very ‘country’ parts, unlike the precision clock mechanisms of English clocks of the period.
So they can be difficult to set up and can be affected by a change in temperature causing the wood in the clock body to shift slightly or being jolted as you walk past. This affects the swing planes and can cause the clock to stop. Also the mechanisms are open to the air and its very easy to get dust caught in the cogs.
So that’s why most of our clients go for the battery option. It doesn’t need winding and it looks exactly the same as the original from the outside. Its easy to do and there’s no damage to the clock as the original mechanism is only kept in place by small screw and you can put the original mechanism back in place whenever you like (although it will need cleaning and setting up professionally if you do).
Further Reading:
- Martha Stewart Appearance, Mora Clocks, and a Winner! Cove Table
- “Mora Clocks and Tall Case Clocks”. Cupboards and Roses. Retrieved 2006-12-29.
- “Swedish Long Case Mora Clocks”. Ryder Antiques.
- http://www.antikuhr.de The Mora Story
- “Swedish painted furniture”. Julie Foster Decorative Antiques. Retrieved 2005-12-17.

Edgar Reeves Lighting and Antiques sells this terrific late 19th century tall long case clock in Swedish “Mora” style. The clock is elaborately painted with floral details from a period perspective. “Mora” clocks are a type of long case clock which were made in, and derived their name from, the town of Mora in Dalrana provence Sweden. Edgar Reeves has this clock priced at $3,200
Leif Antiques has for sale an early Gustavian clock by Johan Lindquist who was a royal clock maker to King Adolf Frederick 1750-1771. This clock was made towards the end of King Frederick’s reign and is a prime example of Lindquist’s work and the beginning of the Gustavian Period. This clock is in exceptional condition and is priced at $80,000
- A Tyner Antiques
- Judy Frankel Antiques
- A Tyner Antiques,
- Dawn Hill Swedish Antiques
- Lillian August Designs,
- Liza Sherman,
- Jacqueline Adams Antiques
- Talisman,
- Scandinavian Antiques,
- Carl Moore Antiques
- Scandinavian Antiques & Living,
- CUPBOARDS & ROSES Swedish Antiques,
- CUPBOARDS & ROSES Swedish Antiques
- Scandinavian Antiques & Living,
- Lillian August Designs
- Laserow Antiques,
- Stair Galleries ,
- A Tyner Antiques
- A Tyner Antiques
- Scandinavian Antiques Co On Ebay


60 Scandinavian Country Folk Art Books On Amazon

Scandinavia – made up of Denmark, Finland, Sweden, Iceland and Norway -has always had a unique mark on the arts through history. Whether it be needlepoint, embroidery, wood carving, furniture painting, knitting or any other local arts, they inspired each other in these regions, often drawing on the same color tones, motifs, and decorations.
The Nordic style craftsmanship and decorative themes can be seen unique to this northern area of Europe. Chances are if you love Scandinavian furniture, you will fall in love with so many of the different arts that are also found in this region.
Folk art, is celebrated in the international galleries around the world, but it also can be found in people’s homes, garages, and attics around Scandinavia. With access to to the internet, you don’t even have to know the back streets of Sweden, or speak the language to invest in high quality antique folk art. With esty and ebay within reach, you can pull together a collection for your interior without leaving your home.
“Folk art” is the most common term to describe the every day craftsmanship of people from one region or another, which depicted the artistic talent of life and times in art. Almost everyone has a hobby today, and it was more so, 100 to 300 years ago, when the family didn’t gather around the television for three hours each night. People had so much more time that could be devoted to the arts when the children were home schooled, and mom and dad worked off the land. Life was so much better back then, and you could have a little piece of that history.
The art was influenced by the culture, which is why German, Italian, and even American folk art each has their own style and flavor. Many of the popular collectible folk art pieces include handcrafted toys, quilting, wood carvings, and basket weaving. Folk oil paintings can be some of the most expensive range of collectibles within Folk art. Oil paintings emerged in the late 1700’s but only until the 1800’s did it really begin to flourish. Folk artists were often self-taught, and considered amateur artists due to the fact that they were not academically trained in the fine arts. These paintings are some of the most collectible of the wall art, and surprise, surprise,….sometimes they are inexpensive! It is amazing what you can find on ebay, if you are willing to wait.
Here is a collection of 60 books that focus their attention on Folk art, or the Scandinavian region in general.
Don’t judge a book by it’s price, as I have bought some books for less than $5 dollars and they happen to be higher quality than the more current books you can easily spend $40 dollars on today.
While I haven’t read all of these books, many of these books listed cost than $10 dollars….! If you are interested in learning how to knit, or work embroidery, you can create your own art with designs from the past. Check out my unique list below:
Books On Amazon:
1-Swedish Folk Art: All Tradition Is Change– Used On Amazon From $8.93
Book Review From Lauren- “I have a huge interest in this subject and so I was pretty excited when I found it in my university’s library. I didn’t finish it since it’s a pretty thick book. Since I enjoyed it, wanted to reference back, and read further, I bought here on Amazon. Not only are the pictures nice, the information is pretty solid. The information probably won’t really be considered outdated, so it’s a nice addition to my own personal book collection.”
2-Swedish Folk Art: Floral and Kurbits Designs – This wonderful book of Swedish Folkart is 88 pages, 62 color with coverage of all the major styles of Swedish Folk Art from 1750 to 1900. Included are 32 projects with photos of antique pieces and pages of basic kurbits and floral forms with strokework by author- Used From $15 On Amazon
3-Our Nordic Heritage Ingalill Snitt-Our Nordic Heritage presents the 18 sites in the Nordic countries which have been inscribed on UNESCO’s World Heritage List – the cultural and natural heritage of mankind. Areas with this status represent outstanding and irreplaceable cultural and natural treasures. They are important to us as sources of experience and understanding of our manifold historical, cultural and natural background. Buy It Used From Amazon $18
4-Masterpieces of Dala Peasant Paintings by Svante Svardstom- Buy it On Amazon $26
5-Design Basics for Swedish Folk Art by Diane Edwards- This is a beginner book for learning the basics of Swedish Folk Art, a beautiful painted art that was done in Sweden in the 1700, 1800’s and early 1900s. There are several different styles which are described in this book and there are patterns of each with complete instructions. There are several pages with illustrated strokes to show the novice painter how to approach and decorate wooden pieces with this ethnic art form. Diane Edwards has done much research into Scandinavian folk art and she has simplified the approach to this art form using acrylics and easily available brushes for today’s artist.– Buy Used From $9.
6-Scandinavian Folk Designs (Dover Pictorial Archive) by Lis Bartholm-With 155 traditional motifs to choose from — all adapted by noted Danish designer Lis Bartholm — today’s artists and craftspeople can re-create many of the lovely patterns that ornamented domestic furnishings generations ago. The eye-catching elements have been adapted from designs that decorated china or were painted or carved on furniture, walls, and wooden dinnerware.- Used from $2
7-Scandinavian Cross Stitch Designs by Jana Hauschild Lindberg- Add a touch of simple Scandinavian charm to your home with these dozens of elegant cross-stitch patterns. Designs range from fifth-century woven textiles to original paper cuts made by the famous Danish fairy-story teller, Hans Christian Andersen. Projects draw upon traditional Scandinavian symbols and motifs that have been handed down from generation to generation and upon the beautiful natural environment and wildlife of the region. Used From $4
8-Swedish Folk Painting of Dalarna: Wall Kurbits and Furniture Rosepainting by Patricia J Virch (1981) Used From $78, New From $144
9-To Amerika: Dala paintings by Bengt Engman – Locate It on Amazon, Or Ebay
10-“DALMALNING” Central Sweden’s Peasant Painting by Lois Bostrom Nuermberger- Used from $5
11-Scandinavian Folk Patterns for Counted Thread Embroidery by Claudia Riiff Finseth- Scandinavian Folk Patterns for Counted Thread Embroidery draws needleworkers into the world of Nordic folklore and tradition. In addition to presenting a comprehensice discussion of mythology and the folk history of narrative textiles in Scandinavia, Claudia Finseth creates fifty-eight striking original counted thread designs. Nordic history, culture and tradition come to life for modern embroiderers through the imaginative adaptation of traditional themes. Many of the projects feature the classic decorations that once adorned Norwegian, Swedish and Danish homes: bellpulls, table runners, wall hangings, samplers and Christmas decorations. The designs fall into five categories, each containing numerous spin-off projects for varying skill levels and imaginations. Used From $1
12-Folk Art Designs: From Polish Wycinanki and Swiss and German Scherenschnitte (International Design Library) by Ramona Jablonski- Used From $2
13- European Folk Art Designs (Dover Pictorial Archive) by Marty Noble-Traditional motifs from Austria, Poland, Hungary, Russia, Switzerland, and other European countries include scores of charming designs incorporating florals, wildlife, and human figures in folk costumes. Ideal for adding a touch of Old World flavor to a variety of print and craft projects. 265 black-and-white designs.- Used From $4
14- Folk Art Needlecraft by Clare Youngs Expert crafter Clare Youngs has long been influenced by the folk art of cultures from around the world. Here she uses some of her favourite motifs to create 35 gorgeous projects to make. Clare uses traditional imagery as well as a more modern take on classic folk art – with beautiful results. The designs use a range of different embroidery stitches – including seed stitch, French knots, satin stitch and cross stitch – to create striking arrangements.- Used from $10
15- Russian Folk Motifs (Dover Pictorial Archive)This treasury of 226 designs for royalty-free use, all meticulously rendered from authentic Russian art and artifacts, include motifs from Moldovian carpets, stove tiles, gingerbread molds, architectural carvings, ancient metalwork, and much more. Depictions of Matryoshka dolls, ceramic toys, and woodcuts of characters from folklore appear as well. Used From $2
16- Folk Art: Imaginative Works from American Hands (American Country) by Time LIFE – This volume explores an aspect of the country lifestyle featuring folk art in 175 pages filled with ideas, information and hundreds of brilliant full color photographs. Buy it used from $1
17-Punchneedle Embroidery: 40 Folk Art Designs by Barbara Kemp and Margaret Shaw- Punchneedle embroidery is back! It still features the same quick and simple technique as before, but now with increasingly appealing designs that result in charming works of miniature art. This beautiful volume explains all the basic techniques, so even beginners will soon be able to create the 40 exquisite folk-style projects. Buy it used from $4
18- Folk Art by Robert Young and Robert Liebe- The vitality and simplicity of folk art makes it accessible and rewarding for collectors and a diverse source of inspiration for interior designers. Folk Art is the first book to draw together the wealth of folk art from across Europe, including textiles, toys and games, naive paintings, pottery, and furniture. It explores the origins and attributes of each piece, with guidance on identifying the most collectable artefacts. Buy this used from $8
20- Folk Art Style: Traditional and Contemporary Painting for Everyday Objects by Sybil Edwards The author explores three distinct genres of decorative folk painting – traditional strokework, bold painting and blending – demonstrating the brush strokes and illustrating the huge variety of finished styles which can be achieved with them. Traditional folk motifs, fine art themes, Art Deco designs, contemporary minimalism – all these and more are used as the inspiration for 20 handpainting projects. Buy this used from $1
21-Folk Art Needlepoint: 20 Projects Adapted from Objects in the American Folk Art Museum by Ruth Peltason We are drawn to American folk art for many reasons—its history, its humanity, and, perhaps most of all, its unaffected beauty. With elements both whimsical and practical, this enduring and beloved art form has become a rich source of inspiration for today’s craftspeople. For needleworkers in particular, folk art is among the most popular styles to stitch. Organized thematically by types of folk art motifs—among them, hearts, flowers, and daily life—Folk Art Needlepoint offers twenty projects and variations, from pillows and paperweights to a door stop and scissors case, that celebrate the best of American folk art. Buy this used from $1
22- Folk Art of Rural Pennsylvania by Frances Lichten Hardcover: 276 pages Buy this used from $7
23-Textiles: Collection of the Museum of International Folk Art by Bobbie Sumberg Textiles explores the cultural meaning and exquisite workmanship found in the Museum of International Folk Art’s vast collection that spans centuries and includes pieces from seventy countries around the world. Handcrafted work in beautiful, vivid colors typifies the clothing, hats, robes, bedding, and shoes that represent the lives and passions of the people who created and used them. Buy this used from $22
24- Folk Quilt Applique by Clare Kingslake -Folk style quilts add charm and comfort to any homes. Here, simple yet effective quiltmaking and appliqué techniques for hand and machine work are combined with a quirky folk style. Drawing on a palette of soft country colors, author Clare Kingslake has created a project collection to brighten up your home all through the year. Discover 20 irresistible projects from small and quick table mats, bags and purses, to attention-grabbing hangings and quilts. Buy Used from $11
25– Folk Art Murals of the Rufus Porter School: New England Landscapes: 1825- 1845 by Linda Carter Lefko- Here is the long awaited update of research on the Rufus Porter Landscape Mural School, greatly expanding the knowledge and understanding of this uniquely American folk art field of the 1820s to 1840s. The text provides detailed documentation never seen before in print. The book takes the reader on a virtual tour of Porter School murals in the New England states, presenting and analyzing more than 400 colorful images, which will provide inspiration for historians, researchers, designers, and painters alike. Buy this used from $60
26- Quilts: Masterworks from the American Folk Art Museum by Elizabeth Warren, Maria Conelli, Stacy Hollander and Martha Stewart- From America’s preeminent museum collection, this definitive volume places the quilt firmly in the realm of art. Combining economy with artistry and everyday craftsmanship with extraordinary beauty, quilts hold a unique place in American culture. Each quilt tells a story about its maker and her community; seen together, these monumental textiles paint a broad picture of the development of a national character and uncover the hidden history of women’s contribution to art. Buy Used from $37
27- Glorious American Quilts: The Quilt Collection of the Museum of American Folk Art by Elizabeth Warren and Sharon L. Eisenstat Used from $5
28- Living with Folk Art by Editors of Country Living and The Editors of Country Living (Jan 2001)- Patchwork quilts, woven coverlets, hooked rugs, painted furniture, carved decoys—these are among the most popular styles of folk art. If you’ve fallen in love with their old-fashioned charm, find out how to show them off effectively. Here are great display ideas for entryways, halls, living rooms, dining rooms, and kitchens—along with tips for mounting textiles and protecting baskets, china, and utensils. Buy this used from $5
29- Folk Art Primer by Jo Sonja Jansen and Edna Snyder – Buy Used from $9
30- Painting Folk Art Flowers with Enid Hoessinger (Decorative Painting) by Enid Hoessinger Demonstrates how to paint folk art flowers using ten acrylic colors and thirteen basic brushstrokes, and includes eight step-by-step projects – Used from $16
31- Folk Art of Europe by Helmut Theodor Bossert- Used from $5
32-Folk Art Friends: Hooked Rugs and Coordinating Quilts (That Patchwork Place) by Polly Minick and Laurie Simpson (Jun 2003) More than 20 quilt and rug designs showcase the authors’ distinctive style- Motifs include simple stars, hearts, flags, houses, and dogs- Photos shot in Polly Minick’s home show her creative ideas for displaying rugs and quilts- Used from $3
33- Treasures of Folk Art: Museum of American Folk Art (Tiny Folio) by Barbara Cate, Lee Kogan and Museum of American Folk Art (Oct 27, 1995) Celebrating the exuberance and variety of folk art, this Tiny Folio presents the museum’s finest examples from colonial times to the present. Created by self-taught artists, the works in this book include paintings, sculpture, weather vanes, decoys, painted furniture, quilts, and more. 340 full-color illustrations.- Buy used from $2
34-Painted Wood Projects in the Pennsylvania Folk Art Style by Alan Bridgewater and Gill Bridgewater – his book shows how to achieve 20 painted wood projects to brighten the home, using a palette with rich reds, yellows, greens, browns and black and white. The designs in the book are based on those of the Dutch communities of Pennsylvania who transformed ordinary objects into exquisite works of folk art. Buy used from $1
35- Color Your Own American Folk Art Paintings (Dover Art Coloring Book) by Marty Noble (Jul 19, 2011) Thirty meticulously rendered versions of well-known American folk art paintings include Edward Hicks’ The Peaceable Kingdom, Eunice Pinney’s The Courtship, and other beloved portraits, still lifes, and landscapes. Colorists of all ages, including would-be artists and Americana enthusiasts, will find this collection an engaging combination of art history and activity. Buy Used From $2
36- Color Your Own Famous American Paintings (Dover Art Coloring Book) -Line drawings of 30 American masterpieces invite colorists to add their own hues to famous paintings — from the quiet charm of Mary Cassatt’s Mother and Child to Edward Hopper’s starkly realistic Hotel Room. Additional works by Albert Bierstadt, Childe Hassam, Edward Hicks, Winslow Homer, Grandma Moses, and 23 other masters- Buy Used From $1
37- Color Your Own Impressionist Paintings (Dover Art Coloring Book) by Marty Noble Use colors of your choice, or recreate the original hues, for 30 great paintings, among them Mary Cassatt’s Mother Combing Her Child’s Hair, Renoir’s At the Concert, and 28 other reproductions of works by Monet, van Gogh, Gauguin, Manet, Pissarro, Morisot, Cézanne, and 4 other great artists. Buy Used From $1
38-Hungarian Folk Designs for Embroiderers and Craftsmen (Dover Pictorial Archive Series) by Anne Szalavary Used From $29
39- Norwegian Handknits: Heirloom Designs from Vesterheim Museum by Janine Kosel, Sue Flanders and Laurann Gilbertson (Sep 6, 2009) Vesterheim Museum in Decorah, Iowa, is one of the premiere centers for Norwegian-American heritage in the United States. As such, it houses one of the country’s most extensive collections of the textiles and handknits that have woven ties between Norwegian communities in America and the Old World, between today’s culture and a rich past. This book collects thirty patterns for handknits from Vesterheim—folk mittens, socks, scarves, hats, wristers, handbags, knapsacks, and sweaters—all inspired by traditional knits housed in the museum. With an introduction reflecting on the history of Norwegian-style knitting and the stories behind the handknits that inspired the patterns, the book is at once a practical guide, a repository of cultural history, and a lovely look at one of the rich traditions knit into the American fabric.– Buy Used from $6
40-Norwegian Tapestry Weaving by Maria Brekke Koppen -The classic book on Norwegian tapestry. Profusely illustrated with over 220 black and white drawings, photographs and 4 color plates. The translation combines the 1978 and 1988 editions. It includes: history, joining techniques (especially the Norwegian dovetail),looms, designing, weaving methods and finishing. Buy Used From $34
41-Norwegian Rose Painting in America: What the Immigrants Brought by Nils Ellingsgard Buy It Used From $31
42- Ornamental Woodcarving in the Norwegian Tradition by Johan Amrud Buy Used From $285
43-Woodcarving In The Scandinavian Style by Harley Refsal -Carve and bring to life wonderful, old-world people in the Scandinavian “flat plane” style of carving. Clear directions and step-by-step photographs show you exactly how to make a few simple, well-placed cuts, leaving large, flat planes intact on the wood-carved figure, for an effect rich with folk-art charm. Plus, you’ll get a history of Scandinavian woodcarving and photographs and drawings of decorative pieces. 132 pages (4 in color), 225 b/w- Used From $2
44-Scandinavian Country A noted interior design editor joins House Beautiful in showcasing the purest, most appealing expressions of this classic yet understated style. ;iiScandinavian Country marries the most exciting elements of contemporary style with an appreciation of the pristine, inviting land that gave them birth. 290 full-color illustrations Buy Used From $1
45- Scandinavian Country (Architecture & Design Library) Buy Used From $5
Review 1- This book makes you wich a small house by the fjords! The photos are superbe! To welcome you in the north Europe, that’s a very good book. You have the right colors, as much light as you needed and the nature all over the pictures. Flowers everywhere. A small walk through History. All in a very simple way. When you know this countrys, you know everything’s writh about this book. Yet,some things are missing. If you buy this book to have information, don’t expect to find many details about how to decorate a house in the scandinavian style. Not really! After this first book, you will surelly want to find other ones about the subject! Because, you’re just beginning to know what north european houses are about! Not a bad beguinning! Not at all! If I were you, I’d start right here.
Review 2 -I really loved this book. As one reviewer commented, the pictures definitely make you wish for a home by a fjord. They alone are well worth the price of the book. Every so often,I page through the book again and enjoy it as much as the first time I looked through it.
I disagree with the reviewer who complained about the quality of the writing. The text explained the photographs, which made them so much more meaningful. For example, Scandinavian countries have a very short summer. Because of this people spend every moment of the long summer days they can out of doors. They don’t need fancy outdoor furniture for tea or meals. A couple of chairs and a small table will do nicely. Also, because of the long dark winters, Scandinavians love to paint and deteriorate their homes in bright colors. They almost always have natural pine or hardwood floors and wood furnishings. Because of it’s simple and oh so appealing decorating style, this book has influenced the way I decorate.
46- Country Living The Scandinavian Look -Inspired by the storybook home of the beloved Scandinavian artist Carl Larsson, Wisconsin native Loran Nordgren realized a dream of twenty years: the building of a magnificent home in an idyllic, rural corner of the state. It is a glorious place – of soaring ceilings and intimate rooms, of open views from room to room, of viewing lofts and internal balconies – where a family can gather, share good times, and also find solace and solitude. A virtual village, the Nordgren compound includes a main house, family cottage, and a storehouse clustered around a central courtyard. Buy Used From $1
47-Painted Rooms: Scandinavian Interiors by Sigmund Aarseth – Traditional decorative arts meet contemporary living in the Scandinavian interiors of Sigmund Aarseth.
‘Painted Rooms’ presents an impressive variety of beautifully painted interiors, from colorful traditional Norwegian farmhouses to exciting commercial interiors. The book shows the innovation, experimentation and individuality which has always been an important part of the Norwegian psyche. It also documents a renewed demand for colorful, decorated rooms in Norway.
The broad range of styles and techniques featured in this book makes it a valuable resource for anyone with an interest in interiors, decorative arts or Scandinavian lifestyles and traditions. It is also an indispensable reference book for decorative artists, interior designers and crafts people of any discipline. Contains more than 200 color photographs by Gudmund Aarseth Buy it Used From $21
48- Norwegian Rosemaling: Decorative Painting on Wood– Rosemaling-rose painting- is the art of applying traditional rose designs to wooden surfaces that begun in Norway centuries ago. Buy it used From $12
49- Aarseth’s Rosemaling Design- The beautiful art of Norwegian Rosemaling with step-by-step instructions by world renowned Norwegian Rosemaler, Sigmund Aarseth. The book covers classic design characteristics of Norwegian Rosemaling, traditional color use and placement, how to background wooden pieces so they are historically accurate, information about brushes and stroke work and Sigmund’s painting methods. There are 64 color pages of illustrations of Sigmund’s paintings and color examples of historical Rosemaling. This book is a great reference for Folk Art painters and teachers. It is an indispensable guide for students and admirers of Norwegian Rosemaling, Telemark Style. Buy It New from $21
50– Design Basics for Telemark Rosemaling –Basic information on designing Telemark rosemaling for beginners and intermediate painters of rosemaling. Strokes, color mixing, designing and basic backgrounding information included with designs for 19 rosemaled pieces.- Buy New From $11
51- Telemark Rosemaling: Design Basics for Telemark Rosemaling, Volume 2 – This book follows Design Basics in Telemark Rosemaling Volume 1 in continuing to discuss painting and design in the Telemark style of Norwegian Rosemaling. This book moves beyond the basics of strokework and teaches the new rosemaler how to paint on many different types of surfaces. The book has 12 pages of color photos of the different pieces which have patterns and instructions in the book. Both oil and acrylic media are used in the paintings in this book.- Buy this new from $9
52- Rosemaling the Beautiful Norwegian Art -Two books in one! Rosemaling flourished in Norway from 1700 to 1850, and the designs are still around, gracing old wooden trunks, furniture, bowls, plates, and many other wooden surfaces. This gorgeous, classic art form is still being practiced today. Penfield’s latest rosemaling title combines two previous books by renowned artist/instructor Helen Elizabeth Blanck. It shows how to perform rosemaling in simple, step-by-step instructions helpful to the novice or expert alike. Topics covered include bands or borders, scrolls, getting started, materials, color harmony, accents, and quick tips. Dozens of designs allow readers to create their own works of art. Buy it new from $14
53- Collection of Norwegian Rosemaling in America– Buy it used from $20
54- Scandinavian Painted Furniture: A Step-By-Step Workbook by Jocasta Innes Provides more than 20 examples of Scandinavian furniture painting, and shows, with step-by-step photographs, how these designs and effects can be achieved. The book offers the key to painted finishes and design motifs such as: marbled and distressed colour; layered, glazed colour; rustic grained finishes; and a range of applied decoration, from Rocco arabesques and floral pieces to the stylized brushwork used to build up traditional motifs.- Buy it used from $5
55- Scandinavian Painted Decor – With the help of internationally renowned artisan Jocasta Innes, anyone can create the beautiful and diverse decorative styles found in Norway, Sweden, Finland, and Denmark. Stunning full-color photographs enable you to explore the delights of Scandinavian interiors and painted wood architecture, from the cheerful charm of rural farmhouses and country manors to the rich splendor of palaces and churches. Learn to use traditional painting techniques, including splatter painting, marbling, and stenciling, to transform walls, floors, ceilings, furniture, and other home accessories. With this inspiring source of decorating ideas and how-to instructions, you can bring a touch of Scandinavia to any place in the world.– Buy used from $5
56- Simply Scandinavian: Painted Furniture Patterns to Pull Out and Trace-Simply Scandinavian is a workbook, with pull out and trace pattern sheets and blue chalked transfer paper for tracing the patterns onto furniture pieces. The blue may be washed off with water after painting is complete. Teaches beginners to paint in the Scandinavian tradition, suggesting types of paint, colors, tips for steadying the brush for large swirls, producing dry brush highlights, and personalizing your creation with initials and date. Jocasta Innes’ simplified process of painting allows you to follow the steps of itinerant Scandiavian painters who were self taught and repeated the same simple designs in different combinations and colors to enliven winter interiors. Buy it used from $1
57- Simply French: Painted Furniture Patterns to Pull Out and Trace – Buy it used from $6
58- Painted Furniture Patterns: 34 Elegant Designs to Pull Out, Paint, and Trace – The author of Paint Magic offers a new book on the latest decorating craze: painted furniture. In this simple and practical book, she groups 34 handsome, unique patterns according to theme, each set containing ready-to-use motifs that range from wild roses to bows to lyres to laurel wreaths. Detailed instructions. 168 color plates. Buy it used for $1
59- The Woven Coverlets of Norway by Katherine Larson -The Woven Coverlets of Norway showcases one of Norway’s most beautiful and enduring folk arts. A warm, thick cover has always been important during Norway’s long winter nights, but coverlets also decorated the family bedsteads in one-room farmhouses, affording housewives an opportunity to display their talents. Coverlets were a central feature in the important ceremonies of a person’s life as well, wrapping an infant at christening, providing a cover for the marriage bed, and draping the coffin as a last offering of comfort to a loved one. To explain the coverlet’s importance as the pinnacle of the Norwegian weaver’s art, Katherine Larson looks at the role textiles played in the lives of women prior to the twentieth century. Buy it used from $24
60-Paper Cutting Book: Contemporary Artists, Timeless Craft by Laura Heyenga, Rob Ryan and Natalie Avella (May 11, 2011) There’s a renaissance underway in the art form of cut paper, with an explosion of raw talent and an abundance of amazing work produced in the medium in recent years. This gorgeous volume features work from 26 contemporary international artists who are creating images of astonishing intricacy, using little more than paper and blade.- Used from $10
One of my favorite AUTHORS, check out my review:
Jocasta Innes Scandinavian Painted Furniture – The Swedish Furniture
Jocasta Innes, cookery and interior design writer: born Nanjing, China 21 May 1934; married 1960 Richard Goodwin (divorced 1967; one daughter), one son (by John Michell, adopted by Goodwin), 1967 Joe Potts (divorced 1979; two daughters), partner to Sir Richard MacCormac; died London 20 April 2013.
Swedish folk art cabinets were quite popular between 1770 and 1850, and were present in most country homes.
‘Allmoge’ cabinets like this one are a vital part of Swedish folk art tradition. Farm craftsmen were also called ‘allmogen’ in Swedish, which is where the style of the cabinet got it’s name.The cabinets were decorated based on local traditions by craftsmen. A by-passer who also used his/her artistic talent to pay for food or a place to sleep, would also paint furniture. The colours used were made up of natural ingredients such as egg- based paint, blood and plant pigment. These natural paints would give the pieces a soft, or pale, weathered look as they aged.
A Ladle cabinet, which often was the finest furniture in most country homes, could be a combination of a bed, a desk and a clock, tables and cabinets, all made into one piece of furniture. The furniture was commonly seen throughout Sweden, although appeared most commonly from Dalarna, Halsingland and Jamtland. Info From Skona Hem
Get this look for your own home by step by step instructional guides. Here are some of the best guides on Amazon that talk in depth about the folk art style.
Chandelier in the grass and bearberry by Gustaf Åhman from Järvsöbacken.
PHOTO: Robert Blombäck
Self-made chandeliers became a common household decor item in the Swedish peasant home in the 1800s. These beautiful crowns were seen hung over the dining table. Many of the chandliers took on designs similar to what was created locally.
In Dalarna, the hand made chandeliers consisted of straw, yarn and björktickor which was sawn into thin slices and täljdes in heart and star shapes.
Many of Härjedalsvägen crowns were made of reeds, where the straw was threaded into diamonds adorned with thick yarn tassels.
On Gotland were chandeliers made of pig bristles bent and then the ends were joined together with beeswax and then was wrapped with colored wool.
Info From Skona Hem
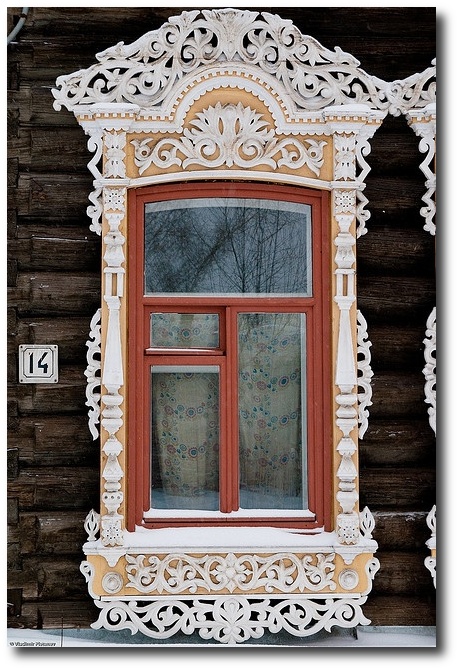
Czech Republic Tschechien Prague Prag Praha on Flicker
The Norwegian blog Ernashus cookbook author Hannu Sarenstrom.
Swedish Jugend House- Originally Seen on Sköna Hem
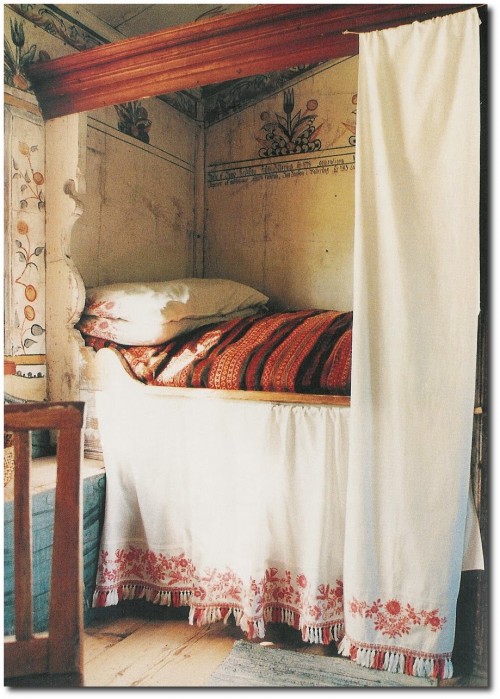
Swedish Cupboard Bed
Red Swedish Country Style Bench- Lindas Lantliga Blog
Red Scandinavian Tea Cup- emmelines.blogspot.com
Swedish Folk Art Costume-Visit kurbits.nu
Floral Swedish Folk Art Texiles- Visit borntoknitblog.blogspot.com.au
Red Scandinavian Interiors Seen in Katrin Cargill Interiors
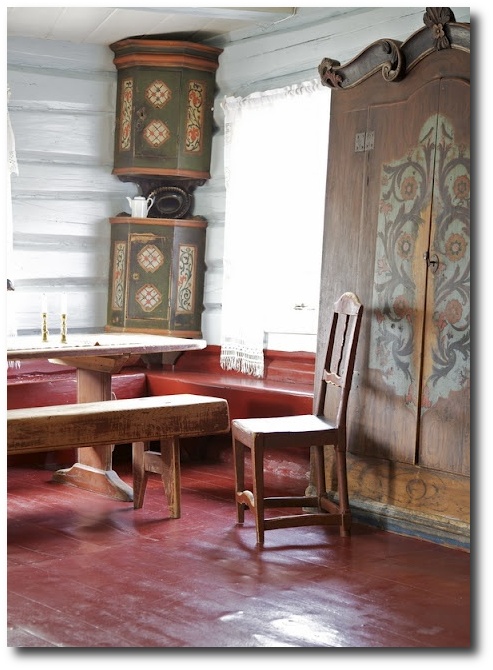
Swedish Folk Art Style- Seen On Livs Lyst Blog
“Living in Norway” is a pictorial tour throughout Norway of days gone by in quiet solitude between the grand fjords with the majestic mountains on all sides. The book is divided into the four seasons: fall, winter, spring and summer. You can experience the beauty of Norway through all seasons. Winter time in Norway is long, and the daylight hours few, but the homes are gaily decorated throughout the dark winter days.
When it comes to antiques, here you can see them in their natural surroundings. This book offers hundreds of color photographs, but don’t forget to read the text, it is a fantastic tour of Norway.
The “hytta” or cabins the norwegians used in the summer days are featured, many of the old hytta still exist and open their doors to guests as do American bed and breakfasts. Some of the hytta remain with the original families, others have been purchased for private use or for overnight stays. Traditional rosmalling on the walls and the “box beds” will guide you through times gone by.
An intimate tour through the summer home of Edvard Grieg and his wife will delight you and amaze you to discover that this is also the final resting place of the Greig’s. But more awaits.
The modern Norwegian homes are smartly represented also, from a simple concrete structure in Oslo decorated to please someone with an eye for new-age artwork, these glimpses inside the homes of Norway and excellent stories about their histories may leave you wondering how to find these places. No fear, among the last pages of the book are addresses for each of these homes if you would like to include one of these homes on your next trip to Norway.
No matter if you wish to visit a Nordland harbor with it’s peaceful calm fjord, or a Gudbrandsdalen farm which is linked to the 3 series trilogy written by Nobel prizewinner Sigrid Undset (The Bridal Wreath, The Mistress of Husaby, The Cross), you will find a rich selection of Norwegian homes, interior and exterior, modern or antique. As you read the book, it will look handsome on your coffee table. It makes an excellent gift for a family member who would enjoy reading about days gone by in Norway and living in modern Norway.
If you desire to decorate your home norwegian style, ideas abound in the book. How about a stroll along Karl Johan street in Oslo to find a excellent restaurant with a historical past? A great book for Norwegian genealogists interested in farm life also. This book is rich in text and photographs, and the book is so inexpensive
- Lars Bolander’s Scandinavian Design
- Seen On The Essence Of The Good Life
- Heritage Of Europe- Studio Dreyer Hensley, Kisten Visdale
- A Swedish girl wearing traditional costume, Dalarna, Sweden by Bjö© on Flickr
- The Swedish House- Review
- Swedish Folk Art Style- Seen On Livs Lyst Blog
- Norwegian-American Homes at the Vesterheim Museum
- Carved Norwegian Spoons-Visit plumo.com
- Norwegian Folk-Vibrant colors My North.com
- Russian motifs painted on a wooden shelf- Marieclaireidees.com
- Råbystugan (old farm house from 1776-1777) by Vilseskogen on Flickr
- Book- Country Style by Judith and Martin Miller Seen on The Paper Mulberry
- Swedish Folk Art Style- Seen In The Swedish Room
- Seen On Kevin Sharkey’s Blog
- Review Of Living In Norway By Debbie Cole
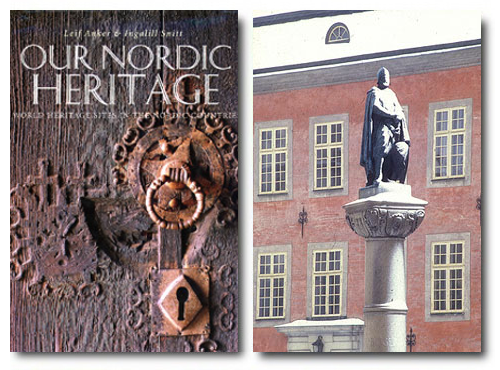
Book- Our Nordic Heritage Ingalill Snitt- Buy It Used From Amazon $18
Book – The Soul of Stockholm From Ingalill Snitt- Amazon From $2


50 Examples Of Swedish Folk Country Interiors
Interior archive is one of those sites where you can spend hours on. Looking through their dozens of pictures, there are a number of beautiful pictures that present a country look from Sweden. Here are my favorites:
A Swedish Interior Design Country Folk Art Home Photographed By Tim Clinch
The Interior Archive showed some beautiful pictures of a country house in the folk art Swedish style. A simple kitchen is furnished with antique wooden furniture. A hand-painted Swedish Mora clock stands against a distressed orange wall in the kitchen. Here, we see the detail of the hand-painted decoration on the chair that sits in the kitchen. A wall-mounted corner cupboard provides ample storage in the kitchen.
Swedish Country Home Designed By Van Breem
Photographer Simon Upton captures a guest bedroom is painted a pale grey and the bed is from van Breem’s line of reproduction Swedish furniture. A pair of rustic wooden chairs flank a console table and a Swedish Baroque mirror in the yellow painted hallway. The dining area in the kitchen has a wooden trestle table and Swedish grandfather clock and is full of spring flowering bulbs. The large range in the kitchen displays a collection of Swedish copper pots. A painted yellow Swedish sofa from 1760 and a dresser in the living room. Outside we see a Swedish bench and lantern infront of a shed with a blue door.
A Swedish Home Designed By Lena Renkel-Eriksson
-Lena Renkel-Eriksson has used shades of white, blue and dove grey to recreate the classic style of her native Sweden in her Surrey home Here she creates a unique space around the color blue. A blue-painted cabinet in the kitchen was custom made by Swedish carpenters and the swedish country chair was painted in a richer more saturated blue and distressed. In this photo, we see a yellow painted doll’s house flanked by tiers of battered leather suitcases in a nursery. This spectacular photo shows off a dining area designed around the Swedish styles. A Swedish bench is paired with white painted Swedish gateleg table, and two classic swedish side chairs. The wooden floor of this hallway has been hand- painted in a yellow and white harlequin pattern. In the attic bedroom, white is the dominant color. A white wooden desk and Gustavian-style chair are placed infront of the window. A country styled white painted chair sits in the corner of the living room, where beautiful painted walls steal the attention. An oval Gustavian bow mirror is painted in white on the wall shows this room is decorated around the classic Swedish styles.
Noteworthy Beauties:
-A Rustic Lars Sjoberg Home shows a Swedish mora clock which stands on the stone staircase.
-Designer Lena Proudlock shows a solid blue-painted Swedish mora clock which stands on a blue-painted wooden floor.
-Mish Tworkowski designs this rustic styled living room that sits an antique spoolwork armchair
and a re-upholstered French chair in an orange velvet. In the room sits a cream painted 19th century Swedish cabinet. White washed wood walls give plenty of light to this sitting area.
-Miguel Flores Vianna shows a spectacular Swedish kitchen with a wood burning stove, with country Swedish chairs. This kitchen has many rustic elements to it. A light blue is painted on the walls breaking up
– Christian Kain positions two pairs of boots on either side of a carved painted console table in green the hallway.
Picture Credits:
Jeff R Bridgman American Antiques
Swedish Interior With Slat Wood Walls- Tumblr
Swedish photographer Anna Kern.
Norrlands Chairs Lucas Antiques Blog
Swedish photographer Anna Kern
Swedish photographer Anna G. Tufvesson ,
Swedish antiques from Gudrun Ödmann Antikhandel gudrunodmann.com
Picture Credit-masterhenriks.blogspot.com
Swedish photographer Anna Kern

Corner cabinet in red, white and green with a built in Mora style clock. Tumblr
Swedish Bench- Live Auctioneers
Sandemar, Sweden, 17th Century
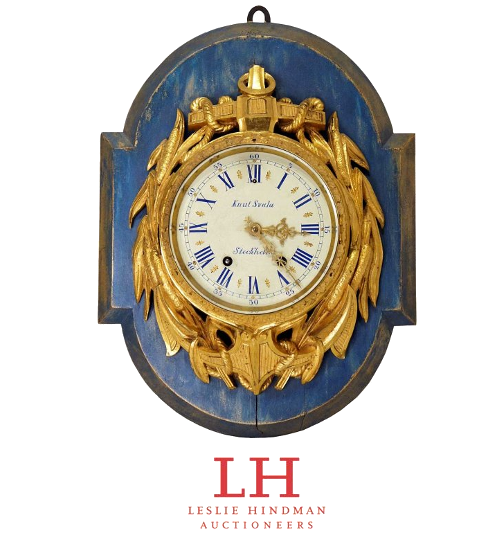
Swedish Gustavian Style Gilt Bronze Cartel Wall Clock,circa
1860, having a heavy bronze case in the form of an anchor draped with a
laurel wreath mounted on a blue painted wooden plaque; the white
porcelain dial has a blue Roman numeral chapter ring encircled by an
Arabic numeral minute ring, marked Knut Svala / Stockholm
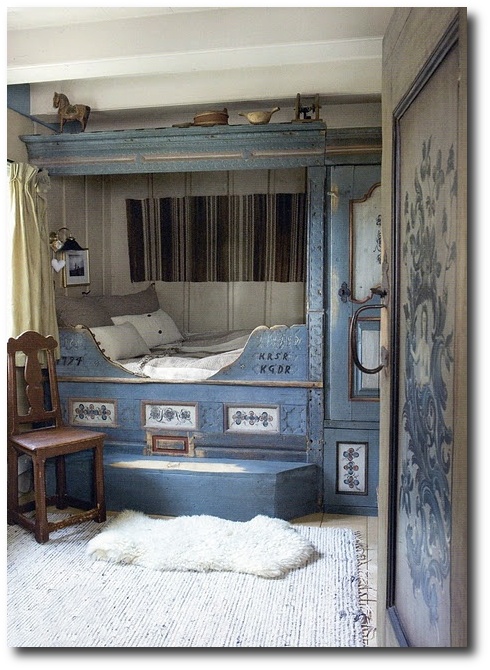
Scandinavian Bed
Folk art painted step back hutch with adjustable shelves, two drawers and two doors.
Scandinavian room scanned from BOOK: The Perfect Country Cottage by Bill Laws
Featured on Glenda’s Blog The Paper Mulberry
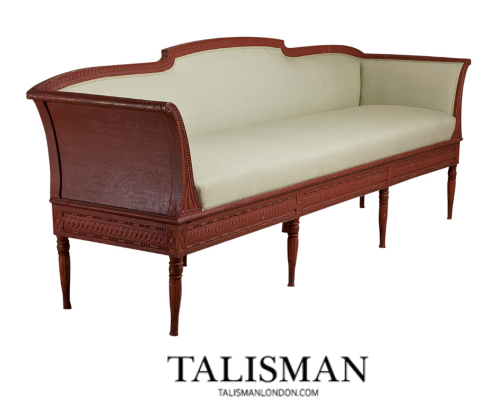
A Rare Swedish Gustavian Red Painted Sofa circa 1790 Reupholstered by Talisman
The Swedish Country House By Susanna Scherman- Buy It On Amazon
Original Pictures Seen On Martha Stewart
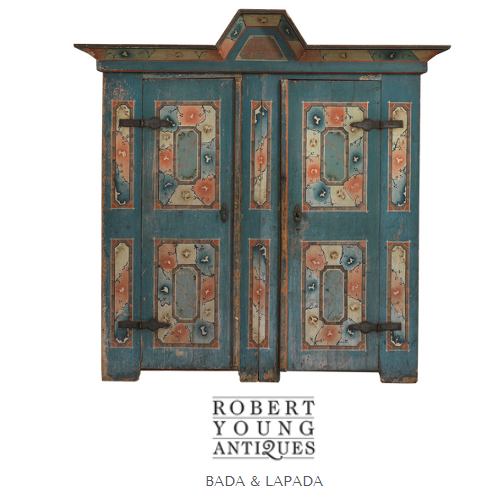
A remarkable late 18th Century Marriage Cupboard, in the Folk Art tradition, made in two vertical sections and surmounted by an arched molded cornice, all retaining the original painted decoration and hand wrought iron hinges. The original painted surface shows some appealing evidence of wear and age and the subtle original polychrome colours have softened and patinated to a delightful chalky dry surface.
Marriage Cupboards of this scale and importance were generally made to special commission for young married couples and were frequently offered by their families, containing woven, homespun and embroidered fabrics. They are also known as “Dowry”, “Brides” or “Wedding” Cupboards and are often associated with the Scandinavian Countries, where there was a strong tradition of Paint Decorated Furniture of this type as in other European alpine regions. The reason they are made in separate sections is so they could easily be de-assembled and transported up to the mountains in summer months, when the agricultural folk would take their livestock up to new pastures.
The extraordinary artwork seen in this social gathering space was painted by Jonas Hertman in the 1770s. The subjects of the murals depict cherished images and events in Swedish culture.
Original Pictures Seen On Martha Stewart
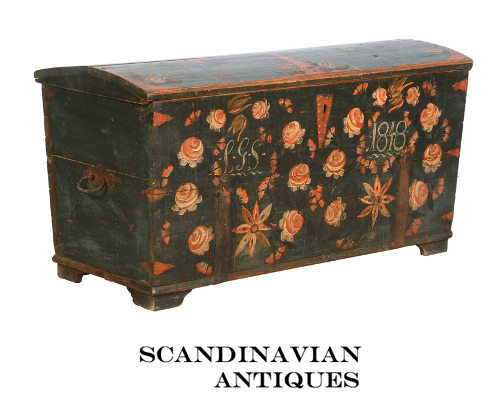 The colorful original paint has been well preserved on this lovely chest. The monogram and date of 1848 indicate it was likely a wedding or anniversary gift.
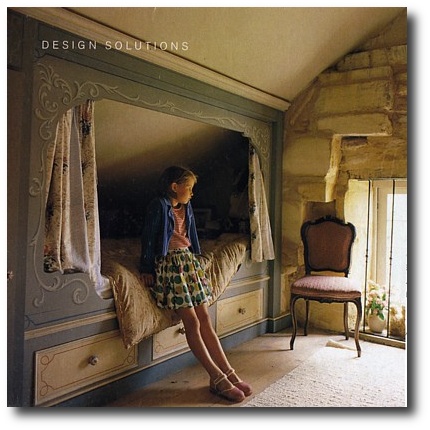
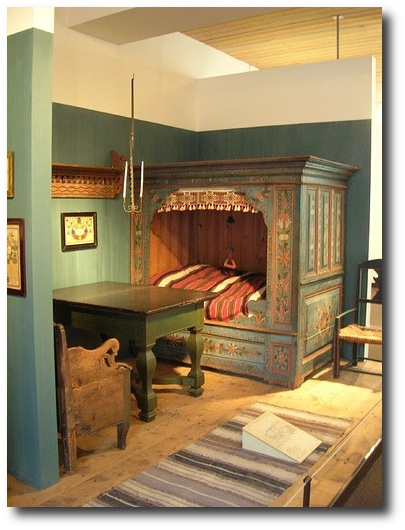
Scandinavian style bed stuffed with charm –Flicker

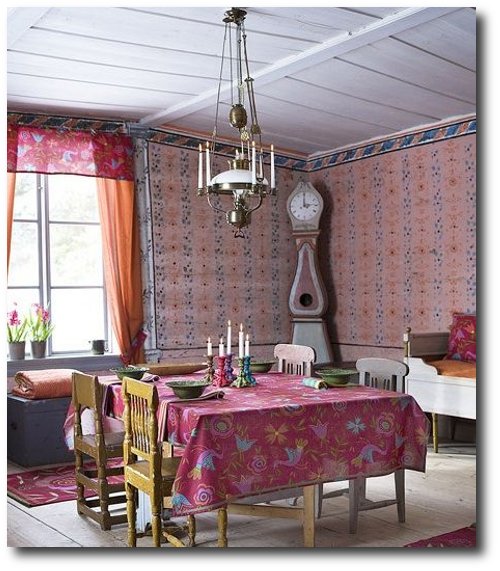
Swedish Folk Art Style- Space For Inspiration
Primitive Corner Cabinet With Astonishing Blue Paint, 3 Beautiful Country Chairs,
Red Antique Chest, -Swedish Wedding Chest Lucas Antiques Blog,
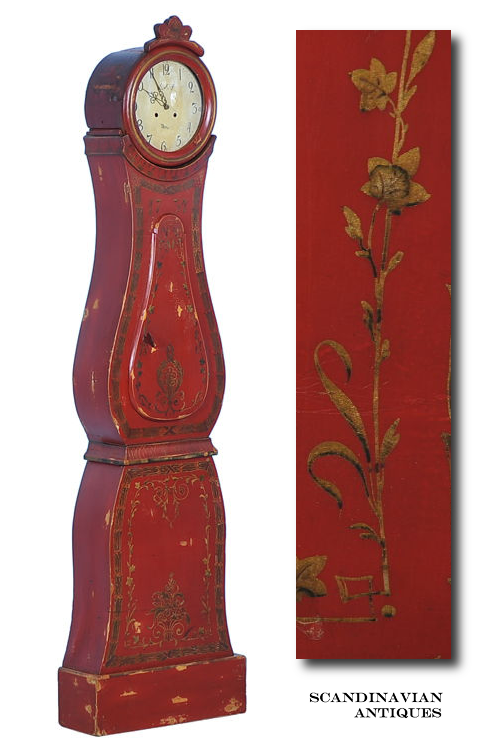
The beauty of a Swedish Mora clock such as this is found in the lovely
curves of the piece itself. In addition, this one had been painted a
deep shade of red and has intricate floral and leaf flourishes in gold
and green (note, paint is newer than the clock case, painted
approximately 100 year ago).
Swedish Mora Clock In Red From Scandinavian Antiques


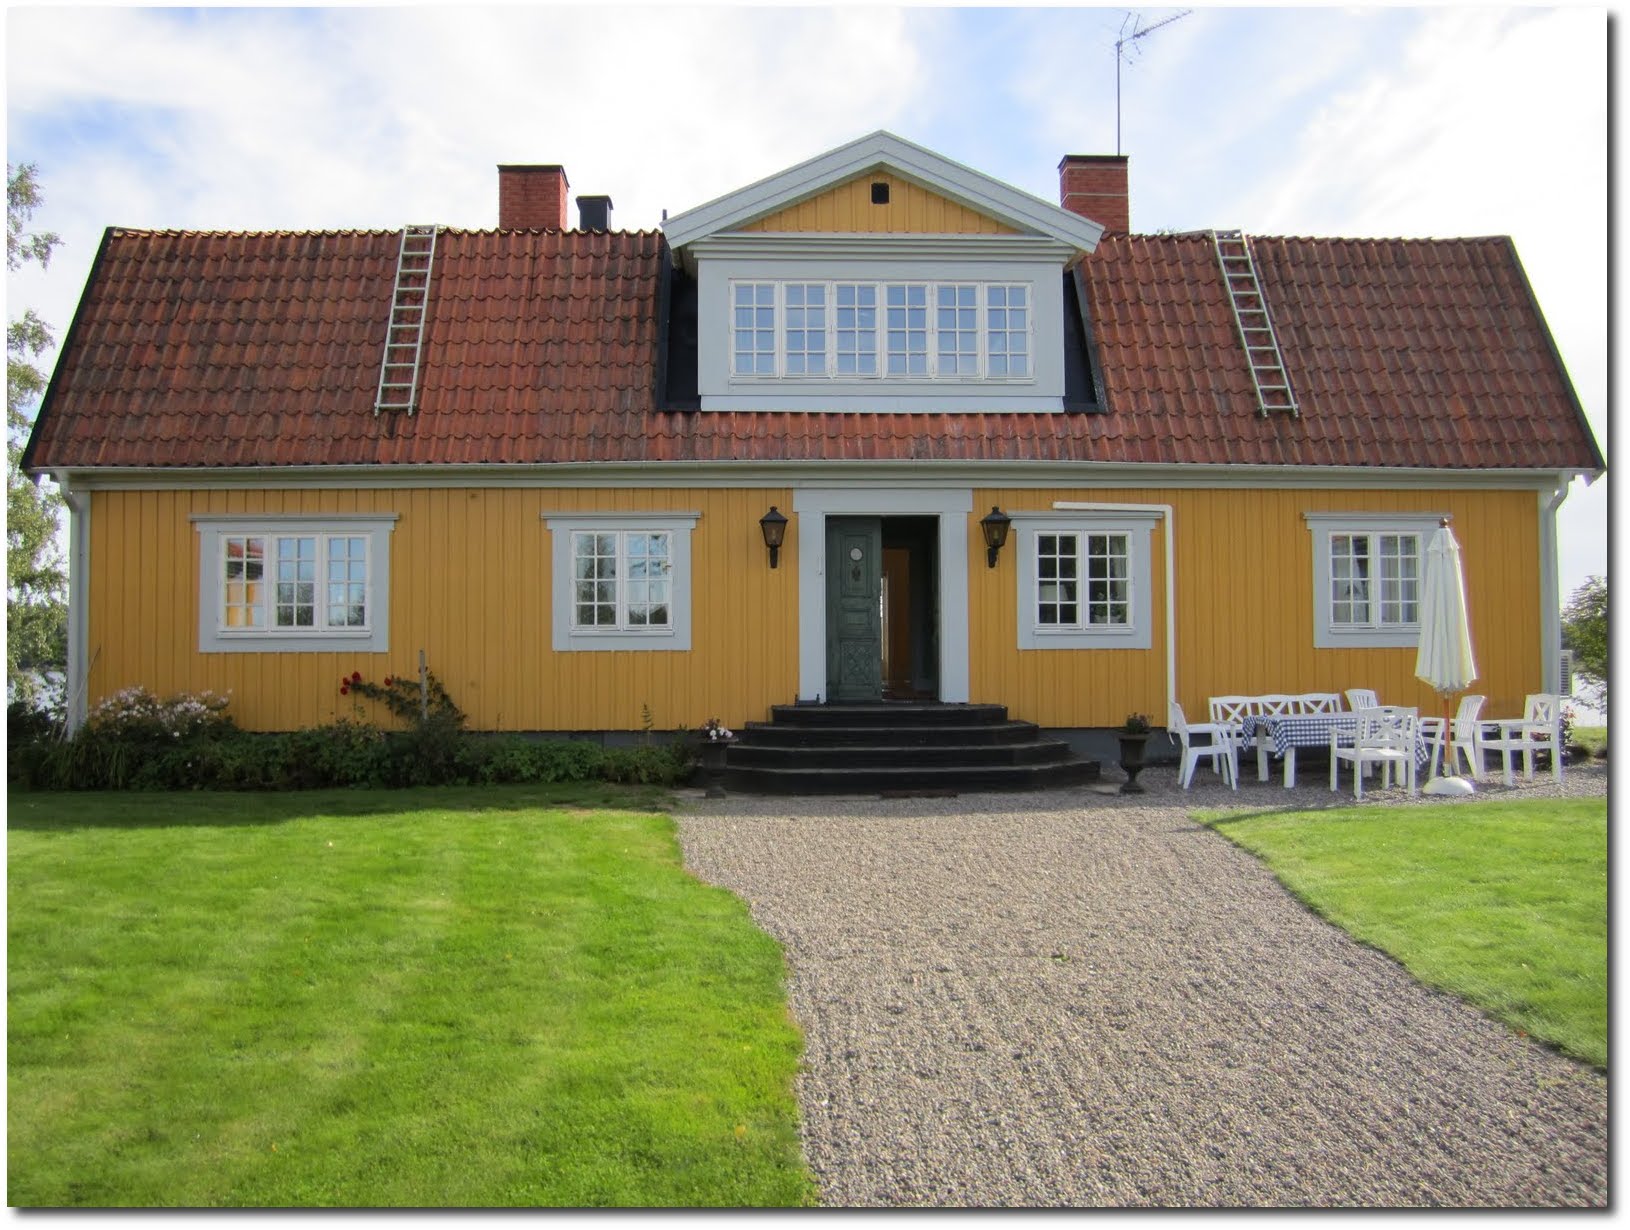
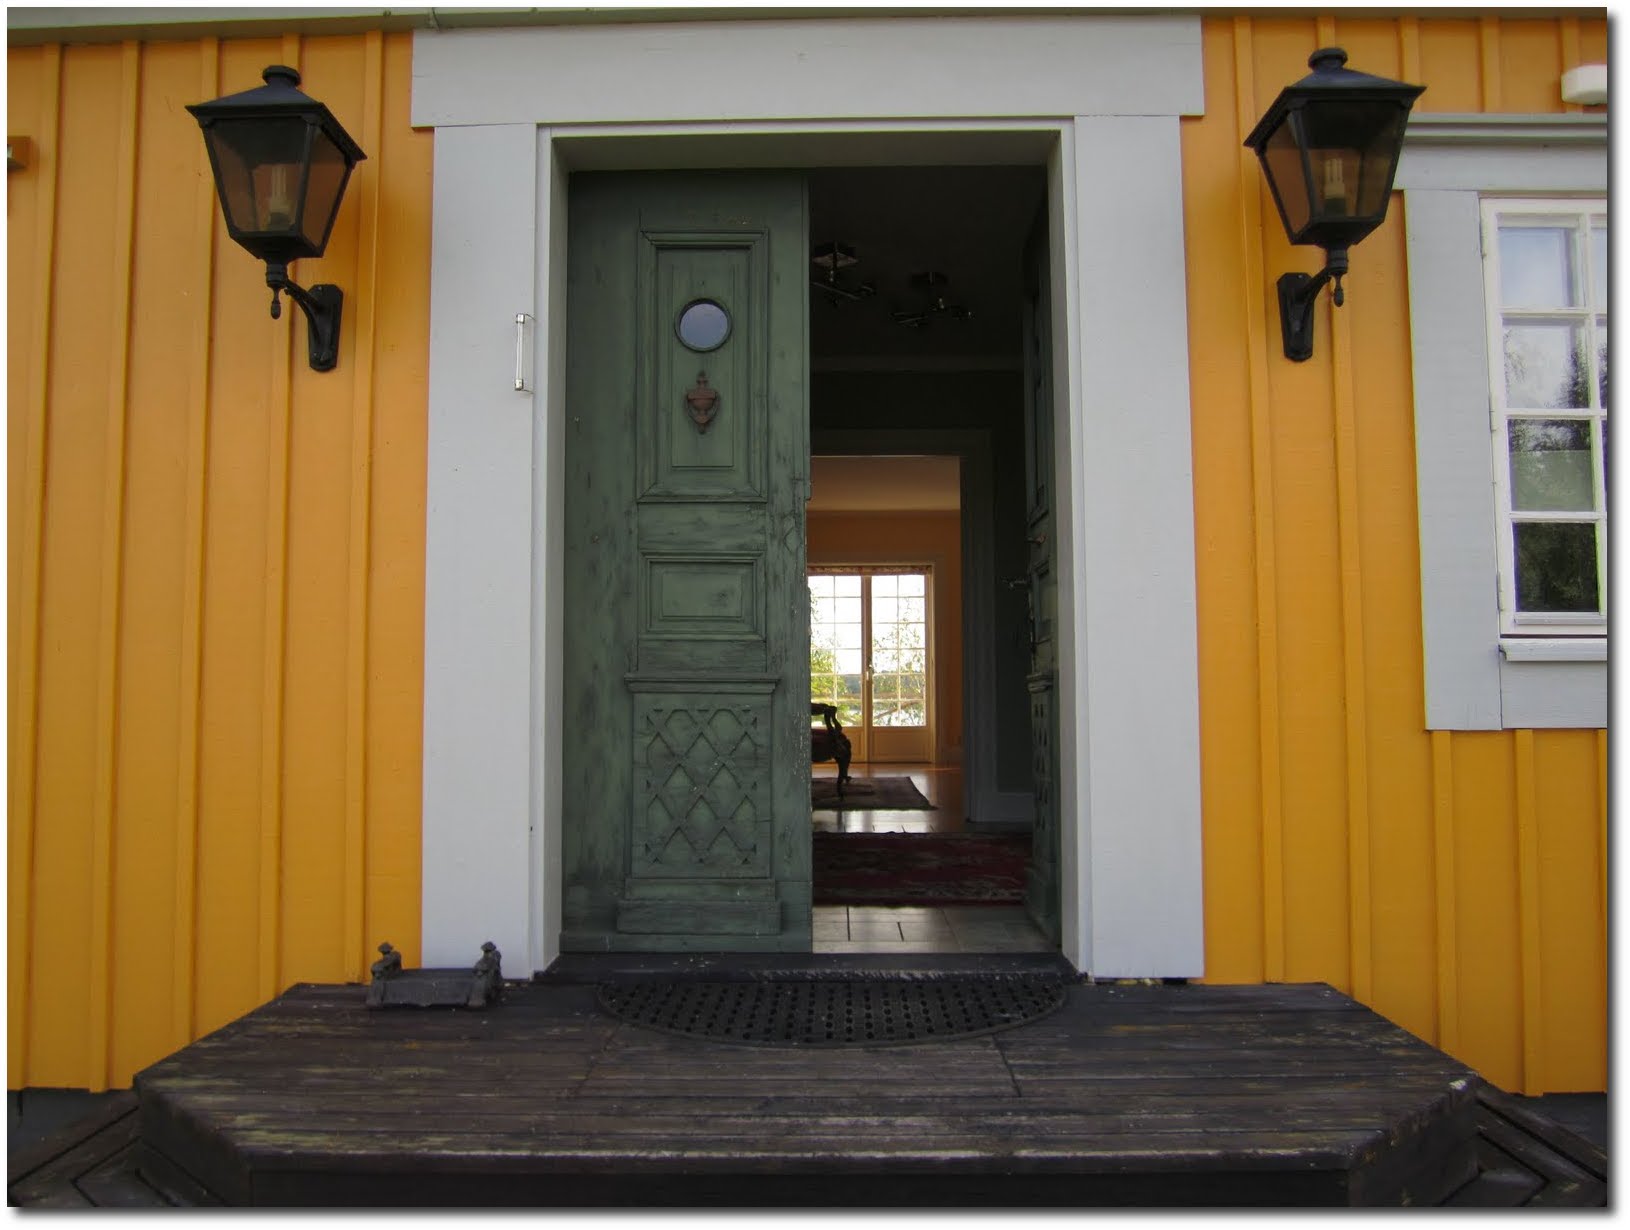
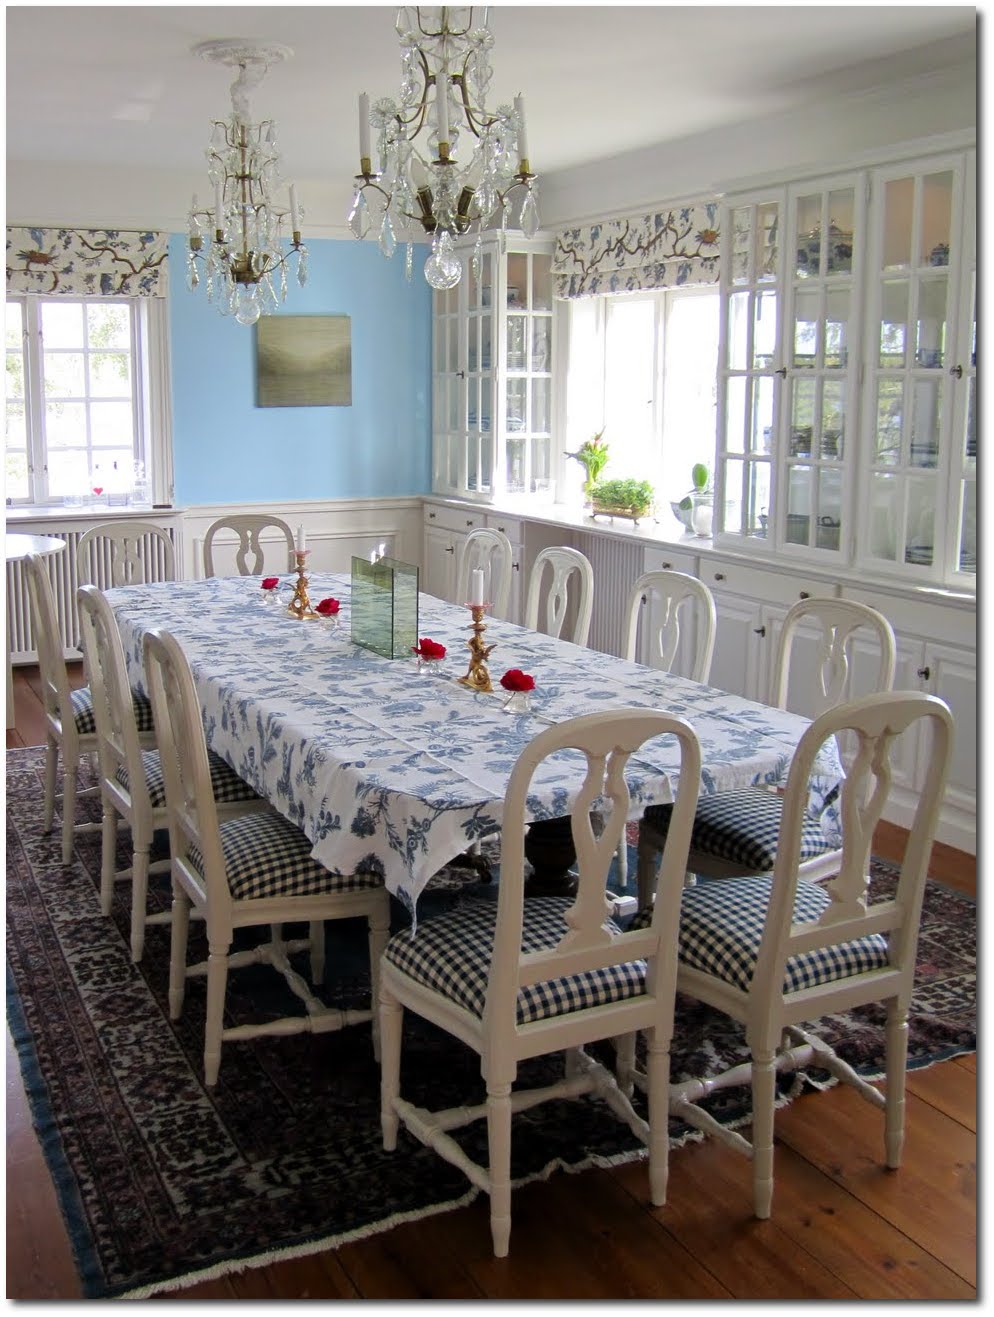
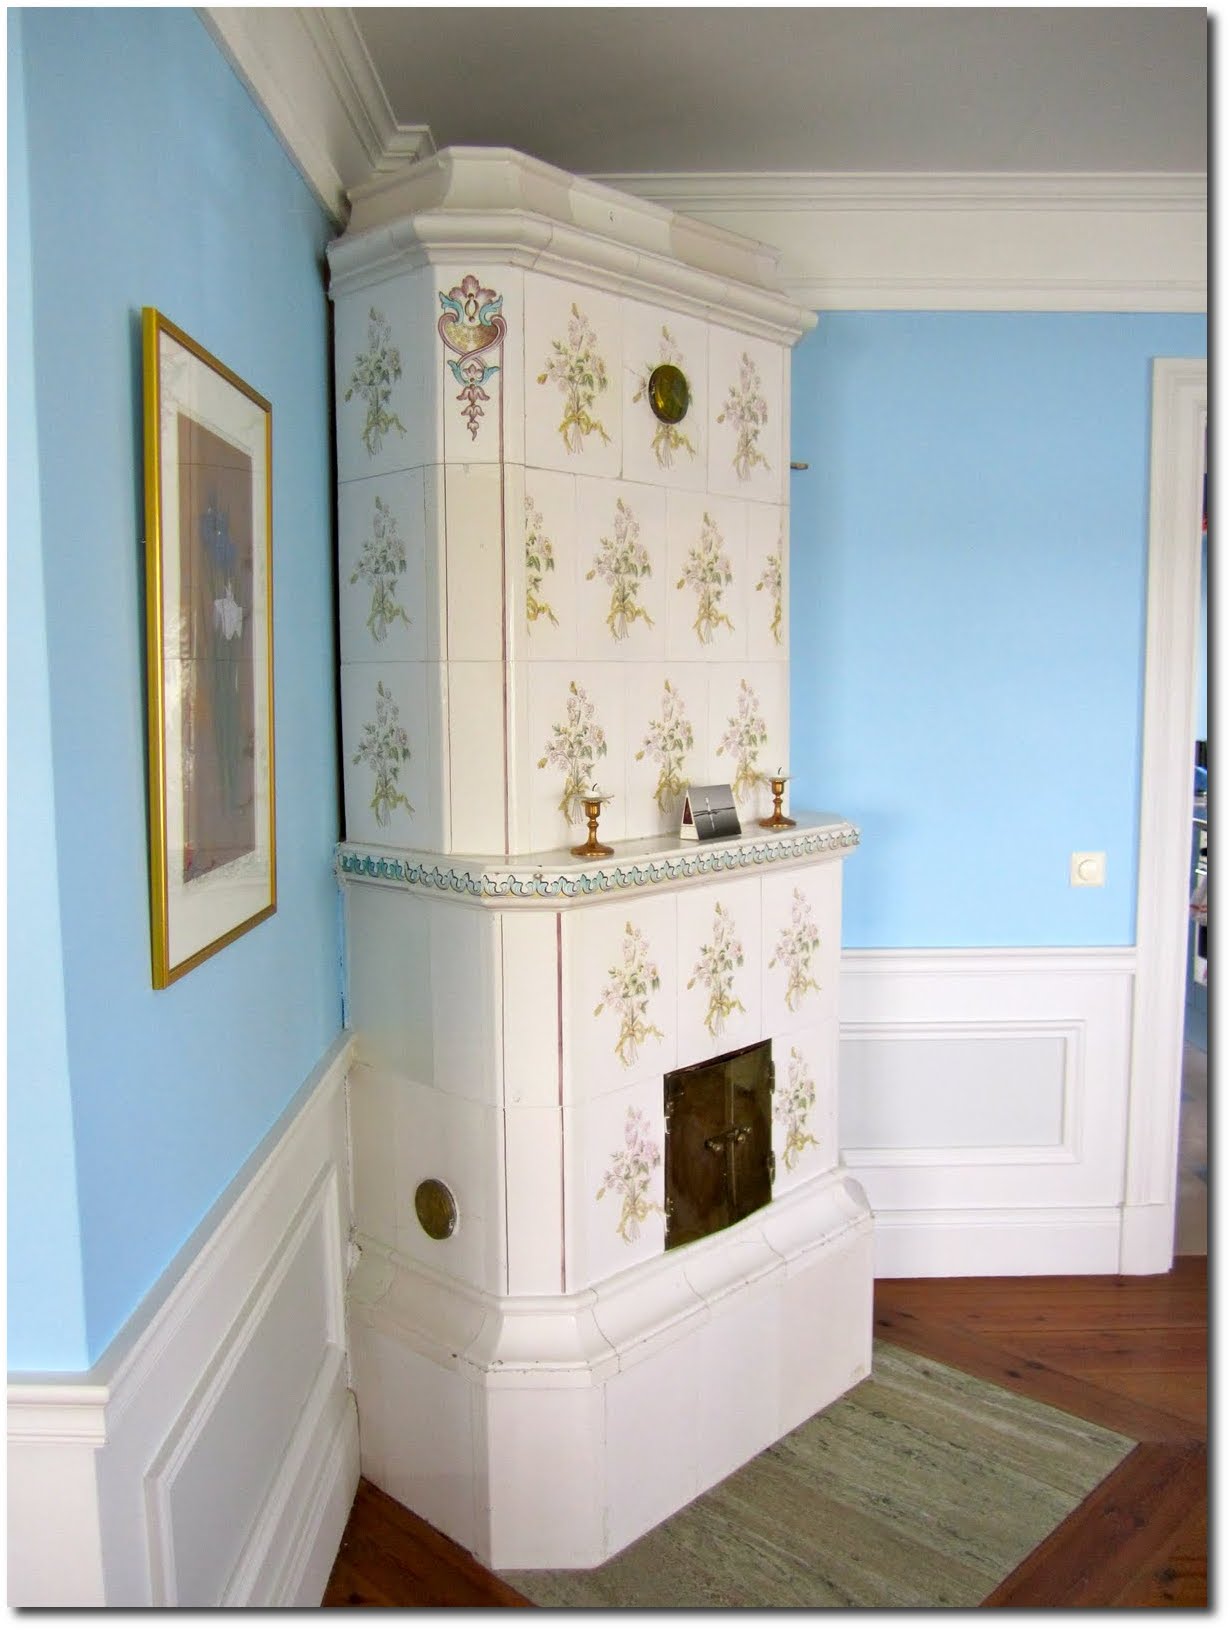

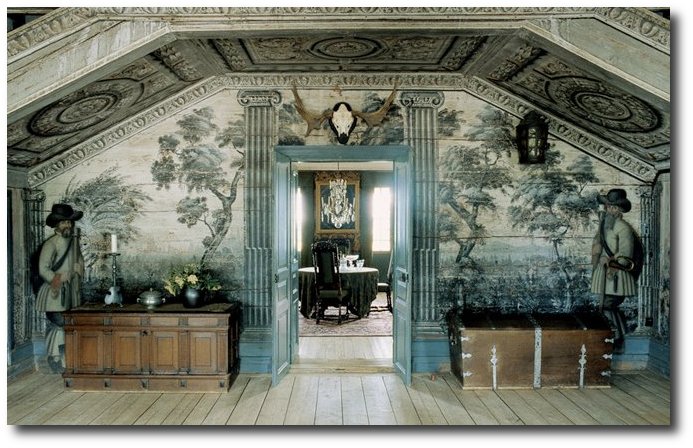
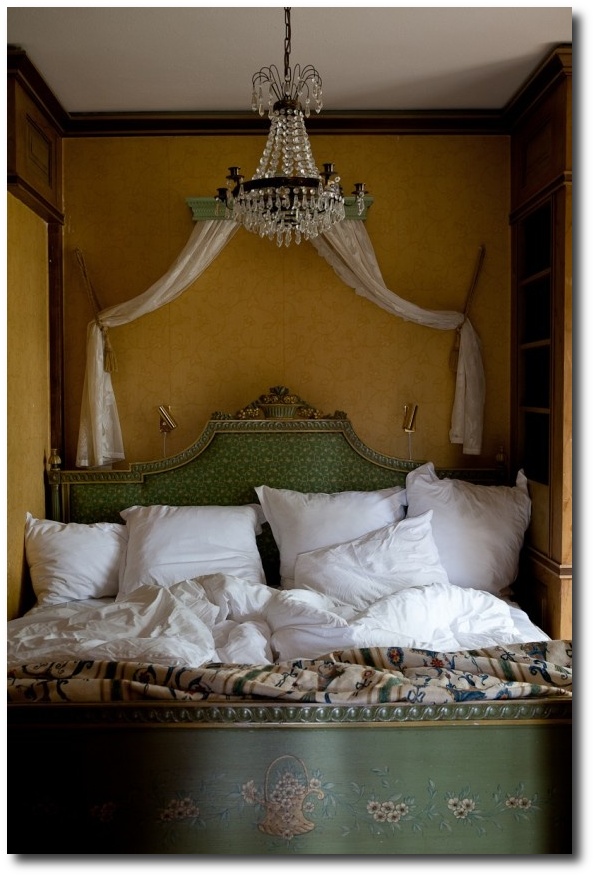
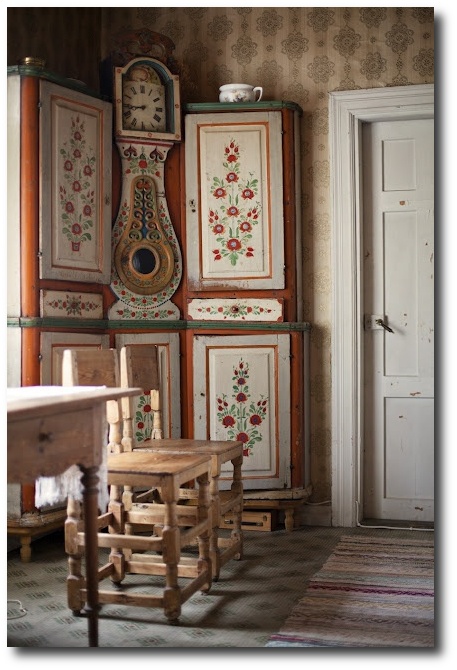
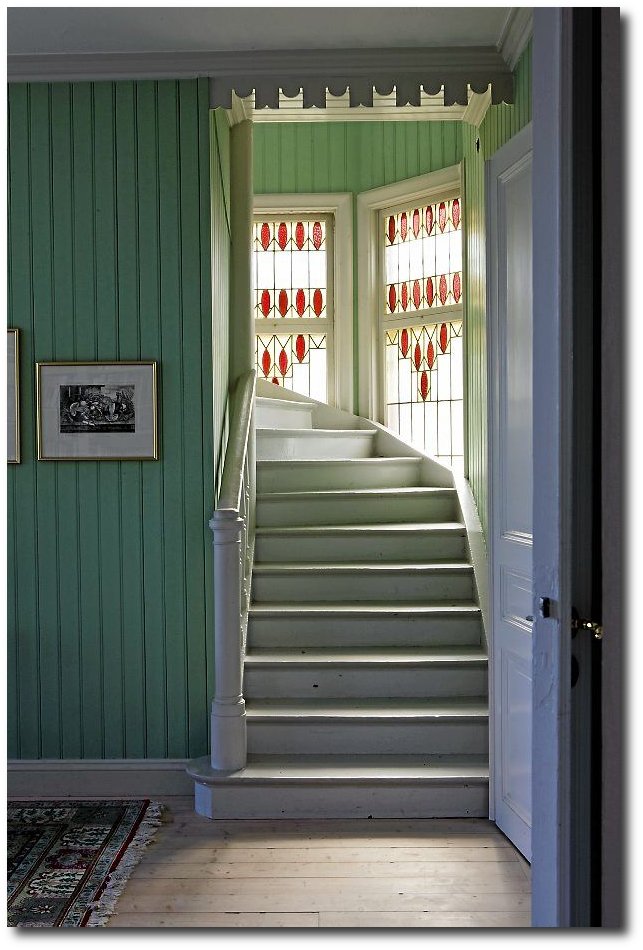
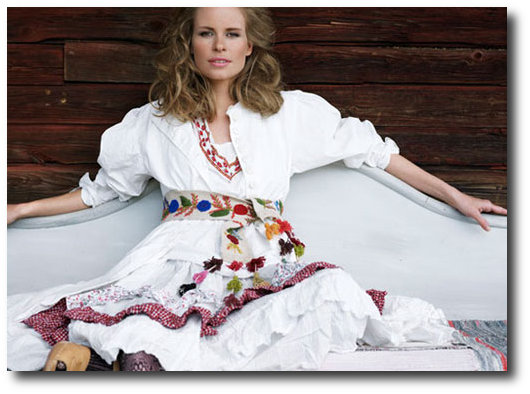
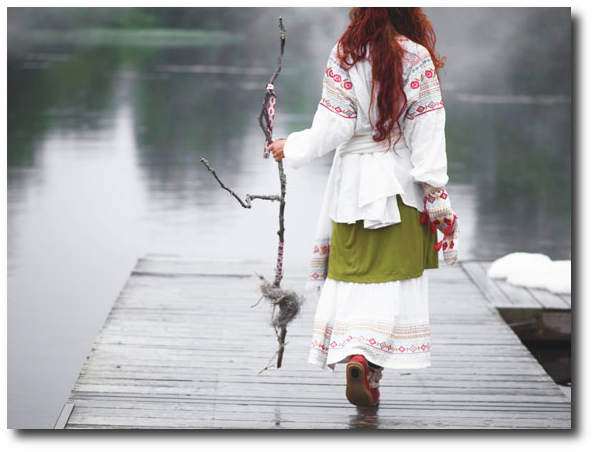
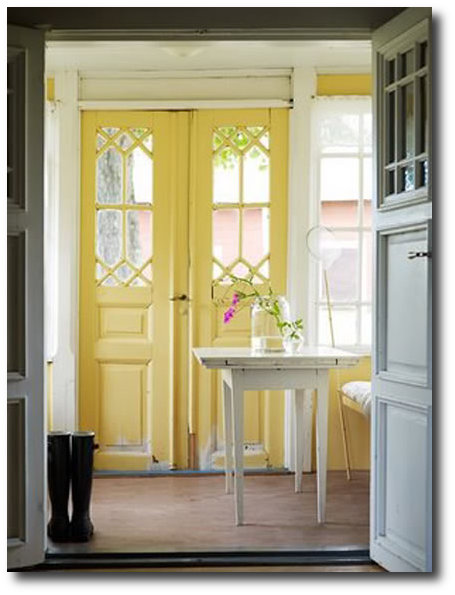
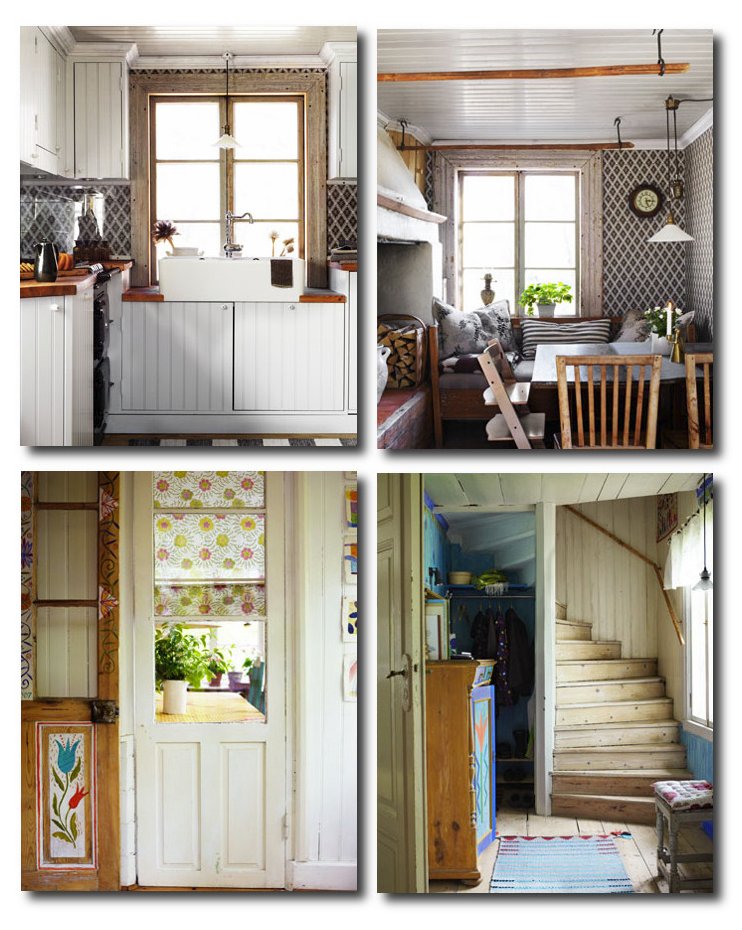
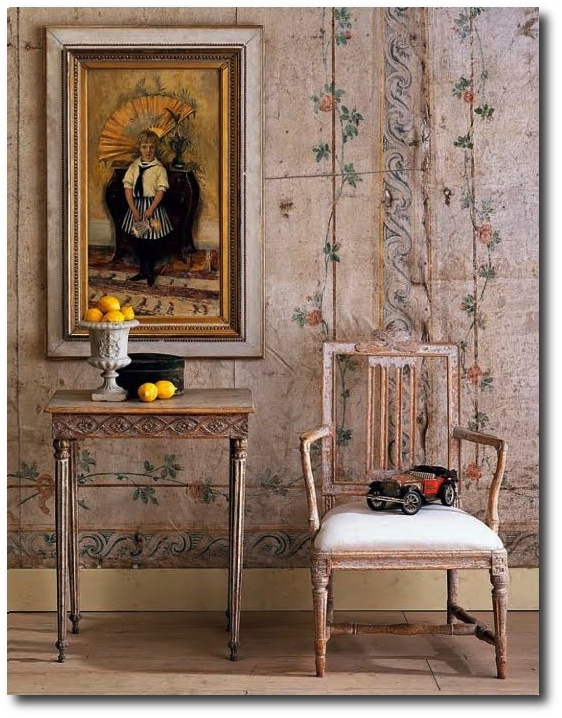
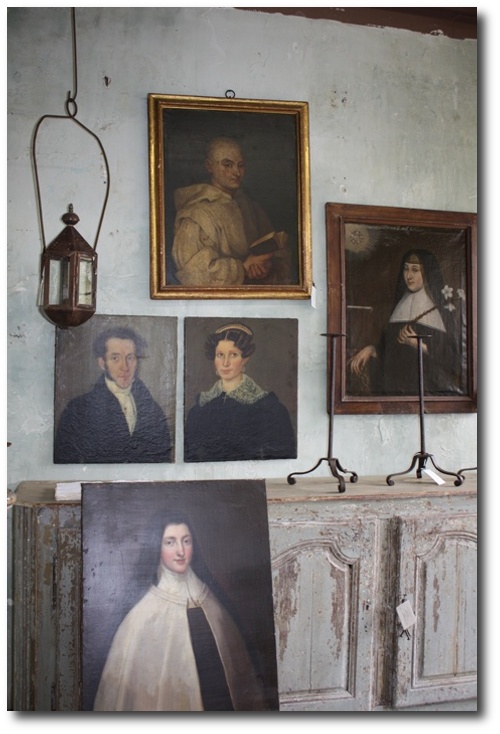
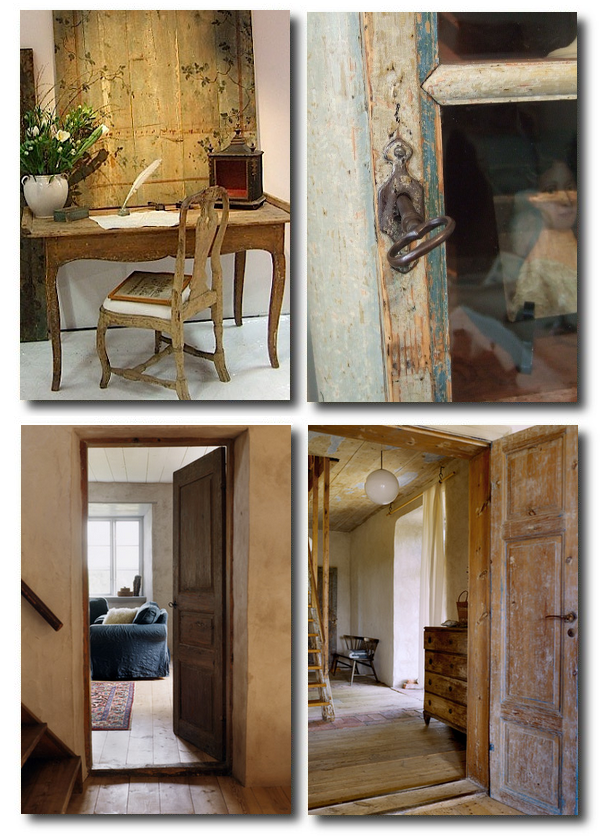


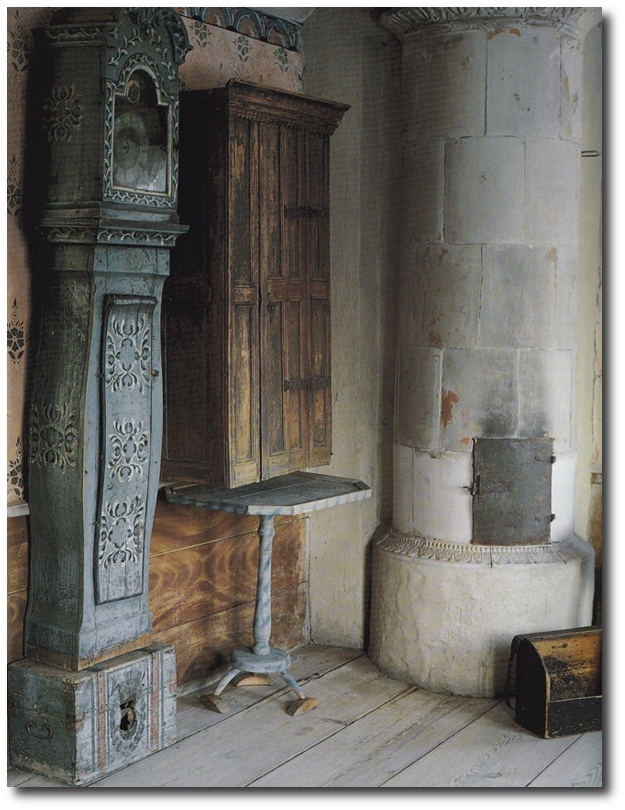
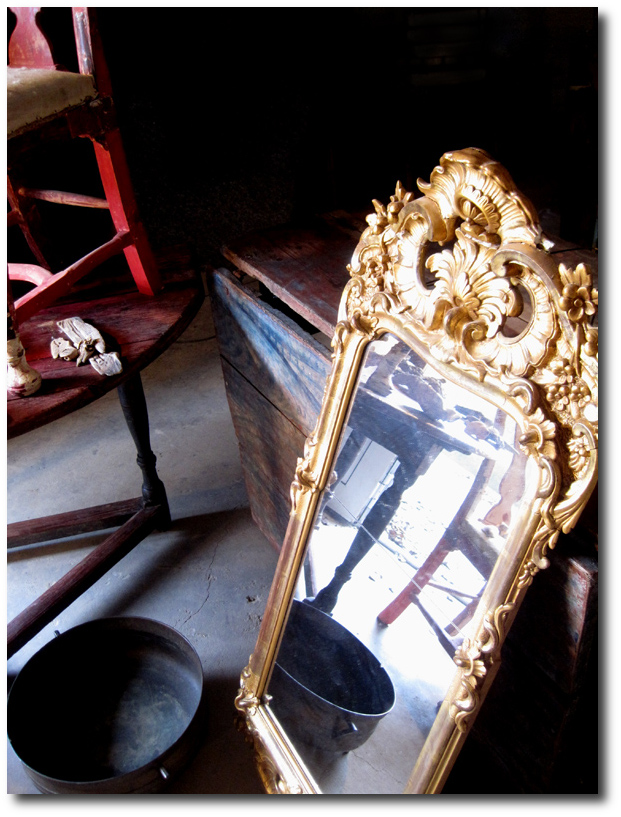
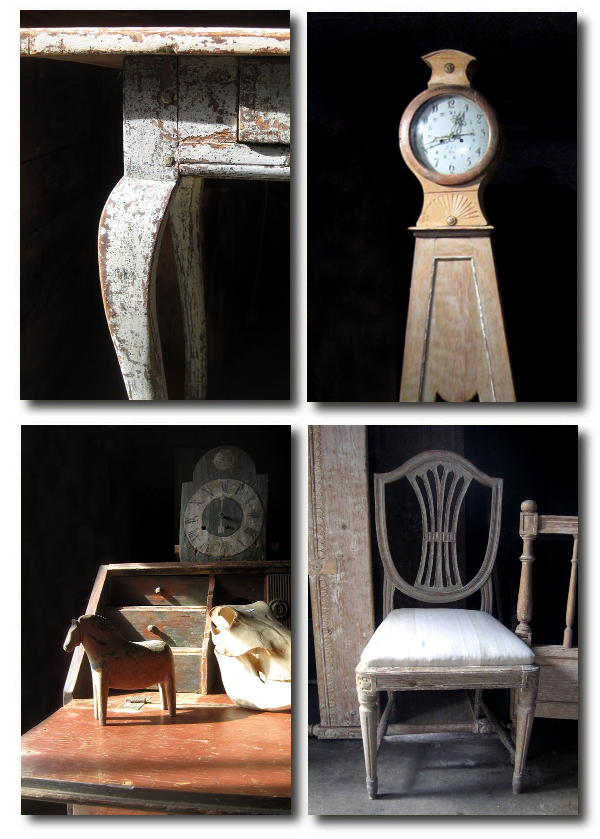
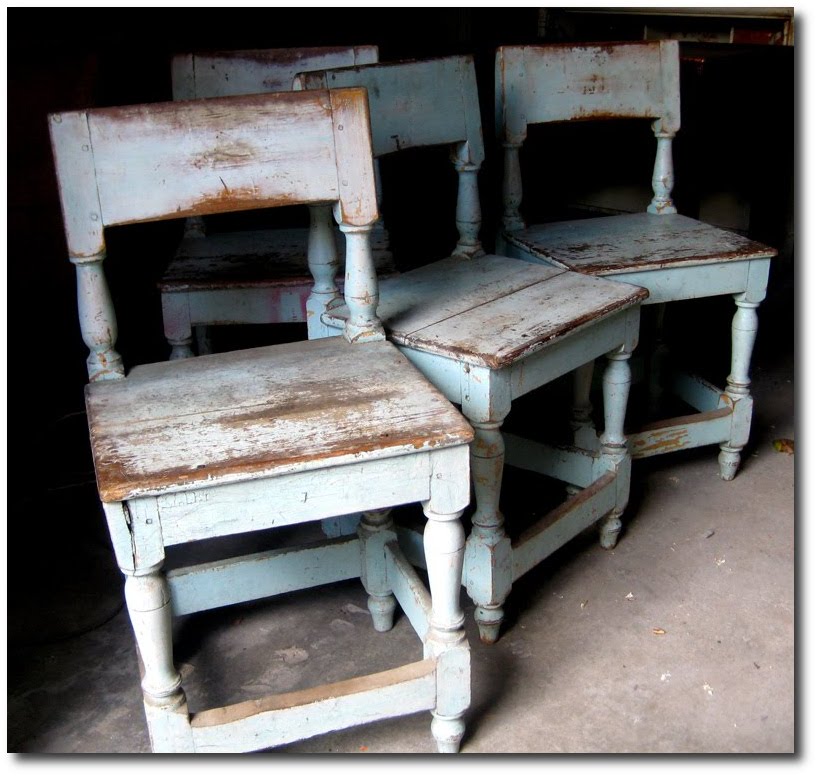
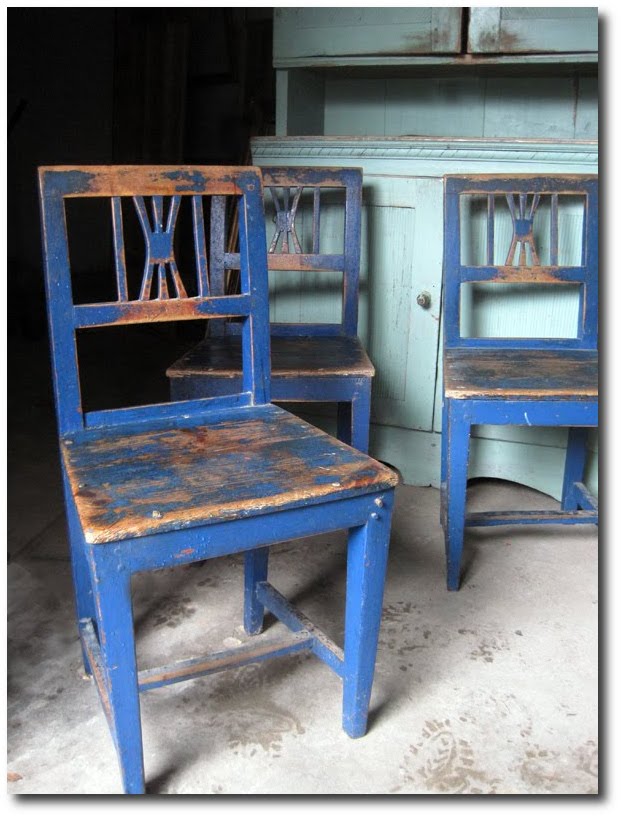


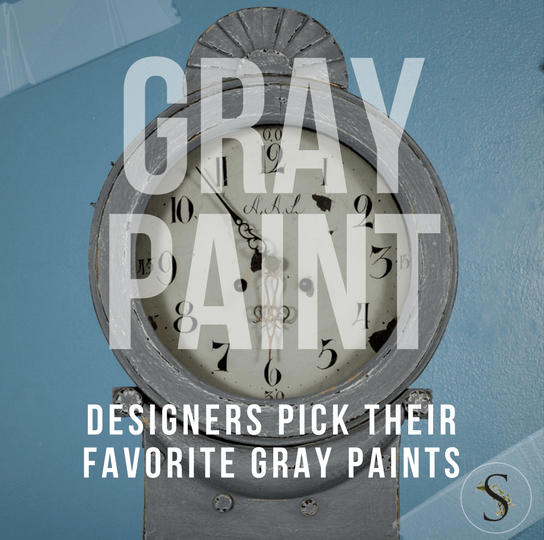
Designers Pick Their Favorite Gray Paints
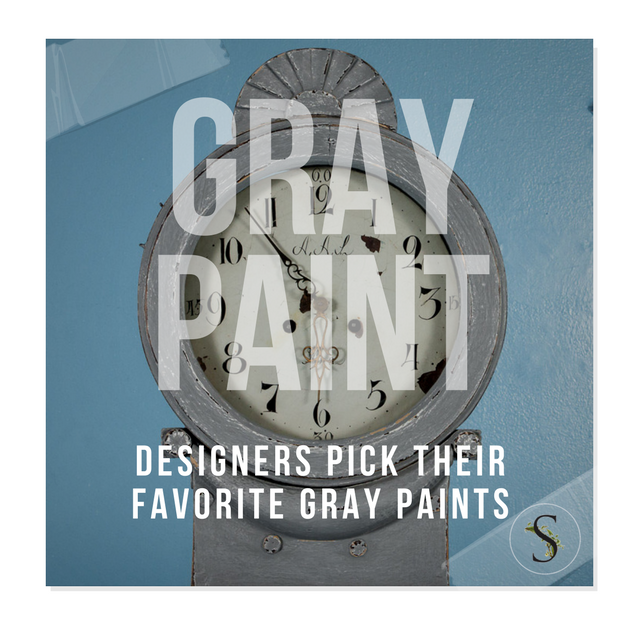
Picture Credit –Scandinavian Antiques Co On Ebay
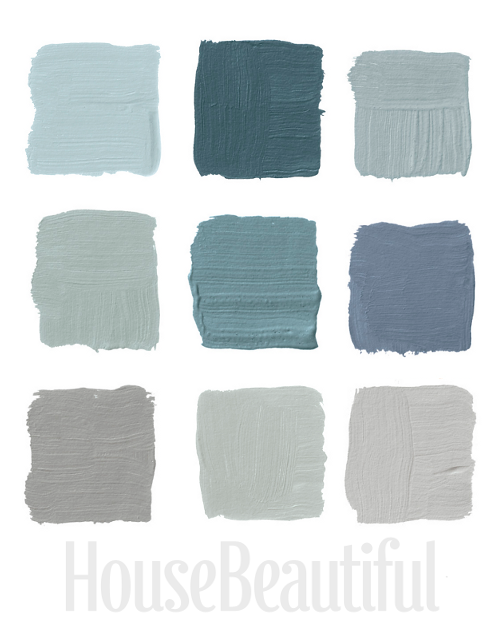
Featured above are the colors, Top Row: Pratt & Lambert’s Argent 1322, Farrow & Ball’s Claydon Blue 87, Farrow & Ball’s Green Blue 84, Middle Row, Farrow & Ball’s Light Blue 22, Benjamin Moore’s Sea Star 2123-30, Benjamin Moore’s Wolf Gray 2127-40 Bottom Row, Benjamin Moore’s Graytint 1611, Sherwin-Williams’s Magnetic Gray SW-7058, Benjamin Moore’s Stone Harbor 2111-50
Home Beautiful featured an article on 26 Designers who shared their favorite Grays. Gray painted interiors can be the perfect color palette for Swedish Gustavian or Rococo antique furniture. Gray can showcase antiques like no other color, because it is neutral, and doesn’t compete with the furniture and decor. The last thing you want after spending thousands on a piece of furniture, is to have someone notice anything but what you spent your hard earned money on! Pair your painted gray antiques with a backdrop of white gray interior walls and trim, and add a punch of color with your upholstery, accessories, and flowers.
Many of the designers featured in the article, were those of Richard Gluckman, Stephanie Stokes, David Kleinberg, Tori Golub, Stephen Sills, Phoebe Howard, Steven Gambrel, Gerrie Bremermann, and Sharone Einhorn and Honey Walters.
Here are just a few of the designer quotes:
“Mesquite is a flattering light moss green without much yellow. I love it because it doesn’t shout ‘I’m green!’ It says, ‘I’m a very beautiful color.'” –Jennifer Garrigues, Benjamin Moore’s Mesquite 501
“Lago Argentino is a glacier lake in Patagonia, and it’s the most amazing color, an aqua, milky because as the ice melts it pulls minerals off the mountain. I stayed in an inn with a stunning view of the Perito Moreno glacier.” –Suzanne Rheinstein , Ralph Lauren Paint’s Blue-Green GH81
“For me, the most appealing colors in summer are not hot but cool. You don’t need to be reminded of the sun and heat — you’re in it. What you want is a cool breeze through the pine trees, like this chalky gray green.” –Frank Roop, Benjamin Moores Soft Fern 2144-40
“In my cutting garden I have morning glories climbing over a lattice obelisk painted this wonderful silvery sage green. It reminds me of lavender leaves.” –Michael Whaley, Benjamin Moores Cedar Grove 444
“I have a big, hugely functional Georgian Revival lawyer’s desk in tired dry mahogany, bought from a tired dry lawyer. I painted it this pale gray-green in an oil-base stain finish, cleanable, very calm, but not so pale that it dies. The gimmick is the old-fashioned desk in an unexpected color. It catches light and makes for a more interesting surface.” –Carey Maloney, Donald Kaufman Color Collections DKC-10
“It’s kind of robin’s egg blue, and with mahogany furniture and neutral upholstery, it looks great. I see dining rooms as mostly evening rooms, and this has life to it. It’s very soothing.” –Mariette Himes Gomez, Benjamin Moore’s Sage Tint 458
“Green is the great neutral, all the way from pond scum to soft sage or pale celery. I recently moved into a new house surrounded by greenery, and when I was thinking of what color I might use for a drapery lining, it came to me to reflect the green that is present year-round right outside that window.” –Barbara Barry – Donald Kaufman Color Collection’s DKC-8
“This is the color of the sky in Old Master paintings, when the varnish has yellowed; it’s luminous. Paint just the floor and you’d feel as if you were floating.” –Thomas Jayne, Benjamin Moore’s Heavenly Blue
“In my cutting garden I have morning glories climbing over a lattice obelisk painted this wonderful silvery sage green. It reminds me of lavender leaves.” –Michael Whaley, Benjamin Moore’s Cedar Grove 444
 Gray Painted Swedish Furniture – Laserow Antiques

18th Century Swedish Tray Table – Jacqueline Adams Antiques

This mirror would have been part of a room paneling. It features a beautifully hand carved and gilded top panel of a basket with flowers and grape bunches before crossed mallets and grape branches and is surrounded with a square, gilt molded frame. Beneath is a square mirror framed with a beaded, molded edge