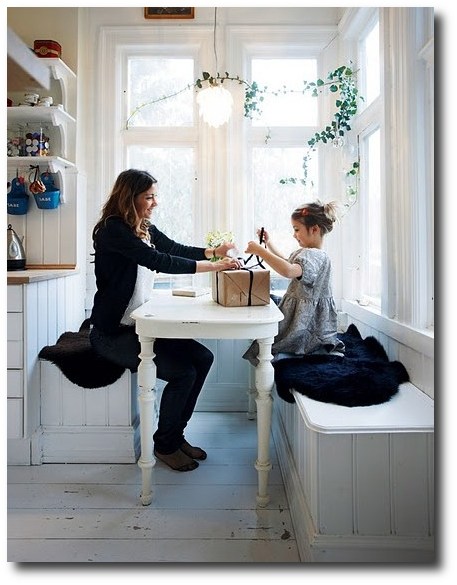
Painted Wood Flooring, A Swedish Design Must Have – Part 5
Painted wood floors are making a come back, and we believe that painted floors will become even more popular than we see today. In the past, finer homes installed decorative parquet floors and inlaid patterns. In the 17th and 18th century paint also was the means to create these decorative patterns on the floor, many which mimicked parquetry. Painted wood floors made it possible for more light to enter into the home, as the winter season in Sweden was quite dark. Rustic unfinished wood over time, darkens, and painting the wood just seemed like a practical approach of having a brighter home without spending a bundle.
Raw wood accepts paint so much nicer, and allows the paint to distress beautifully over time. Sanding wood, allows the paint to soak into the wood, compared to painting over varathane floors which may scratch easier with foot traffic. Homeowners with existing floors often have to carefully think carefully about how they go about re-finishing their wood floors,because the process can be pretty involved. Refinishing wood floors can seem more labourous than painting, and often times it is. Sanding wood floors can be a time-consuming task.
There are a couple steps that cannot be skipped and we list them out below:
1. Prep
This involves removing your furniture from the room. Once you start belt sanding the floors, there will be dust everywhere. It can be a bit time consuming sealing off the house with drop cloths, or plastic tarp, but it is necessary for a great finish.
2. Sanding
The most time labourous part by far is sanding. Using a belt sander will kick up a ton of saw dust, and cleaning up the dust, which ends up everywhere becomes a tedious job. Sanding an entire floor can take up to 4 hours or several days depending on the size of the room.
Renting industrial professional tools saved my husband and I a lot of time when we refinished parquet floors in a rental in Virginia. Drum sanders are large machines that can handle large floors, and are very easy to operate. Drum Sanders can be rented at around $40 to $50 per day. I would highly recommend it than using a small scale sander that you can buy from a Hardware store.
Most homeowners choose to rent the specialty equipment and then purchase the more standard tools at their local hardware stores. Edge or orbital sanders are terrific for sanding the edges of the floor that the drum sanders cannot reach. A handheld power tool lets you tackle the tight corners, and are worth purchasing outright from Home Depot or Amazon. They allow you tools for additional furniture projects in the future.
3. Staining, or Painting
While everyone in the design community has their favorite paint brands, I would highly suggest going with a oil based paint. Oil holds up longer and has a tougher finish than any water based brands.
I would highly suggest sanding your room down to its bare wood, before painting. Painting over an existing paint is always possible, but the extra work pays off when the paint naturally distresses over time, which shows the wood through rather than an unsightly under color.
Sanding down to the natural wood also allows you to pickle the floors. White washed floors in my opinion are much nicer than painting the floors, because the wood gives the room a bit of depth and natural appeal.
In this post I show a photo of the Behr Wood Stain that is highly recommended. The stain is available in a number of colors, and evens out nicer than just paint that is mixed with water. Behr has a number of colors available that are off white, gray, beige that would work nicely with the Swedish interior schemes. Mixing paint with a bit of water or stain work rather nicely.
Many people suggest applying paint with a professional paint brush which gives a smooth finish, rather than with a roller, which creates a stippled finish. Today you can purchase smooth rollers which can be used with extension pole to apply paint. Rollers are inexpensive ranging from $4 to $7 per pack. A pole will be anywhere from $5 to $40, depending on length and material.
You can choose a variety of different approaches with your paint choices….
If you decide to work with an existing painted floor, a great oil based primer is “Coverstain by Zinsser” This paint can be tinted almost any lighter color, dries very fast, and can be mixed with most other oil paints. Coverstain is in fact a primer that will adhere to almost anything, and would be a fantastic choice for the floors.
One gals review of Coverstain -“Zinsser oiled based primer is like gold”
(Please note that Kilz or Coverstain primers should never be used on concrete floors. Go to Lowes or Home Depot, and buy stain or paint made just for concrete floors. Concrete stain doesn’t flake off on concrete like paint does)
As a top coat on your wood floors, you can purchase a Water-based polyurethane clear varnish, to seal in the tinted paint, or purchase water based, or oil based paint for your top coat. I have tinted this paint many shades of gray, blue, green and yellow. It is marvelous on furniture. This primer dries flat, allowing almost any other paint to be applied to it. It serves as your primer and your base paint, allowing you to just then seal the color in with a water based sealant.
If you are working with a previous painted floor, floors need to be sanded for the paint to stick properly. The worst is when you skip sanding, and the first time you move a furniture piece only to have the paint come off in sheets, or scratch. You will have regretted not sanding.
Sand first, and then paint the floors with a paint formulated for the flooring. We had painted our deck with paint formulated for the outside, and we are so glad we spent the extra money, because rain or snow, the paint hasn’t chipped.
4. Sealing
Polyurethane is an oil based sealant, that is NOT suggested for lighter colored paints. If you use this over your floors, in a week or a matter of days, the floors will have a tinge of yellow. You might then have to consider re-painting your white floors.
Polyurethane works perfect on unpainted wood, or on darker paint colors such as red, navy, black and so forth. A water based varnish is required for lighter based floor colors such as light gray, white, or cream.
You’ll have to wait 6 hours for each coat of polyurethane sealant to dry. It is recommended that most floors require at least 3 coats to achieve best results, and many professionals suggest 24 hours in between each coat of urethane. It also takes up to 3 days before you can move furniture back into the room and walk on the floors again.
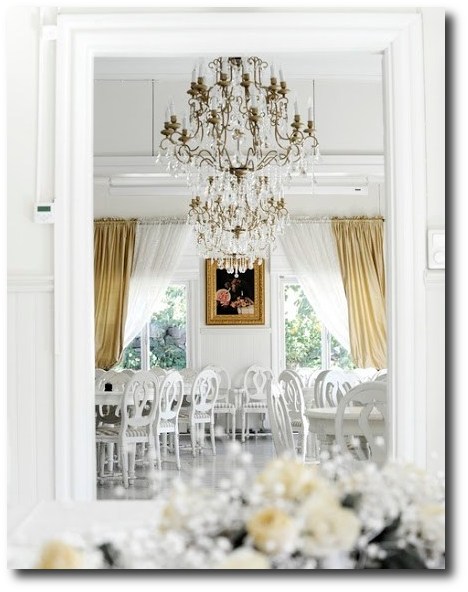
Onni Hotelli Kuvia Picture Credit Ranskalainenpatonki.blogspot
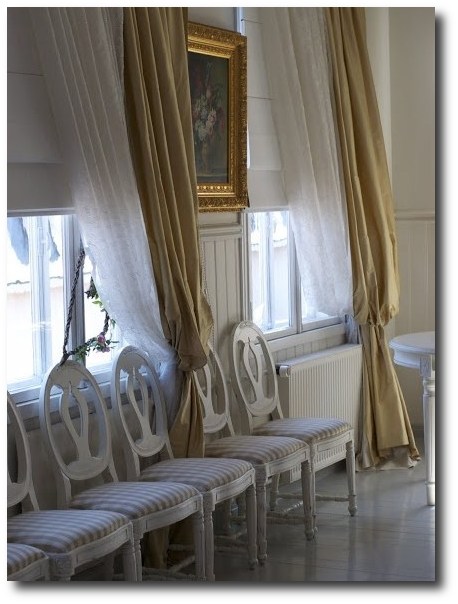
Onni Hotelli Kuvia Picture Credit Ranskalainenpatonki.blogspot
Belle Maison Corbeille Bed- Featured in Swedish Decorated Room With Painted Floors

Blue Painted Wood Stairs
A Colonial Floor Makeover by Sara Kate
Sara Kate and her husband painted their summer house floors in an oil paint. Here are some of their remarks……..
“Moving the furniture was easy, the problem was working with the paint. I made a big mistake in laying the second coat on too thick and painting on a rainy day. The humidity and the thickness caused the paint to wrinkle, clot and appear dull and matted. I had to work hard to undo my mistake.”
They suggest using a Polyurethane based porch and floor enamel. After cutting the edges with a
brush, roll on a thin coat with a 1/4 inch roller. Keeping the heat on insures the paint will dry fast. He then suggests to roll at least two more thin layers and allow at least 24 hours between coats
Here are a couple of tips from the comment section of the article.
“Three simple lessons from eveyone’s paint woes: 1)PRIME- Frankly, no one wants to do this but priming is not a paint company scam – especially on a floor. Primer is NOT paint (anyone who’s had the lowly job of brush cleaner -such as I- can tell you that primer is much harder than paint to clean out of a brush. Pros, in my experience, will often designate some brushes for primer only). Think of it as glue that will hold the paint onto whatever’s beneath it. (and, yeah, tinting the primer is a nice trick and the paint store should do this). 2)PATIENCE. I assume you are all painting with a gloss finish. 24 hours minimum on this. 3) Relax with the dusting! Dust falls. Your sweet new floors are gonna trap some dust as they dry. “
“An alkyd paint dries overnight, but takes 28 days to cure to maximum hardness.”
“A response to a fainted floors in a rental apartment- I know you didn’t want to put down a rug to lighten the floor, but how about painting a floor cloth? You can get a large canvas drop cloth from a home improvement centre, Paint it with any kind of paint you want. After it is dry, put at least 2 coats of polyurethane sealer on, letting dry completely between coats. You are in control of the design, you don’t have to worry about putting the floor back to a rental state because you can lift the cloth and take it with you!”
“Katherine – A Painter – To those who asked about painting various surfaces, and those who asked about primer: Sanding and primer are twin keys to getting paint to adhere to almost any surface. Start with a clean surface — remove grease, wax, and anything chalky. If there’s any gloss or if you’re concerned about adhesion, do a light sanding with 150 0r 200 sandpaper. On a floor, you can use a floor sander with a screen… available at a rental shop. All you want to do is de-gloss so the primer has something to hold onto. (If you’re going over polyurethane, you have to scuff it up diligently, because poly doesn’t want to stick to anything.) Then prime with any of the primer-sealers that mention “excellent adhesion” on the label. Kilz, BIN, Bullseye… these are a few of the big names. A water-based primer-sealer is fine. If you’re making a drastic color change, look for a primer that is int0 tint-able, and tint it in the direction of your final color, but not necessarily matching the final color. The only time you will have a problem is when the surface is already painted and the existing paint isn’t adhering well. There isn’t much you can do about that, short of removing that old paint.”
“Red paint is difficult because red pigments are transparent therefore they need many more coats to give a good coverage – the purer and clearer the red the more transparent it is – burgundy reds and terracotta reds will cover better as they have other pigments in them which are not transparent”
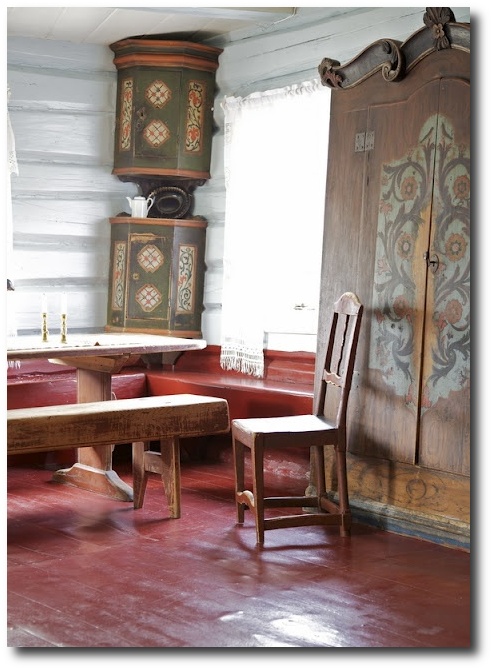
“When I stained my concrete, I got the acid at B. Moore. Instead of painting concrete, stain it instead. Staining is much prettier. B.Moore has many colors of concrete stains. Regarding the wood floors, they are worth so much more sanded and stained. To cut the cost, only hire out the sanding, and do the staining and sealing yourself. You will save at least half. I discovered this myself when some floor guys failed to return to finish my floors. I had only paid a small deposit, and they had finished the sanding. When I realized how easy and cheap it was going to be to finish the floor myself, I was thrilled they had deserted me.”
“All kinds of great coatings for all different applications (floors, countertops, faux stone/granite, etc.) are available at ArmorPoxy.com. I’ve used several of their products and all with great success. Particularly fabulous is the “For Dummies Bath Refinishing Kit”. You can use it on your tub, sink, tile, etc. and it makes everything look like brand new white porcelain. It’s truly amazing and easy to use. I did my bathroom more than 2 years ago and it still looks amazing….”
Another interesting comment-
“Concrete can be a tricky beast, especially in a basement or former garage that might have dampness or oily spills on the floor. You’ll have to clean and degrease the floor thoroughly, and if it has a very smooth, shiny surface you’ll need to etch it with muriatic acid to give it some tooth. There are special primers for concrete floors–use one. It really will make a difference. I painted the workroom floor in my basement without using a concrete primer, and the mineral salts in the concrete came up through the paint. I then had to strip away as much paint as I could, re-prime with concrete primer, and re-paint in order to fix the problem. Don’t be me. Use the primer the first time, and save yourself the headache.
Plywood, chipboard, and particle-board subfloors are easy to paint–sand the rough spots, prime, paint. Use an oil-based primer suitable for raw wood in order to keep stains from rising up through the paint.
If you think you might want to change the color every few years or so, don’t apply a water-based polyurethane, as it will keep future layers from sticking as well. Just paint the floor, touch it up as needed, and repaint as desired. The higher the paint gloss, the better it holds up, so use either high-gloss or semi-gloss, rather than urethane.
Use oil-based primers, yucky as they are. They block stains far better than latex primers, and provide better adhesion. Given how much wear a floor takes, and how much work it is to re-paint, do it right the first time. You can use latex paint over them, and subsequent paint jobs will not have to be re-primed (unless you’ve worn through to bare wood, but spot-priming will take care of that). If you have a really stubborn rust or dye stain that bleeds through oil-based primers, pigmented shellac will usually kill it (it’s the one thing that keeps the Calcimine often used as an interior finish in old houses at bay, and that stuff is pure evil).
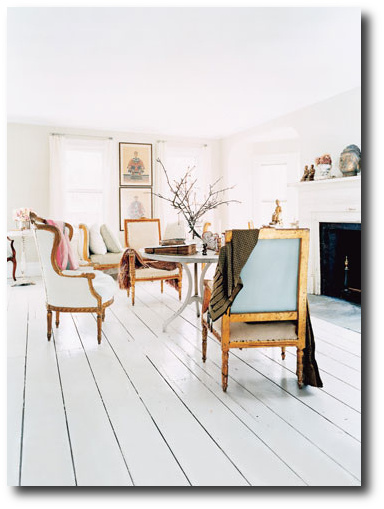 Swedish Flooring Looks From Domino Magazine
Swedish Interiors With White Painted Wood Floors
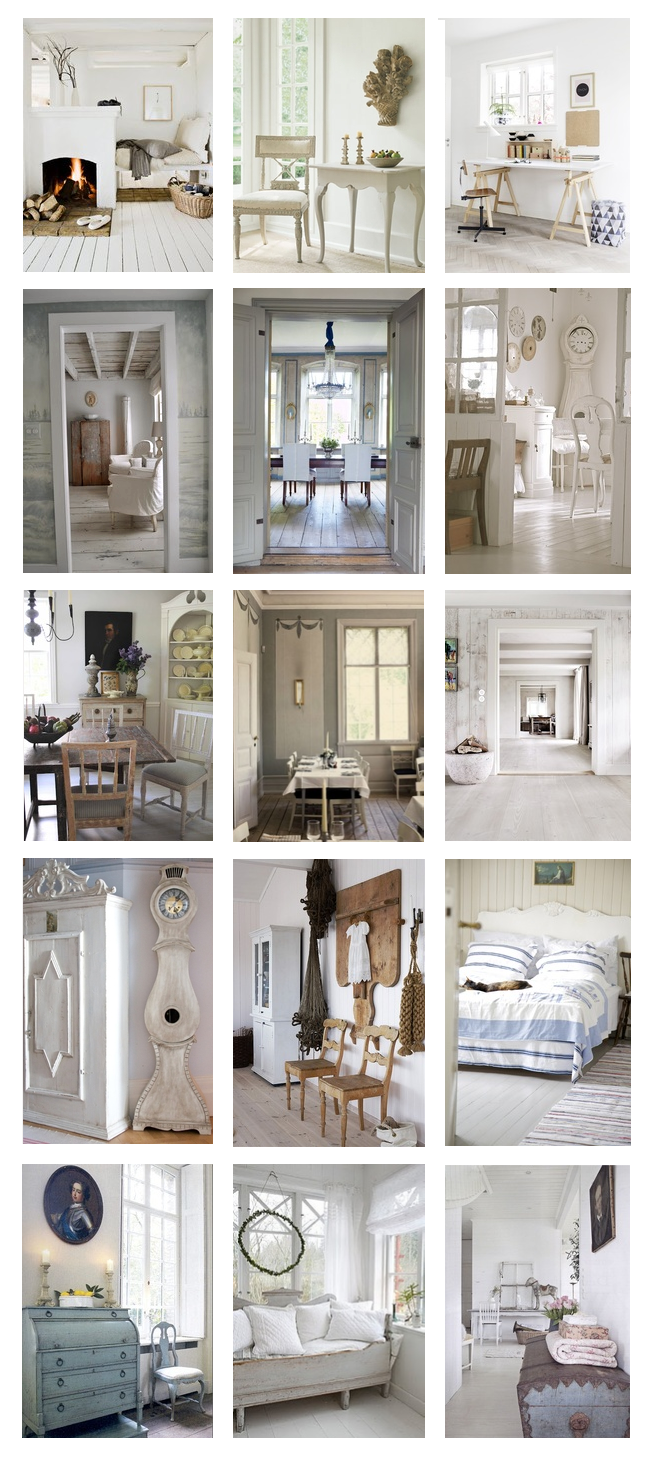 Swedish Interior With White Painted Floors


Quiet luxury inspired by 18th-century Sweden
Light - Patina - Heritage

Restoration Tools
- Matte Topcoat
- Pro Grade Brush Set
- Finishing Sealer In Matte
- Bronze Spray For Hardware
- Sticks To Everything Primer
- Dead Flat Varnish
- Stick To Everything - Matte Primer
- Transparent Aged Glaze
- Sticks To Everything Brown Primer
- Prima Transfers
- Dyke Brown Glaze
- Escutcheons
- Medallion Silicone Mold
- French Key Molds
- Portico Scroll
- Rusty Paint Finishes
Recent Posts
- 200 Swedish Antiques A Person Can Look For
- Rococo In The Nordic Countries
- For The Love Of Collecting Antiques – A Swedish Interior
- Gustavian Furniture – How to get the look – Ulla Kloster
- 3 Swedish Must Haves – Decorating A Home Around Swedish Antiques
- The Beautiful Wall Paintings Of von Echstedtska gården In Sweden
- 400 Professional Designers Picked Green As The New Color To Watch
- 5 Scandinavian Interior Design Tricks – Megan Slack
- 30 Gray Toned Paint Colors For Swedish Styled Interiors – Behr
- DIY Upper Kitchen Cabinets – Lindsay – White Buffalo Styling
- Bringing The Garden In For The Winter
- The Home Office – Why Not Make Yours Unique ?
- The Light And Airy Furniture Of Sweden
- Slipcovers Have Always Been Popular Through Time – Swedish Decorating
- The Couple Behind D. Larsson Interior and Antikhandel – Swedish Antiques
- 6 Colors You’ll Find In Every Scandinavian Home – Laura Barry
- 5 Decorating Mistakes Not To Make – By Gabrielle Savoie
- Designer Marshall Watson’s Scandinavian Newport Beach Home
- Designer Marshall Watson’s Scandinavian Summer House
- Swedish Inspired Kids Bedrooms
- 5 Kitchen Design Lessons You Can Learn from Scandinavian Interiors
- Jenny’s DIY Wide-Plank Plywood Flooring Studio Renovation
- Decor Mistakes All 20-Somethings Make
- Can I Stain Over Paint To Produce A Patina?
- Q&A With Swedish Designers Edie Van Breems and Rhonda Eleish
- How To Avoid Yellowed White Painted Furniture With General Finishes Products
- Colleen Martin, Founder of Swede Collection Tells Us Her Journey Of How She Began Reproducing Gustavian Furniture
- Expect To See More Warm Grays, Blues And Creams In Gustavian Decorating
- 8 Brands Of Gold Spray Paint Were Compared To Find The Best Color
- Essential Characteristics Of 18th Century Swedish Interiors
- Gustavian Style By Kristie Barnett
- 7 Places To Find Swedish Design For Toddlers
- Study Shows The Gustavian Period Has Defined All Tastes Through Time In Sweden
- Mix Old and New Like the Scandinavians Do- Chloe Taylor
- Swedish Furniture Design – What Makes The 1800’s So Obsessive
- 5 Pieces Of Wise Decorating Advice From Tricia Foley
- Impressive History Of Fine Swedish Table Linen
- Linen Has An Incredible History- Find Out Why……
- Life In 17th Century Norway & Sweden
- How To Select The Right Linen For Your Children’s Bedroom- Kids Room Decor Ideas
- Nordic Style Kids Bedroom Decor Ideas
- Decorator Tricia Foley’s Signature White Interiors
- 10 Tips From Interior Designer Furlow Gatewood
- Living In Norway- Norwegian Life In The 18th & 19th Centuries By Elisabeth Holte
- Investing In Mora Clocks – Expert Advice From Jo From Swedish Interior Design
- International Interior Decorating Magazines Worth Buying
- Swedish Council Of America Articles
- 5 Homes Decorated Around The Nordic Style
- Swedish Reproduction Furniture At Solgarden
- Behind The Rundale Palace in Latvia
- Nordic Style Historical Interior Decorating Books – Living Museums in Scandinavia
- Decorating Around Red- Historical Interior Design Ideas
- Florence De Dampierre Comments On Nordic Furniture In Sweden And Denmark
- 12 Designers Pick Their Favorite Paint Colors – House Beautiful
- 7 Of The Most Famous Swedish Furniture Designers And Decorators
- New Research Suggests Swedish Furniture In The 1700’s May Have Had Strong Colors
- Swedish Tripod Tilt-Top Candle Stand Tables
- Decorators Who Have Embraced The Nordic Style – 30+ Pictures
- A Look Behind Skogaholm Manor -18th century Swedish Decorating
- Decorating With Swedish Country Antiques- Darlene Peterson Buchanan
- 12 Interior Designers Pick Their Favorite Swedish Paint Colors
- 50+ Decorating Books Worth Looking At
- Swedish Decorating Inspirations In Yellow, Ivory And Beige- 50+ Pictures
- Decorating Around The Color Green – Swedish Style
- A Dallas, Texas Home Decorated Around The Swedish Style
- 3 Houses Decorated Around The Rustic Swedish Style
- Reproduction Distressed Furniture And Home Decor From Bliss Studio
- Buy The Swedish Style For Less
- 3 Swedish Style Homes Featured In Magazines
- Swedish Antiques From Debenham Antiques
- The History Behind Jean Bernadotte Otherwise Known As Karl Johan
- 5 Faux Wall Painting Techniques That Are Easier Than You Think
- Swedish Kids Rooms: 6 Ideas To Get The Look
- 5+ Nordic Homes Decorated Around White
- 10 Of The Best Tours In Sweden
- 3 Rustic Scandinavian Country Homes – Borrow Ideas From Norway and Denmark
- Spring Summer Checks and Florals For The Swedish Home
- 70 Swedish Furniture Pieces That Sell For Less- Swedish Decorating On A Budget
- Decorating With Blue: Swedish Style Decorating Ideas
- An Interview With Daniel Larsson- The Go-To Guy For Swedish Antiques
- 7 Scandinavian Country Decorating Books
- 75 Swedish Nordic Pinterest Pages! Oh Yes…More Eye Candy!
- 69 Inspiring Pictures Of Nordic Country Style Decorating
- 20 Scandinavian Gift Ideas
- 5 Ways To Add Life Into Worn-Out Furniture
- Mora Clocks: Investing In Swedish Heritage
- How To Decorate With Botanicals
- Buying Property In Sweden
- Get The Swedish Look By Installing Tongue And Groove Paneling
- The Lavish Interior Of The Swedish Häringe Castle
- The Swedish Wreta Gestgifveri Inn
- Paint It White He Says…. Washington Interior Designer Darryl Carter – Swedish Decorating
- 5 Pro Painting Tips For Black Furniture
- The Swedish Artist Carl Larsson
- A Guesthouse Decorated in The Swedish Style
- Swedish Furniture From Bukowski Market
- 216 Selections From Wallpaper Direct – Swedish Decorating
- A Look Behind The National Museum of Stockholm
- Antique Swedish Dealer Jane Moore’s Home Veranda Magazine
- A Swedish Collected Home In Upstate New York – Swedish Gustavian Decorating
- $100+ Solid Braided Rugs
- 60 Scandinavian Country Folk Art Books On Amazon
- 50 Examples Of Swedish Folk Country Interiors
- Designers Pick Their Favorite Gray Paints
- HOW TO: Paint Gustavian Finishes
- “Söderbo” A Home Untouched Since 1920
- Designer Martha Angus Loves Gustavian Style
- Les Indiennes Fabrics
- Decorating Secrets- 60 Quotes From The Best Experts In Design
- Swedish Kakelugn Stoves
- Helen Olsen’s Rungstedlund Home Revealed In Gods & Gardar Magazine
- The 1700 Collection Swedish Furniture
- Swedish Plaster Medallions
- The History Behind Empire Furniture From The Karl Johan Period -Liza Laserow
- Swedish Styled Wallpaper
- Nordic Style Drapery And Window Coverings
- The Gentle Palette of Swedish Antiques-Corey Amaro
- Custom Reproduction Swedish Furniture From Garbo Interiors
- 30 Spectacular Picks From Frantz Hemeleers Antiques
- Go Bold With Red- Part 1 Grand Sophisticated Interiors
- Go Bold With Red- Nordic Country Interiors
- The Baroque Style Of Switzerland
- Daniel Romualdez’s Swedish Montauk Home
- The Shocking History Behind “Emerald Green” Paint
- Stylish Looks For Slip-covering Your Furniture
- The Best 5 Websites For Purchasing Antique Hardware
- Fired Earth’s Anniversary Paint Collection
- Swedish Furniture Auctions -Uppsala Auktionskammare
- Louis Masreliez- The Designer Behind Gustav III’s Pavilion At Haga Park
- A Nordic Design Staple- The Swedish Kakelugn Tile Stove
- Swedish Antique Mirrors
- How To Decorate A Child’s Room In The Swedish Style
- Ruby Beets Swedish Rustic Home
- The Country Side Of Sweden- An All White Based Home
- Akerö in Södermanland, Sweden
- Krusenberg Herrgård: An 18th Century Swedish Luxury Hotel
- Wood Plank Flooring, A Swedish Design Must Have – Part 1
- Vinyl Plank Flooring, A Swedish Design Must Have – Part 2
- Laminate Wood Flooring, A Swedish Design Must Have – Part 3
- Plywood Plank Flooring, A Swedish Design Must Have – Part 4
- Painted Wood Flooring, A Swedish Design Must Have – Part 5
- The Romantic Baroque Style: Part 1- Stromholm
- The Romantic Baroque Style: Part 2 King Gustav Vasa
- The Romantic Baroque Style: Part 3 Skokloster & Steninge Palace
- The Romantic Baroque Style: Part 4 – A Collectors Home
- The Romantic Baroque Style: Part 5 Add Color
- Sweden’s Empire Decorated Rosersberg Palace
- The Most Beautiful Rococo Library In The World:The Anna Amalia Library
- 4 Resources For Swedish Decorating
- How Important Are Accent Pieces In A Swedish Home?


