
19th Century Swedish Painted Cabinets – Find It on Ebay Vintage Mid-Century Daybed by Karl-Erik Ekselius for Dux […]
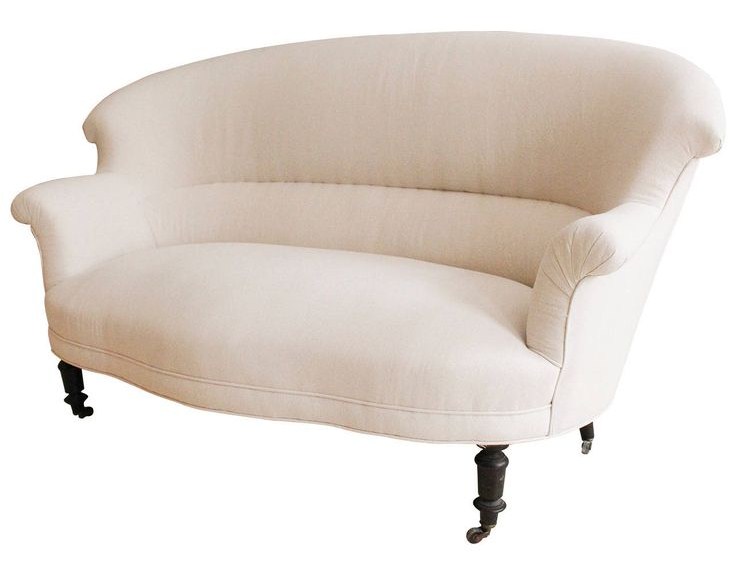
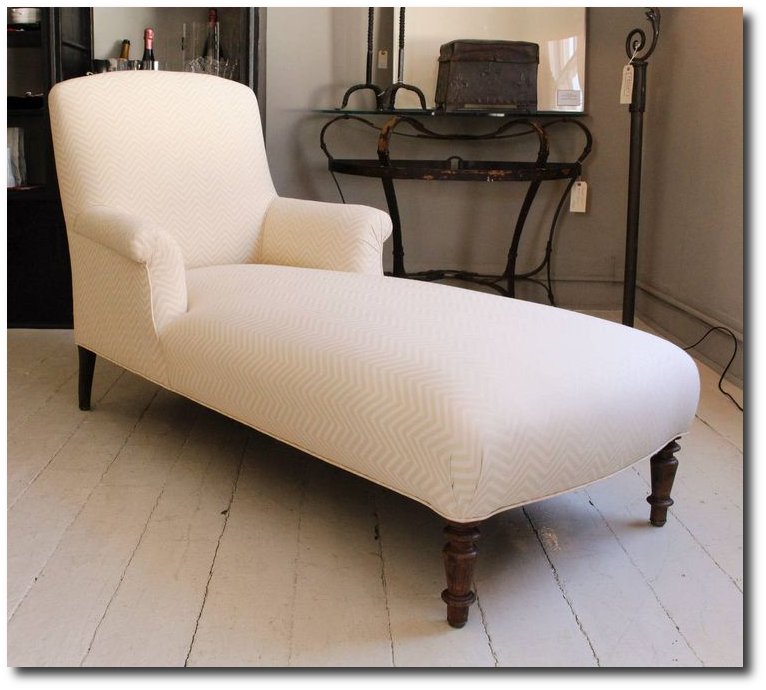
My goodness, this sofa is spectacular, isn’t it? This sofa is upholstered in natural linen featuring a high […]
An Island-Inspired House in Oslo… Norway Interior designer Nicolette Horn brings a bit of the Bahamas into her […]
Volga Linen Guest Post, Jason Phillips Linen has been a part of humanity for thousands of years. The […]
Picture Credit- Unofficial Royalty
Gjestestuene at Norsk Folkemuseum- commons.wikimedia.org
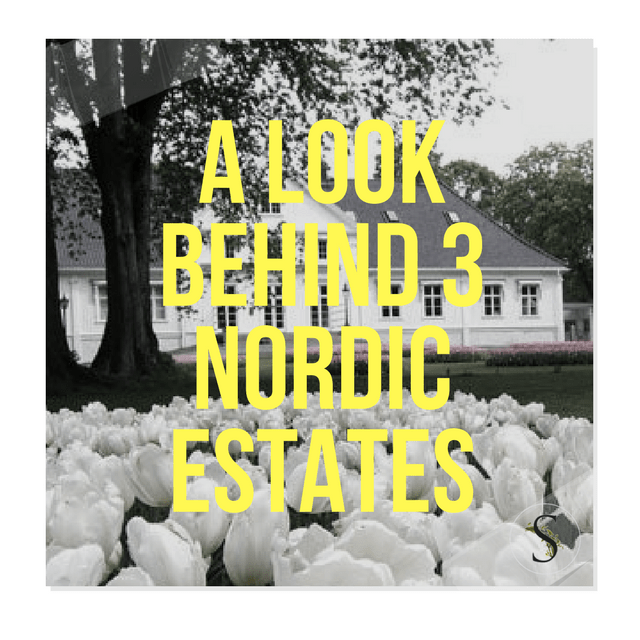
Gjestestuene –Gjestestuene is beautifully situated at the Norwegian Folk Museum in Oslo. Gjestestuene is surrounded by old farmsteads and a stave church from the 1200s. Gjestestuene was built in 1917 by the renowned architect Magnus Poulsson. His style was was quite popular in the early 1900s. Today you can host a dinner party or a wedding at Gjestestuene, as they cater to groups as little as 15 and as large as 250 people.
Gjestestuene selskapslokaler
Strømsborgveien 2, 0287 Oslo, Norway
+47 488 91 603
Bakkehuset-( Bakkehusmuseet ) is a historic house museum in the Frederiksberg district of Copenhagen, Denmark. Dating from the 1520s, this building has been used for a number of functions. It was used as a farmhouse, inn, a home, as well as a hospital and orphanage. Today, it functions as a museum has a beautiful small park will be located next to the museum.
Rahbeks Alle 23, 1801 Frederiksberg C, Denmark
+45 33 31 43 62
Bygdø Royal Farm –Bygdø Royal Farm is located in Oslo, Norway and today is owned by the state but at the King’s disposal. Bygdø Royal Farm has been owned or used by Norwegian monarchs since 1305. The farm dates back to the Middle Ages. King Christian Frederik resided here during his reign in 1814. In 1837 King Carl Johan bought Bygdø Royal Farm from the state. He had the French gardens re-landscaped in the more natural English style, and enlarged the lake to its current size. The property remained in royal hands until 1863, when King Carl IV sold it back to the state. In 1905, King Haakon VII and Queen Maud began using the farm as their permanent summer residence and enabled the Queen to be able to pursue her interest in gardening.
Bygdø is one of the best examples of an upper class 17-18th-century country houses in Norway. At that time it was the custom in all the Scandinavian countries for the upper classes to spend the winter in the city and move to estates in the surrounding countryside during the summer. The estates were actively farmed in the summer to supply during the winter months in the city.
The present main house was built by Count Christian Rantzau, from 1731 to 1739, as his summer residence. By 1734 the house was complete and the property had been redesigned in the contemporary Baroque style. The house is a fine example of Norwegian early Baroque panel architecture. The main building and garden are designed to complement each other. The development of the garden reflects the history of Norwegian landscape gardening from the early 18th century to the first decades of the 20th. After the death of King Olav the park was somewhat neglected, but in 2003 restoration work begun that was completed by summer 2007, when the King and Queen resumed the tradition of using Bygdø as summer residence. Source royalcourt.no
Bygdøy, 0287 Oslo, Norway
+47 22 04 87 00
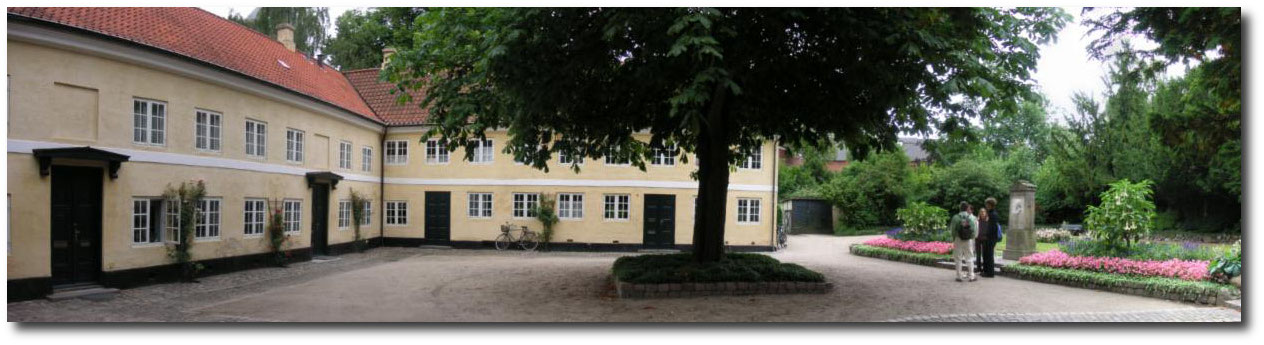
Bakkehuset- en.wikipedia.org
Bakkehuset bakkehusmuseet.dk
Are you interested in seeing the best antiques Sweden has to offer? The highest quality finds will be […]
The Swedish Country House by Susanna Scherman- Found on homedesign.marthastewart.com
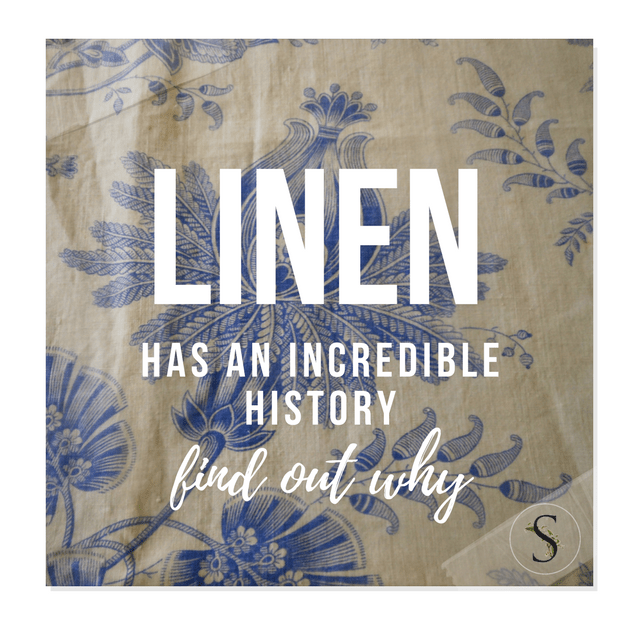
Guest Post – Jason Phillips
Linen is a type of fabric or textile manufactured from fibers. The making process is laborious, and the result is truly remarkable. Many things are made of linen including towels, aprons, bags, tablecloths, bed linens, runners, curtains, drapes, upholstery covers and more. Textiles that feature a linen weave texture, even those made in combination with hemp or cotton, are also referred to as linens; some have specific names, such as madapolam, which is a fine cotton yard wove in linen style.
Linen textiles have an incredible history. Fragments of seeds, yards, straw and additional types of materials date back to 8000 BC, and were usually found in Swedish homes. In Ancient Egypt, linens were used as currency, and the mummies had to be wrapped in this luxury material as a symbol of purity and light. Nowadays, fine linens are high-priced yet incredibly qualitative.
Curtains And Drapes
In the early 18th century most homes still used shutters to block light and make the place appear private and secluded from the eyes of people on the street. However, they had a fuller texture and came in different styles than in the 17th century. As for the materials, main fabrics were cotton chintz, taffeta, and velvet. A valance or pelmet cornice was usually employed to hide the workings. Then the paired curtains made an entrance. They were topped with stiffened pelmets and featured embroidery work and appliqués; also, they had a really elegant shape. The linen fabric used for the curtains included Rococo motifs, including knots of ribbons, garlands of flowers, and leave fronds.
By the middle of the century, pelmets became a lot softer, with small tails and shallow swagging and bells. Portieres had lighter curtains and deeper pelmets designed in Italian style. Store marquises, also known as light silk festoons, were widely used with beautifully draped pelmets. At the end of the 18th century, roller blinds made an entrance as well. Their use was first recorded in 1726, in London.
Fabrics
There was a great variety of fancy fabrics one could select from in the 18th century. There was one industry in particular that thrived – the silk industry. Fragile florals, lace, and scallop, as well as patterns that incorporated doves and other beautiful prints were in high demand. Inside people’s homes silk was the most appreciated. It was used for linings, beds, tables and inner covers. During that time the bed in the bedroom had sophisticated hangings, which were also made of silk; those who could afford to invest in such fancy linens, bought Genoese silk velvet.
For the windows, brocades and silk damasks were highly appreciated. For hangings, brocatelle was still in high demand. Ribbed silk, satin, chintz, taffeta and clouded silk were all exceptional materials used mainly for curtains. Those who couldn’t afford such fancy linens had great alternatives, such as moreen for draperies and beds, and velvet or silk mohair for chair coverings.
The most exclusive chintz was manufactured in Versailles, and was produced by Jouy-en-Josas. However, throughout the 18th century, in England and France there was an anti-cloth law materializing. It was aimed at protecting silk and wool industries. The production went full ahead in 1770.
Sophisticated Trimmings
In the 18th century there was a wide variety of sophisticated trimmings materializing in Germany, Ireland, the Netherlands, England and Switzerland, mainly due to the battle of Huguenot craftsmen n the 1600s France. Narrow and broad bands of rich colored lace were used thus contrasting the rich, new techniques. Furthermore, fancy details started being used such as frogging, gold galloon and artificial flowers on valance and pelmets; these were meant to replace entirely heavy trims found in the 17th century.Embroidered, tie backs or appliquéd and ended with ribbons or bows became a new feature in home décor that many people adopted for their window treatments.
Decorating with 18th century linens from the French period will add sophistication to your personal space. Give your windows the treatment they deserve and use luxury linen materials for the curtains and shades. Make your bedroom seem romantic, your living area chic and welcoming, and your kitchen practical and fun. Consider the best materials and the finest shapes, and your entire home will come back to life.
19th Century France Napoleon III Settee
Pair of 19th Century French, Napoleon III Armchairs
Gustavian Lounge Chair, Sweden, c.1780, Found on 1stdibs.com
Anna Maria King Upholstered Bed Found on ballarddesigns.com Mlinaric, Henry and Zervudachi Sweden Early 20th Century A great […]
19th Century Swedish Painted Chest Find It on Ebay Ann Joerner Antiques, William Word Fine Antiques Swedish richly […]
Guest Post Jason Phillips Your kid’s bedroom has to look fun and entertaining; otherwise the little ones may […]
Martha Stewart showed how her wool and silk covered wingback chairs were given a new look for the […]

The design of your kids rooms should be an extension of your overall home, and your style. You don’t have to have a room filled with cartoon characters plastered all over the walls to be a fun mom.
Here are a couple quick tips for decorating your kids room with youthfulness, while maintaining a beautiful design.
- Limit The Number Of Pieces In A Room- Free up space. Choose a couple of really nice pieces for your kids rooms, and allow there to be some moveable room for your kids to play. Many modern homes simply don’t have big second bedrooms, so think storage when choosing pieces for their room. Functional dressers, and beds with storage options.
- Add Storage Space For Toys – Teach your kids to put away their toys in a specific space. We made over all the closets in our home using a simple brackets bought from Home Depot. Line baskets in the closet where your kids can put away their own toys. Have one row for their clothes, and use the remaining shelves for their toys. When their rooms are cleaner, you don’t loose your mind over the mess.
- Pretty Up Their Space By Adding Wall Shelves- Their real toys can be housed in the closet, while the more decorative antique toys can be on the wall. If you love design, make their room functional, but use the wall space to your advantage. Use wood that can be painted and then distressed. Rarely do you see people using the full extent of the walls. Create book shelves that go to the ceiling, and use the higher shelves for the decorative toys. So many of the thrift stores today have porcelain dolls for next to nothing. I have picked up beautiful porcelain dolls for our daughter for as little as $5 dollars a doll that she can eventually play with.
- Invest In The Right Fabric- Printed fabric can make a huge statement in a room. If you don’t have time to sew, look for bed comforters that gives you the look you are after. Order curtains in the same fabric for throw pillows, or upholster an accent chair using that fabric to match things up.
- Go For A Really Nice Antique- An antique toy on a shelf, or a nice bed can really make a statement in a room. You don’t need a heck of a lot of furniture, or toys…just one really nice piece and few accent pieces to make a room. The Nordic style is based around simple interiors, so work that look by carefully choosing a few really functional, but nice pieces.
- Mix in New With Old- You can get the Swedish look by using new modern pieces. Decorate with pattern, but incorporate new furniture. Go for the classic check pattern with a new bed. Work with ribbon, and bring in color.
- Blow Up A Vintage Print– I bought several picture frames at local yard sales, but the prints were old and outdated. I took a print that my grandmother gave me from a calendar book, and blew it up at Staples. This is a very inexpensive way to fill up large frames with beautiful art work.
See these posts:
My Botanical Print Gallery Wall – Her Site
My Winter Projects- My Nursery And Framing Projects- Part 1
48 Books Of Antique Graphics For Mod Podge Fabric And Wood Transfers

Melissa and Doug Plush Dogs – Amazon
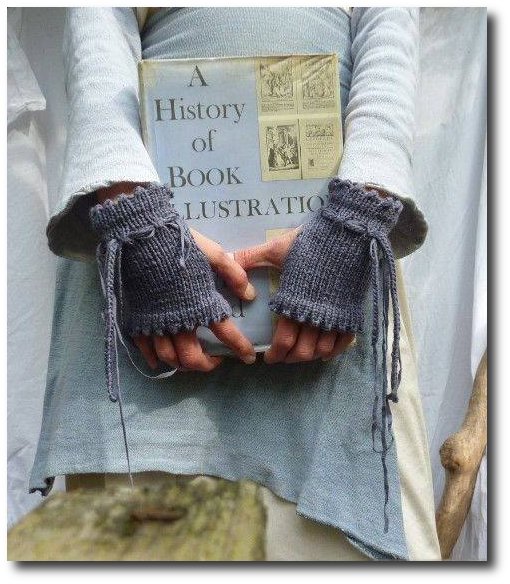
A History of Book Illustration -Amazon This collection of scholarly articles traces the history of book illustration from its first notion in cave art to the early 20th century. It is arranged chronologically with the first section covering the beginning of illustration; the second moves from the illuminated manuscript to the advent of printing; the third and fourth takes the reader from the earliest woodcut illustrations to the beginning of the 20th century; and the final part is concerned with children’s books
Tricia Foley by recent settlers on Flickr If you love simple, white interiors, you will love decorator Tricia […]
This beautiful California home decorated in the Swedish style was featured in the Country Home September 2004 issue. […]
The Chelsea cast iron radiator was originally commissioned for the Chelsea Barracks Officers Mess Guest Post- Mike Smith, […]
Swedish Gustavian Chairs. Maison & Co.’s 19th c. Gustavian chairs ~ chosen in the Taigan Fetch Magazine story […]
Living in Norway by Elisabeth Holte, is a book you need to look though. This book features 250 […]
Swedishinteriordesign.co.uk specializes in Swedish Antique Gustavian, Biedermeier, Rococo and Country Painted, Veneer and Natural Wood Furniture. In the Homes […]
Antik & Auktion Antik & Auktion- (Antique & Auction) Antique & Auction is a great Swedish magazine which […]
DECORATIVE ARTS Antikhuset (Spring 91) Falu rödfärg (red paint) (Winter 89) Ferdinand Boberg (Summer 97) FibreWall (Spring 90) […]
New Orleans invid Mälaren- Skona Hem Country House Inspired After New Orleans -One hundred and fifty meters from […]
Trågsoffa | Solgården If you are looking for beautiful reproduction Swedish furniture, consider Solgarden. Solgarden has two lines […]
This week we’re visiting Rundale Palace in Latvia, newly restored to former glory. I can’t wait to go […]
Living Museums in Scandinavia By Per Nagel- On Amazon From $89 An inspiring, interesting and useful insight into […]
Antique Vintage European Textiles On Ebay
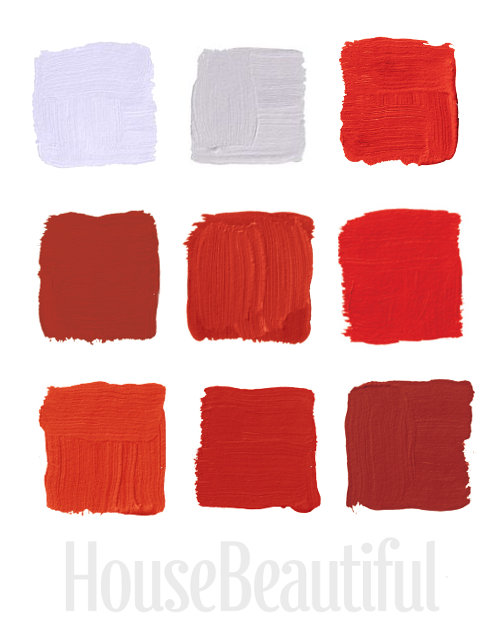
House Beautiful Magazine featured the top favorite red colors from the most famous interior designers. Here are my favorite 9 red shades of paint from their selection of 24
TOP ROW:
1.”This is a really deep coral, kind of like a cheerful Chinese red. Pinks and reds to me are synonymous with frozen drinks and relaxing.” –Richard Mishaan Pictured, Benjamin Moore‘s Chili Pepper 2004-20
2.”When I look for red, I want a pure, true red, like the color in the American flag. Ralph Lauren does absolutely the best. It’s the essence of red. It makes me think of boating or polo.” –Suzanne Kasler Pictured, Ralph Lauren Paint‘s Dressage Red TH41
3. “Red never goes out of style. It’s full of life — always fresh, always fun to wake up to. We go for reds with less blue in them and more orange because they’re happier to live with.” –William Diamond and Anthony Baratta Pictured, Ralph Lauren Paint‘s Lattice Red IB57
MIDDLE ROW:
4. “It’s a true, deep red. I like the temperature of it: it’s a bit cooler. But a little red goes a long way. It’s good in areas where you don’t spend much time or in boring areas that need a strong burst of color.” –Roderick Shade Pictured, Benjamin Moore‘s Million Dollar Red 2003-10
5. Benjamin Moore‘s Redstone was used in Eldon Wong’s cupboard.
6. “All my life I’ve pursued the perfect red. I can never get painters to mix it for me. It’s exactly as if I’d said “I want Rococo with a spot of Gothic in it and a bit of Buddhist temple” — they have no idea what I’m talking about.” –Diana Vreeland Pictured, Benjamin Moore‘s Red 2000-10
BOTTOM ROW:
7. “Red is the color of excitement, and I tend to go for corally orange reds. With red, you know you’ve arrived and you glance in the mirror and realize how great you look and breeze right in.” –Keith Irvine Pictured, Benjamin Moore‘s Salsa 2009-20
8.”I prefer the warm, vibrant reds to the historic reds, which are beautiful but sedate. This is a daring red, a real fire engine red. It has a playfulness that reminds me of a little red schoolhouse.” –Ruthie Sommers Pictured, Fine Paints of Europe‘s Dutchlac Brilliant Tulip Red W1001B-M
9.”Lately I’m on this anti-completely-neutral kick. You have to have some seasoning in your rooms. Sangria is good, universal-donor red — not too blue, not too orange, not too dark.” –Elissa Cullman Pictured, Benjamin Moore‘s Sangria 2006-20
Frijsenborg Castle
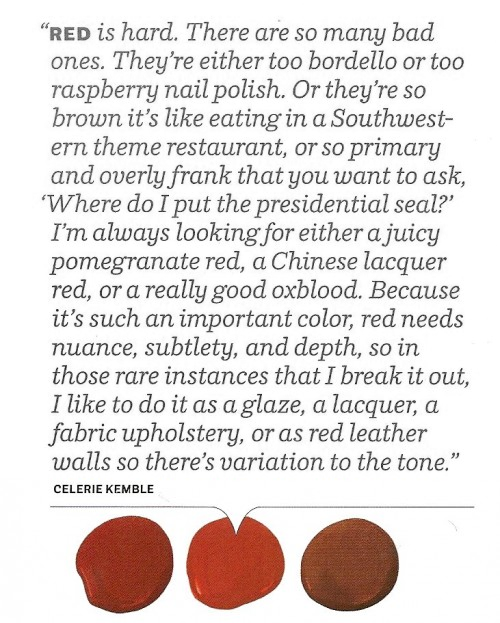 House Beautiful Color Celerie Kemble’s Advice
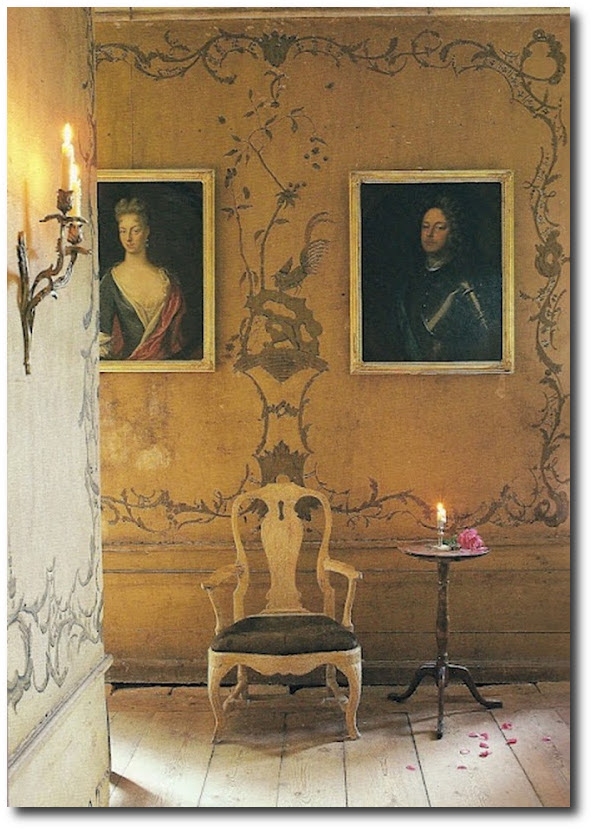
Chinoiserie found another outlet in the rare longcase clock at the right, made about 1765 by Nils Berg, […]
This loveseat can be just the piece you need in a room you need to really show off. […]
Picture Credit- Creative Co-op Grandfather Clock Soft & Cool, White Noise, Moonstone Blue From Do It Best Take […]
House Beautiful often features the best designers with their favorite go-to paint colors. Sometimes having the just-right color can […]
This streamlined Swedish styled sofa is white on white. It is now listed for $1,135 here
This Swedish styled chair can function as your new dining chairs or entry chairs. Buy it for your […]
House Beautiful Feb 2011 Designer Alexandra Angle shares her Scandinavian design advice with House Beautiful on how she […]
Bureau of Jonas Hultsten, champion in Stockholm 1773-1794. Veneered with rosewood, mahogany, maple and stained hardwood and slice […]
The computer-generated image shows how Gottlieb Iwerssons bureau was color set from the beginning with stained inlays. Furniture […]
Swedish Tea Tripod Tables- trouvais.com Tea tables were originally designed to serve tea. Some were designed to tilt […]
Alexander Doherty Design Here are a couple modern day interiors which incorporate many of the elements found in […]
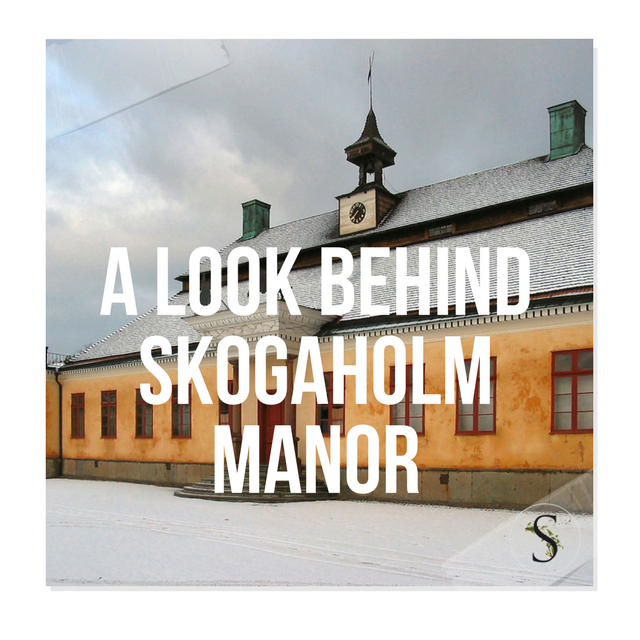

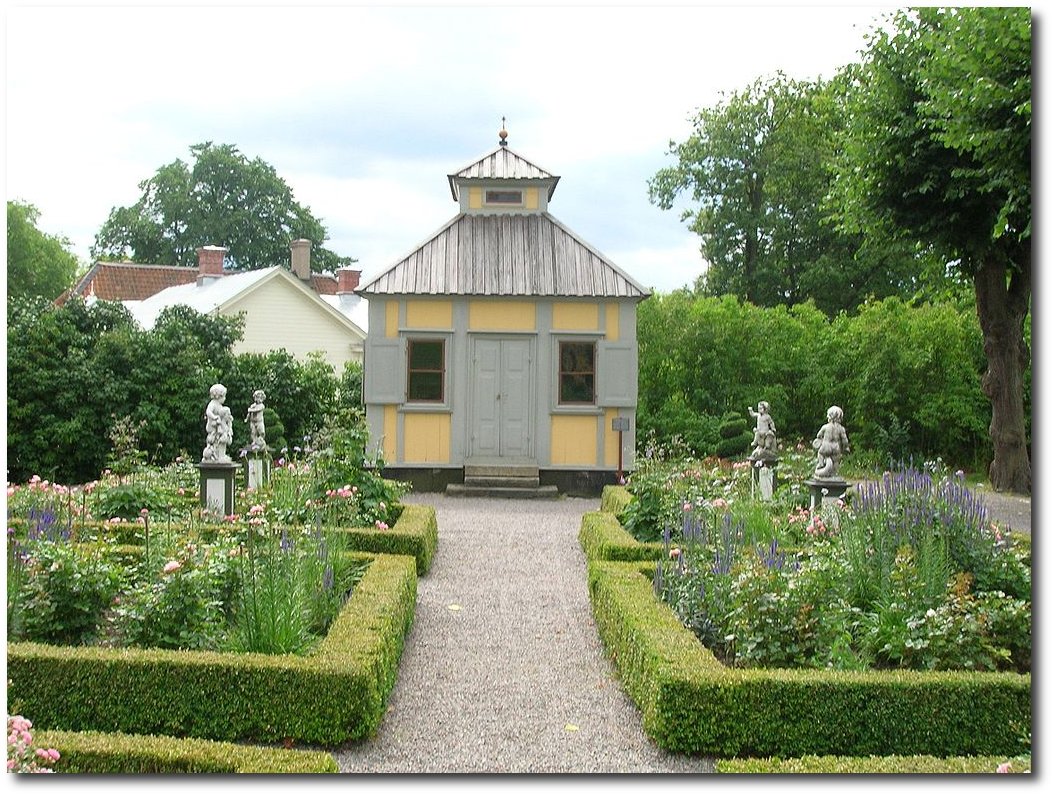
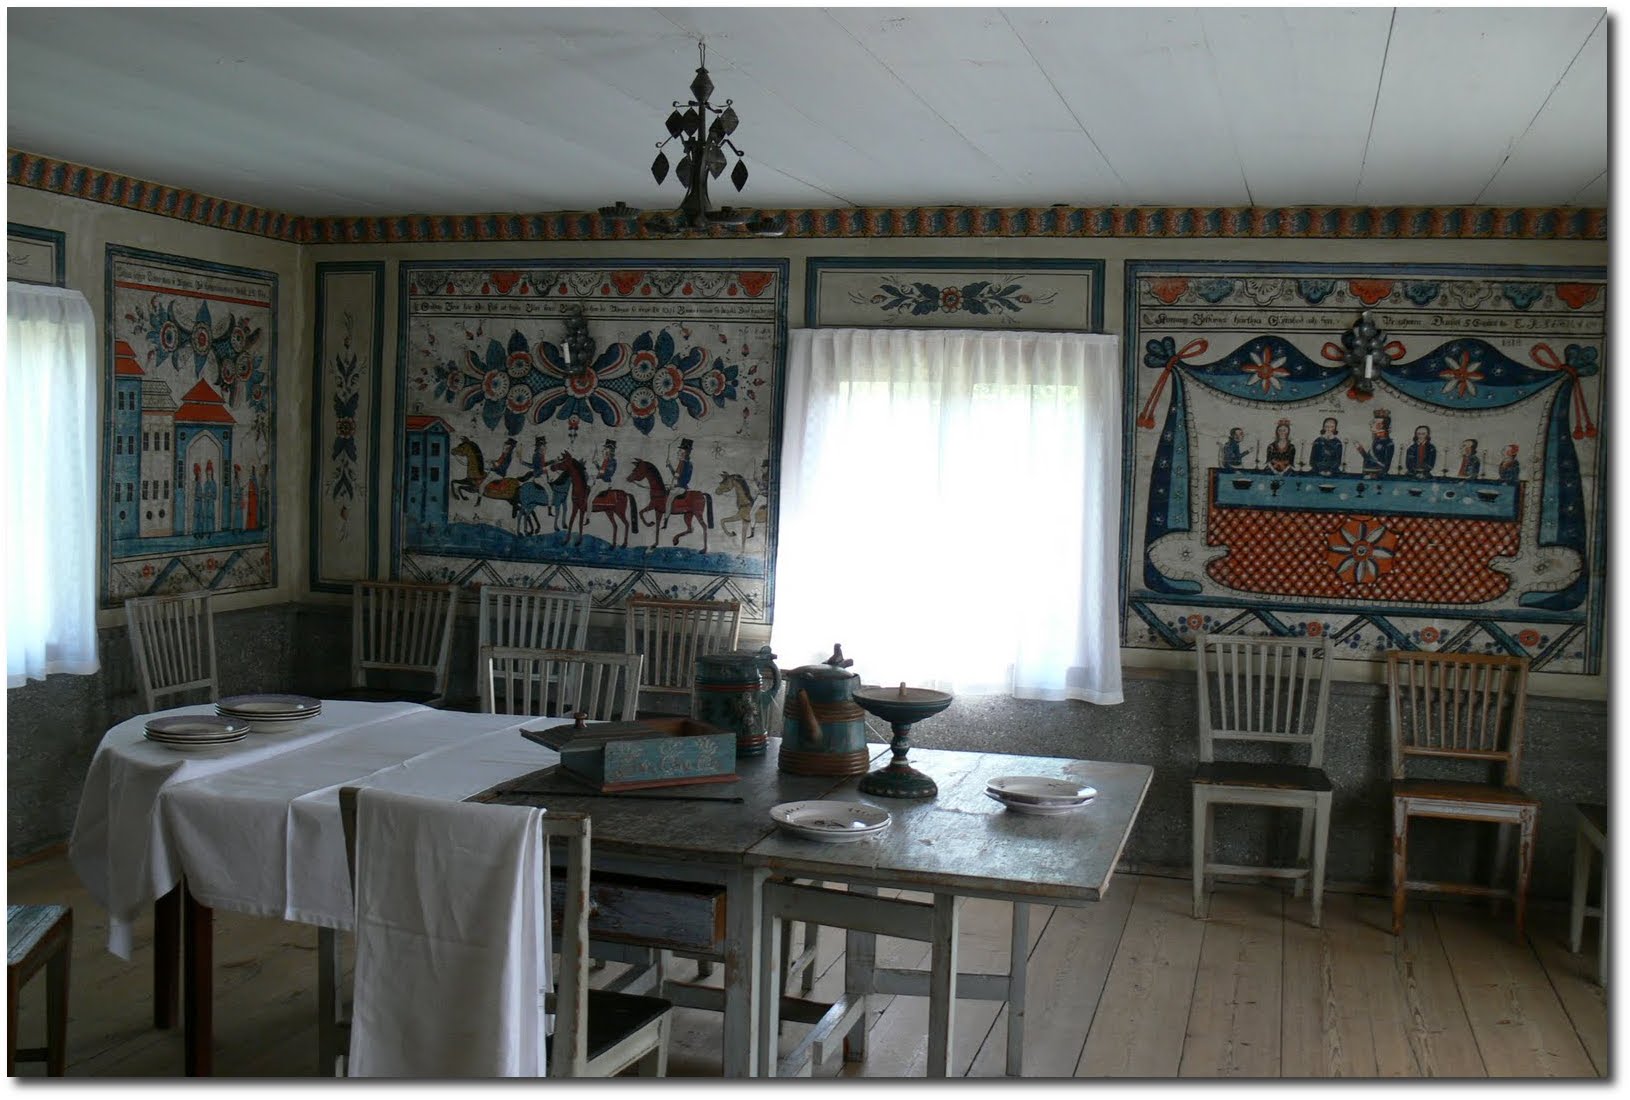
Skogaholm Manor, Jane Nearing
Skogaholm Manor is a large mansion built in the Caroline style in 1680, located at Skansen in Stockholm.
Skogaholm Manor, forms part of the open air museum at Skansen where it stands as an example of an 18th century Swedish manor house. The manor’s main building was donated in 1929 to the Nordic Museum and moved from Svennevads parish in southeast Närke.
The manor house was built around 1690 for Catherine Rosenberg and her husband Anders Wennerberg Manor, who inherited Skogaholm after her parents Simon Rosenberg and Margaret Larsdotter, and had visible colored red timber with white trim.
Skansen Air Museum is located on the island Djurgården in Stockholm, Sweden. It was founded in 1891 by Artur Hazelius (1833–1901) as a way to show life in the different parts of Sweden before the industrial era. Hazelius bought around 150 houses from all over the country, and had them shipped piece by piece to the museum, where they were rebuilt to provide a unique picture of traditional Sweden. Only three of the buildings in the museum are not original, and were painstakingly copied from examples he had found.
All of the buildings are open to visitors and show the full range of Swedish life from the Skogaholm Manor house built in 1680, to the 16th century Älvros farmhouses. Skansen attracts more than 1.3 million visitors each year and many of the exhibits cover over the 75 acre (300,000 m²) with a full replica of an average 19th-century town, in which craftsmen in traditional dress such as tanners, shoemakers, silversmiths, bakers and glass-blowers demonstrate their skills in period surroundings.
- Skansen Air Museum,Djurgarden 49-51, Stockholm 115 93, Sweden
- Skanseninfo, 08-442 82 00, info@skansen.se
Other Interesting Links:
Skogaholm Manor – The Interior Archive
Skogaholm Manor, Madame Berg Blog
The Skogaholm Manor – Skansen- Bittelitens Blog
The Skogaholm manor – Skansen – Cision
Skansen, Skogaholm Manor Panorama Pictures – 360Cities
Skansen- Johan Schuisky Pinterest
Skansen – Traditional Sweden in Miniature – PBase.com
Interesting Reviews:
“I have visited Skansen some times some years ago, and I enjoyed this revisit. The guides are excellent providers of information, and the interiors are cleverly reconstructed along with matching dresses of the guides. Statarlångan, Helsingslandsstugan, the ironware shop, Konsum shop … every house and shop have its past and worth while a visit. Petissan is a small, picturesque cafe where we enjoyed a cup of coffee and a variety of cakes. The carpenter’s workshop and the knowledgeable guide made me especially happy.” kanute07
“We made the mistake of not preparing for our visit. We had no idea of the size of the property, 75 acres, or of the number of historic buildings, 150! Thus, we did not leave enough time to properly watch the artisans at work, or talk to the interpreters in their traditional dress. Our hour and a half just skimmed the surface of what there was to see. We also made the mistake of not arriving at the main gate, and had to take a funicular railway. Thus, we missed the 15 shops in The Town Centre. The best time to visit is obviously not in mid-week in September, when activity is winding down, and the buildings begin closing at 5 pm. The free map is also essential!” Billitchyfeet
“This open-air museum is a collection of Swedish stuff. Swedish animals, Swedish housing across time and places, Swedish traditional clothing, everything. They even have real-size replica of a traditional old Swedish village from the 17th century. The Swedish animals are awesome! Make sure to go around 3:00 PM, it’s the animals’ feeding time.” John J
Summerhouse of Swedenborg Source- Wikipedia
Graeme & Ann’s 2010 Trip: Skogaholm Manor
Swedish Country Plates Sold Through Food52. Visit Swedish Country.com For A Look At The Whole Rosemaling Collection America is […]
House Beautiful’s September 2014 issue- Photographer Michael Croteau Seen In House Beautiful’s September 2014 issue, interior designers spill on […]

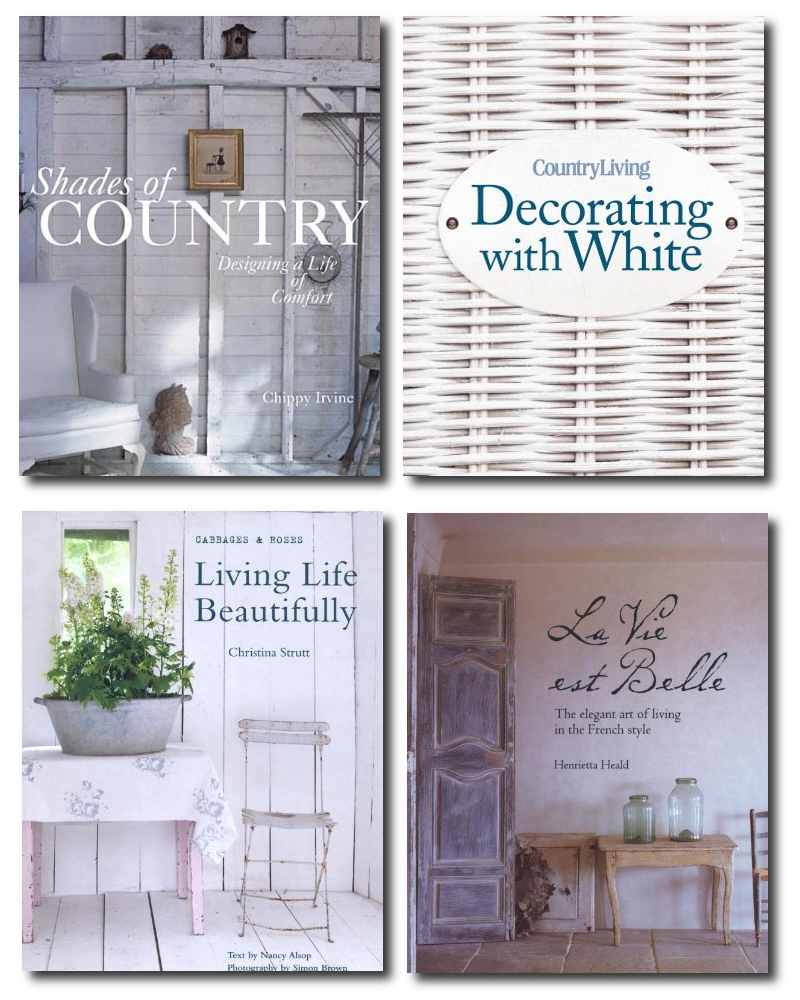
1. Shades of Country: Designing a Life of Comfort – From $3.99 Amazon
“Shades of Country,” written by “Chippy Irvine,” masterfully presents some of America’s most beautiful, charming and fascinating country houses. It is profusely illustrated with a wealth of examples of actual American homes, some of them are derived from European country styles, but most are what we think of as typically American – east coast farmhouses, Shaker simplicity, Montana ranch and rustic Adirondack cabin. This book covers a lot of decorating territory. A few pictures of each, as well as others styles like Ranch, or French. If you are having trouble deciding on a style, this book might help you.
2. Country Living Decorating with White- From $14 Amazon
Country Living Decorating with White showcases a beautiful new vision of how to use this classic hue. Explaining the art of choosing the right shade of white and blending it with other colors and objects. Close to 150 color photographs fill this volume with captions describing successful design features and giving decorating tips. The classic motifs of white with blue or black are given primary focus, although every room of the house is shown with various color accents.
“I have wanted to change back to all white but needed ideas to avoid a completely “washed out” look. Varied surfaces, tones of paint color, accents, etc. are among suggestions that work well with white and offer many great ideas.”
3. Living Life Beautifully $14 On Amazon
Christina Strutt Living Life Beautifully tells the story of how Christina founded legendary fabric company Cabbages & Roses and grew it into a lifestyle brand. Christina talks about her inspirations and influences, and how she works these into her products. Christina gives the reader a look behind her home where she designs her fabrics, experiments with her new wallpapers, and gathers all her favorite antiques.
4. La Vie Est Belle: The Elegant Art of Living in the French Style – $18 On Amazon
The book is arranged by region and offers a privileged glimpse inside dozens of French homes, from chateaux to farmhouses, as well as the regions in which they are set. Interior colors are more simple and muted that what we use here in our American country homes
The Swedish style is a bright decorating style, in which presents a peaceful, liveable, serene place to live in. The lighter interior looks have always been popular in the Nordic countries for centuries. Pale wall colors, lighter painted furniture, throws and bedding in white, or pastels tended to give the illusion of light, which was particularly welcoming through Sweden’s long winter evenings.
1. Lighter Painted Walls Allow You To Do More With Your Interior
To achieve the Swedish style, consider starting with the foundational walls of your room in a lighter paint tone. Gray, or tones of light green, blue or natural creamy white will complement accessories in touches of warm yellow and gold. Using a neutral base color such as ivory, beige, or light gray will complement additional colors added into the room. Consider soft pink, bold red, for stenciling ribbons, scrolls and gatherings of wheat upon walls.
Like your walls and draperies, keep your floors light and bright. Consider blonde or pale woods, or a lighter hued paint for your floors. If you want to jazz things up, stencil or paint pale designs on the floor’s surface.
- Thinking About Painting Your Floor? Consider These 10 Tips First…. Hersite Blog
- Polish Your Concrete To Make It Look Like Marble- Hersite Blog
- How To Paint Your Wood Subfloor- Hersite Blog
- How To Use Plywood As Wood Flooring- The Swedish Furniture
Floor coverings can make all the difference in a room. Natural fiber rugs, such as berber, jute, sisal rugs are natural and a neutral covering that works with any style and decor choice.
An alternative to painted walls is wallpaper patterns. If you consider wallpaper, work with a neo-classic style with soft colors on a white background. Floral prints, swags, ribbons and bows are a common theme that runs through Gustavian style. A touch of gold gilding is important as an accent, and adds the prestige into your rooms.
- 6 Stencils I have My Eye On- Which One Is Your Favorite? – Hersite Blog
- My Favorite 216 Selections From Wallpaper Direct! The Swedish Furniture
- Wallpaper Used In Svartsjö Palace- The Swedish Furniture
- Spring Summer Checks and Florals For The Swedish Home- The Swedish Furniture
- Buy Floral, Chintz, And Gustavian Wallpaper and Fabrics From My Friend Paula At Lily Oake
2. Pair a Settee At One Side Of Your Dining Table
While many of us may not have the room, a settee at the dining table really looks fabulous if you can pull it off. My friend Stephanie Tuliglowski went for a French Provence look in her house, and paired a large farmhouse table with a French settee. In this photo, you can see she left the settee in it’s natural wood, instead of painting it. It gives the room so much more of a natural, cozy feel.
The “Köksoffa” has been known as the kitchen sofa, and originates from the 1700’s. The idea behind this sofa was it could be used during the day, and then pulled out at night to be used as a bed. Rooms were smaller, and often pieces were created for multi purposes. The sofas were often painted and antique versions often can be seen having a dark patina from the paint aging over time.
3. Rotate Your Collections Through Out The Year
The Nordic style of decorating has always been one to border on minimalism. Invest in pieces that function as storage solutions which can hide away your belongings, while at the same time look decorative.
- Leave Armoire Doors Open- If you have a armoire, paint the inside a different color than the outside, and leave the doors open to display what you have.
- Paint The Inside Of Your Cabinets, Or Bookcases In A Different Color– Spice up your collections by painting the inside of your drawers, or cabinets in a color that will pop. If you are decorating around the creams, consider a darker buff, vanilla, apricot, or saffron for the inside.
- Rotate Your Decorative Accessories through out the year, and mount more of your collections on the wall. If you do collect, consider keeping only the best of what you already own, and discard the rest. Use lighting to draw attention to those items that you want to be seen.
- Group Decorative Items In Pairs, or Collections. Gather your pictures in one spot, and create a collection by using the same frames. Simplify your pictures by working in black and white, or sepia tones. Work with cabinets, bookcases, or wall shelving to give your collections a really upscale look.
- Store Collections In Boxes Which Can Be Painted– In this photo, you can see a picture of Eric Pike’s home office, where magazine boxes, and storage boxes look sophisticated on shelves.
26 Ways To Organize With Shoe Boxes- Kids Room Decor
4. Push Chairs And Side Tables Against The Walls
This is a classic Swedish look that is found in most historical Nordic homes. Chairs and tables were pushed against the wall, creating more space in a room. Furniture was positioned in the center of the room, allowing more room between furniture pieces. Position one chair by itself, or gather your chairs in sets of threes.
5. Redesign Your Closet Space
As soon as my husband and I moved into our new home, I wanted to make the best use of our closet space. You can see some of my closet makeovers at my new website Hersite.
- My Summer Projects, My Garage Makeover-Hersite
Shelving brackets were bought from Home Depot, and wood shelves, which were painted were added to our closets. Paint makes everything so much more inviting.
Why NOT make use of the wall space all the way up to the ceiling? Instead of having one rod in your closet, break the wall up so you can have two rods. Show off those expensive heels you only wear once a year, and coordinate your wardrobe into color schemes. Your closets can look like they were professionally designed.
In this picture of Eric Pike’s home, he transforms an ordinary closet into a beautiful display for his tableware. The interior of the closet is painted in a darker gray, and collections are grouped together.
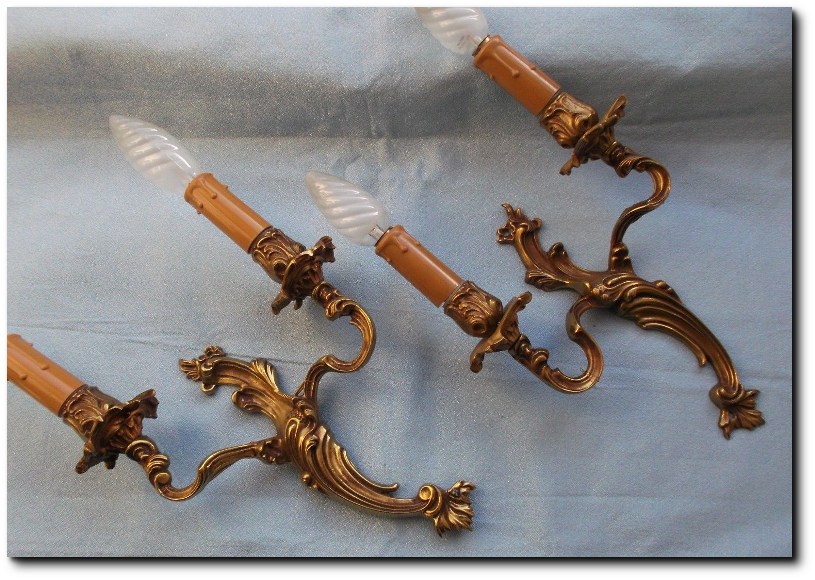
French Wall Sconces On Ebay
6. Work With Neoclassical Lamps And Mount Wall Sconces For The Classic Swedish Look
Wall sconces can look very romantic in the Swedish setting. We should light candles more often, and working with candles on the wall, than on the table is the safer route to prevent fires from happening.
Decide if you want something simple or ornate in style for wall sconces. Today you can purchase an ornate set of French wall sconces for around $90 dollars on Ebay. Place a set of two sconces on either side of a mirror or painting.
Plain table lamps can be dressed up by recovering plain shades. Purchase simple barrel shades from your local big box store, and re-cover them with the same upholstery material as your accent chairs and slipcovers. Chandeliers and lamps add light to an already bright interior.
- 16 Lamp Updates For My Home In 2 Years- Hersite Blog
Use mirrors to create the illusion of even more open space and to reflect light, and use light colored accents like blue and white china, silver and glass to add shine and style.
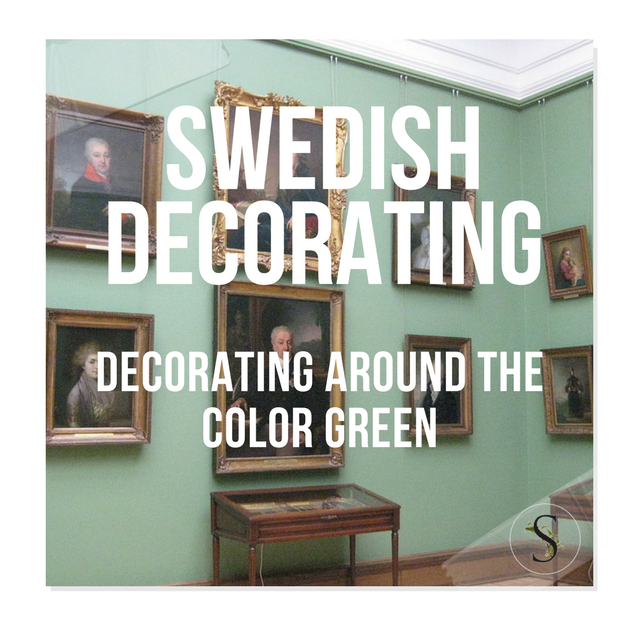
 House Beautiful- 26 Designers Share Their Favorite Grays
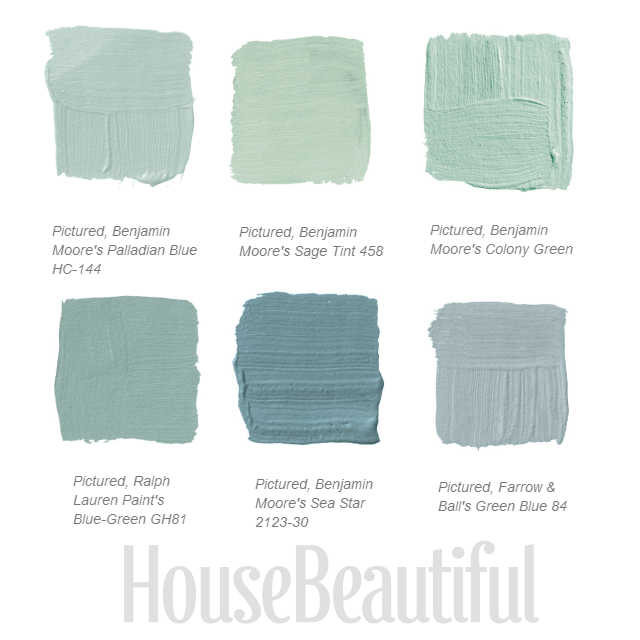
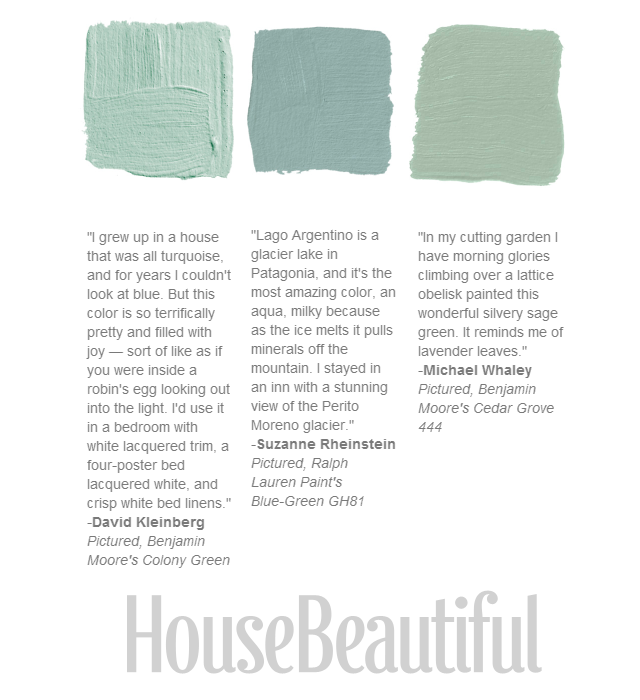
House Beautiful Designer Grays 3: Top Row, 1-Pratt Lamberts Argent 1322, 2-Farrow Balls Light Blue 22, 3- Farrow Balls Green Blue 84 Middle Row, 1- Benjamin Moores Cedar Grove 444, 2-Ralph Lauren Paints Blue-Green GH81, 3-Benjamin Moores Colony Green Bottom Row, 1-Benjamin Moores Heavenly Blue, 2-Benjamin Moores Palladian Blue HC-144, 3-Benjamin Moores Sage Tint
 House Beautiful- 26 Designers Share Their Favorite Grays
Benjamin Moore’s Colony Green, Ralph Lauren’s Blue-Green GH81, Benjamin Moore’s Cedar Grove 444
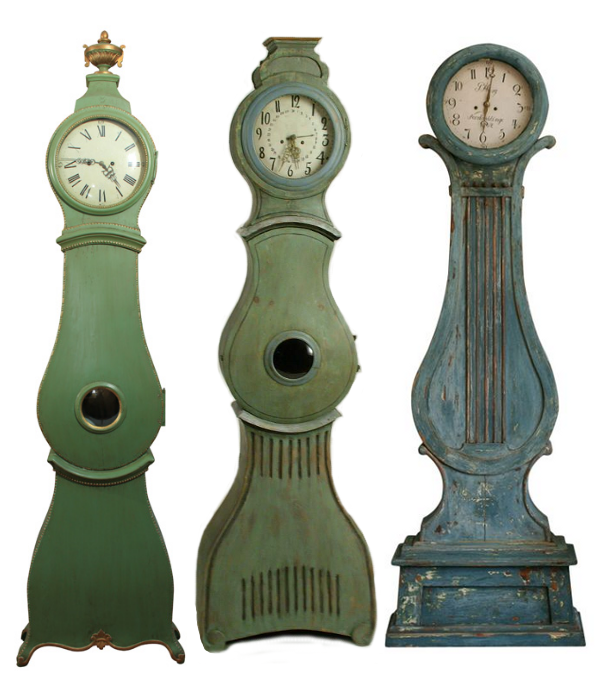
Mora Clock Seen At Bagatelle Antiques, Green Painted Mora Seen On Attic Mag.com, Blue/ Green Mora From Eloquence
Featured twice in Veranda, this utterly unique home contains 1610 square feet, decorated in the Swedish, Nordic decorating […]

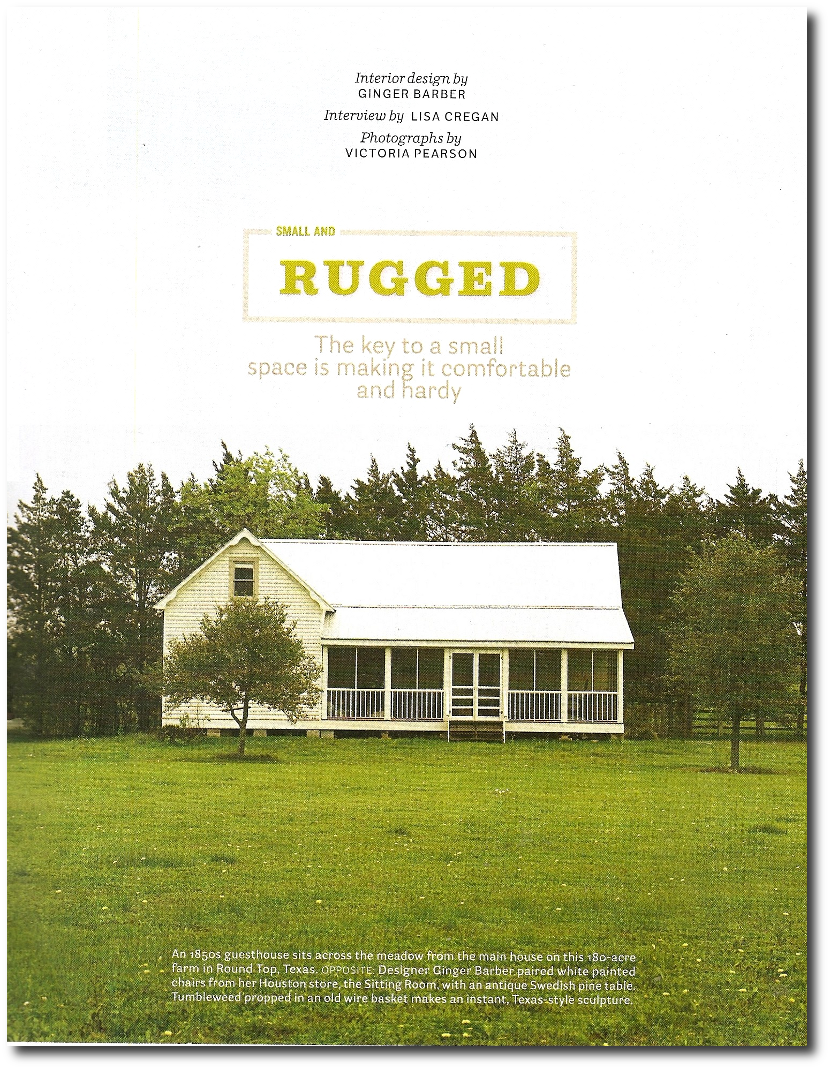
Ginger Barber’s Rugged Texas Home
1. Cotswold’s Barn Conversion comes from Light Locations. Inside, the home is saturated with shades of whites. Take notice of it’s whitewashed rustic oak beams, the neutral decor scheme and open plan interior. Decorated around minimal decor, this home has rustic furniture, industrial pendant lights, linen bedding and furniture and huge picture windows.
See more of this home at Light Locations
2. A Chattahoochee River Home, decorated by designer Amy Morris, was seen in Atlanta Home Magazine. This home is decorated around the neutral palette, with soft creamy whites and touches of gray, green and blue. In the entry hall, we see the start of a theme that continues throughout the house…. “Rustic and elegant“. A herringbone-patterned brick flooring, combined with country distressed furniture is very welcoming. What makes this house appear warm and cozy are the fabric choices and old world color choices. One of the designer’s favorite style secrets involves using outdoor fabric in busy rooms…… “I typically use a polyester, which looks like natural velvet,” she says. It looks great and no one knows.”
View more of this interview in Atlanta Home Magazine
View Designer Amy Morris Interiors
3. Ginger Barber’s Rugged Texas Home. This home was featured in House Beautiful‘s July 2009 issue. As you enter her 180-acre property you see a beautiful white farmhouse, which is Ginger’s main house, and across the pasture, is her 1850s guesthouse.
When they decided to renovate the guest house, they worked with an open design scheme. It has a combined family and dining room, along with a master bedroom and bathroom.
She choose to work with a soft creamy gray for the color scheme. Going with a lighter color palette helps the rooms feel bigger. In addition to keeping it brighter, they boarded every wall with reclaimed wood and whitewashed the boards for warmth.
Ginger Barber On Lived-In Rooms
On Patina “A nice wide table with the paint peeling off. It’s got great lack-of-paint, doesn’t it? I love chipped painted things; they feel more natural, softer, more inviting. And that washedout Swedish cupboard in the main house’s living room is so wonderfully dull—I love that, too. I’ll even take a new piece and work on the finish to get the look I want. If you look at that pine table in the main house, you’ll see it’s stripped raw, rosy raw. I used white chairs around it because I love the back and forth of crisp white against old and worn”
On Slipcovers- “Again, you’ve got to live. You’ve got to be ready to throw the slipcovers in the wash andbe done with it. My work is 90 percent slipcovers. I mean, this family’s got two Jack Russell terriers, and they’re always on the furniture.”
Simple Linens- “I think a person gets sick of a floral sofa in six months, tops. And in a small space it probably takes even less time to get tired of too much color. The accessories are what give a shot of color to my work, and their shapes and textures add personality. A simple purple-striped coverlet does amazing things for a white bedroom like this guest room, doesn’t it?”
View more of this article in House Beautiful Magazine
View Designer Ginger Barber
Lindome Swag Table, H:34″ D:24″ W:36″ Lindome Console Table -H:34″ D:16″ W:62″ If you love furniture with layers […]


19th Louis XVI Gilt Wood Cartel Clock- $189+$88 Shipping From Arek631 On Ebay
Skalin Bell Chime Swedish Gustavian Gallery Wall Clock Louis XV- Starting bid $24 On Ebay
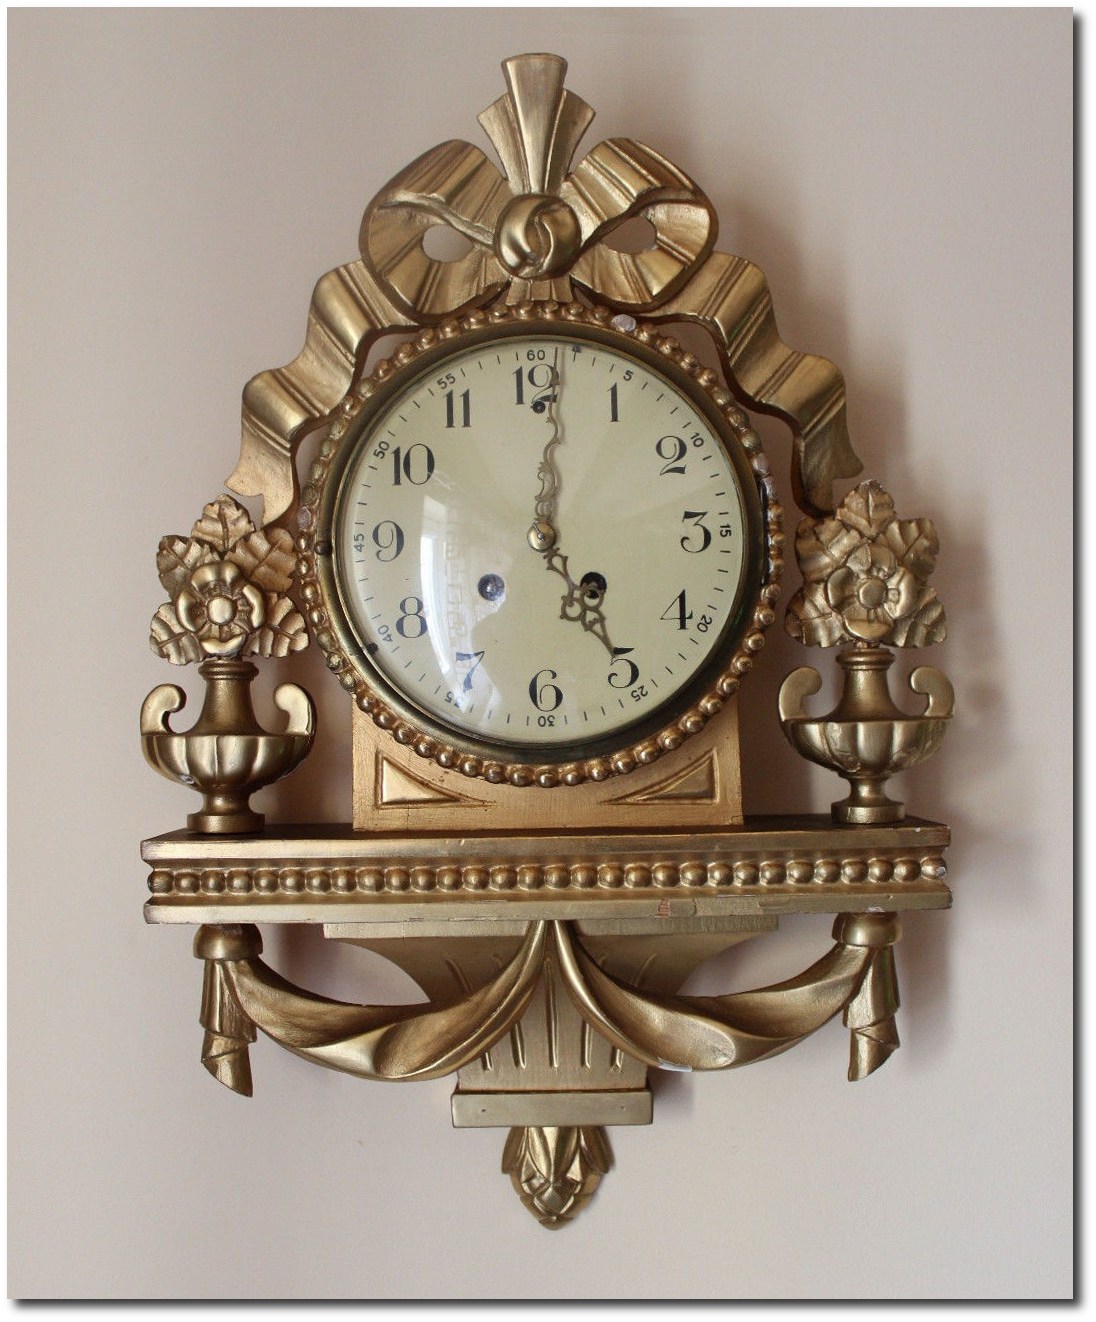
Hau Junghans Rare 19th Cartel Clock $199 From Arek631 On Ebay

Porcher sells a terrific stone top black granite bathroom vanity that has a very attractive Swedish design. These doors feature beautiful reeded wood that bring texture and dimension.The cabinet is made from select veneers and premium hardwood construction. This cabinet is designed to resist moisture and warpage over time making it ideal for the bathroom.
Paint and distress this cabinet with an off white paint. Consider a black to match the black granite top, or consider a red for a country appearance. Distress the cabinet to show off the wood details and add classic Swedish key holes for an upscale antique appearance. Amazon has one for sale from $127.50
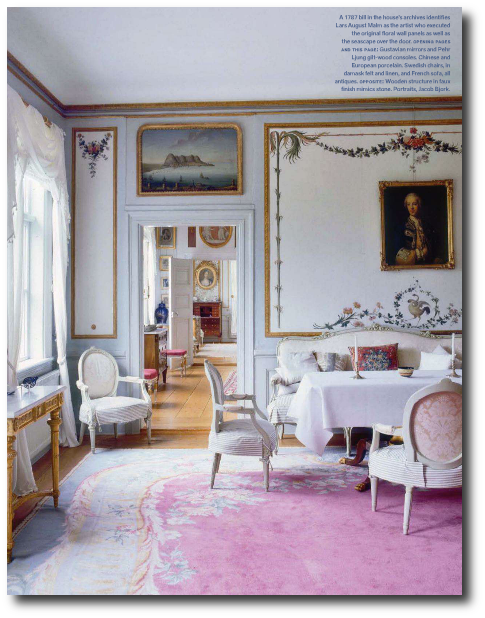
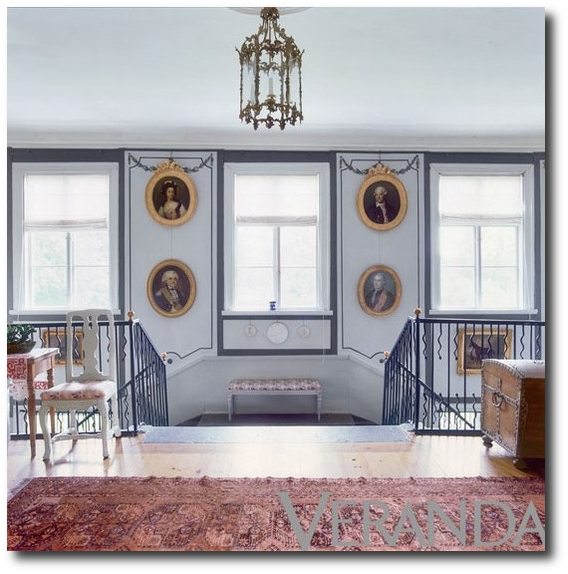 Johan and Ingrid Lagerfelt’s Home In Veranda
I have been holding on to Veranda’s November / December 2011 issue which featured an 18th century manor situated in Sabylund, 2 hours west of Stockholm. Built in 1780’s in the Gustavian aesthetic, the house has stayed virtually intact as it was back in the 18th century.
In the red room, chalky white finished chairs with gilt wood embellishments are covered in Chinese red damask. A Swedish day bed functions as a sofa and a bed, and is accompanied by a table surrounded by Gustavian white painted chairs. A Swedish Kakelugn stove has gold painted garlands on the tile. A number of small rectangular portraits hang on the wall.
In the main room, light blue painted walls are framed with wall moldings, and hand painted garlands add a romantic feel to the walls. Sheer drapery allows the light to come into this room. A settee and Louis XVI chairs with a blue and white stripe slipcovers form a seating area with a Empire table and crisp white tablecloth. A pale light blue and white scheme pull together a soft, yet delicate look for this room. A pink rug, and lighter pink upholstery seen on the backs of the chairs offer up a subdued, yet tender room to lounge in. Large gilt oval portraits add a historical feel to the room.
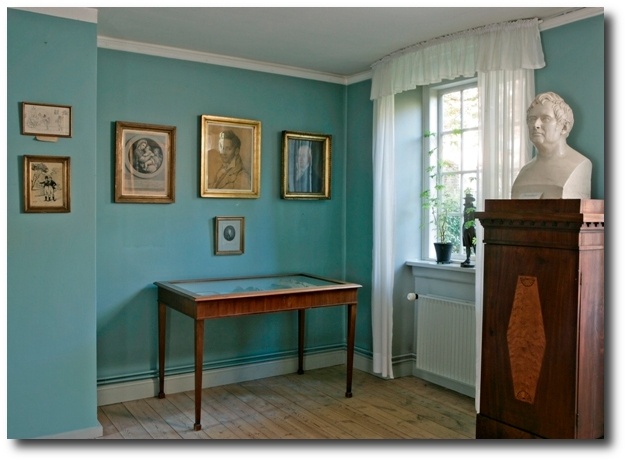
A grand library filled with the owners original books offered a taste of the high life. Books were so much more valuable in the 17th and 18 century, and having a library filled with them, suggests the owners were well off. A 1799 white stucco medallion mounted on a simple wood frame depicts the houses first owner. A Dutch or German table centers the room, with English cane chairs backed to the books. Swedish pewter candlesticks sit on the table, along with a brass telescope for viewing nature. The shelves are painted in a blue/ gray, houses natural leather books adding such rich contrast. Furniture is left in it’s natural wood, which adds a rustic effect.
“The most interesting thing about this house is that it has actually been lived in all these years” says Johan who owns the house. His wife Ingrid Lagerfelt and their two children live in this home currently. Their ancestor inherited the house from the original brother and sister who built the home. Johan is a doctor, and his wife Ingrid farms the estates 2,500 acres of land.
More from Veranda:
- Swedish Design Inspiration – Veranda.com
- Eugenia’s Swedish Shopping Resources – Veranda.com
- Swedish Country Interiors -Book Review – Veranda.com
- Swedish Antique 18th Century Daybed – Juan Montoya
- Winter Warmth – Veranda.com

Johan and Ingrid Lagerfelt’s Home In Veranda
Johan and Ingrid Lagerfelt’s Home In Veranda

An Up-close and Detailed Look At The Wall Painting
19th Century Swedish Birch Neo Classical Sofa US $5,540.37 On Ebay Early 19th Century Painted Gustavian Sofa -US […]

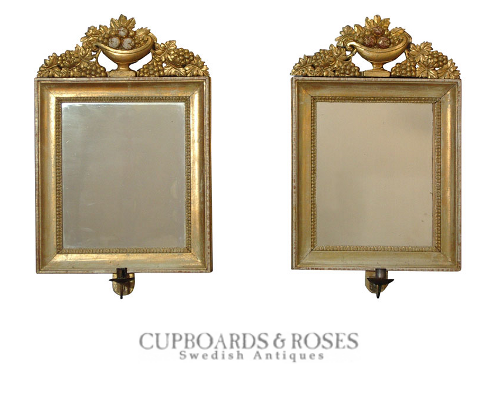 Pair of carved and gilded wood mirrors from the Karl Johan, or empire, period, Sweden circa 1830. Original brass candle holders on each. Original gilding, mirror glass, and backs. $8,500
He was born by the name Jean Bernadotte in France, and later in life became the ruler of Sweden. Here is how the history unfolded…..
Napoleon I – On The French Front
In May of 1804, the French people voted to change the consulate to an empire and to make Napoléon the Emperor of France.
In 1805, Austria, England, Russia and Sweden became united in a new Third Coalition to move against France. It was in September of 1805, when Austria attacked the French controlled Bavaria. Napoléon moved his army into Germany in September, and by October, Napoleon captured the Austrians at Ulm and occupied Vienna. It didn’t stop there, in December, Napoléon won his most brilliant victory which decimated the Austro-Russo armies at Austerlitz.
In June of the following year, Napoléon named his brother Louis as King of Holland, and within each following each victory, Napoléon enlarged the French Empire.
On the other front, Prussia and Russia joined together to mount a new campaign against France. In October, of 1806, Napoléon’s army decimated the Prussian army at Jena and at nearby Auerstadt. Napoléon was interested in preventing his enemies, especially the British, from trading with continental Europe. In November, he declared a new administrative law, which banned English ships from all ports under French control.
Napoléon was on a roll, in June of 1807, Napoléon eliminated the Russian armies at Friedland, which resulted in the signing of the Treaty of Tilsit, by Napoléon and Tsar Alexander. Under the treaty, King Frederick William III, of Prussia, became a vassal to France and lost half of his territories. Russia was forced to recognize the yet-to-be-created Grand Duchy of Warsaw which was to be carved out of Prussian Poland. Russia was also forced to make other territorial changes. Napoléon then turned to defeating Sweden, which he did with the help of Russia, in 1808.
The Start Of Things Falling Apart For Napoleon
The Peninsular War began in 1808 when Spanish and Portuguese forces rebelled against French rule. Tens of thousands of French soldiers died in the war, and the loss of Spain and Portugal greatly damaged Napoléon’s prestige.
Napoléon divorces Josephine, aged 46 years old in 1809, because she had not produced an heir. Worried about the continuity of the empire, he had the senate pronounce his divorce from Josephine in December of 1809. It was because of this that Pope Pius VII excommunicated Napoléon. Retaliating, Napoléon had the Pope arrested on July 6. On February 17, 1810, the Papal States were annexed to France. The pope was then forced to sign an additional concordat and to annul Napoléon’s marriage to Josephine. It wasn’t too long after that that Napoléon married Marie Louise, in April, 1810, the 18 year old daughter of Emperor Francis I of Austria.
On July 9, 1810, Napoléon again increased the size of the Empire by annexing Holland and much of Germany to the Empire.
Jean Bernadotte – On The Swedish Front….
Bernadotte joined the French army and after the French Revolution, he advanced quickly and was in 1804 appointed as a Marshal of France by Napoleon I, even though the pair had a tumultuous relationship. When his service to France ended in 1810, he was voted the heir to the Swedish throne.
In August of 1810 Swedish Parliament had their eye on him for the Swedish throne. In October the same year, Bernadotte arrived in Sweden, and quickly took over as the real head of state, as the reigning King Karl XIII was in poor health. The Swedish royal family was dying out with King Charles XIII, so Baron Carl Otto Mörner (a Swedish courtier), advocated for his position for leadership.
Karl Johan had good relations with France however, Swedish foreign policy led Sweden into alliance with Russia and Britain against France. Sweden was then promised to Norway, which meant going against Napoleon. In 1813 led Karl Johan Swedish troops in the sixth coalition war , which was successful against France. After the victory against French, he forced Denmark to cede Norway by the Treaty of Kiel . Norway declared its independence after having hosted a national assembly at Eidsvoll, but after a short war in late summer 1814 the Norwegians surrendered, and entered into a union with Sweden.
A few facts about Karl Johan:
- He was originally named Jean Bernadotte, but was also named Jean Baptiste after John the Baptist
- He converted the royal court from Roman Catholicism to the Lutheranism, and never learned to speak Swedish or Norwegian. French was widely spoken by the Swedish aristocracy.
- He married in 1798 with Désirée Clary , who had previously been engaged to Napoleon Bonaparte .


Rosersberg Carl’s Country Retreat – Featured in Neoclassicism In The North On Amazon

Lars Sjoeberg The Swedish Room Photo Credit Ingalill Snitt
If you are wanting depth to your walls, here are some of the very simple faux finishes you can do yourself.
Start by selecting a color theme for your room. In this post you will see a variety of color examples from pale blue, to lighter warm yellows and lighter greens.
Working with glaze, crackle finishes, and distressing techniques can make your furniture appear older than it is. Likewise, layering paint on your walls will also create depth and give you that old world look we all have fallen in love with. Here is how to do it…..
1. Ragged Finishes
Color washes are finishes that are produced with rags and paint.
Color washing is usually is achieved by a using rags which attach to a roller.
The trick to achieving this finish is to work with translucent glaze. Don’t attempt this finish with solid paint. Using a glaze mixture of (half glaze, half paint), paint is applied over a previously painted wall. The effect it produces a subtle textured finish.
A Primitive Effect Using Green, seen on www.ralphlaurenhome.com
Notice the whole wall isn’t ragged, just a small portion of it. Also painted furniture in the same tones are paired in this room to join together the various looks.
Keep All Tones In The Same Color Family
- One tip that I have learned through ragging finishes is to have the glaze mixture matched to be a few shades darker or lighter than the wall color. If you decide to do three colors, keep the tones quite close in color. The overall effect will be soft, and subtle.
Glaze + Paint For A Final Top Coat
- Another trick I have learned is to go over your entire project with a layer or two of glaze mixed in with a small amount of paint. The entire effect of the tinted glaze dulls the look slightly, and hides the roller effects. The idea behind this is to make your work appear subtle. You want to keep people guessing as to what you used to complete the finish.
2. Dry Brushing
Brushed finishes, is an effect which is achieved by dipping your brush into paint, and then removing most of the paint, on a rag. The small amount of paint allows you to add a very soft effect over a previous layer of paint.
The effect depends much on the brush you use. If you use a badger softening brush which tends to be very large and soft, it will produces a soft effect with paint.
I have used this effect with an old broom handle. The bristles are thicker, and harder, and produces lines than a soft shading.
Again, mixing together paint + glaze will allow you to get the look of an additional layer with a faux effect, and you may not have to wipe off the excess paint.
- In this picture, this effect can be achieved by using a dark brown artists oil paint. Most of the paint must be removed from your brush to achieve this look. This look can be achieved using brown artists oil paint over a muted orange base coat, slightly brushing the which highlights some of the raised details.
- Achieve depth to your furniture by applying a lighter coat over top of a painted finish. As you can see with this look, a lighter shade of green-gray is applied over a darker shade of green. This look could be achieved by dry brushing.
3. Sponge Finishes
Sponged faux finishes are those which a paint mixture is applied with a sea sponge.
Sponge painting is still the best and most frequently used mediums when it comes to classic faux finish painting.
Using a sponge, you can use multiple glazes layered over solid paint which gives the illusion of great depth.
Ideally, like most finishes, you want to start with a base coat, and build on it using a glaze mixture. The overall effect should be soft and serene.
Sponging can also be used on furniture to give an old world Swedish look.
In the past, I would use a base coat of brown, and then after it was dry, I would apply a base of oil paint in butter yellow and use a rag, or a textured paper towel to remove the paint. Within just a few minutes of applying the paint, I would remove it, and the oil paint which was wiped off on the rag I would then slightly dab here and there, on the furniture to create a very soft effect, making it seem as there was more layers to the paint finish. After it was dry, dry brushing with the same oil paint was used to blend in the textured effects.
4. Faux Leather
Terrific faux effects can be produced using a very heavy garage bag. Again working with a wall that has been painted, apply a layer of a glaze mixture on the wall. More than half glaze to paint.
Tape the wall in rectangular sections and apply the glaze in the taped area.
Next apply a heavy weight garbage bag to the wall allowing the folds to be pressed into the wall using your arms and hands.
Take the garbage bag off, and the folds of the bag produces a beautiful faux finish.
This is a very easy way to create a classy effect on the walls.
– Great Article- How To Faux Paint
5. Stenciling
Stenciling can be very powerful if it is done right.
Create your own stencils using a stencil cutter which is a fine heated tip that cuts through the plastic blank stencils with precision. Lay a piece of glass in between the stencil and the pattern, and cut away.
17th and 18th Century stenciling has always been the very best model of inspiration.
Here are a few very well done Swedish stenciled homes:
– Book Review: Jocasta Innes Scandinavian Painted Furniture
–Ted and Lillian Williams chateau in Normandy, France
-Neoclassical White Stenciled Walls-Petit Trianon
-Antique Original Red Hand Painted Trunk with Rosemaling Floral Motif
-This photo shows a great example of wall framing simply made by stencils and paint
-Here we see a stunning Rococo design stenciled, or hand painted on the walls for a distinct Swedish look.