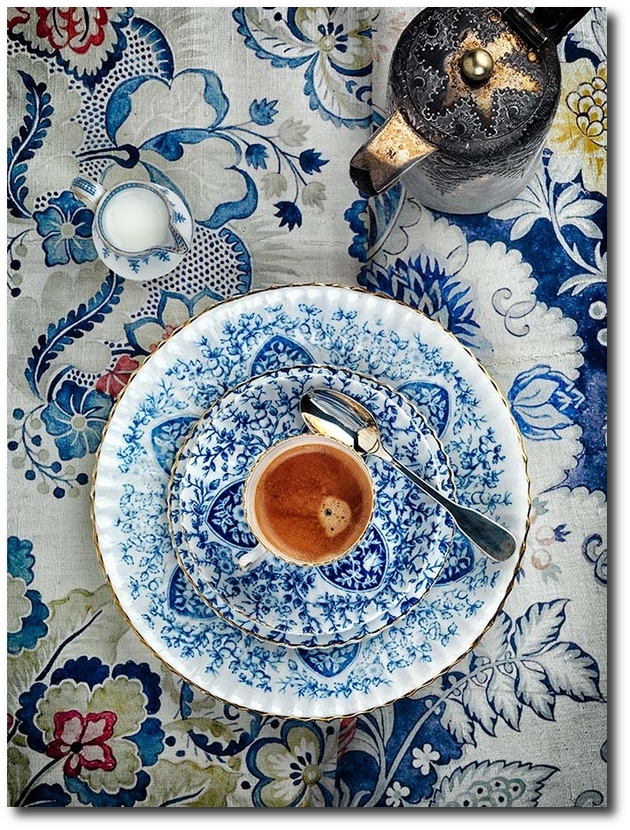
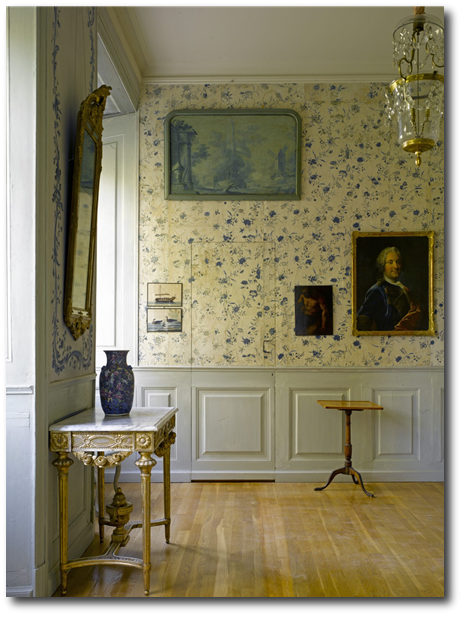
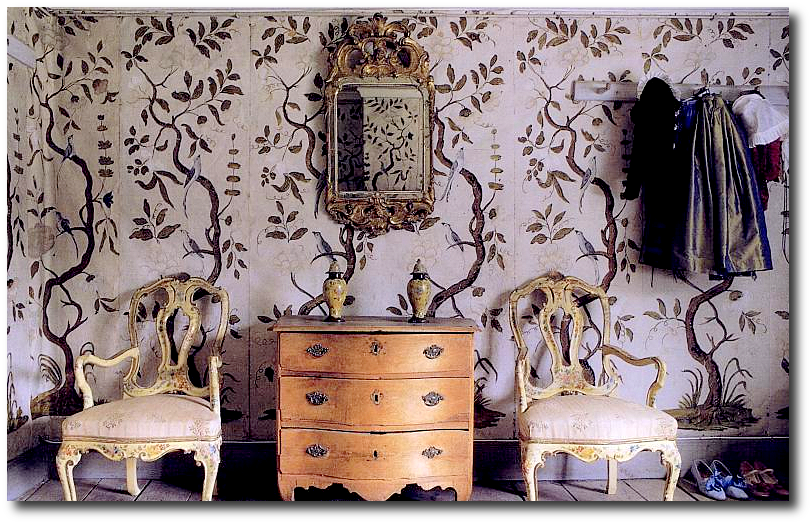
Swedish Styled Wallpaper

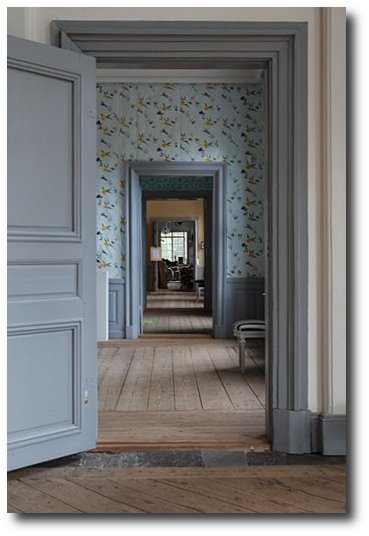
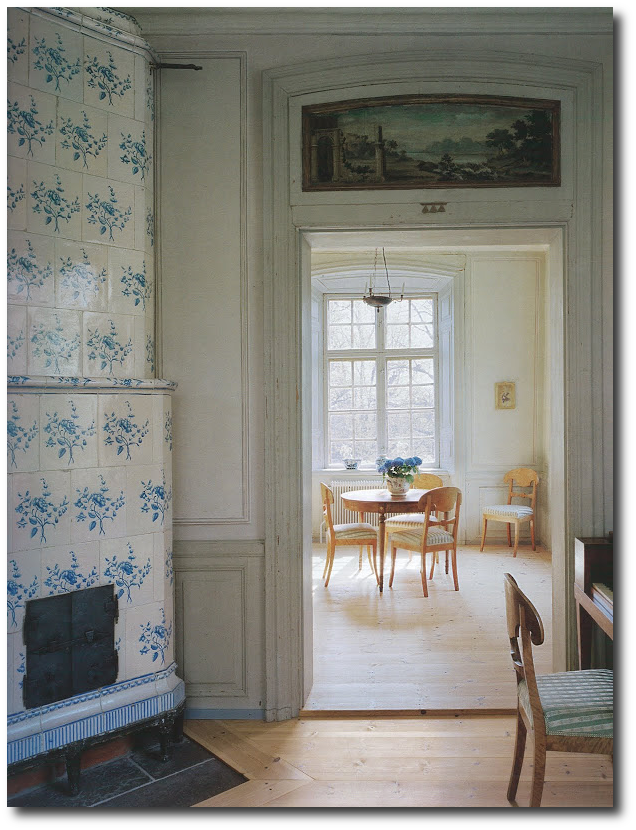
Stola Herrgård, Sweden
Wallpaper can make a tremendous difference in a room decorated around the Swedish style. It has the ability to add historical flavor to a room, and infuse color on the walls in a way that is decorative. Prints can be a remarkable tool for a designer or homeowner who wants to give an impression of a room based around a period theme.
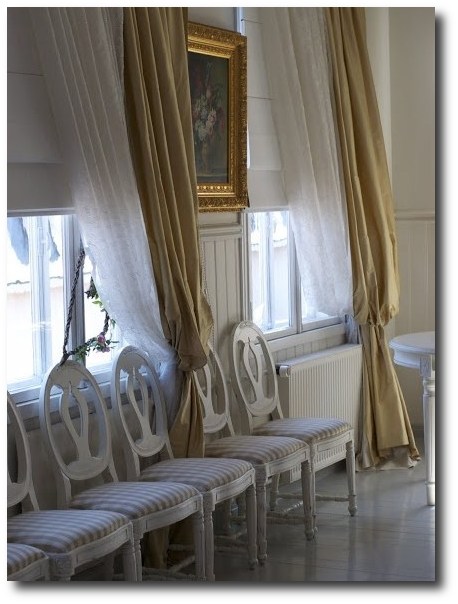
Stripes are known to be particularly Swedish, and are often seen combined with a floral pattern. See an example in this room. Floral patterns, or all-over patterns which repeat themselves are also heavily used in Swedish decorating. During the Gustavian period, damasks also became popular as many elements of the French Style were brought to Sweden. Castles and houses of the wealthy had contemporary
wallpapers imported from France to decorate the walls of their gracious reception rooms.
In the 12th Century, papermaking reached Europe, and by 1481, Louis XI of France ordered Jean Bourdichon to paint angels on blue background on 50 rolls of paper. It was then that the ruling class began to commission artists to paint paper for their walls. In 1599, a Paperhangers guild was established in France. Then in 1675, Jean-Michel Papillon started making block designs in matching and continuous patterns. He was considered the inventor of wallpapers. Come the 18th century, wallpaper products from London became popular. Wallpapers gained popularity because they were less expensive, than hand painted papers. Later, Louis XVI issued a decree that wallpaper rolls should be about 34 feet in length, in 1778. It was Christophe-Philippe Oberkampf of France who invented the wallpaper printing machine in 1785. Nicholas Louis Robert of France invented a way to make endless roll of wallpaper.
Duro, Gammalsvenska Wallpaper From Sweden
Since 1946, the past three Kings of Sweden have appointed Duro as supplier to the Royal Court. Today Duro shares this honour with only about 120 other companies in all of Sweden. In addition, the fact that the Royal Family and Court are very restrictive with the distinction makes it all the more appreciated.Over the years, Duro has accumulated thousands of wallpaper fragments from castles, manor houses, and historical buildings throughout Sweden.Working closely with antiquarians and museums, Duro has meticulously recreated many of these beautiful patterns that can be found in their Gammalsvenska Collection.
Country Swedish
Country Swedish sells a variety of Swedish furniture, fabrics, rugs and wallpaper; everything you need to put together a Gustavian styled room. Country Swedish makes fine reproductions are designed and developed by craftsmen with careful attention to scale, proportion and ornamental details. Many of their wallpaper designs can be paired with sophisticated interiors or country interiors depending on the furniture you select, and the coordinating accessories. They have a wide variety of period style wallpapers with several colors to choose from which would aid in furnishing a Swedish country house or an elegant Gustavian city home. Check out their wallpaper selections here, and my favorite picks are below.
The Gustavus Collection By Zoffany
Zoffany has turned to the restrained classical style of eighteenth century Sweden to influence a wallpaper collection that exudes character,elegance and simplicity. Core colours of creams, whites, blues and greys are warmed with the addition of earthy reds. The challenge for the Zoffany design studio was replicating the quality of the natural materials inherent to Swedish eighteenth century interiors for a contemporary market. By using modern printing techniques and rich opaque pigments the studio has captured the authentic textures of natural wood and rough plaster.
Noteworthy Posts:
Book Review: Jocasta Innes Scandinavian Painted Furniture- The Swedish Furniture
Spare Room Before Wallpaper- Lily Oake
Master Bedroom Wallpaper Lily Oake
Swedish Interiors: The Chinese Pavilion Continued……. –The Swedish Furniture
Scandinavian Design- The Swedish Furniture
Love Affair With Blue and White Wallpaper – Lily Oake
Picture Credit
- The Best Wallpaper Place
- Aged And Gilded Blog
- Designer Timothy Whealon
- Gammalsvenska Collection
- Henriot Floral wallpaper by Quadrille Featured On House Beautiful Magazine
 Duro, Gammalsvenska Wallpaper
House To Home Magazine- Pierre Frey
Eleonora, By Gustavus by Zoffany
A beautiful design of shaded birds amongst trailing leafy-branches on a
golden lime-washed effect background – ideal for natural freshness and
modern sophistication. Additional colourways also available. Please
request sample for true colour match.- Available Through Wallpaper Direct
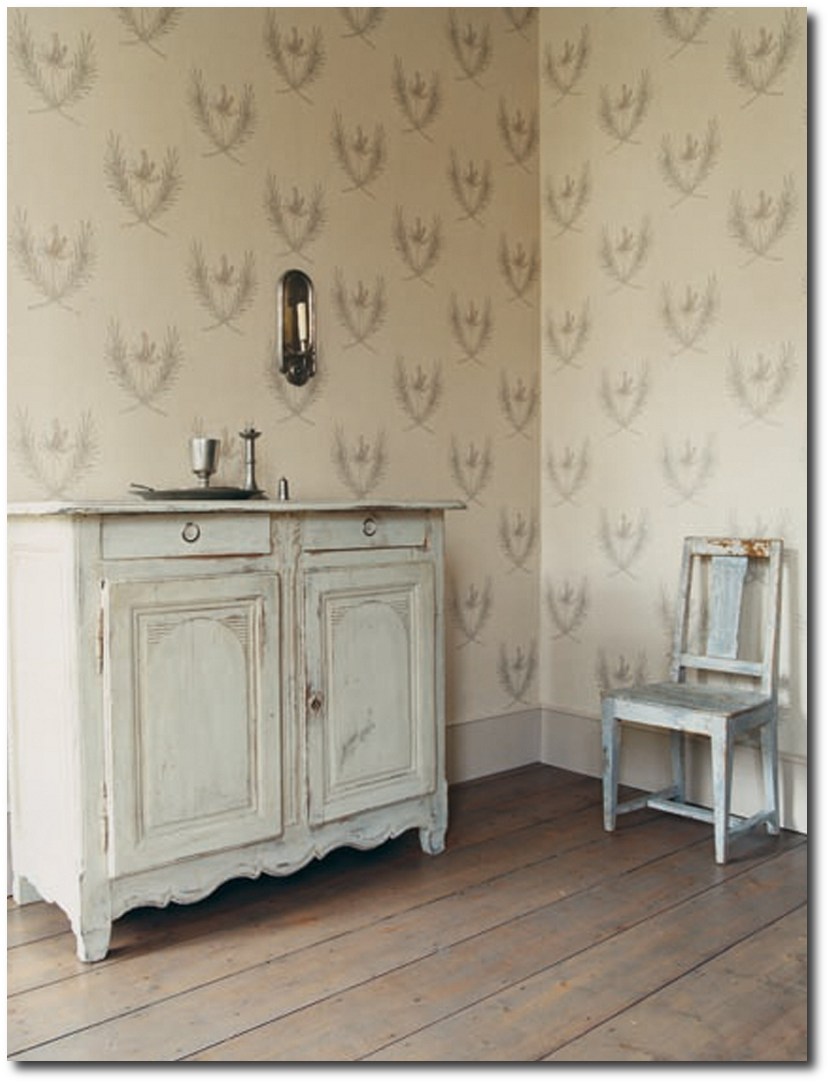
Thibaut Piccadilly Birgitta


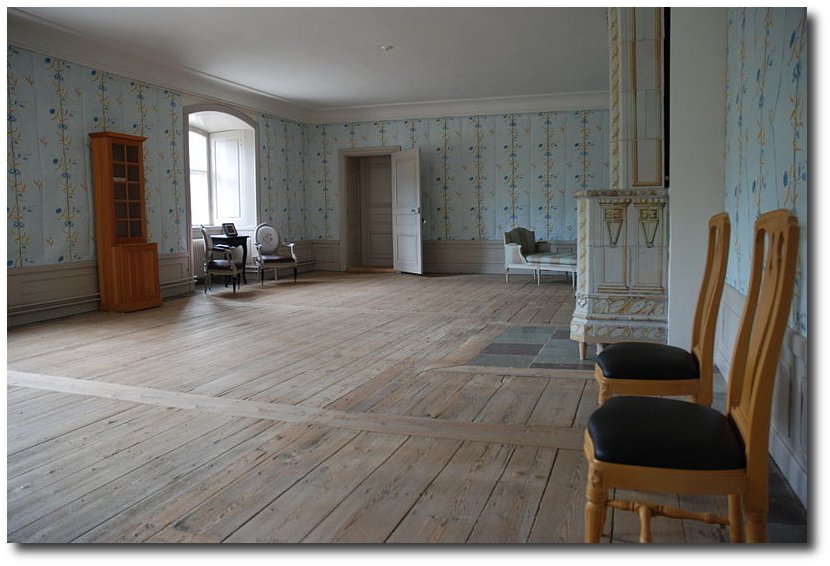
Wallpaper Used In Svartsjö Palace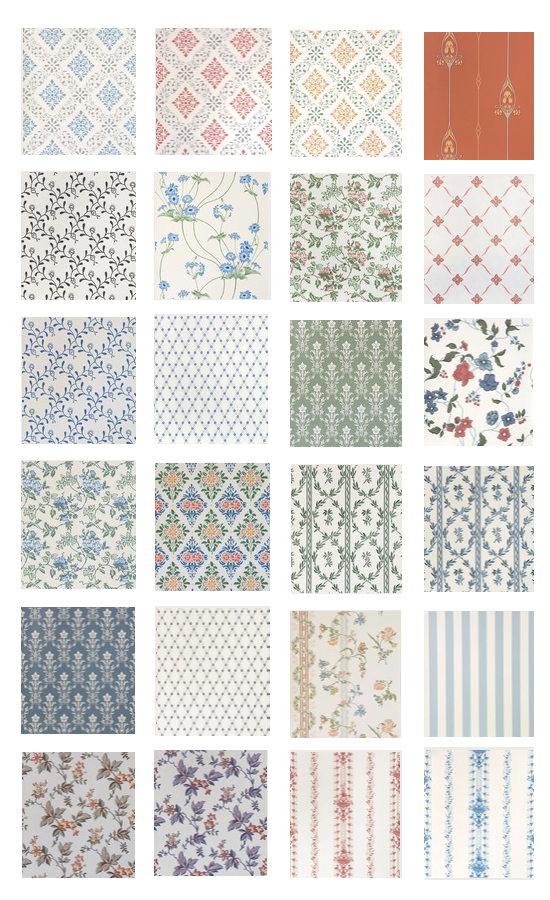


Stylish Looks For Slip-covering Your Furniture
 Veranda May June 2012
When you think of slipcovers, you may have memories of the 80’s clunky furniture covered with slipcovers that were tied with over-sized bows and small scale stuffy florals with outdated colors. Interior design took a tumble in the 80’s and 90’s, however, interior design directions haven’t ever looked so good as they do now. Today, we are seeing an emergence of the simple raw materials become exciting again. Old weathered barns, which were once eyesores, fetch quite a bit of money, as the wood is recycled and reclaimed furniture fetches top dollar. Simpler interiors and quality materials have become a new way of life, as people throw away the cheap products mass produced overseas and opt for natural, raw, rustic and antique goods. Those who follow the design trends for the home aren’t shopping at the big box stores for their furniture, but rather they are after the unique looks which merge with their individual styles.
Slipcovers have a long history in interior design, because they offer change and functionality in the home. In the 18th century, the slip-cover had become a design tool for wealthy homeowners, who wanted a change from season to season. Slipcovers were made for furniture,and often coordinated with drapery. Slipcovers have always posed some challenges, mainly that they can be ill-fitting and poorly made. Wrinkled seats and sagging backs produce a careless appearance that gives a lax impression in even the most orderly room. Making slipcovers can be complicated, as they need to fit furniture well, just as a sharply made tailored suit can define a beautiful figure. If the slipcovers are made poorly, the lines of the furniture can be completely lost.
Slip-covers also posed some challenges with seasonal changes. Many would find the covers too tight, or too loose in different seasons. To compensate this, linen covers were made a bit larger, which could stretch with summer’s humidity and heat. The material would then have enough shrink for the change in the dry air for the winter. These difficulties are overcome by accurate measurements, and carefully following the lines of the chair when the pattern is made. Allowing several inches of material for tucking at the back and under the arms, a slipcover can be comfortable throughout the seasons.
Several Professional Tips
– One famous London upholsterer puts a strip of wood across the back of the seat before tucking the material in, to give added firmness.
– Elaborate detailing such as French pleating, cording, ruffles and special buttons add a customized look to any piece of furniture.
– Heavy linen, and cotton canvas have been popular as natural slipcover choices. The French tickings and cotton damasks make great bed covers, drapery and slipcovers. Consider using unbleached muslin with which also can be dyed in soft shades of blue, green, or yellow. Gingham and simple checks can give your room a Swedish, gustavian flair. Stripes lend a sophisticated touch to any room, and wear well, and are especially easy to launder. Chintz florals are quite attractive to look at, and do a terrific job of keeping the dust out and soil out than other fabrics. Chintz is the most expensive by far, and the most effective material for slip covers. The bold patterns of birds, flowers, and medallions of contrasting colors make it a pattern that is lovely to look at year around.
– Gathers, and wide flat box-plaits add interest to the bottom of slipcovers. These details can be used just below the seat of the chair, probably on a line with the upholstery or seat frame. This style works particularly well with French chairs with beautifully designed cabriole legs which are so decorative in themselves that they do not need to be concealed.
– Consider combining plain fabric colors with a few stripes, and some delightful flowered patterns.
Pamela Pierce – Swedish Chair Natural Fabrics
Swedish Chairs With Linen Slipcovers from Biskops Garden

Dining room slipcovers by Donna Jenkins
Stephen Sills’s Holiday Decor – Veranda.com
Slipcovers From brucebarone.com

1.Stunning Wingchair Slipcovered –thebrownshed.com
2. Slipcovers From store.theseasidestyle.com
3.customslipcoversbyshelley.blogspot.com
4. Slipcovers Featured on brabournefarm.blogspot.com
Slipcovers In Neutral Fabrics

1, 3, 4 Unknown – 2. Slipcovers Featured on stylecourt.blogspot.com
 1.Heavy Ruffling From nineandsixteen.blogspot.com
2. Upclose Detail Of French Ticking –michellefritz.blogspot.com
3. Stunning Louis XVI Chair in Pink From Rachel Ashwell
Classical Slipcovers At Monticello. Photography by Charlotte Moss.
Thibaut Ad
Green Gingham Sofa –Tilly’s Cottage

1. Green Gingham Slipcover- Country Home
2.Green Desk Chair Slipcover – flickr.com
3. French Ticking Slipcover- pinkwallpaper.blogspot.com
4. Slip-covered toile Chair – Cathy Kincaid
Slipcover Your Headboard! Martha Stewart
A slipcovered chair, photographed by Russel Sadur.

Dropcloth Slipcover – The Twice Remembered Cottage
Image from Country Home

1.Tips On Making Slipcovers With Drop Cloths- missmustardseed.com
2. Checked Linen Gathered Slipcovers- cotedetexas.blogspot.com
3.Paula & Erika Table Covers etsy.com
4. Knife Pleats Around A Sink- countryliving.com

Jackie Von Tobel- Jackie Blue Home Blog

1.Slipcover With A Beautiful Large Bow- beekeeperscottage.com
2. Beautiful Mahogany Gray Painted Chair With A Toile Slipcover- whendecorating.blogspot.com
3. How To Make Slipcovers- honeybearlane.com
4. Pleated Slipcover- thecottagejournal.com
Slipcovers Over A French Sofa – peekingthruthesunflowers.blogspot.com
French Flour Sack Linen Tablecloth-Jeanne dArc Living Blog

Designer Kelley Proxmire
The Best 5 Websites For Purchasing Antique Hardware
 Rococo & Empire Pulls- House Of Antique Hardware
Most do-it-yourselfers know that adding new hardware to new or existing furniture or cabinetry is a great way to dress it up. These seemingly small touches make a huge impact on the overall appearance of a piece.
You can create the look you want. Hardware pieces are available in a variety of finishes, designs, and styles. You can walk into any local hardware store and find shiny chrome and brass knobs and handles as well as modern sleek knobs that have clean simple lines.
The only time there seems to be real problems finding the right hardware and accessories is if you want antique hardware. However, the Internet has made it easier to find what you are looking for; this article offers a list of the top five online resources for antique hardware. It’s a list you can refer to time and again.
Antique Hardware & More provides a great selection of knobs and pulls for all types of furniture and cabinetry. Whether you are looking for antique pulls or knobs to add an elegant touch to your dining room furniture or to bring out the charm on your kitchen cupboards, this place is worth checking out.
The site includes a search feature to make finding what you need easy. Antique Hardware & More also sells the tools and other supplies needed for restoration and antique refinishing projects.
House of Antique Hardware offers a comprehensive resource of reproduction hardware. You can shop according to type, such as door hardware or cabinet and furniture hardware, and you shop by style and special collections. This online store provides a phone number for questions and assistance. House of Antique Hardware accepts credit cards online, and it is accredited by the BBB.
With more than 25 years in the business, Kennedy Hardware must be doing something right. This shop offers wholesale prices on restoration hardware. You will find a huge selection of all types of hardware. This includes architectural hardware as well as hardware for furniture and cabinetry. This company can provide skeleton keys, glass knobs and handles, furniture casters, and much more. If you are into antique restoration, Kennedy Hardware is definitely a site you should check out.
Rejuvenation has everything from doorknobs to window hardware and light bulbs. Shoppers can search and browse according to category, by room, or style. Styles include such classifications as arts and crafts, colonial revival, deco, mid-century modern, period basics, and Victorian. Rejuvenation provides a phone number as well as a live chat for questions and assistance with orders.
Signature Hardware offers a large collection of hardware pieces in a variety of styles. Shoppers can browse according to departments, and the search can further be narrowed down according to specific categories. Signature Hardware offers an online signup for a free catalog and an email newsletter. The site accepts a variety of payment options including PayPal.
Final Thoughts
A replaced hinge and a new knob or handle is all it takes to make an old piece of furniture new again.
This list is not complete. There are other online resources that offer quality products at good prices. If you know about some of those resources, please share them.
Restoring furniture is a fun and cost-effective hobby. It is a way of preserving our heritage and passing on history. And many times, the simple addition of new hardware is the magic that brings furniture back alive again.
If you have an old piece of furniture hidden in the attic or basement, why not give it new life? Add some new hardware and let it live again.
Debbie Allen is an online marketer and professional writer.

House Of Antique Hardware – Swedish Styled Keyholes

Louis XVI Style Matte Black Cabinet Ring Pulls 12 Pulls For $24 Dollars

My Swedish Hardware Picks From Kennedy Hardware

Swedish Little Girl, Old Country Door Hardware- Photography by Per Breiehagen
Swedish Chest In Old Red Paint- Ann Koerner Antiques

Cast Iron Wreath Torche Keyholes 6 For $12 Dollars
These don’t come in brass, but rather I spray painted mine.

If you are ever looking for some SMALL delicate ornate decorative knobs, consider these small round pulls from National. They remind me of the beautiful jewelry of David Yurman, who is famous for his rope gold jewelry. One of the older hardware shops in Arlington Virginia had them on their shelves, and they were inexpensive, yet beautifully decorative. The knobs themselves are 3/4″, so quite small for and ideal for dressers, small scaled furniture, furniture drawers and anything else you need a small knob for. These knobs come in a bright shiny brass, and come two per package. Amazon sells these 2 pack knobs only for $3.50.

Swedish chest of drawers with original paint and hardware, three drawers, cabriole legs on squared feet. Provenance on top drawer dates piece to 1737.

Gustavian Chest of Drawers – Painted Gray

A Swedish Gustavian Painted Commode with a Simulated Marble Top circa 1790

Swedish Bombe Chest of Drawers– Sweden circa 1860 Cupboards & Roses
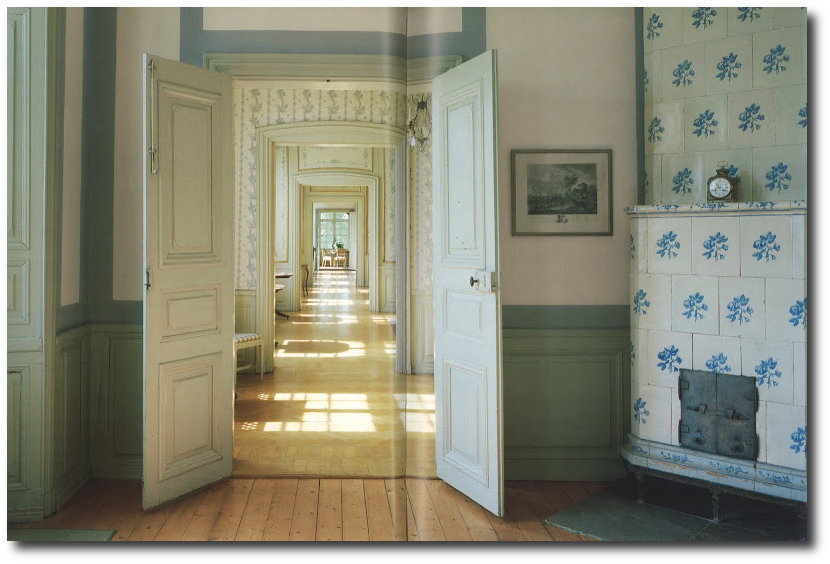
A Nordic Design Staple- The Swedish Kakelugn Tile Stove
These beautiful stoves were first designed in Sweden in the 18th century, as a result of an economic crisis that pushed Swedes to come up with a better way of extending the life of their firewood. It was then that the famous Swedish stove “kakelugn” was born.
Early versions of the tile stove date back to the Middle Ages, however, two clever Swedes created smoke channels beneath the tile, that held the heat for an extended amount of time. They introduced vents that controlled the burn speed, giving an additional 24 hours of comfortable radiant warmth. With the heat-retaining cast iron core and long multi channel flues, the kakelugns were able to retain heat, keeping rooms warm up to a whole day after the fire is out.
These antique stoves vary in shape. They are often seen round, rectangular, or columnar, and positioned in a a corner or against a wall. Heights range from about 5 feet 10 inches up to 9 and 10 feet tall.
In an article written by Stone Mason, they describe these amazing stoves:
“The period between 1500 and 1800 was known as ‘Europe’s little ice age’. In Sweden, where it was even colder than it is nowadays, it was clear that the constant use of fireplaces from morning till night would eventually lead to the total depletion of the nation’s forests. It was most fortunate, then, that in 1776 Adolf Frederik, the King of Sweden, commissioned Carl Johan Cronstedt to develop a stove that would make better usage of the country’s timber resources.”
“Cronstedt, an Earl, architect, inventor and scientist, was given the tall order of producing a design that would use much less wood while still heating Swedish homes efficiently. An interesting side effect of this commission was that not only was a model developed that accomplished the King’s request, but it turned out to have other unforeseen environmental benefits.”
“Very little smoke is seen coming out of a chimney where these stoves are being used. In the course of the year, a kakelugn regularly used will burn the wood of one medium sized tree”
“One main advantage of the kakelugn is that it burns very hot, typically 1110-1200 C, whereas a standard iron stove burns at around 650-700 C. However, you can safely touch it and feel only warmth”
Stockholms Lans Museum provides us additional information on these stoves:
“The decoration was initially cobalt blue but later extended with yellow, green and brown violet. First with the new colors were Rörstrand factory and from 1758 dominated the all colors. But it was rare for more than three patterns of colors in the same oven.”
“In the mid-1700s it was not unusual for dinnerware pattern was used for The Fireplace tiles. The tiles were decorated with repeating patterns where palm branches, Chinese patterns and blomrankor were common motifs. The designs were painted by hand on each tile, always against a white background. ”
“Gradually began to Swedish architects interested in the design of the stove. The workshops were to start from pattern drawings made by Swedish architects rather than making use of foreign models. Fireplace Manufacturing became a domestic crafts.”
“These fine stoves occurred only in castles, mansions and wealthy burgher. But even in these environments were those in the representative areas, the easier rooms put you in the cheaper and plain tile usually green or yellow.”
")
Kakelugnar empiremasonryheaters.com
Low Tech Magazine suggests that this old technology should be brought back.
“An oven stove is a very efficient and robust oven that radiates heat all day. In the US it was introduced only 20 years ago, but in Europe the technology is almost one thousand years old. Especially in Russia,Scandinavia and Central Europe the oven stove has a long and rich tradition. In the 18th century, several European governments financed research to improve the technology, as a way to overcome an acute shortage of firewood: ecotech before the term existed.”
“traditional Swedish tiled stove (kakelugnar) is so beautiful and iconic.”
Additional Links
-Stunning White Stove Taken By Kasmil on Flicker
-Blue and White Stove From Gissa’s Flicker
-A Beautiful Room In Ekebyhovs castle.
-Kakelugn Tiled Stove –Victorious Felines
-Tiled Stove –Victorious Felines
-Swedish Cafe House –Eric Ebel
-Late 19th Century Swedish Ceramic Tiled Stove- KBHS Photostream
-Kakelugnar (Swedish tile stove)


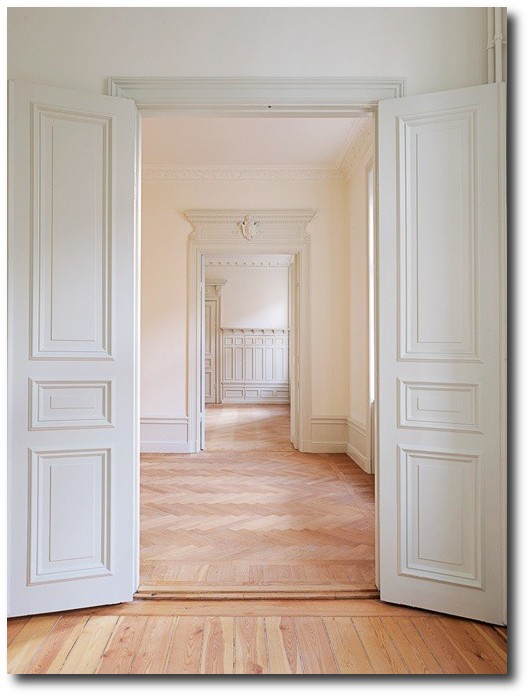
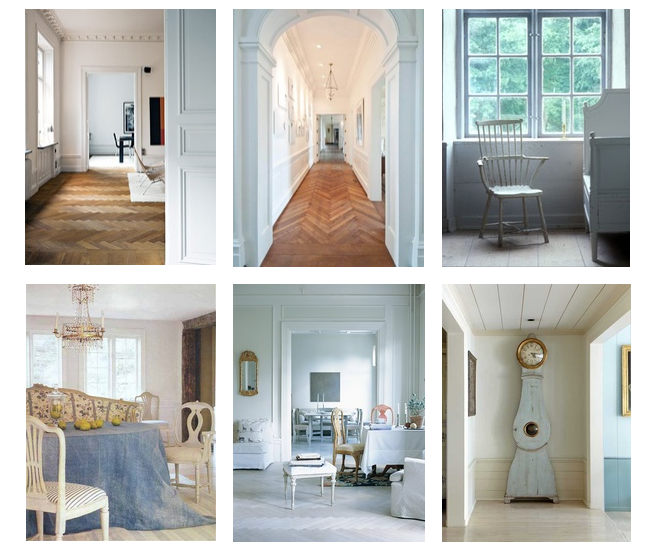
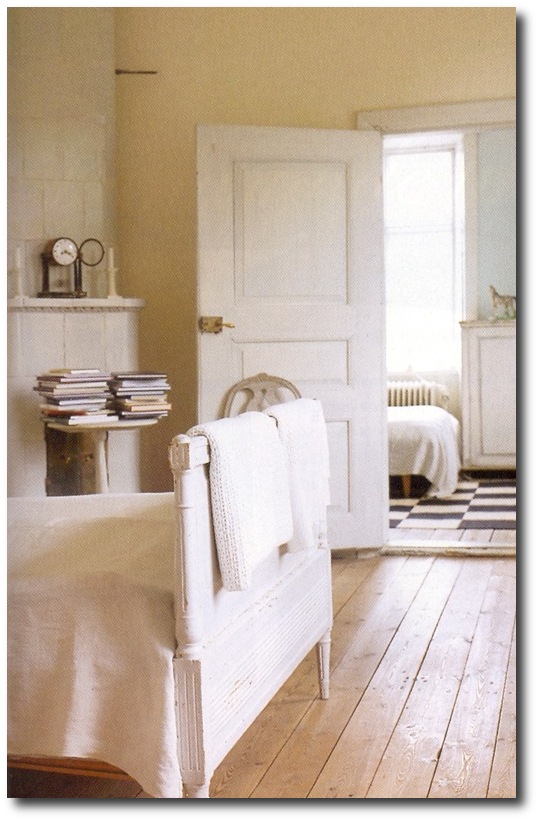
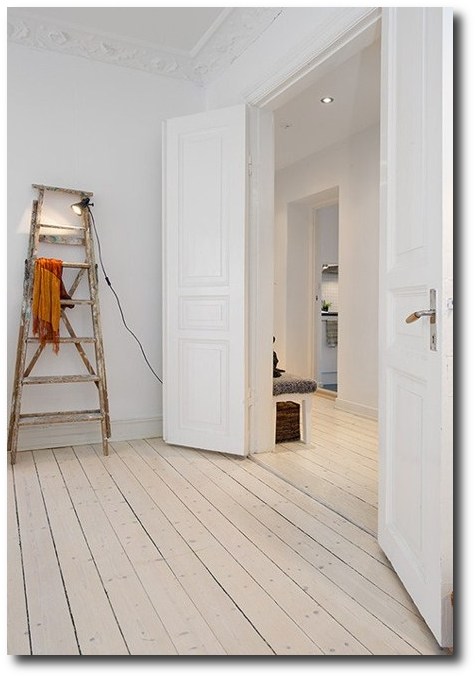
Wood Plank Flooring, A Swedish Design Must Have – Part 1
Wood floors are one of the most recognized design feature of the Swedish Gustavian look. Rustic planked wood is a top choice for flooring in the design industry. Wood floors are easy to maintain, and they are associated with the utmost quality and taste. Hardwood flooring will outlast carpet in any competition making it a smart investment.
If you have children or pets, carpet gets dirty. Pets that come in and out of the house bring dirt back into the home, and over time, the carpets become soiled. In this situation, carpeting only looks good after they are shampooed. While I am not here to beat up carpet, as there are many styles of carpet that are elegant choices, wood flooring maintains better over the years. Even if you decide to go with one of the less expensive wood alternatives, you are assured that this look is easier to maintain than carpet.
It wasn’t until the Baroque Era began, that wood flooring became an option for the home. Before 1625, most European houses continued to have dirt floors. Wealthy families utilized elm or oak boards which were held on joists. Once wood floors gained popularity, it became known as a more affluent design choice. Throughout the 17th and 18th century wood flooring flourished. Solid wood plank flooring, was installed in many homes, and many trend setting homes painted their floors. Upscale homes installed the richer designs such as parquet and marquetry wood patterns. Wood flooring today is still the most desired flooring, surpassing stone flooring.


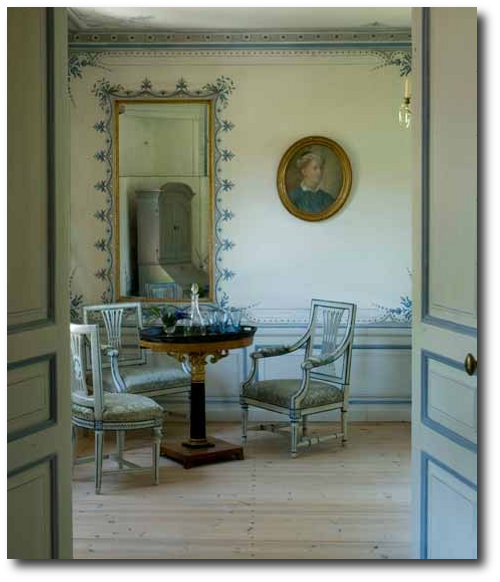
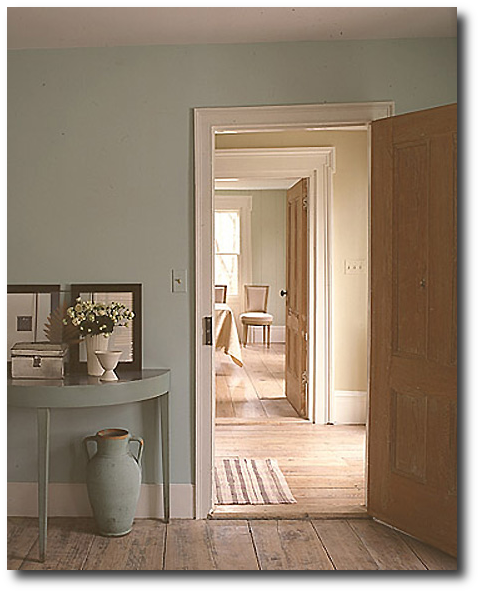
Svartsjö Palace In Sweden

Svartsjö Palace In Sweden

Svartsjö Palace In Sweden
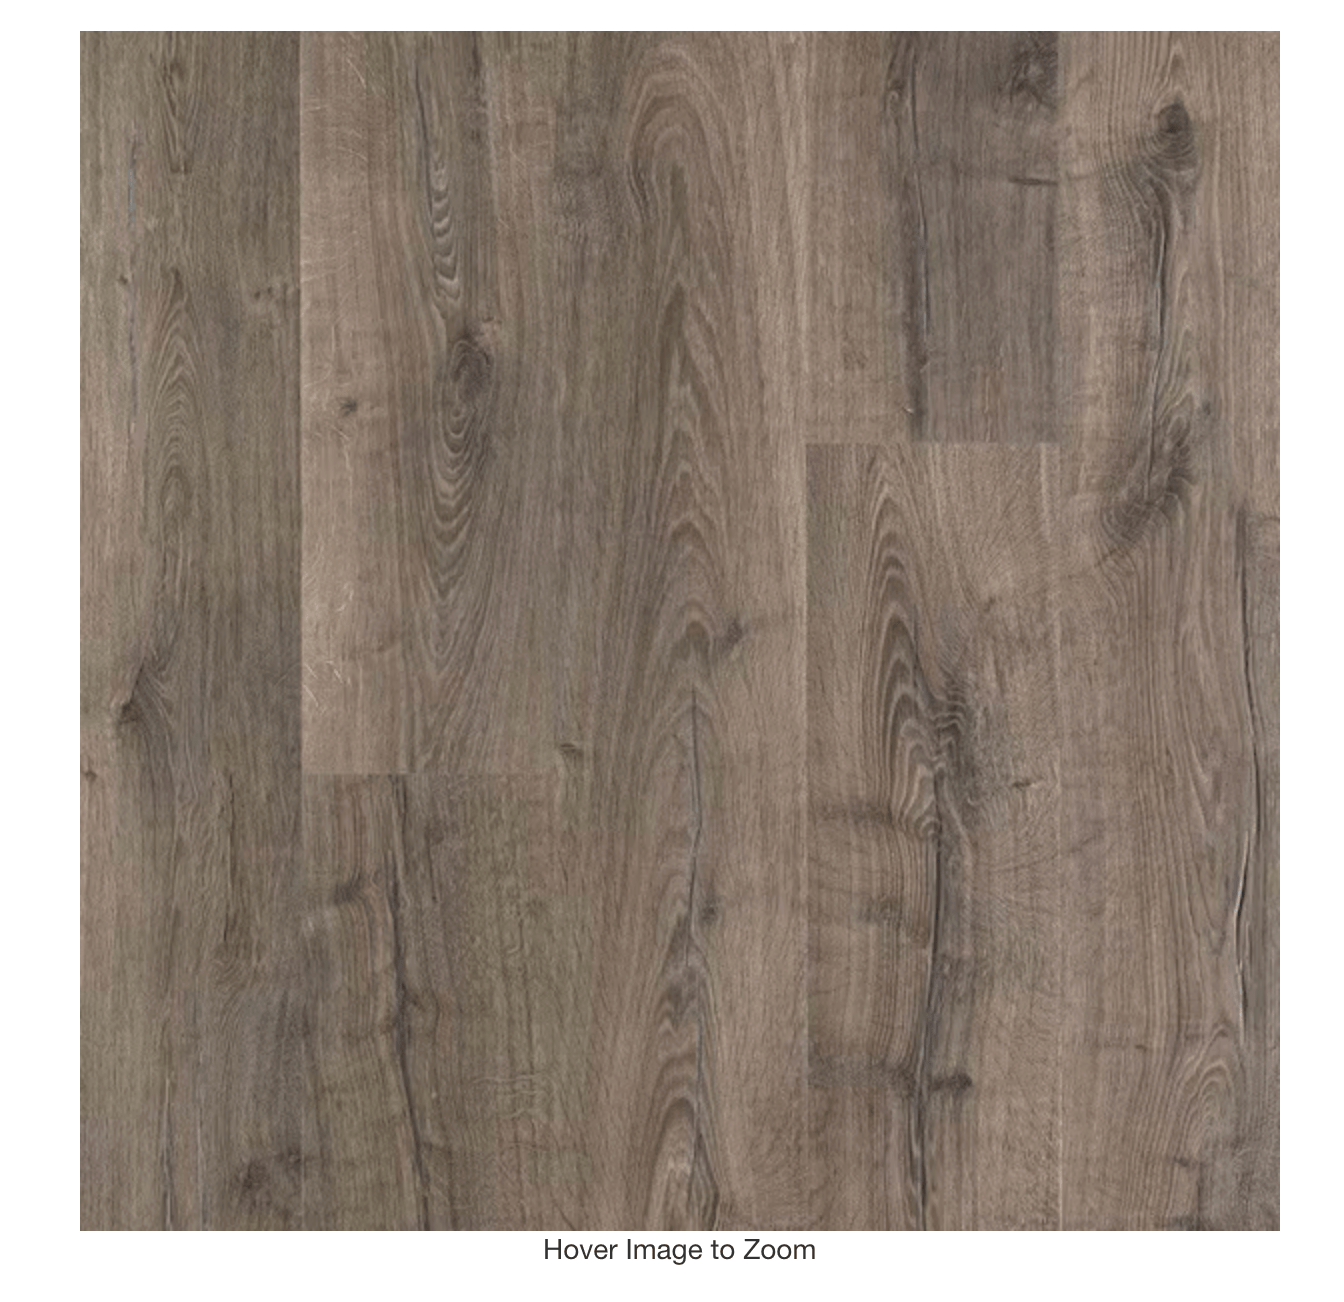
Vinyl Plank Flooring, A Swedish Design Must Have – Part 2
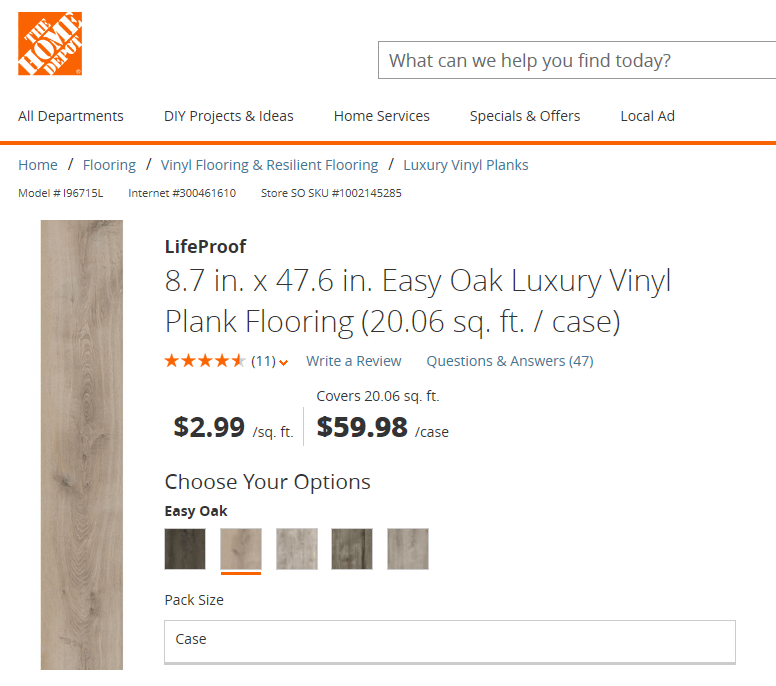
See this option at Home Depot
If you’re a do-it-yourself type of person who isn’t afraid of tackling renovations, then this is an article is a must-read if you are planning on replacing your flooring. Every home is under a budget when renovations come into play. If are a few inexpensive alternatives for the rich look of hardwood flooring.
Inexpensive Options For The Wood Floor Looks
Vinyl Plank “Peel and Stick” Flooring.
Vinyl wood plank floor is a rather new idea that has become popular in the last several years. Everyone is familiar with the “peel and stick tiles”, now they have come out with a “peel and stick plank” that replicates plank flooring. If you want to save some money and install the flooring yourself, this might be an option to consider.
Pros For Vinyl Plank “Peel and Stick Flooring”
All that is required to install theses floors is a utility knife with a sharp blade and a tape measure. Peel-n-stick vinyl flooring means the adhesive has already been applied to the back of the vinyl, and all that’s required to install the vinyl plank is to peel off the protective paper and firmly press the plank in place. Unlike wood flooring, vinyl wood plank floors don’t require a miter saw to complete the cuts around the room. Vinyl planks can be cut to the appropriate size with nothing more than a good utility knife and a metal ruler.
-Lowes Style Selections put together a very simple video guide of how to install the Peel & stick vinyl plank floor. These tips will give you a professional look- Here
-In this video, a customer makes a video of how to install plank flooring. What I love about this video is this customer is an every day person who hasn’t installed flooring before. If you are considering buying this flooring, and are worried about how to install it, this video will put your mind at ease- Here
-One Ladies Kitchen Transformation here
Many companies have mimicked numerous varieties of wood in countless colors. The reason vinyl has become so popular is the material is durable and easy to clean, and anyone can install it. You can spill almost anything on the floor, and not worry if it will stain the flooring like you would with wood.
Our floor has a large sheet of vinyl flooring that is meant to look like hardwood and it has held up quite well since we have lived in our home. I could drag a large piece of furniture across the floor, and it likely wouldn’t scratch like laminate would.
Large sheets of vinyl are pretty complicated to install for the average DIY homeowner, where as the individual planks make it easy for any homeowner to install with ease. You could easily do a room over the weekend yourself, and I suppose you could haul these boxes home in your car compared to rolls of vinyl.
Protile 4″ x 36″ Vinyl Plank in White Wash -36.-Square Feet per Carton $47
On the Voices Yahoo Site, One Customer gives this product an in-depth review, here are some of the comments I found interesting:
“Seeing our strong interest but still sensing some hesitancy, the Home Depot employee told us that WalMart had been installing this flooring in upgrades to many of its stores. In fact, he suggested that we go visit our own local WalMart to see TrafficMaster Allure flooring in use – they had installed it a year ago. We went, we looked closely, and we were impressed. Regardless of what you think of WalMart as a flooring reference, you know that they get lots of people through their stores and the flooring they use has to hold up. The TrafficMaster Allure flooring looked great in WalMart.”
“While on the carport, several hundred dollars worth of Traffic Master Allure was subjected to two bouts of heavy rain that flooded our carport and soaked our boxes of wood vinyl flooring. We were very concerned that we had lost our flooring but we opened the ruined boxes and let the TrafficMaster vinyl planks air dry. Surprisingly, everything seemed to be fine. The vinyl wood planks dried perfectly, the adhesive was still plenty sticky, and there was no warping at all.”
“Cost-wise, at $2.39 a square foot, TrafficMaster Allure is about the same price as the average floor tile, comparable in price to Pergo laminate flooring and half the price of hardwood flooring. Additional cost savings can be found because it is entirely possible that you can install this flooring by yourself – even if you aren’t an experienced do-it-yourselfer. It is also much quicker to install time-wise than a tile floor. My only complaint would be in selection choices at the store. There were several color choices in stock at Home Depot and no one mentioned that even more choices were readily available online”
Cons For Peel and Stick Plank Flooring:
Apartment Therapy did up a post called “TrafficMaster Allure Vinyl Flooring” where they posted comments from a Home Depot employee left on their website. Check out the post and look over the dozens of comments left on the article, before purchasing the product.
1. Peel and Stick Plank Flooring IS Not for Concrete Flooring.
This style of flooring is meant to be used in rooms that are normally kept at room temperature, (65 to 85 degrees). If you are thinking about using it in a basement, or sun room that are rather cold, then vinyl plank flooring is not for you.
On the Buzzillions website, the picture above shows Traffic Master flooring installed over concrete, and it looks horrible. “I installed my Allure floor in Oct of 2008 over concrete floors (30 year old house, basement, previously I had carpet down with zero water issues) . In the spring of 2008 the below started. I can scrap up the glue and clean up the floor only to see the same thing happen again within 2weeks…. I’m planning to go to them to see what they can offer as a replacement”
2. The Pattern Wears Off
Vinyl wood plank floors cannot be re-finished and have a relatively short life-span compare to solid wood floors.
Depending on the thickness, manufacturer, and foot traffic volume, vinyl wood plank floors might only last a short amount of time. After the floor has reached the end of its life, it will have to be removed and a new floor installed.
Solid wood floors on the other hand afford the homeowner the ability to re-finish them several times, even allowing for the ability to change stain variations and colors as they re-decorate.
One customer leaves this comment:
“I put it down in my kitchen over a smooth surface (vinyl sheet over plywood), but after a few years the edges turned white as well as several areas where the “wood” surface wore off leaving big areas of white. We use gentle cleaners and there are only a few people living in the house so it doesn’t get tons of traffic. I love the product for the ease and look, but now I have to replace my floor after only a few years!”
3. Look Closer, It Does Look Like Plastic.
Vinyl hardwood has become quite popular, because people want a nice look for less. In our modern society, almost everything is faux, and many people are perfectly content with it. Many people aren’t snobs about their interior, and aren’t particular about the style of furniture, color schemes, matching drapery and so forth. If you are a person that is rather particular, vinyl floor may bother you because it is plastic, and not real wood. Vinyl isn’t cheap, and yet costs quite a bit of money, and it doesn’t even compare to real wood. So if you think the faux look might bother you, I would suggest getting real wood.
Zoffany’s Wallpaper collection, Gustavus 
Check Out ALL the colors from Hangzhou Enzo I/E Trading Co., Ltd.
Laminate Wood Flooring, A Swedish Design Must Have – Part 3
Laminate Floors- Are They Worth The Money? Some would say heck yes!
Laminate flooring is a multi-layer, synthetic flooring product which simulates wood, marble, limestone and granite, using a photograph installed beneath a clear protective layer. This image closely resembles a natural material, but the difference becomes apparent upon close inspection. Common woods are available such as maple, oak and pine, and more exotic species, such as Brazilian cherry, mahogany and walnut can be purchased. Beneath the photographic layer is an inner core composed of melamine resin and fiberboard materials. Pergo® is the most popular brand of laminate flooring, although other manufacturers include DuPont® and Witex®.
Laminate can look nice as well, but also are subject to failure just like any product choice. Here are a few disadvantages to the flooring.
– The biggest draw back to laminate is you cannot refinish it. Dings add to the character of true wood floors, and often times people bang them with chains and gouge them to get the authentic feel of time worn wood floors. One scratch in laminate floors and you simply cannot fix it. You must be careful with high heels, kids toys, and moving of furniture to keep your floors in excellent condition.
– Extreme temperature changes can cause the boards to pull away from one another.
-Panels can push up against each other at the joints, creating un-level high points. This is common where the boards were not installed with sufficient expansion space.
– Warping and buckling issues are caused by high humidity or excessive surface moisture, or a lack of a sufficient moisture barrier. Hardwood floors, by contrast, are naturally more resistant to moisture damage, as they will swell and shrink to accommodate changes in moisture
-Mold will occur when excessive moisture is present. Mold is a serious threat to home owners and can cause permanent serious health concerns.
– Patterns sometimes don’t always match from package to package. This can be very obvious and beyond the control of a consumer.
-The inner core can expand because it is made out of high-density fiberboard. If you have any moisture issues, or even if you didn’t lay down a sufficient enough moisture barrier, your flooring will swell and fall apart.
-Formaldehyde-outgassing, which originates from the melamine resin in various laminate floors. Chemically sensitive individuals may have reactions to particular brands of laminate or vinyl flooring.
A customer leaves this comment about Traffic Master:
“My family got very ill after this product was installed in our house. Apparently it was off-gassing causing headaches, body aches, runny noses and more. When we called the manufacturer, they quickly arranged to have the floor removed and reimbursed us in full. Obviously we are not the first ones to have a health issue with this product. It should NOT BE SOLD!”
Laminate floors look great, and can be the ideal choice for nice exotic wood floors without the cost of wood Many people want the high end looks, and this allows them to get the look for less than the real thing.
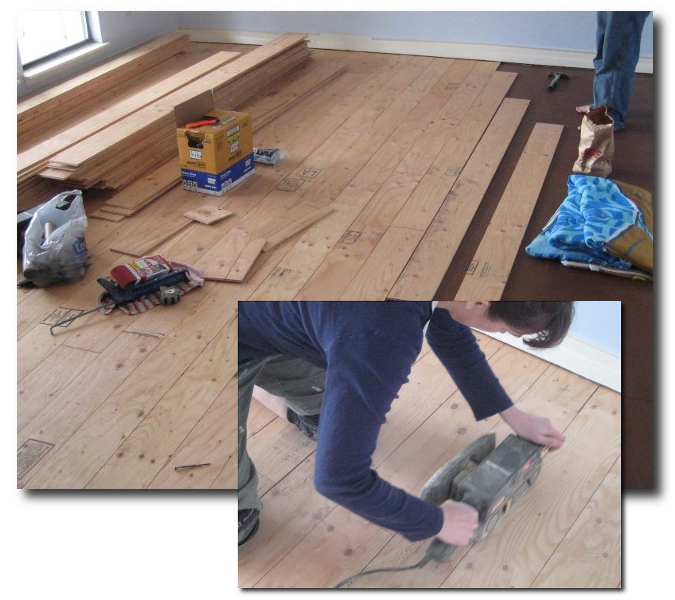
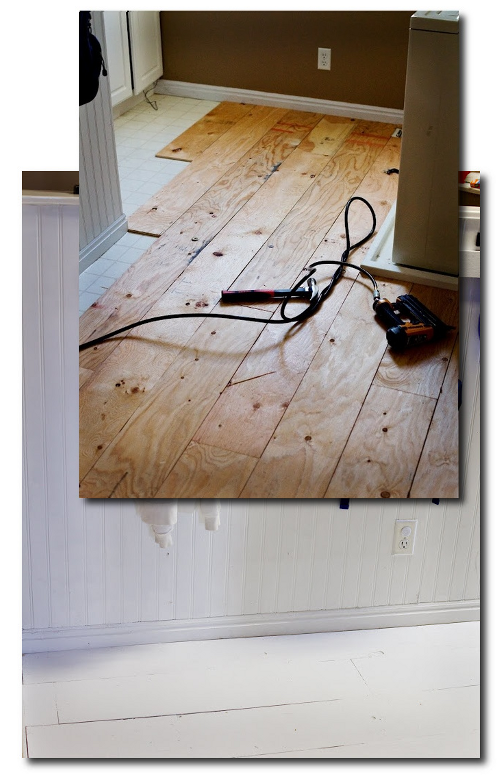
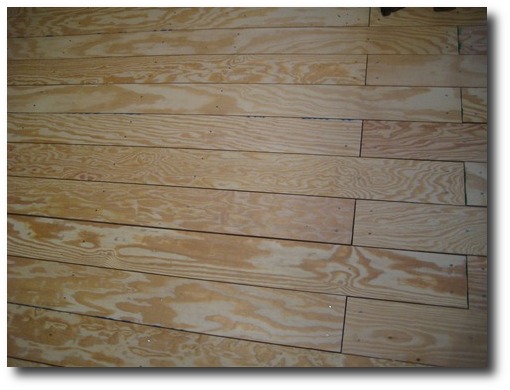
Plywood Plank Flooring, A Swedish Design Must Have – Part 4
I stumbled across a DIY trend out there where people are cutting their own “planks” out of plywood. It seems rather unusual at first, but the results really surprised me. You get the look of real wood flooring which you can sand, paint, stain, varnish, or white wash, for fractions of the cost.
“We tore up nasty old carpet, then cut grooves in the plywood that was under the carpet to replicate plank flooring with a skill saw – and used a dremel to get closer to the walls. This worked better than the router which was recommended in the web article I got this idea from. We stained and then did three coats of poly. Everyone’s amazed that this isn’t ‘real’ plank flooring! We varied the width of the planks, using a 2×4 as a guide.”
There are a couple of links I want to share that might move you in the direction of considering this look.
1. Layers Of Learning Blog Flooring Transformation
Layers Of Learning Blog posted absolutely stunning photos of a room that they used plywood cut into 6″ strips of wood.
They mention in their article that plywood floors allowed them to transform their WHOLE house because of the low cost of the materials. This certainly a reason to consider this option. Many people can only afford a couple rooms with the other options. Plywood is so inexpensive, that you can do it yourself, and it is affordable.
Plywood gives you the option to cut wide planks with real grain. For those of you who want the REAL thing, this would be an affordable way of getting the look for less.
Buying plywood allows you to do one room at a time. It doesn’t matter if your project takes you a couple months to a year to complete, because plywood is practically the same from store to store. The finishing process allows you to dent, distress, and apply paint or stain which unifies the space.
Another plus to plywood floors is if something is spilled on the floors, which ruins several boards, all they would have to do is rip up the damaged boards, and replace them with the same finishing paint, stain or varnish!
Here are some of their costs:
Living room – 20′x13′ which equals 260 square feet.
$13.97 each on 9 sheets of 11/32″ “CD” grade plywood = $125.73, See the rest of the break down on their blog Layers Of Learning Blog
Here are some of their tips to consider.
Don’t Buy the Premium Brand Of Plywood
“There are different grades of plywood. “A” grade is the nicest, it comes with one very clean and sanded side. This is not what we went with because, as the guy at Lowe’s said, we can sand it ourselves and save big $$$. A sheet of “A” grade plywood costs about $28 in our market, but a sheet of “C” grade plywood is only about $14.”
Let The Wood Adjust To The Temperature Of The Room
” After the plywood is cut, stack it in the room where you’ll be laying it for a couple of days.”
2. Quarry Orchard Blog
Quarry Orchard Blog also put together a beautiful floor made from Plywood. In their “Plywood To Plank Flooring Tutorial“
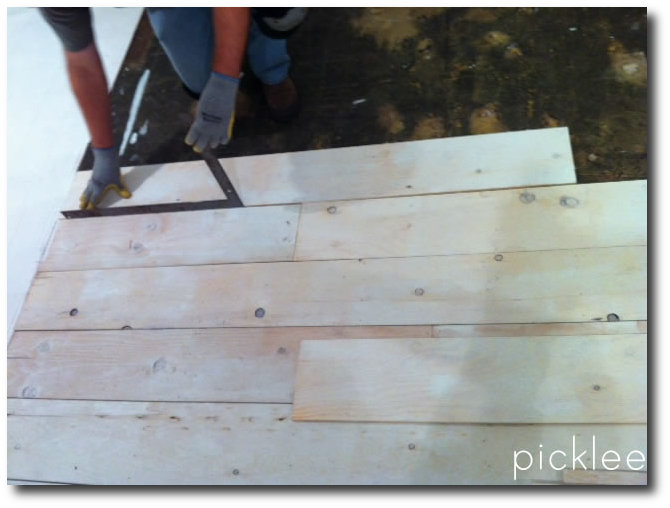
They decided to tackle a redoing the room above their garage with a square footage of approximately 533. They decided to go with 6 inch strips that were all 8 feet long. They were shocked that it only took them an hour and 45 minutes to cut the sheets into the planks.
A Couple Tips From The Quarry Orchard Blog
– They started with the first board and squared it with the wall, leaving a 1/16 inch gap between the first board and the wall.
– Be sure to use a nail punch to make sure that the nails at least flush with the flooring.
– Clean up the look by being sure the nails are all in line and evenly spaced. Have a helper that can measure and mark the wood. They measured every 16 inches for each nail. Consider making a jig to help with the measuring and marking for where the nails are to go. This will enable you to line up the previous board and mark rather than measure for every single nail.
Check out the final pictures of this room! What a transformation!
A Break Down Of Their Material Costs:
16 sheets of 15/32 pine plywood @ $16.49 per sheet
9 gigantic tubes of Liquid Nail @ $4.75 each
10 lbs of cut nails (ordered from Tremont Nail Company) @ $69.63 (includes s&h)
4 gallons of Varathane polyurethane @ $37.46 per gallon
2 quarts of stain @ $9.99 each

3. Tidbits From The Tremaynes Blog
For their stunning transformation they used 4×8 sheets of plywood; cut into 8 inch strips, and laid it like a regular hardwood floor. They used an old nailgun, some pennies to space out the wood, for the old farmhouse-style look. The cost was $60. Fabulous!!
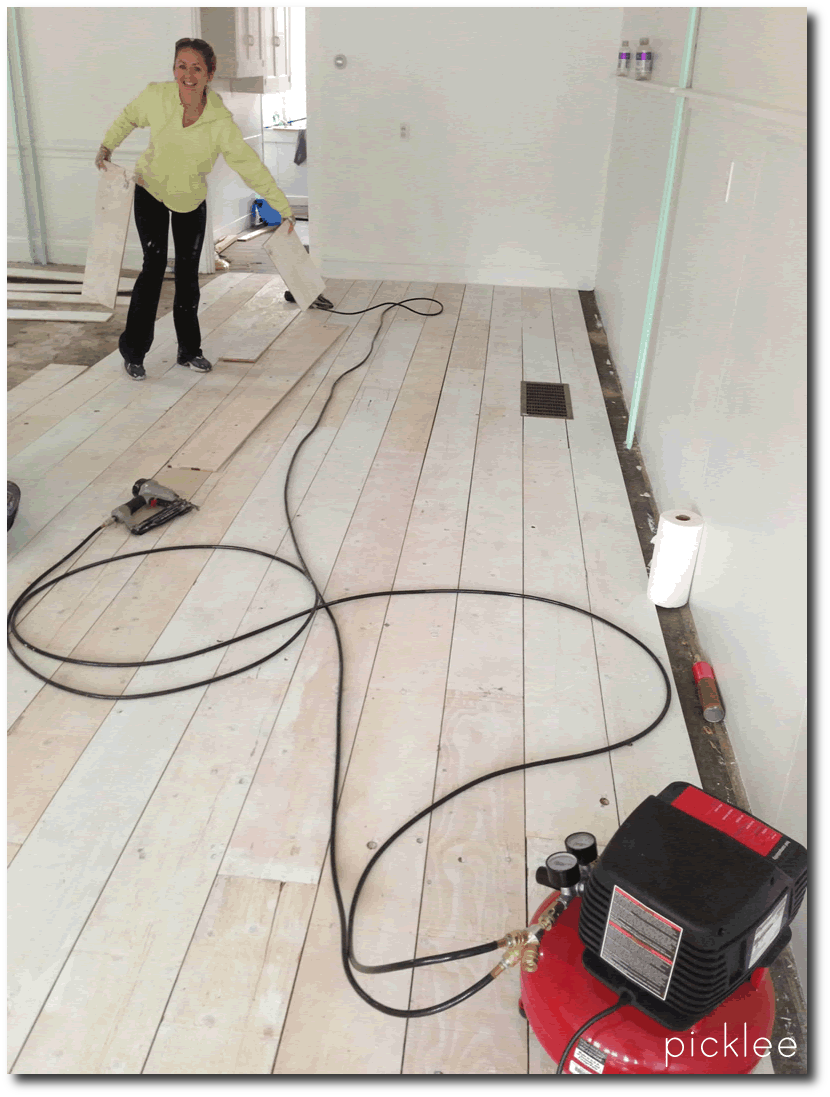
About to open a shop in Newport, RI, store owner Jordan decided to tackle the outdated carpet flooring that came with the shop. Being that the shop was a historic home built in the early 1700′s, she wanted something more period appropriate.
She decided to go with the standard 1/2″ thick 4′ x 8′ sheets at a cost of just under $20 each. In order to have zero waste, she chose to have the boards cut into 8 inch by 8 foot lengths, giving her six planks per sheet of plywood.
When she got back to the shop, she laid them out, and sanded all rough edges and splinters, and decided to white wash them before nailing them down. She mixed up 1/4 CeCe Caldwells Simply White Chalk Paint and 3/4 water. She then used a roller attached to a broom handle to apply a coat of the white washed paint to all of the planks.
After all the planks were dry, her fiance Brett, started working on nailing the planks to the flooring. They used Bostik flooring adhesive to the backs of the plywood planks, which were then laid into place and nailed into the floor. Brett used 1 1/2″ nails and shot them in on an angle. The nails were spaced out about every 12″, placing two all along either side of each plank. Brett used a metal straight edge for a spacing guide, which gave the perfect distance between planks. As Brett went on nailing down the boards, he used a table saw to cut some of them into different lengths so that the boards would have more of a staggered look.
Some Additional Period Looks To Give You Inspiration:
- Stunning Antiques With White Washed Flooring- Unknown Source
- THE SWEDISH ROOM by Lars Sjoeberg and Ursula Sjoeberg,
- Photographs by Ingalill Snitt
- Classic Swedish Home With Wood Flooring- Painted White Gustavian Bed
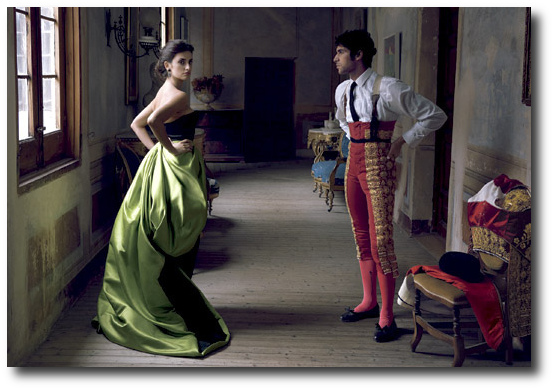
- Beautiful Planked Wood Floors White WashedCayetano Rivera Ordóñez & Penelope Cruz in Armani Privé – Made in Spain
- Photographed by Annie Leibovitz for US Vogue December 2007
- Distressed Wood Flooring- Make your plywood floors aged with translucent glazes
- Herringbone floors add personality in Jenna Lyons Brooklyn Townhouse.

![]()


Painted Wood Flooring, A Swedish Design Must Have – Part 5
Painted wood floors are making a come back, and we believe that painted floors will become even more popular than we see today. In the past, finer homes installed decorative parquet floors and inlaid patterns. In the 17th and 18th century paint also was the means to create these decorative patterns on the floor, many which mimicked parquetry. Painted wood floors made it possible for more light to enter into the home, as the winter season in Sweden was quite dark. Rustic unfinished wood over time, darkens, and painting the wood just seemed like a practical approach of having a brighter home without spending a bundle.
Raw wood accepts paint so much nicer, and allows the paint to distress beautifully over time. Sanding wood, allows the paint to soak into the wood, compared to painting over varathane floors which may scratch easier with foot traffic. Homeowners with existing floors often have to carefully think carefully about how they go about re-finishing their wood floors,because the process can be pretty involved. Refinishing wood floors can seem more labourous than painting, and often times it is. Sanding wood floors can be a time-consuming task.
There are a couple steps that cannot be skipped and we list them out below:
1. Prep
This involves removing your furniture from the room. Once you start belt sanding the floors, there will be dust everywhere. It can be a bit time consuming sealing off the house with drop cloths, or plastic tarp, but it is necessary for a great finish.
2. Sanding
The most time labourous part by far is sanding. Using a belt sander will kick up a ton of saw dust, and cleaning up the dust, which ends up everywhere becomes a tedious job. Sanding an entire floor can take up to 4 hours or several days depending on the size of the room.
Renting industrial professional tools saved my husband and I a lot of time when we refinished parquet floors in a rental in Virginia. Drum sanders are large machines that can handle large floors, and are very easy to operate. Drum Sanders can be rented at around $40 to $50 per day. I would highly recommend it than using a small scale sander that you can buy from a Hardware store.
Most homeowners choose to rent the specialty equipment and then purchase the more standard tools at their local hardware stores. Edge or orbital sanders are terrific for sanding the edges of the floor that the drum sanders cannot reach. A handheld power tool lets you tackle the tight corners, and are worth purchasing outright from Home Depot or Amazon. They allow you tools for additional furniture projects in the future.
3. Staining, or Painting
While everyone in the design community has their favorite paint brands, I would highly suggest going with a oil based paint. Oil holds up longer and has a tougher finish than any water based brands.
I would highly suggest sanding your room down to its bare wood, before painting. Painting over an existing paint is always possible, but the extra work pays off when the paint naturally distresses over time, which shows the wood through rather than an unsightly under color.
Sanding down to the natural wood also allows you to pickle the floors. White washed floors in my opinion are much nicer than painting the floors, because the wood gives the room a bit of depth and natural appeal.
In this post I show a photo of the Behr Wood Stain that is highly recommended. The stain is available in a number of colors, and evens out nicer than just paint that is mixed with water. Behr has a number of colors available that are off white, gray, beige that would work nicely with the Swedish interior schemes. Mixing paint with a bit of water or stain work rather nicely.
Many people suggest applying paint with a professional paint brush which gives a smooth finish, rather than with a roller, which creates a stippled finish. Today you can purchase smooth rollers which can be used with extension pole to apply paint. Rollers are inexpensive ranging from $4 to $7 per pack. A pole will be anywhere from $5 to $40, depending on length and material.
You can choose a variety of different approaches with your paint choices….
If you decide to work with an existing painted floor, a great oil based primer is “Coverstain by Zinsser” This paint can be tinted almost any lighter color, dries very fast, and can be mixed with most other oil paints. Coverstain is in fact a primer that will adhere to almost anything, and would be a fantastic choice for the floors.
One gals review of Coverstain -“Zinsser oiled based primer is like gold”
(Please note that Kilz or Coverstain primers should never be used on concrete floors. Go to Lowes or Home Depot, and buy stain or paint made just for concrete floors. Concrete stain doesn’t flake off on concrete like paint does)
As a top coat on your wood floors, you can purchase a Water-based polyurethane clear varnish, to seal in the tinted paint, or purchase water based, or oil based paint for your top coat. I have tinted this paint many shades of gray, blue, green and yellow. It is marvelous on furniture. This primer dries flat, allowing almost any other paint to be applied to it. It serves as your primer and your base paint, allowing you to just then seal the color in with a water based sealant.
If you are working with a previous painted floor, floors need to be sanded for the paint to stick properly. The worst is when you skip sanding, and the first time you move a furniture piece only to have the paint come off in sheets, or scratch. You will have regretted not sanding.
Sand first, and then paint the floors with a paint formulated for the flooring. We had painted our deck with paint formulated for the outside, and we are so glad we spent the extra money, because rain or snow, the paint hasn’t chipped.
4. Sealing
Polyurethane is an oil based sealant, that is NOT suggested for lighter colored paints. If you use this over your floors, in a week or a matter of days, the floors will have a tinge of yellow. You might then have to consider re-painting your white floors.
Polyurethane works perfect on unpainted wood, or on darker paint colors such as red, navy, black and so forth. A water based varnish is required for lighter based floor colors such as light gray, white, or cream.
You’ll have to wait 6 hours for each coat of polyurethane sealant to dry. It is recommended that most floors require at least 3 coats to achieve best results, and many professionals suggest 24 hours in between each coat of urethane. It also takes up to 3 days before you can move furniture back into the room and walk on the floors again.

Onni Hotelli Kuvia Picture Credit Ranskalainenpatonki.blogspot

Onni Hotelli Kuvia Picture Credit Ranskalainenpatonki.blogspot
Belle Maison Corbeille Bed- Featured in Swedish Decorated Room With Painted Floors

Blue Painted Wood Stairs
A Colonial Floor Makeover by Sara Kate
Sara Kate and her husband painted their summer house floors in an oil paint. Here are some of their remarks……..
“Moving the furniture was easy, the problem was working with the paint. I made a big mistake in laying the second coat on too thick and painting on a rainy day. The humidity and the thickness caused the paint to wrinkle, clot and appear dull and matted. I had to work hard to undo my mistake.”
They suggest using a Polyurethane based porch and floor enamel. After cutting the edges with a
brush, roll on a thin coat with a 1/4 inch roller. Keeping the heat on insures the paint will dry fast. He then suggests to roll at least two more thin layers and allow at least 24 hours between coats
Here are a couple of tips from the comment section of the article.
“Three simple lessons from eveyone’s paint woes: 1)PRIME- Frankly, no one wants to do this but priming is not a paint company scam – especially on a floor. Primer is NOT paint (anyone who’s had the lowly job of brush cleaner -such as I- can tell you that primer is much harder than paint to clean out of a brush. Pros, in my experience, will often designate some brushes for primer only). Think of it as glue that will hold the paint onto whatever’s beneath it. (and, yeah, tinting the primer is a nice trick and the paint store should do this). 2)PATIENCE. I assume you are all painting with a gloss finish. 24 hours minimum on this. 3) Relax with the dusting! Dust falls. Your sweet new floors are gonna trap some dust as they dry. “
“An alkyd paint dries overnight, but takes 28 days to cure to maximum hardness.”
“A response to a fainted floors in a rental apartment- I know you didn’t want to put down a rug to lighten the floor, but how about painting a floor cloth? You can get a large canvas drop cloth from a home improvement centre, Paint it with any kind of paint you want. After it is dry, put at least 2 coats of polyurethane sealer on, letting dry completely between coats. You are in control of the design, you don’t have to worry about putting the floor back to a rental state because you can lift the cloth and take it with you!”
“Katherine – A Painter – To those who asked about painting various surfaces, and those who asked about primer: Sanding and primer are twin keys to getting paint to adhere to almost any surface. Start with a clean surface — remove grease, wax, and anything chalky. If there’s any gloss or if you’re concerned about adhesion, do a light sanding with 150 0r 200 sandpaper. On a floor, you can use a floor sander with a screen… available at a rental shop. All you want to do is de-gloss so the primer has something to hold onto. (If you’re going over polyurethane, you have to scuff it up diligently, because poly doesn’t want to stick to anything.) Then prime with any of the primer-sealers that mention “excellent adhesion” on the label. Kilz, BIN, Bullseye… these are a few of the big names. A water-based primer-sealer is fine. If you’re making a drastic color change, look for a primer that is int0 tint-able, and tint it in the direction of your final color, but not necessarily matching the final color. The only time you will have a problem is when the surface is already painted and the existing paint isn’t adhering well. There isn’t much you can do about that, short of removing that old paint.”
“Red paint is difficult because red pigments are transparent therefore they need many more coats to give a good coverage – the purer and clearer the red the more transparent it is – burgundy reds and terracotta reds will cover better as they have other pigments in them which are not transparent”
“When I stained my concrete, I got the acid at B. Moore. Instead of painting concrete, stain it instead. Staining is much prettier. B.Moore has many colors of concrete stains. Regarding the wood floors, they are worth so much more sanded and stained. To cut the cost, only hire out the sanding, and do the staining and sealing yourself. You will save at least half. I discovered this myself when some floor guys failed to return to finish my floors. I had only paid a small deposit, and they had finished the sanding. When I realized how easy and cheap it was going to be to finish the floor myself, I was thrilled they had deserted me.”
“All kinds of great coatings for all different applications (floors, countertops, faux stone/granite, etc.) are available at ArmorPoxy.com. I’ve used several of their products and all with great success. Particularly fabulous is the “For Dummies Bath Refinishing Kit”. You can use it on your tub, sink, tile, etc. and it makes everything look like brand new white porcelain. It’s truly amazing and easy to use. I did my bathroom more than 2 years ago and it still looks amazing….”
Another interesting comment-
“Concrete can be a tricky beast, especially in a basement or former garage that might have dampness or oily spills on the floor. You’ll have to clean and degrease the floor thoroughly, and if it has a very smooth, shiny surface you’ll need to etch it with muriatic acid to give it some tooth. There are special primers for concrete floors–use one. It really will make a difference. I painted the workroom floor in my basement without using a concrete primer, and the mineral salts in the concrete came up through the paint. I then had to strip away as much paint as I could, re-prime with concrete primer, and re-paint in order to fix the problem. Don’t be me. Use the primer the first time, and save yourself the headache.
Plywood, chipboard, and particle-board subfloors are easy to paint–sand the rough spots, prime, paint. Use an oil-based primer suitable for raw wood in order to keep stains from rising up through the paint.
If you think you might want to change the color every few years or so, don’t apply a water-based polyurethane, as it will keep future layers from sticking as well. Just paint the floor, touch it up as needed, and repaint as desired. The higher the paint gloss, the better it holds up, so use either high-gloss or semi-gloss, rather than urethane.
Use oil-based primers, yucky as they are. They block stains far better than latex primers, and provide better adhesion. Given how much wear a floor takes, and how much work it is to re-paint, do it right the first time. You can use latex paint over them, and subsequent paint jobs will not have to be re-primed (unless you’ve worn through to bare wood, but spot-priming will take care of that). If you have a really stubborn rust or dye stain that bleeds through oil-based primers, pigmented shellac will usually kill it (it’s the one thing that keeps the Calcimine often used as an interior finish in old houses at bay, and that stuff is pure evil).
 Swedish Flooring Looks From Domino Magazine

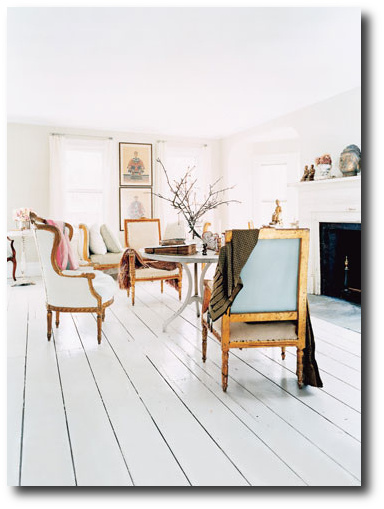
Swedish Interiors With White Painted Wood Floors
 Swedish Interior With White Painted Floors


An Amazing Design Secret That Professional Designers Use All The Time
Jeffree Turney from Lone Ranger is one biggest dealers who specialize in Gustavian antiques, and also happened to be on Martha Stewart and revealed some of his refinishing secrets. He recommends after initially painting and distressing your piece using milk paint, mixing 20 percent “Howard’s Feed ‘n’ Wax” furniture wax to 80 percent “Dark Walnut” Minwax. Wearing latex or rubber gloves covered with socks, apply wax, and use a paint brush for tight spots. Rub off excess wax immediately with a long plastic-bristled scrub brush. The overall faux finish gives you an antique effect.
I always found this picture from Martha Stewart captivating. Matching furniture up with the wall color is a very interesting design concept. Adding a dark wax to your piece will allow your furniture to stand out from your wall color.
Here are some unique examples:
In this kids room wall storage is painted a bright red. The design look appears minimal.
This room is painted a vibrant teal blue. Wall letters on the wall and furniture is painted in the same paint color.
A matching set of Swedish chests are placed in a room where the wall color and drapes are designed to match.
In one of my favorite pictures a kitchen is painted in a mute blue. The walls and the kitchen island and cabinets are painted in almost the exact shades. The walls are 5 shades lighter and brighter than the cabinets. It is one of the best kitchens I have seen.
Gustavian Designed Interior From Swedishinteriordesign.co.uk

Gustavian Decorating – Martha Stewart
Martha Stewart always seems to get color right. I believe she has an eye for historical colors palettes. In this photo we see a console table that is matched up to the wall color. The look is absolute perfection. See additional Martha Stewart interiors based on Gustavian influences.

Gray Paint Tones
Gray Paint Tones
A series of gray tones are paired together in this dark interior. The bar table is painted in a lighter shade of gray with glass cloche’s are paired together. Limed wood add to the gray appearance without loosing the detail of the wood. Stainless steel also works with the gray interiors like no other metal. The metal adds a richness and some light to dark room. If you love this appearance, but find it too dark, consider the same elements with lighter paint tones.
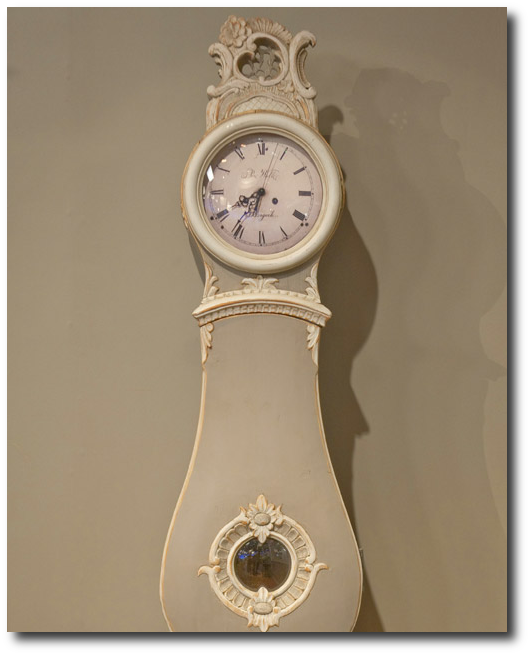
Look How This Mora Clock Is Painted The Same Color As The Wall- A Gray And White Combination -Clock From Jeffree Turney of Lone Ranger Antiques
Matching Wall Paint and Furniture
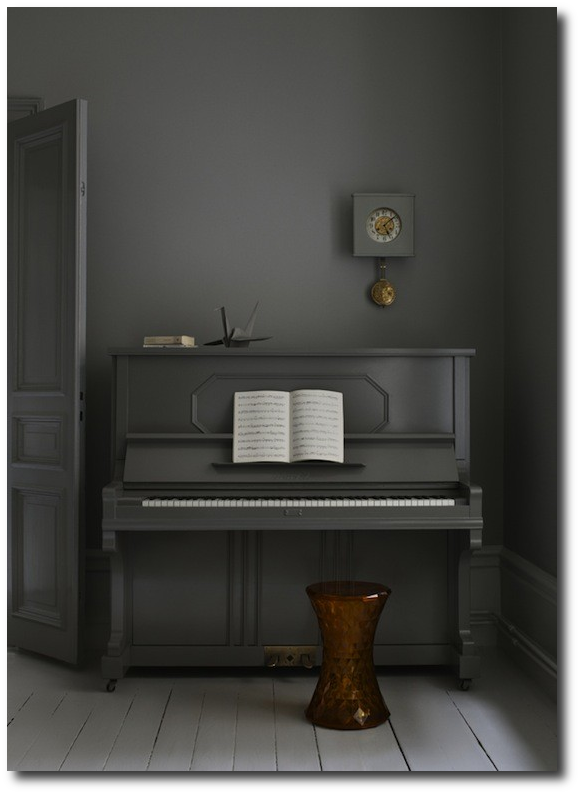
This photo takes the concept to the extreme, where everything is painted in the same shade except for the stool, and the accessories. Furniture that may be an eyesore, could be given a face lift using this concept. It allows the furniture to disappear into the room, giving other pieces the spot light. This concept also gives a minimal look to a room, allowing a busy room to appear less cluttered.
Matching Wall Paint and Furniture
Matching Wall Paint Up With Furniture
In this photo, we see a very interesting effect using two paint colors instead of one shade for the entire room. We see a chair rail used to divide the wall. A brighter paint color is used on the bottom of the wall, and the furniture is painted in the exact same color. Using this idea, adding a brown glaze to the furniture which can be painted on and wiped off would give the furniture a bit of a distinction and less of a newly painted appearance.
How To Get This Look
-Use the same shade as your wall color on your furniture. After your piece has been distressed (and dried), consider painting a thin coat of brown glaze to give it an antique appearance. Ralph Lauren glaze works terrific. You simply mix one third paint to glaze, or half glaze/ half paint in a cup. (The glaze is white, but dries clear with what ever paint you mix with it) Add brown paint to your glaze, and simply paint a thin coat on to your furniture. You can either paint on a thin coat, and call it done, or you can wipe off some of the glaze with a rag leaving some of the glaze behind. I cannot tell you how thrilled I am to have discovered this secret for brighter paint colors. Brighter paint colors automatically look antique when a translucent brown is added. Bright blues become muted, everything looks better.
-Heavily distress your furniture to give your furniture more depth. The natural wood will give more warmth in your room, and add to the overall look of the furniture.
– Add furniture ornaments to your furniture painted in white or in gold to add some detail to your painted furniture. Cake molds often have beautiful designs that would look just as beautiful on furniture. These designs can be made easily with plaster, concrete, or resin inexpensively.
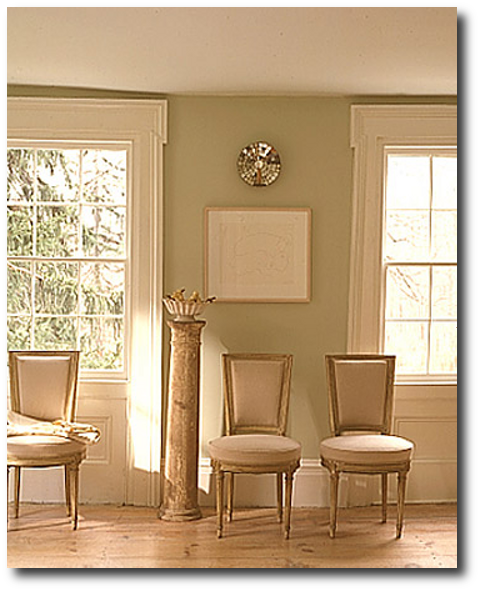
Gustavian Pedestal- Neoclassical Decorating From Gift & Home Today
Eighteenth century Neoclassical style had made its way into Swedish style when King Gustav III of Sweden corresponded with Marie Antoinette about his decorating projects. Scandinavia responded to the French style with even more elegance and sophistication. While Sweden wouldn’t be able to duplicate the vast wealth of the French, The Swedes made it better with less to work with.
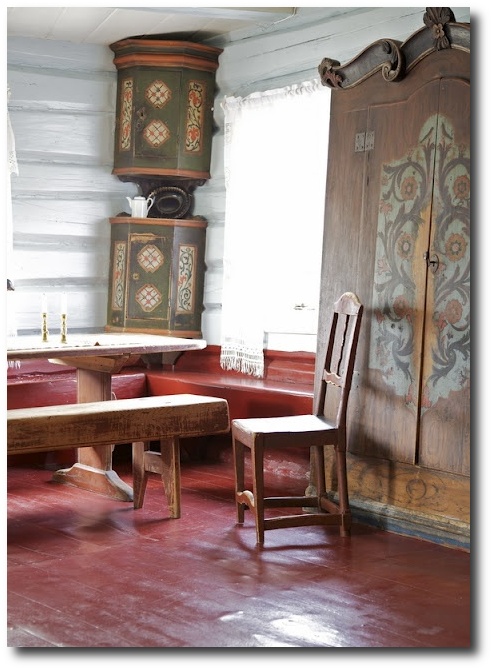
Swedish decorating is based around wood. In order to get the look, consider basing your entire interior around wood. Painted wood furniture, distressed wood floors, wood paneling, and painted wood accessories are all key elements to Swedish style. If you have just one of those elements you are on your way to attaining the elegant Gustavian interior looks.
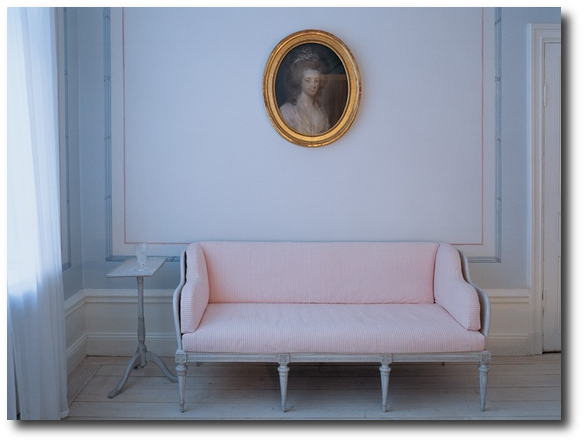
Pearl grey was the universally popular shade, and often accompanied by carved flourishes, ribbons, florals and bows. These elegant carved details were very neoclassical in nature and often ornamented mirror frames, chairs and furniture alike.
One of the most common draws to Swedish furniture is the paint shades that were used. Muted tones were used, and the pastel family was at the height of fashion through the 18th century. Common shades found in Sweden were blues. pinks, pale green, and straw yellow. Gold leaf was used less than in the rococo period, but were still used to add richness to furniture and decorating.
- The lines of the Rococo period were still in style, yet more streamlined designs came into play. Splayed legs become more straight, though finely tapered.
- Fluted legs had the sophistication of something more classy while the tapered legs played to the country side of Swedish decorating.
- Chairs were designed with straight backs instead of curved, and long narrow sofas became very fashionable.
- Mirrors were a must have in the 17th and 18th century, and this was especially true for Sweden, as their interiors became darker earlier because of the early sun sets.
- Candles were often placed in front of mirrors to magnify the reflective light. for Mirrors became longer and rectangular instead of round or oval.
 Swedish Style Decorating Ideas From Martha Stewart
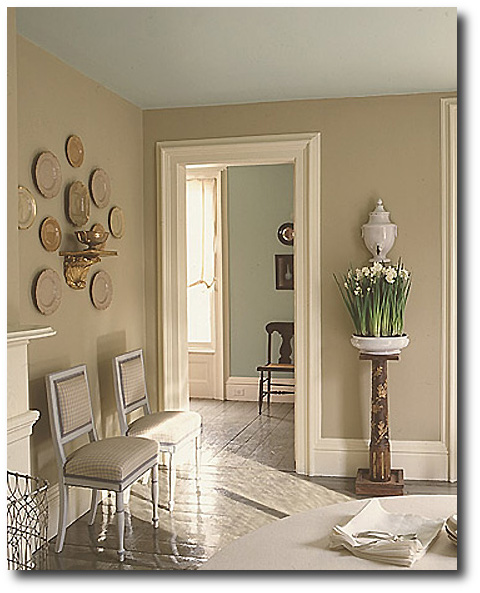
Martha Stewart has such a good eye for style and her impeccable taste shows in these photographs. Here she uses her own paint- Drabware on the walls. One of the highlights of this room is the Wedgwood china on the wall. Do you see how well they match with the wall color? You have to wonder if the entire room was decided with those few pieces? The china is a few shades darker than the wall color. The Swedish check is chosen for the chairs, again matching perfectly with the wall color. The white in the check pattern gives depth to these chairs.
In the next room, the perfect shade of blue is used on the walls in a saturated shade. Look how blue is chosen for the ceilings instead of white. The floors are painted a darker hue than the walls.
These series of photographs has remained some of my all time favorite photographs out of the thousands I have looked at and compiled for our many blogs.
 Swedish Gustavian Decorating Ideas From Martha Stewart
Again, another perfect example of classic Swedish style. Orange has to be one of my favorite colors, and here you can see how that hue comes alive in this room. The doors are stripped back so you can appreciate their details and patina.
In the past I have taken all natural wood (or faux painted) and painted an entire piece with plain light gray paint. After letting the piece dry for 5 to 7 minutes I have washed with a hose (for bigger furniture) or running water (for smaller pieces) to reveal a more distressed look than pickling or white washing. The overall effect leaves a very rustic painted appearance than your typical clean look of white washing.
Here, the floors are bare and rustic which is a classic Gustavian must have. One of the best features in this room is the demilune tapered leg console table. Look how the paint shade is within the same color family as the wall except darker?
 Swedish Gustavian Decorating Ideas From Martha Stewart
Here you see in the picture above extremely elegant neoclassical chairs. The right period style can really make a room look distinctively Swedish. This room is very simple yet the architectural features are incredibly ornate.