How To Make Your Own Stenciled Grainsack / Burlap Pillows
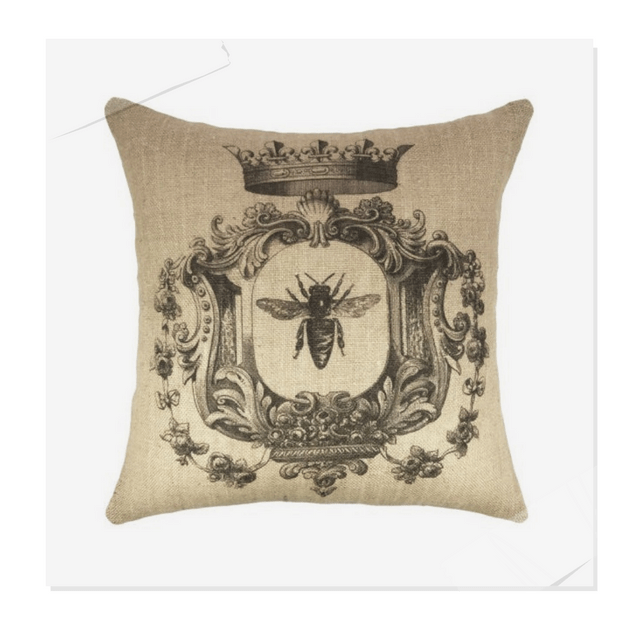
Picture – Restoration Hardware

French Pillows From Overstock On Ebay
Grainsack pillows have gained tremendous popularity in the last several years that we are seeing them everywhere from Restoration Hardware to Pottery Barn. These old world pillows have a rustic edge to them, with a bit of a classic 17th century French appeal to them. Why pay a hundred dollars or more for one of these pillows when you can create your own for less. With so many stencils available on ebay, it couldn’t be easier. Ebay is one of the best places to find old antique French fabrics that you can create your own drapery, bedspreads, and throw pillows. Get the genuine look and customize it for your homes individual colors. Here are a couple ideas below to get the very hot grainsack and burlap pillows in your home for less……
Create these stunning pillows for yourself…..
Here are pictures that have inspired me……..
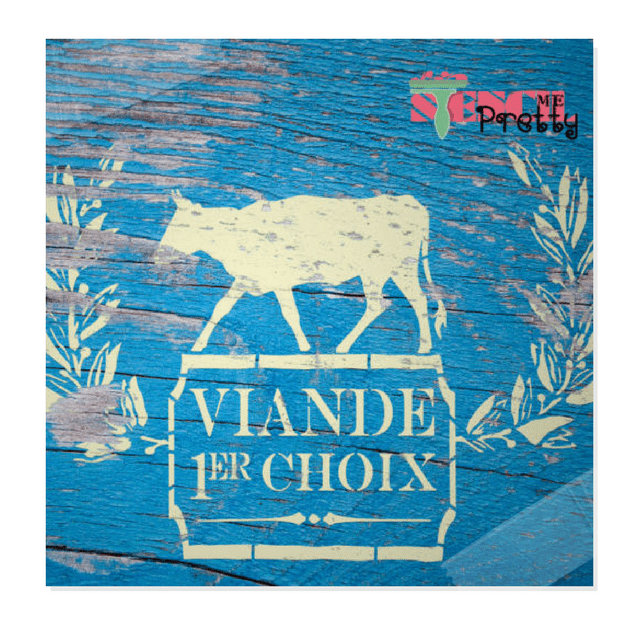
-Vintage and Antique Burlap on EBAY
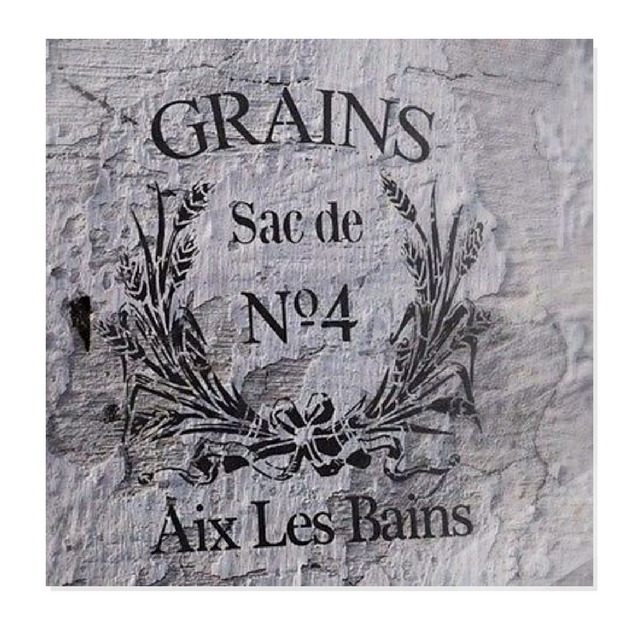
– Bolster-shaped pillow with a wreath
–Shabby Chic Charming Blog shows you how to do this yourself with a printer.
-Here we see an all natural pillow with a ruffle edge. The stenciling doesn’t have to be clear in order for it to be very lovely.
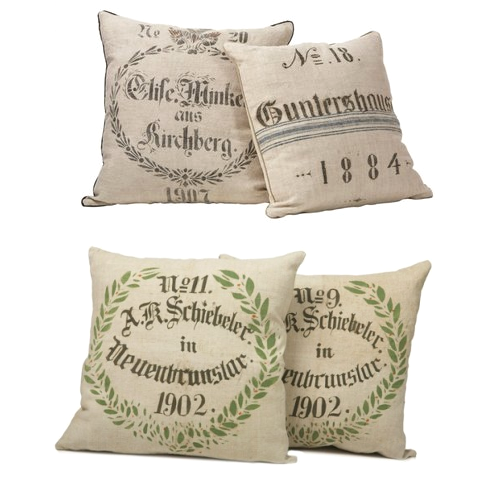
-A little bit of color goes a long way. This antique German grain sack pillow by Melissa Neufeld shows how lovely these pillows can look on a bed, or on a sofa for a primitive appearance.
-If blue is your favorite color, you have to look at these pillows. The top right pillow looks to have the picture stencil in blue, and the vertical stripe in a different shade of blue. Both colors combined with charcoal make such an impact. Make Your Own Grainsack Pillows – From Doesn’t Cost The Earth Blog
-Kymberly Frasier has combined her passion for antiques, textiles and design into
exquisite one-of-a-kind pillows and upholstery for her company, 3 Fine Grains.
-These cushion slip covers simply sit on the chairs and provide protection to your upholstered furniture. They could be very easy to stencil without committing to stenciling the fabric on your chairs and upholstery. It is as easy to change it out if you want to go in a different direction in several months.

 Plain Stuffer Pillows
–Square Sham Stuffer Pillow – 18×18″ (Large) $5.50
-12×18 Cluster Fiber Pillow Form Insert $13.35
-Bolster Sham Insert Stuffer Pillow – 8″x24″ $19
-Decorative 100% Linen Pillow Covers (Gray Set of 2) $49
Decorative Stencils For Pillow Stenciling
– Border Stencils In The Wind Border Stencil-
-167 – Classic Garland Stencil Library $31
– Alphabet Stencils On Ebay
-AD7 – Adam Cartouche Stencil Library
-AD8 – Adam Cartouche No 2 Stencil Library
– Tassels and Vines Stencil– Victoria Larsen
–Alphabet Stencils From The Stencil Library
–Victoria Larsen Architectural Stencils That Can Be Used in Other Ways
–Martha Stewart Stencils On Ebay
-Round Medallion Stencil $2.49
–Tulip Vine Stencil From Victoria Larsen Stencils
-Simply Stencils- Set of Three Foliage Stencils
–Ring of Roses Pattern: 7.5″ x 7.5″ $12
-Designer Decorating Stencil Script Numbers $13
-ER40A – Garland Stencil Library
– Wreath Stencils on Ebay
–Country Vine Wreath Stencil
-TR20 – Gustavian Stencil Library, ALL Gustavian Stencils From Stencil Library
–Borders Stencil – 3 Patterns Victoria Larsen
-Decorating Fabric: Print, Stencil, Paint and Dye Over 100 Fabulous Projects
Linen Fabric By The Yard
-56” Wide Vintage French Feedsack Beaudelaire Jacquard Black , BLUE, Charcoal Fabric $30
-56” Wide Vintage French Feedsack Duboise Script Jacquard Chocolate, RED, $30
-58” Wide European Linen Fabric Oatmeal By The Yard $14
-56” Wide Vintage French Feedsack Claudine Stripe Blue , BLACK Fabric $25
-58” Wide European Linen Fabric Cream By The Yard $14
-58” Wide European Linen Fabric Elephant By The Yard $14
-58” Wide European Linen Fabric Ice Blue By The Yard $14
-54” Wide Robert Allen Linen Duck Natural Fabric By The Yard $12
-9-Feet x 12-Feet Canvas Drop Cloth Perfect For Drapes $22
-46” Wide Stretch Linen Blend Stripe Ecru Fabric By The Yard $11
-46” Wide Stretch Linen Blend Stripe White Fabric By The Yard $11
Chocolate Burlap Chateau Marmont Pillow Slip by TheLetteredHome on Etsy
Vintage Grainsack Pillow Triple Red Stripe by jillbent on Etsy
 Old World Grain Sack Natual Stenciled Pillows From Dan Marty Designs
Dan Marty Grainsack Pillow with Laurel Design Seen On The Duchess Of Corbin Blog L.A.’s Dan Marty is often credited with helping fuel the feedbag/burlap decorative trend. Marty’s furniture was upholstered in burlap and feedbag instead of pricey fabrics.
1. Pillow Decor – Quality Guarantee Red, Brown $70
2. Pillow Decor – Cacao Bean Red Print Throw Pillow $70
3. Pillow Decor – 1907 Airmail 24×24 Throw Pillow $89, Postcard To Paris $89
4. Pillow Decor – Tulips 20×20 Decorative Throw Pillow $49
5. Pillow Decor – Wading Birds 20×20 Throw Pillow $70
6. Pillow Decor – Bird on Branch 20×20 Throw Pillow $70
1. Pillow Decor – Rustic Floral Green Throw Pillow $49
2. Pillow Decor – White with Green Spring Flower and Ferns $34, Green with White Spring Flower and Ferns $28
3. Tommy Bahama Designer Boutique Throw Pillow Covers $40
4. Pillow Decor – Rustic Floral Orange Throw Pillow $49
5. Pillow Decor – Fire Coral Orange, Blue,
6. Pillow Decor – Sea Coral in Orange, White, Blue, Red $40
Additional Interesting Pillows
-Dwell Studio Masala Bedding in Citrine Standard Pillows $60, Citrine Sheet Set Queen $208
–Coral Red Scroll Print 22″ Wide Throw Pillow $60
-Judy Ross Textiles Vines Printed Linen Coral Pillow $135
-Outdoor Throw Pillow in Blue Coral – Frontgate $119
-Croscill Home Mikasa Italian Countryside King Pillow Sham $39
-Provence French Laundry Square Toss Pillow, Linen/Red $21

DIY Furniture Appliques From Architectural Depot
Furniture Appliques From Architectural Depot

Furniture Appliques From Architectural Depot
Architectural Depot has a number of simply beautiful appliques that could be used to adorn your existing furniture and walls with. They have a variety of hard-to-find historical materials for your architecture needs. This stunning frame featured on The Paper Mulberry Blog shows how lovely a frame or a piece of furniture looks with appliques.
This stunning ceiling has gilded rosettes with an ornate gilded border. Creating a ceiling this stunning is a lot of work, although it doesn’t have to be. Interiors can be as complicated or as easy as you want them to be. Ebay has a number of stunning molds which you can create out of plaster saving you thousands if you decide to go after a look like the ceiling of Gumbo.
This plaster cement tile mold would be an ideal mold for the bathroom. Tile your whole bathroom in this mold and gold leaf the rosettes. The mold itself is $4 dollars, and you can buy plaster at your local hardware store.
This beautiful tile mold has a border around it making it very much like the ceiling of Gumbo. Produce this look as a backsplash in your kitchen, and gold leaf the rosettes.
This lovely rococo inspired frame would be just beautiful above doorways, or even posted on pieces of wood for labeling your garden. Make dozens from a couple bags of plaster or concrete. The possibilities are endless.
In this picture, an over the door plaque is detailed with swags and laurel leaves. This can easily be created with molds.
One of my favorite pictures is this one from Barbro Grandeliuss’s Swedish Home, where furniture appliques are hammered on to a simple piece of wood.

My Best Tips To Doing Upholstery Yourself
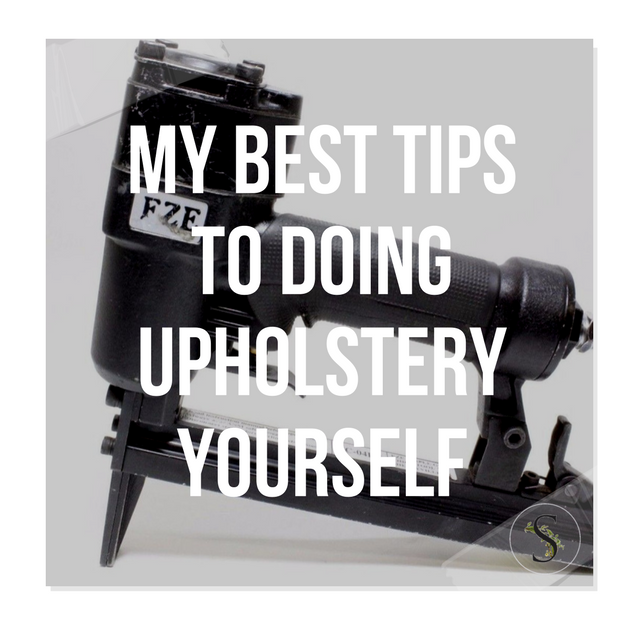
Over the last several years I have jumped into upholstery without any experience, and through all the mistakes I am so glad I had the interest to learn. It has allowed me to recover many of the second hand chairs and settes that I have found for an affordable price. Swedish style is certainly a style that I adore, but there is no way we could furnish a whole house buying antiques. Thinking back to the first chair I recovered, I am sure it was sloppy, but I learned my mistakes and moved forward. When it is your home, who cares if you make mistakes. Learning can be a lot of fun, and you get better as you practice. I am in no way a professional, although I have learned a ton over the years that I would like to share with you.
At first, I had no idea what I was doing. It would have helped if I took some classes as soon as I got interested in it, but I decided to take the long drive and learn on my own. Upholstery isn’t something I particularly enjoy, and at times some of the projects I have attempted are simply out of my league, and it can get discouraging, so try something that looks relatively easy at first. I don’t like looking at sloppy upholstery, so in getting it right, sometimes it takes me extra long.
One of the easiest ways to produce a nice looking product is to make sure your material is snug. The last thing you want is loose looking material that isn’t tight along the seams.
When I first started upholstering I simply went down to the local hardware store and bought a T50 staple gun, which worked pretty well, until it broke. I bought another T50, and it worked quite well, but just an hour of work would cause my hands to hurt so hard that I could only do so much upholstery every week. I then bought another manual staple gun which was backwards and broke instantly.
I eventually ran down to the same hardware store and graduated up to a electric staple gun. I sure saw a difference right away. I didn’t have to force my weight on the chair in order for the staple to grip the wood and fabric. It was rather –point, shoot, and it was done. The brand I purchased was the Arrow Pro Electric Staple gun which loaded with the same staples I was used to with the T50 manual staple gun, so I was in my comfort zone. This staple gun worked for the first couple projects, but because it was made out of plastic, then loading compartment broke. It was plastic. SO, again, I invested in yet another staple gun. In fact the exact same brand!!! I knew eventually it would brake again, so I decided to look into getting something more professional.
A friend of mine had an upholstery gun which hooked up to a compressor, so I decided to look into buying a professional upholstery gun and see how different it was compared to the ones I could find at the local Home Depot.
 I ran across the EZE TC-08LN Long Nose Upholstery Staple Gun
 on ebay, and took a chance on it. When it arrived at my home, it sat in the living room for several weeks, until I got around to working with it. I could’t figure out how the gun loaded, so I contacted the ebay seller, hoping to send it back to get repaired. He told me, that these professional upholstery guns load much different than the regular electric guns. You flip them over and they load through the bottom. The first time I used it I couldn’t have been more excited. I literally was jumping up and down, because of the vast difference in the staple guns I had been using up to that date. With a compressor, the sheer power of air forces the staple out where there is no NO work involved what so ever.
I was so used to pulling my fabric as tight as possible and then stapling it, that this gun can do most of that work for you. The ebay seller, said this gun would be so easy to work with, and that I would be excited when I finally saw the difference.
This gun certainly has revitalized upholstery for me that it has become a joy to upholster.
Getting that gun was one of my best decisions, and I would suggest you buy it for some of your upholstery projects.
In the last 3 months we just moved into our very first home, and I had a number of chairs that I have upholstered, although I am wanting to finish up the edges. I have been experimenting with double welting cording, but I have had a really tough go at it.
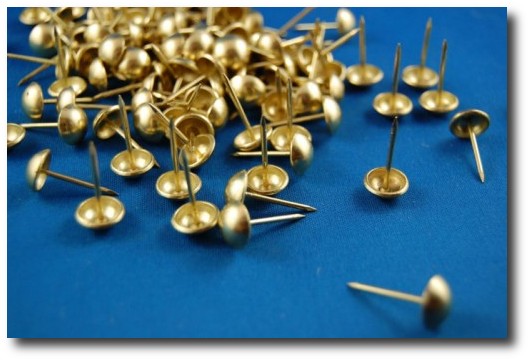
Brass Plated Upholstery Tacks Nails Trim pack of 100 From The Rusty Anchor
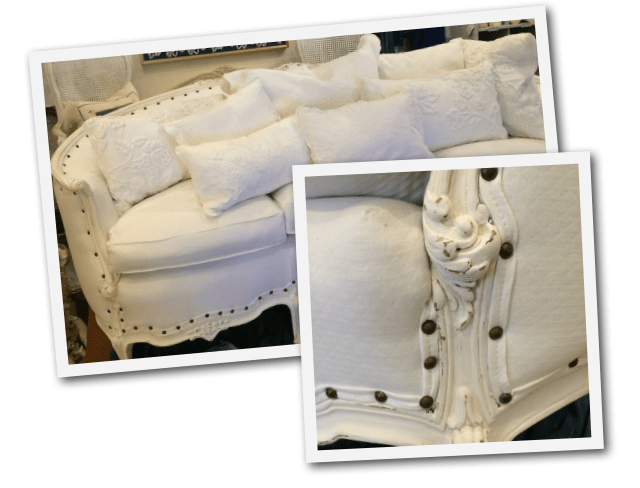 An upholstered sofa by Barbara Gray located at her shop -Etceteras 7503 Girard Ave La Jolla Ca.
In the past I have bought upholstery tack trim, which you can find on ebay by the yards for a very reasonable price. I have done a number of chairs with upholstery tacks, and the results do look very nice. They are a very easy way of covering staples.
In the past I simply sewed up a long strip of fabric which I folded and sewed down the center to create a nice professional appearance. Then, I used hot glue, and glued it in place, and then hammered on upholstery tacks for that professional look.
The upholstery tack trim is very easy to work with and gives your chairs that antique appearance without all the effort of lining each tack up and hammering it into place.
I still use this technique with many of my chairs. Here are a set of chairs I finished when I first started upholstering. I had no idea how to upholster the back, so I left the original leather fabric in place. Sadly the chair seats were torn to threads, so I recovered the seats and used upholstery tacks.
Another great tool that I picked up which I really enjoy is an upholstery tack spacer. You can get one from Kennedy Hardware for just over 10 dollars, and does it ever do a nice job of spacing out the tacks. I have done up my dining chairs with the spacer, and several other chairs, and it looks terrific. I never could get that professional appearance in the past spacing the tacks on my own, and this took is worth the 10 dollars.
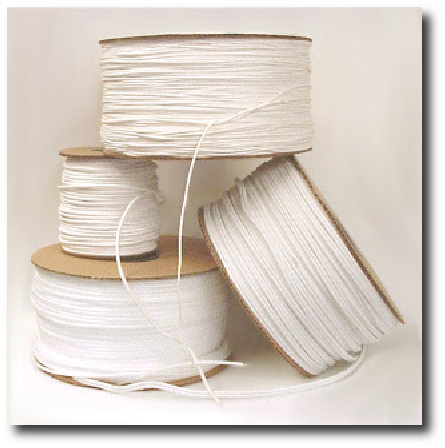
For my living room chairs, I really want a professional look with double welt cording. I love the simplistic look that it gives to furniture, and it gives off such a nice appearance. I had no idea how to get the look, so I decided to go to a local sewing machine store which the woman suggested getting a cording zipper foot. At the time I was attending a class on making box cushions and so a cording zipper foot allows your needle to get right near the edge of the cording where a normal sewing machine foot would not. When I discovered this, I again started cheering, because it seemed like I was battling getting as close as I could when I sewed pillows only to fail!! The zipper foot allows you to sew those really nice corded pillows and drapery with cording. It is a must have for sewing with cording.
Naturally I assumed when it came to double welt cording that you sew two cords separately with your zipper foot, and then sew them together.
I started looking on You tube for more instruction on this, when I came across a double welt attachment! I couldn’t believe my eyes, contemplating how much fabric I have wasted!
I then ran across a really great article by Prudent Baby how to sew welting cord. She does a great job of showing step by step how to sew welting cord.
Her article was just the very thing I needed!! She suggested buying a 250 yard spool from Rochford Supply which turned out to be the best deal after looking on ebay.
A 250 yard spool came to $27.94, with about 19 dollars of shipping which came to about $46.97. I purchased my first DOUBLE welting foot on ebay, and I am looking forward to whipping out these chairs, rather than having them sit in our garage!
The other thing I wanted to mention about the EZE TC-08LN Long Nose Upholstery Staple Gun was when it came to stapling on the final double welt cording, it was as simple as you can get. You can pull the cording around the curves of your furniture with ease!! The staples on this gun are so thin, that they can hardly be seen. If you shoot them in the middle of the double welt, they disappear. It truly produces a professional result, and with little time what so ever.
I am looking forward to my new welting cord and welting foot!! ANYTHING to make our lives much easier!
6 Tips For Painting Plaster Wall Finishes

The impact of a well-executed faux finish becomes immediately apparent in interiors inspired by 17th- and 18th-century design. Many of the rooms shown here feature a Venetian plaster finish—an effect created using layered paint and, in some cases, plaster. Historically, paints were far more translucent than what we use today, allowing light to pass through layers of pigment and creating remarkable depth and movement on the walls. These early finishes were likely achieved with mixtures of linseed oil and natural pigments, producing surfaces that feel rich and alive—qualities rarely replicated by modern, high-coverage paints.
Today, walls are often completed in two coats and considered finished, but Venetian plaster techniques offer an opportunity to restore that sense of depth and craftsmanship. A variety of Venetian plaster products are now available at most hardware stores and can be custom-tinted. Some mimic polished marble with a subtle sheen, while others resemble the softly textured plastered walls found throughout historic European homes.
The Venetian plaster finish featured in Better Homes and Gardens is an excellent example of an advanced application. Lighter tones near the top of the wall blend more naturally, while deeper hues toward the bottom anchor the space. Upon closer inspection, you’ll notice the use of a sponge to introduce texture, adding visual interest without overwhelming the surface.
Working with lighter color palettes also helps open up a room and creates an interior that remains comfortable and livable over time. Consider undertones of peach, soft orange, or warm beige for a timeless effect. Always practice this technique before committing to your walls—especially with textured finishes—since correcting mistakes often requires sanding back to bare plaster. I’ve learned firsthand that this process can be messy and extremely time-consuming.
How to Achieve a Venetian Plaster Finish
This finish is created by troweling on thin layers of paint using at least three related hues. Paint alone will not produce the desired effect; a pliable texturizing medium must be mixed into the paint. Many hardware stores sell Venetian plaster compounds that can be tinted to your chosen colors and mixed directly into your paint.
For the most authentic result, use:
-
One pale hue
-
One medium hue
-
One darker hue
All within the same color family.
Apply the paint randomly, avoiding the urge to wipe excess paint from the trowel—this irregularity is what creates depth. Use different trowels to vary the size and flow of the markings, preventing repetition and patterning.
The most important step in any faux finish is the final glaze. A lightly tinted glaze applied over the entire wall unifies the colors and adds softness and depth. This step is often overlooked, but it acts almost like a gentle blur, minimizing imperfections and blending transitions seamlessly. Glaze is semi-transparent by nature, which allows the layers beneath to show through beautifully.
I recommend purchasing glaze that is not pre-tinted. This gives you greater flexibility for future projects, rather than being locked into a single color. A simple rule of thumb is to mix equal parts paint and glaze, leaning slightly heavier on the glaze for softer results. For the final coat, I often roll the glaze onto the wall evenly.
Experiment to find what works best for your space and technique. I’ve had excellent results using Ralph Lauren glaze products in the past. That final glaze coat truly transforms the surface. When decorating in the spirit of the 17th and 18th centuries, Venetian plaster is one of the fastest and most effective ways to bring authenticity, depth, and cohesion to a room.


Louis Philippe Chests- A Dresser Style That Can Be Made Over To Look Expensive

I stumbled across a fantastic blog called Life in The Fun Lane the other day and I was pleasantly surprised. Don’t we all want to be in the fun lane in life? Everyday armed with a smile and jetting on the highway of happiness? Holly Baker is the author of this splashy blog, which includes pictures of her home renovations in more than a few pages of her blog.
At first glance, you can tell she has incredible taste, but you will also notice that she also isn’t afraid of getting her hands dirty as she includes several painted furniture makeovers in her own home.
After browsing through her home pictures I couldn’t help but notice the Louis Philippe chest in her home. Being a furniture painter myself, I knew these chests didn’t come with industrial pulls, and the builders options for this chest are always white, and black and cherry veneer.
So it was a nice surprise to look at her version of this terrific chest. As you can see, she took off the traditional bail pulls, and instead put on door pulls.
In the past, I have loved the way these industrial pulls have looked, but they never looked quite right on my furniture. Combining the rustic look of gray and steel just goes hand in hand.
- Ace Hardware sells 5 handles in a kit for only $12 dollars which is a bargain price.
- Stanley Hardware Utility Pull, Nickel #750098
- Utility Door Pull, in Black
- Stanley Home Designs Utility Cabinet/Door Pull, Polished Brass
- Utility Door Pull, in Zinc
- Utility Door Pull, in Black
- National Mfg. Galv Utility Door Pull
- 10 Label/card Holder Black Plated 3 1/2×1 1/2 W/screws
- 25 Label/card Holder Nickel Plated 5/8×2 1/2 W/screws
- 25 Label/card Holder Brass Plated 5/8×2 1/2 W/screws
- Card Holders (no pull) 1-1/2” x 3-1/2”, 2-Pack
- Label Holder 1/2” x 2-1/2”, pair
- Styles inspiration – 3 5/32″ long label holder in faux iron
- Label Holder 1-3/8″ X 2-5/8″ Satin Nickel W/ Pull LQ-PN1052M-SN-C
- Knape & Vogt Label Holder 2in Plus 1in
- 25 Nickel Plated Card Holders 1×1-5/8 Inches W/#2×1/4″ Screws
The Louis Philippe furniture collection features good looks with lovely clean lines and a bit of detail. If you are after a streamlined chest, this might be for you. The first time I came across a (modern) Phillipe Dresser, I just had to get it. I used to paint furniture and resell it. I personally have had the chance to buy the 6 drawer Louis Phillipe dresser twice, in addition, I have also sold a pair of the nightstands. All three sets were painted black, as all of the furniture was bought used, so they had scratches that needed to be sanded out. From my experience, let me tell you about these chests…..
The Advantages:
If you are looking for a really nice looking dresser, with classic looks, this dresser certainly pleases the eyes. It has very attractive lines, and a bit of detail in the molding around the top of the dresser.
- Powell Louis Philippe Cedar Chest
4pc Full Size Bedroom Set Louis Philippe Style in Antique White Finish
Louis Phillipe Black Bedroom Chest - 4pc Full Size Sleigh Bedroom Set Louis Philippe Style in Black Finish
Computer Desk with Hutch Louis Philippe Style in Cherry Finish
Coaster Louis Philippe Style Night Stand, Cherry Finish
The Drawbacks:
This set is made of selected hardwoods and veneers. The only draw back to these chests are they are made of composite woods, which means they are not made of solid wood. This dresser is good for staying in one place and not being moved around. I moved the dressers that I had painted, and although they didn’t damage them, it wasn’t good for them either.
This dresser does not hold up well to wear over the years. In fact, if you were to accidentally drop the chest while you were bringing it into your home, it would dent it permanently. This is what happened to one of the nightstands. We accidentally dropped it, and it bent the corners of the wood. While most chests made of solid wood would scratch, these chests would be permanently damaged. In addition, you would NOT want to put these chests in moist conditions. The wood on the drawers would expand. These sets are heavy, but the quality of wood is not so great.
These dressers operate on sliders. If you have seen an Ikea dresser, you know what I am talking about. Vintage and antique dressers often have middle support sliders, and wood separating the drawers. The modern day dresser doesn’t even use plywood, they use something similar to cardboard. I cannot remember off the top of my head what separated these drawers, but I believe it was the metal gliders. The draw back to these metal gliders is the drawers slip off of them so easily. On another note, they glide in and out, and function with modern smooth cabinetry.
If you are the sort of family that moves around A LOT, forget about this set, because it will get damaged over time. If you are intending to buy it once, and keep it in the same spot, it really is a great deal for the price point. It is one of the nicer dressers around for the price, but the construction isn’t top quality. For a little more than $300, it is a very nice looking dresser, you have to agree~
- A stunning solid wood antique
- Antique German Louis Philippe Chest- Bonnin Ashley Antiques
- Acme 25505 Louis Philippe Antique Chest –FlatFair.com
- French Custom Louis Philippe Style Desk -WOW!! Fireside Antiques


How To Stain Fabrics With Tea To Get An Antique Appearance

Tea Stained Fabric From Country Living Magazine
Tea Staining Fabric: A Simple Technique for an Aged, Timeless Look
Tea staining is one of those quiet tricks designers rely on to give upholstery fabrics a beautifully aged appearance. Often used when recovering antique chairs, softening new drapery, or toning down bright linens, tea staining allows fabric to take on the subtle character of time and use. With this simple technique, leftover fabric remnants can be transformed into naturally aged accents—perfect for throw pillows, vintage-inspired dolls, or decorative details that bring warmth and history into a space.
Tea-stained fabric is especially charming in children’s rooms, where a softly aged fabric doll or muted pillows can add character without feeling overly precious or staged.
How to Naturally Stain Fabric with Tea
Tea staining works best on natural fibers such as cotton, linen, muslin, and wool. Synthetic fabrics will not absorb the stain properly. Begin by washing the fabric to remove any sizing, starches, or chemicals left from manufacturing. This step is essential for even absorption.
After washing, the fabric should be damp—not dripping wet, but not dry either. If starting with dry fabric, soak it briefly in water and squeeze out the excess. Choose a pot large enough to allow the fabric to move freely in the water without bunching or folding tightly.
Bring the water to a boil and add the tea bags. Allow the tea to steep for about five minutes, then remove the bags. Leaving the tea bags in with the fabric can result in uneven or overly dark stains that appear dirty rather than naturally aged. Submerge the fabric and monitor the color closely, removing it once the desired shade is achieved.
Choosing the Right Tea
Tea originates from China, where leaves from the Camellia sinensis plant were first brewed centuries ago. There are six primary types of tea—white, yellow, green, black, oolong, and pu-erh—each processed differently. Black tea is the most commonly used for staining and produces soft cream to warm brown tones. Herbal teas, depending on their ingredients, can introduce subtle reddish or pink undertones.
Keep in mind that fabric will dry slightly lighter than it appears when wet.
Adjusting the Color
If the fabric turns out darker than intended, the color can be lightened using bleach. There are two methods:
-
Run the fabric through a washing machine cycle filled with water and a small amount of bleach, checking frequently.
-
Submerge the fabric in a bucket filled with water and diluted bleach, gently turning it until the color softens to your liking.
Important Safety Note:
If using the bucket method, work outdoors and wear a protective mask and towel over your face. Proceed carefully and at your own risk.
Why Tea-Stained Fabrics Never Go Out of Style
Dyeing and staining textiles can transform ordinary pieces into something with genuine antique character. Roman shades, vintage stuffed animals, children’s dresses, and even simple linens can take on a sense of history with this technique. Tea staining is timeless—it has been used for generations and continues to be a beautiful way to introduce softness and authenticity into a home.
A Simple Lampshade Project Using Linen
I don’t often have time for elaborate projects, but every so often I’m able to fit in a small creative endeavor. For me, the quicker and more efficient the project, the better.
I’ve always loved drum lampshades, though oversized versions can overwhelm thinner lamp bases. When I found smaller-scale drum shades at a thrift store, I decided to recover them using a beige linen fabric. I removed the existing fabric and hot-glued the linen only along the top and bottom metal frames. After measuring the interior, I sewed a lining and glued it into place, again securing it only at the frame edges. Finally, I finished the shade by sewing and attaching a fabric trim along the top and bottom for a clean, polished look.
If I were to repeat this project, I would choose a much lighter-weight linen. Thicker fabric limits light diffusion, and lighter materials allow the lamp to better illuminate the room. This project takes about a full day, or perhaps half a day for faster workers, and it’s one I would happily do again for the right lamp.

Rit Dye Taupe, Rit Dye Golden Yellow, Rit Dye Dark Brown
,Rit Dye Kelly Green
Rit Dye Teal,Rit Dye Liquid Cocoa Brown
,Rit Dye Yellow
Rit Dye Tan, Rit Dye Pearl Grey
, Rit Dye Apple Green
,Rit Dye Tangerine
Round Galvanized Tub Oval Galvanized Steel Tub