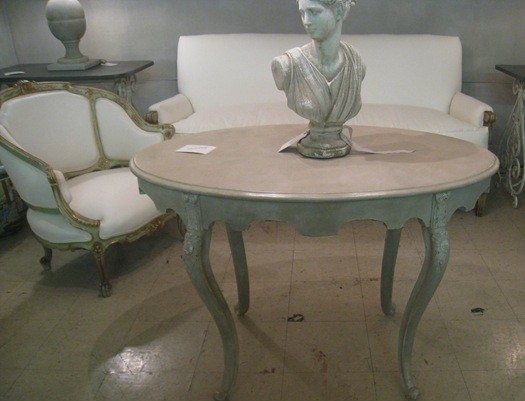
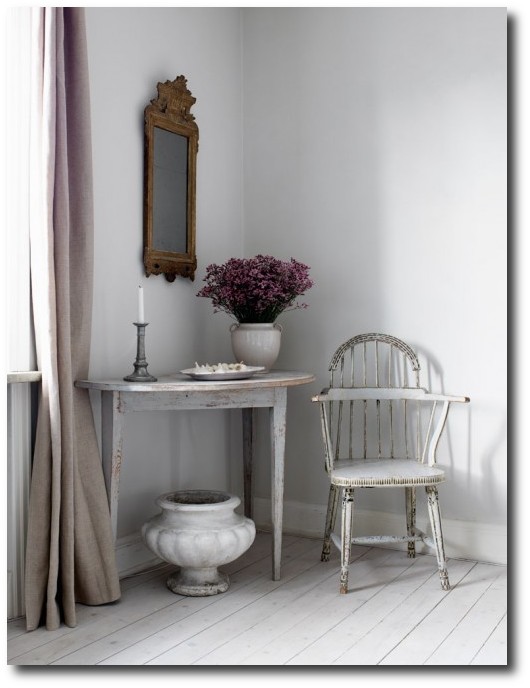
Furniture Painting, Distressing & Glazing
1. Milk /Chalk paints have a saturated color making them an industry favorite. Their chalk like appearance along with being very easy to distress make the paints a favorite amongst painters.
Simply paint your piece and let it dry. As usual, distress your piece of furniture, and apply a tinted wax to the surface of your furniture giving it an aged effect.
2. Using Regular Paints:
Any typical paint will work with this finish. Ideally, starting with a brighter paint is always better. The reason for this is, as additional layers of paint are added, the final paint finish will still have lots of pigment to the overall appearance even though additional dark glazes were added on top of the original color.
Consider using a brighter blue or green in the pastel range in a flat finish for your project french chairs.
Flat sheens allow you to work with the additional glazes much easier. Flat or eggshell work very well, so either one can be used. A satin or semi gloss tend to not eat up the glaze as well as an eggshell finish.
Lets get started:
Paint your entire frame and let it dry. Once it is dry, distress the frame using a sponge sander.
Sponge sanders are great because they can give a natural distressed look compared to belt or electric hand sanders. Norton has a 6 pack for $5 which is the price of two sanders in most stores. The next step is to add the decorative finishes.
There are several ways of going about this.
A) Dry Brushing: Is basically the effect of using a small amount of paint feathered on to a piece of furniture. The overall look is subtle. Much like applying blush to your cheeks over foundation. The effect is light, and not rustic what so ever.
For example if you are working with a bright mint color, consider dry brushing 2 or 3 shades of the same hue (darker or lighter ) on to your furniture.
This is simply done by having a very small amount of paint on your brush, and wiping the excess off on a cloth and lightly going over your furniture. If you are finding streaks or lines with the paint brush, you have too much paint on your brush.
The overall effect should show no indication of what medium you used to create the effect.
An oversized badger brush is ideal for this.
B: Painting On – Wiping Off
This is one of the easiest techniques around, and one I am very comfortable using. Not only is it easier than dry brushing, but it allows you to not over think the process.
This effect looks terrific on distressed furniture, so distress the heck out of your piece!
Again, mix up some paint a couple shades darker or lighter than your base color. This doesn’t have to be complicated, add black or white in your original paint color.
This technique is simply achieved by brushing it on and wiping it off with a rag. Working with a damp but dry rag works the best for me.
If you are working with a fairly large piece, consider working with glaze. Glaze gives you additional time to get the paint off the furniture, compared to regular satin paint.
Going back a few steps……
At first, I recommended a flat finish as your base coat, and the reason for that is flat paint covers well. It sands very easily, and it takes less coats to cover evenly. Additionally it allows the glaze to stick well, and move around easier than a semi gloss base coat.
Glazing on the other hand- When it comes to using paint (not glaze) to dull your furniture down, a satin finish will give your piece a bit of a shine, and also allow you to move around the paint easier with a cloth. The product “glaze” purchased in a store will give your piece a bit of shine as well.
Working with glaze gives you extra time to move around your paint. If you plan on working with paint only as your dulling medium, you have to work extra fast. It takes some practice, especially on larger furniture. Glaze is always easier on bigger pieces, and smaller pieces alike.
Ideally if you start off using a very bright color, dull it down with a couple shades lighter than the base color (see the color chart above) and then finish it off using a very thin coat of brown or olive glaze. I buy my glaze UNTINTED, and tint the paint myself as I go along, because I have a variety of painted projects that I use with glaze.
Glaze is usually mixed half paint to half glaze. Again, eye ball it, you don’t have to measure it.
I find sometimes the nicest finishes are those which I paint on a very light coat of brown glaze. Instead of the other finishes which I take off with a damp rag, this finish is just a thin layer of glaze. The overall effect just dulls down the overall color. Brown glaze can make a huge difference with colored paints. It also makes a impact on white paint as well.
When painting with white, consider a creamy paint, not stark white as your base paint. When glazing over white, paint on the brown glaze, and take it off very very quickly. This is especially so using flat paint. The flat paint will soak up the brown pigments so don’t leave your glaze on too long. In fact, I would suggest using more glaze to paint ratio when glazing white furniture. Experiment for yourself to get the timing right.
C)The best method I have used is oil paint to create surface glazes. I love working with oils because they produce an effect like nothing else. I do the first two steps the same as above….1 (base coat), 2 (distressing) but when it comes to adding a glaze, I tend to work with a satin oil paint from my local Sherwin & Williams. You can get custom colors mixed, and I tend to work with a yellow that is between the top two colors in the color chart above. The yellow works over almost every color I paint with. Over brown it produces the gray you see in this photograph. Here is another dresser which I used the color. You can see remnants of the paint in the details. With oil, you have to work pretty quick, because it can get very thick quickly, making it more difficult to create a nice even finish.

CAST IRON URN Terra Finish From Desgin Studio D
(This is as close as I can describe what a finish looks like using oil paint. Oil paint allows you to move the paint around the piece with a damp cloth leaving a textured finish behind. You can see that in some areas the paint was removed more than others)
For dressers I work in very small sections. Smaller pieces of furniture I quickly apply paint to the entire piece and work like mad to get it off.
I simply paint on the oil paint, over the entire piece (or small sections if it is a big piece of furniture) and use an old facecloth to take off the paint.
If you do more pieces at the same time, I find my cloth gets saturated with oil, (which dries) and makes my later pieces much better.
I have used a muted dulled yellow over blue, and green, and the effect is terrific! Nothing comes close to oil paint. Painting can be fun, experiment, and make the pieces your own.
Painted Antique Furniture Using Pastel Greens – Picture Credited to Cote De Texas

17th Century Primitive Painted Homes
La Pouyette featured a unique post of a primitive painted cabin located a few kilometers from Gstaad. The cabin was originally featured in the 1993 Home and Garden magazine. Gstaad is a village in the German-speaking section of the Canton of Bern in southwestern Switzerland, and home to one of the largest ski areas in the Alps. This home was at one time considered a wellness area with sauna, and built in 1628. The evidence is found in the inscriptions. The walls are decorated with paint in black, green and red. In some areas of the home, formulas of blessings in Roman letters in Gothic characters are seen on the walls. Painted wooden panels, decorated beams, friezes carved into the woodwork, all add to the beauty of this home. Blonde wood is used on the floor boards, and the furniture is found in in natural pine. Visit La Pouyette‘s Blog for additional photos of this spectacular home.

17th Century Primitive Painted Homes

17th Century Primitive Painted Homes

17th Century Primitive Painted Homes

17th Century Primitive Painted Homes


Amy Morris’s Rustic Country Entry Way Featured In Atlanta Homes and Lifestyles Magazine
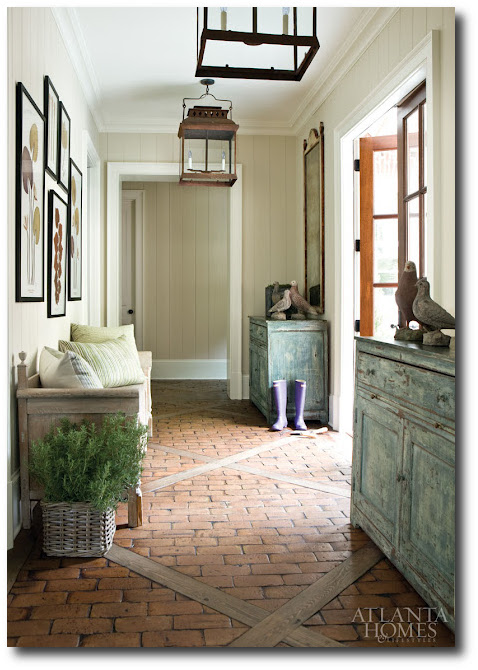
Interior designer Amy Morris’s home Atlanta Homes and Lifestyles
Atlanta Homes and Lifestyles featured Interior designer Amy Morris’s home which was filled with lovely distressed Swedish antiques, and an eclectic mix of furnishings making her home comfortable and inviting to her family and friends.
Here are some of my favorite highlights of the home:
One of the home’s powder rooms features a pair of arched iron windowpane mirrors which were placed together to look like one solid mirror. The mirror and the painted wall paneling give the room a primitive feel. The vanity topped with limestone gave this room a polished appearance. The rustic elements paired with the rich stone pushed this room into absolute luxury.
Several antiques really shine in this home. The master bedroom which features serene Swedish blue and gray-white tones. A 19th-century Gustavian settee sits at the end of the bed and is from A. Tyner Antiques. The basement is just as beautiful as the rest of the house, outfitted with a distressed wood pedestal market table, with Louis XIII reproduction chairs. In the back entry hall, the floor is patterned with brick and wood to create a focal point. Matching weathered chests really steal the spotlight in this room. The distressed paint finishes feature colors of blue and cream make a Swedish statement in this room.
ORIENTAL FURNITURE sells a lovely white cabinet for $569
Furniture Woodworks sells a terrific cabinet that is currently unavailable, although it may become available in the future. They sell it unfinished.
Others to Consider:
Short-Back Split-Seat Storage Bench by LINON HOME DECOR $82.00
Acadian Collection Entryway Bench by CCT GLOBAL SOURCING INC $179.00
Somerton Wooden Storage Bench in Golden Brown by Wildon Home $165.00
BENCH COASTER 501008 by Coaster $289.00
This shoe cabinet has all the Swedish looks for your entry way. This cabinet is crafted of durable hardwood and hardwood veneer. Home
Decorators Collection sells this cabinet for $199. This cabinet isn’t as big as a regular chest making it perfect for hallways or entry ways.
The Jaclyn Entryway Storage Bench From Home Decorators Collection features Swedish looks combined with functionality. The seat features storage compartments that easily lift to tuck away everything from winter apparel to the dog’s leash. The bench is crafted out of wood construction and is sold in a walnut finish. Measurements are 30.75″Hx50″W.
Paint this bench, or strip it and lime white wash it for a look comparable to Amy Morris’s bench.
Check out the Painted Porches Country Painted Bench in Pastel Blue Green
Check out my advice when it comes to White washing raw wood furniture.
Get Amy Morris’s Look For Your Own Home:
Uttermost sells a rustic primitive looking mirror called the Ameil Metal Arch Mirror. This mirror is hand forged and made in a metal frame. The overall dimensions: are 82″ H x 42.25″ W x 114″ D. They sell this mirror for $653
Intelligent Design sells a very attractive arch mirror for $240. This mirror has terrific details, and certainly doesn’t look cheap!
If you like the look of the Louis XIII primitive style chairs, consider the Bailey Street Lassiter Chair which is finished in a bone suede complete with brass nail heads and a rich honey walnut tone. They are priced at $699.
A Louis XVI bench appears in one of the bedrooms. Acme sells a single Louis XVI bench for only $80 dollars, which could be painted, distressed and upholstered for the particular room that needs a stool.
The Hampton Vanity Stool would be spectacular against a wall. Buy two of these stools and make a feature wall shine with these delicate looking stools. The half circle really falls into the Swedish period look. The best thing about these stools is the price point. They are only $60 dollars, which gives some room for re-upholstery and a new paint finish.
Hooker sells a Radcliffe Bench that looks like a Louis XVI bench. The bench is upholstered with Taupe Zebra Fabric and sells for $675.
Foreside Iron Bird on Pedestal is made of cast iron, this bird statue measures 7-inch high. $6.43
Since everything in Sweden is made from wood, why not go with a wood painted bird? Gift Warehouse sells a set of three Folk Art painted birds. If you don’t like the color scheme, simply follow the painted pattern and re-paint them in the colors of your choice. The set costs only $11 dollars
Creative Coop sells a set of Iron Bird Statues in a creamy ivory painted finish for $16.00
Universal Lighting and Decor sells a very attractive birdcage. Often times I see some of these decor pieces come and go on Amazon, and this one is STILL available. It is made of iron, and actually quite big. The cage is 21 1/4″ high, and 12 1/4″ wide. They sell this cage for around $50 dollars. Get it while it is still available. Pair it up with a rounded plant stand for a decorative piece of furniture painted in the same color, or leave it in its rustic state for a piece of decor on a dresser or cabinet.
Space Positive sells a set of two Decorative Antique Nesting Wire Bird Cages with a curved style for $172
Two’s Company sells a very attractive Antiqued Birdcage Display Shelf which can either hang or be used as a stand. They have it priced at $254.
If you are looking for a pretty vase to hold some long stemmed orchids in, consider this cast iron Bird feeder which has a very attractive stem and base, and could be easily painted or left in its rustic state. The feeder sells for $19 dollars and is such a versatile piece. Consider it in the bathroom to hold soaps, or as a vase for faux flowers. The price is right, and the style is lovely.

DIY Furniture Appliques From Architectural Depot
Furniture Appliques From Architectural Depot

Furniture Appliques From Architectural Depot
Architectural Depot has a number of simply beautiful appliques that could be used to adorn your existing furniture and walls with. They have a variety of hard-to-find historical materials for your architecture needs. This stunning frame featured on The Paper Mulberry Blog shows how lovely a frame or a piece of furniture looks with appliques.
This stunning ceiling has gilded rosettes with an ornate gilded border. Creating a ceiling this stunning is a lot of work, although it doesn’t have to be. Interiors can be as complicated or as easy as you want them to be. Ebay has a number of stunning molds which you can create out of plaster saving you thousands if you decide to go after a look like the ceiling of Gumbo.
This plaster cement tile mold would be an ideal mold for the bathroom. Tile your whole bathroom in this mold and gold leaf the rosettes. The mold itself is $4 dollars, and you can buy plaster at your local hardware store.
This beautiful tile mold has a border around it making it very much like the ceiling of Gumbo. Produce this look as a backsplash in your kitchen, and gold leaf the rosettes.
This lovely rococo inspired frame would be just beautiful above doorways, or even posted on pieces of wood for labeling your garden. Make dozens from a couple bags of plaster or concrete. The possibilities are endless.
In this picture, an over the door plaque is detailed with swags and laurel leaves. This can easily be created with molds.
One of my favorite pictures is this one from Barbro Grandeliuss’s Swedish Home, where furniture appliques are hammered on to a simple piece of wood.
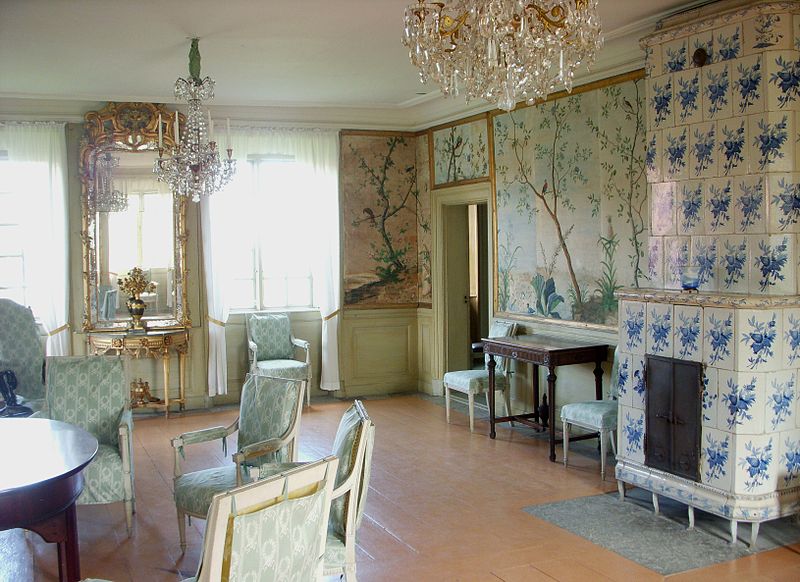
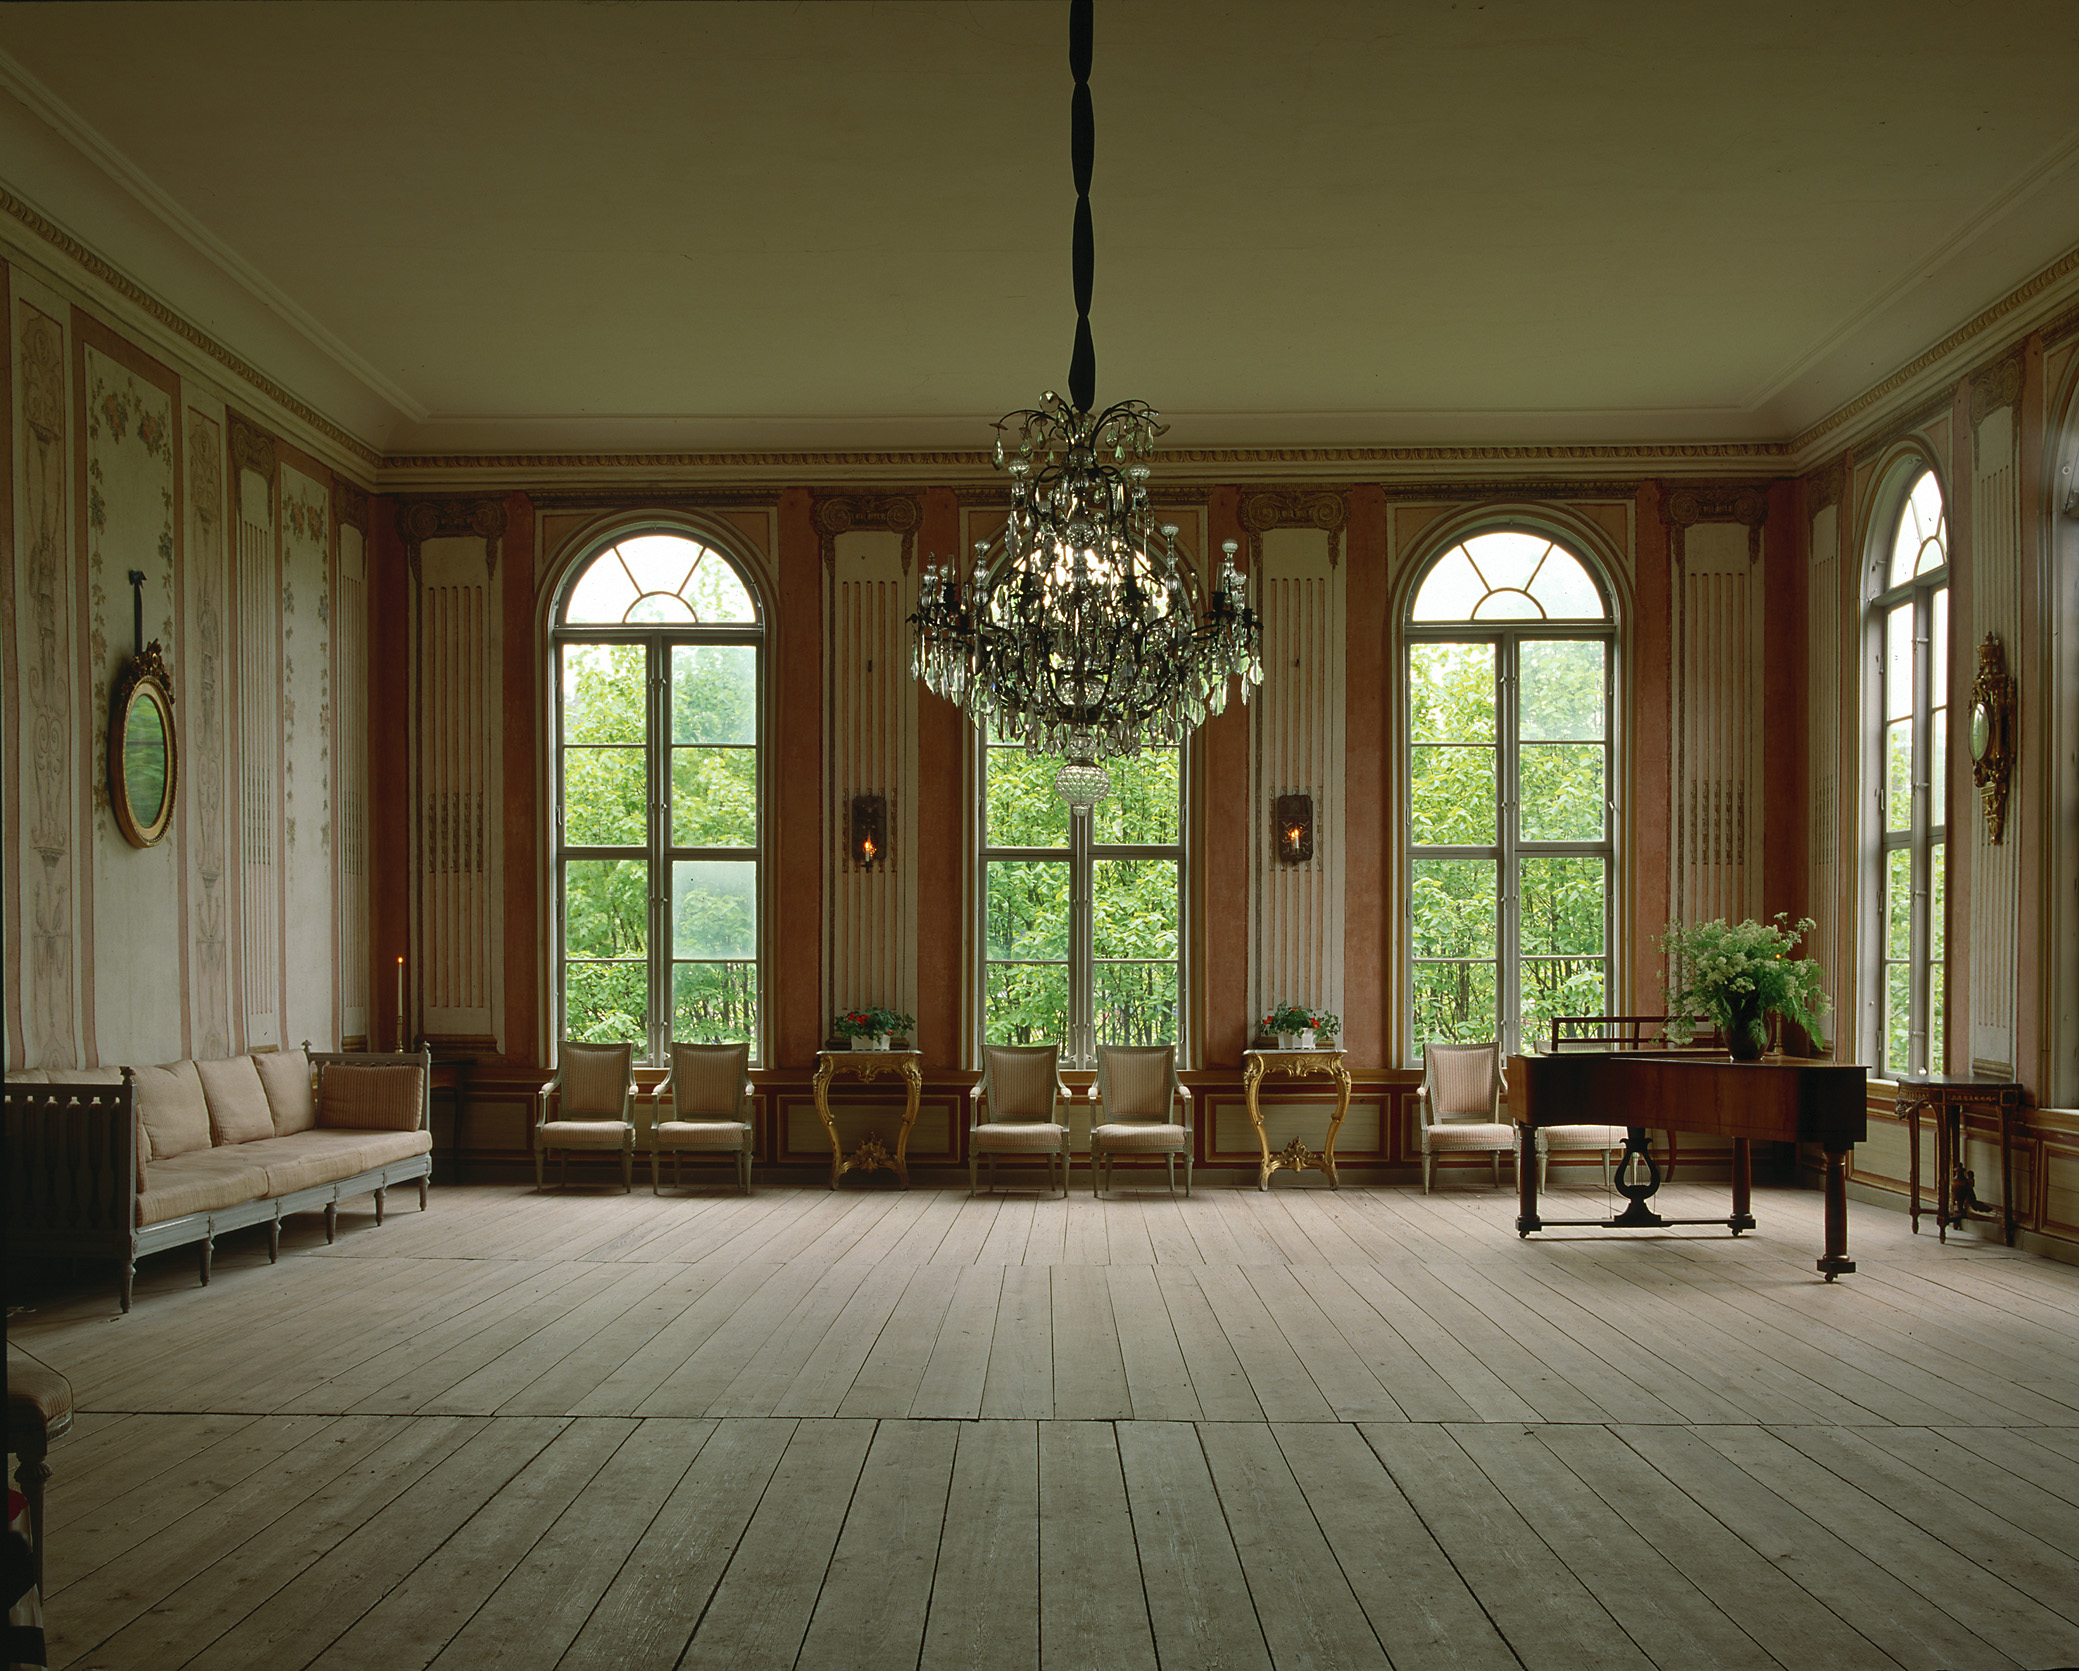
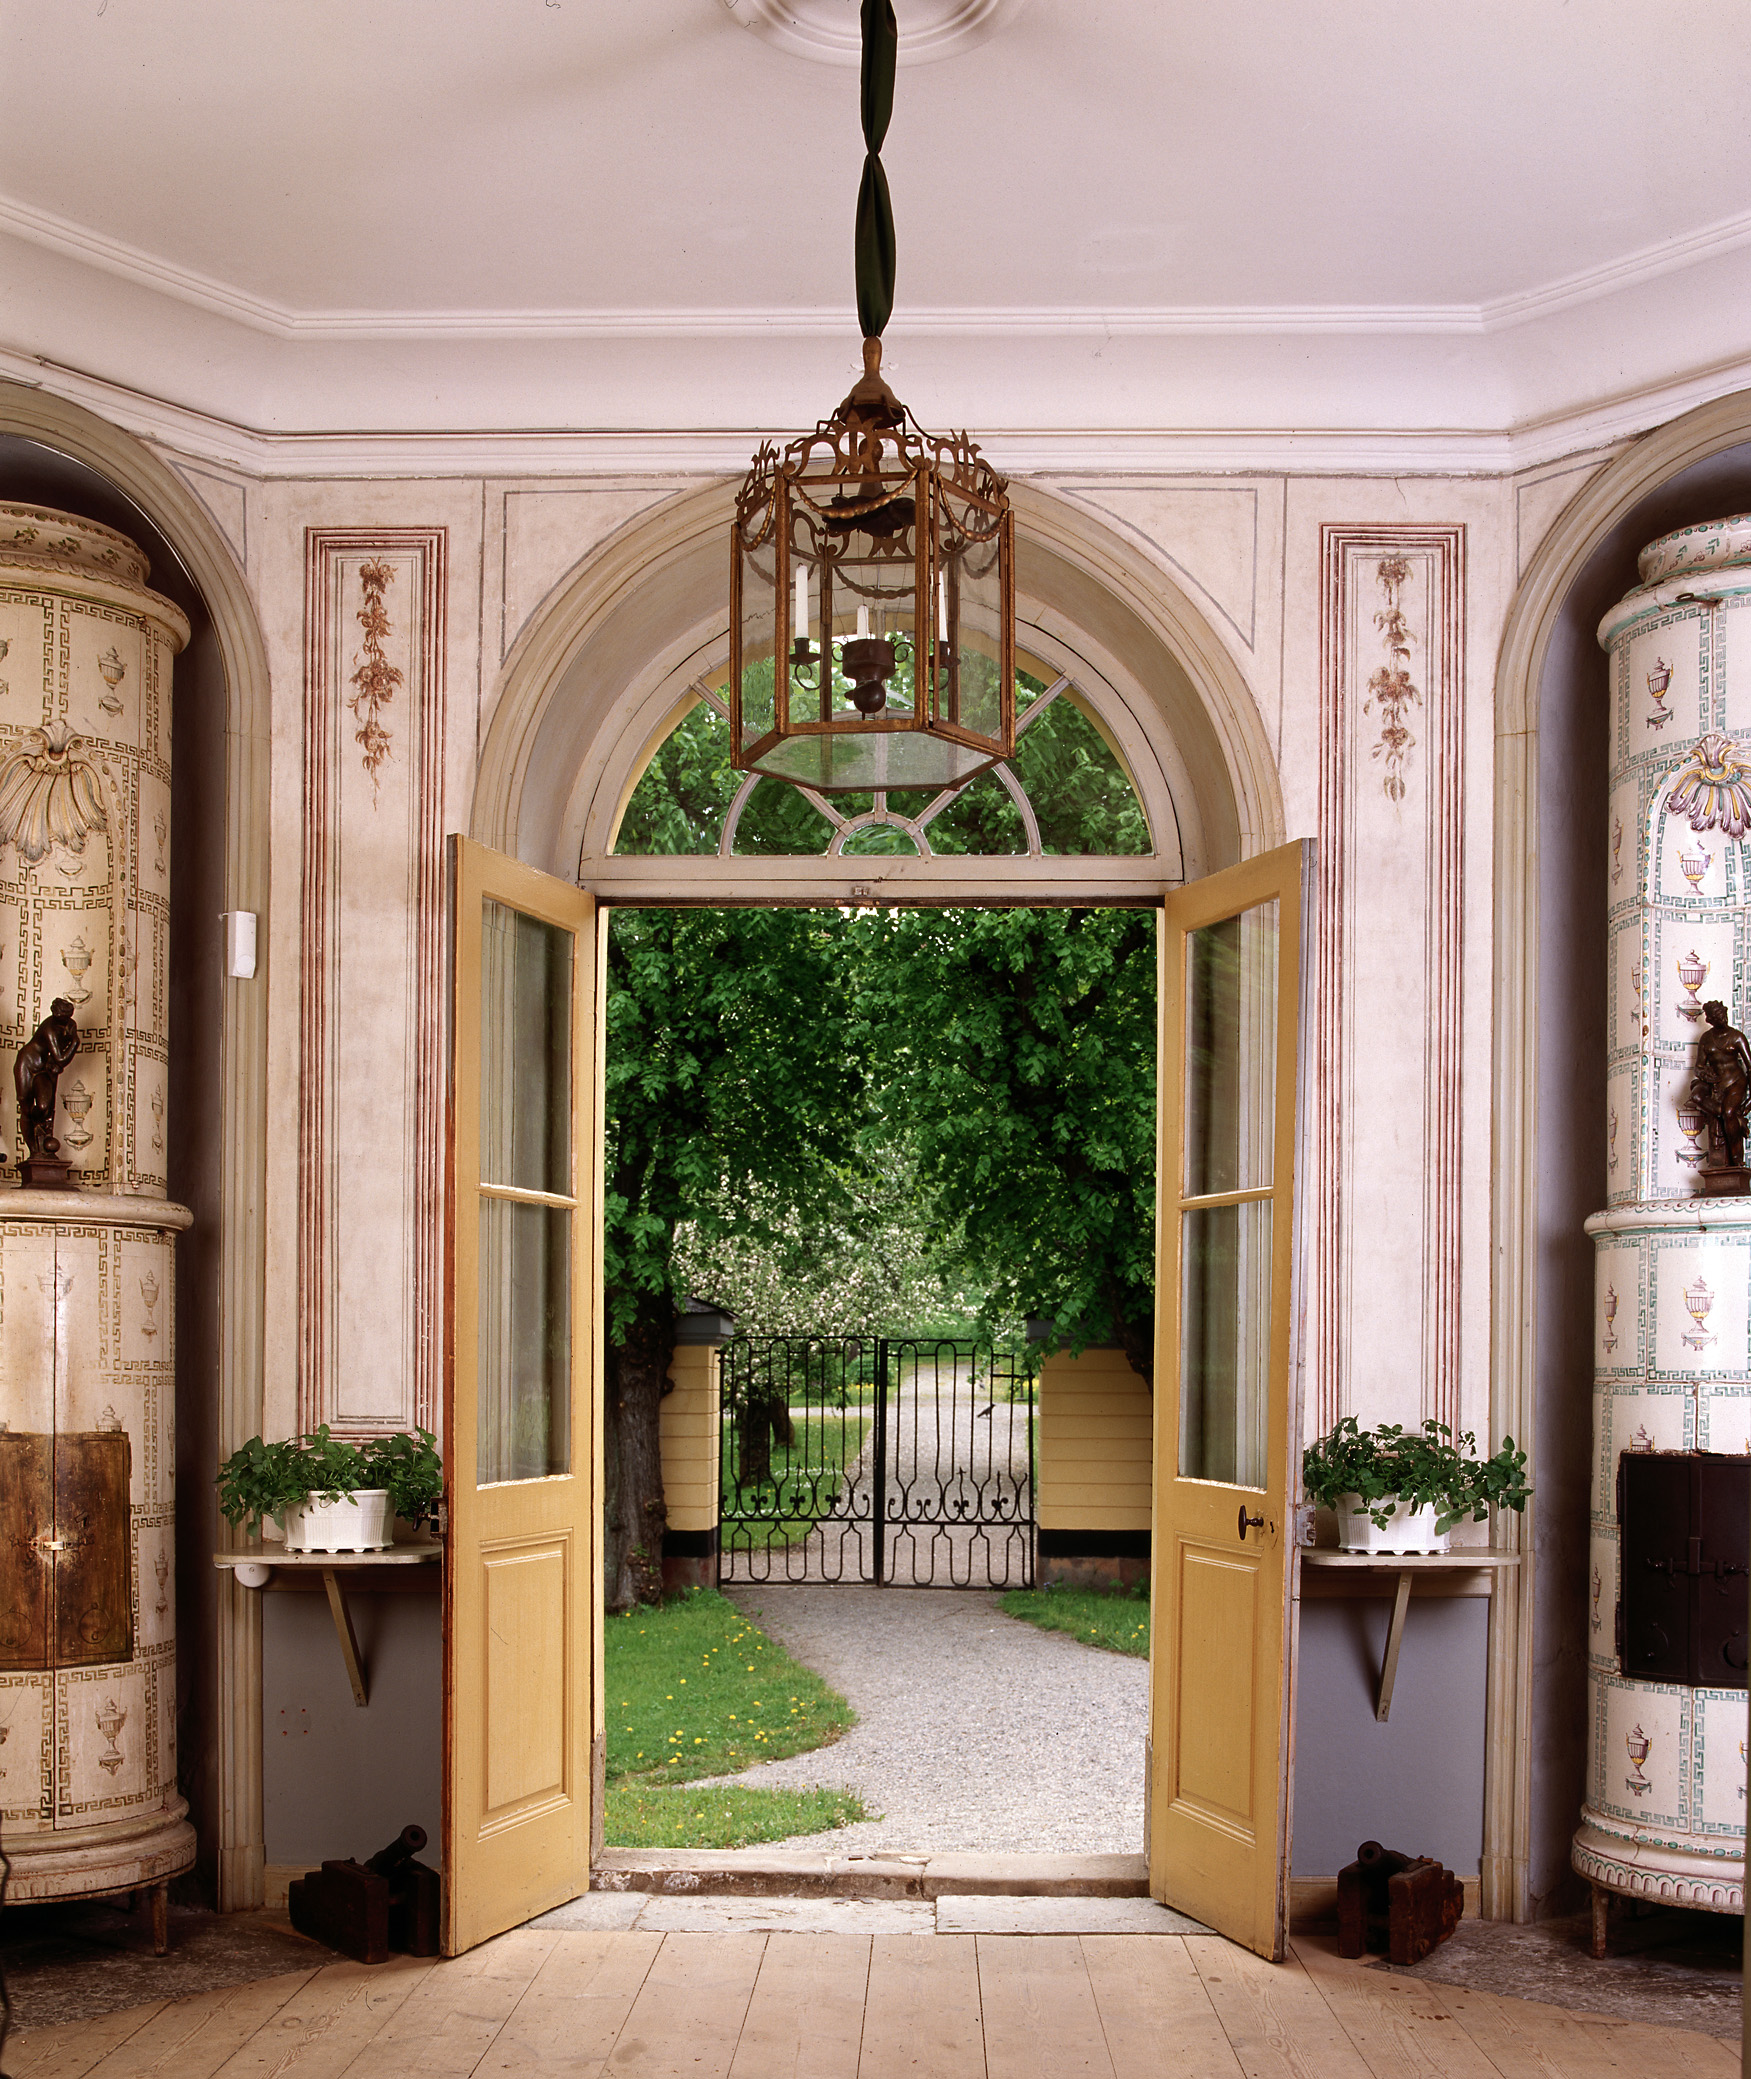
A Look Behind Svindersvik, A Farm Built In 1740s
Svindersvik is a well-preserved summer residence from the mid-1700s. Svindersvik is located at Swine Flinders Bay south shore in Nacka , designed by architect Carl Harleman for merchant Claes Grill.
The farm was built in the 1740s as a summer residence for the merchant Claes Grill and his family. Carl Harleman managed to combine a mansion and a cottage in the same building. He had been inspired by French rococo,but adapted it to Swedish conditions.
Svindersvik consists of a small main building on two floors. The building is strictly symmetrical form given, with a central axis through the entrance, dining room and balcony. To the left of this central axis is a big place, the right two smaller rooms, including one bedroom. The rooms are tiled and silk upholstered seating. The ground floor is a hallway with an oval ceiling opening through which the daylight from the top floor looking down. The upper floor dominates a large billiard room with pool table from the 1700s, which is well preserved.
Besides the main house is the kitchen wing, which is slightly younger than the main building. The kitchen wing is on an older foundation, probably from the 1500s. The kitchen was for the time very modern, with built-in cabinets, marble countertops and sink.
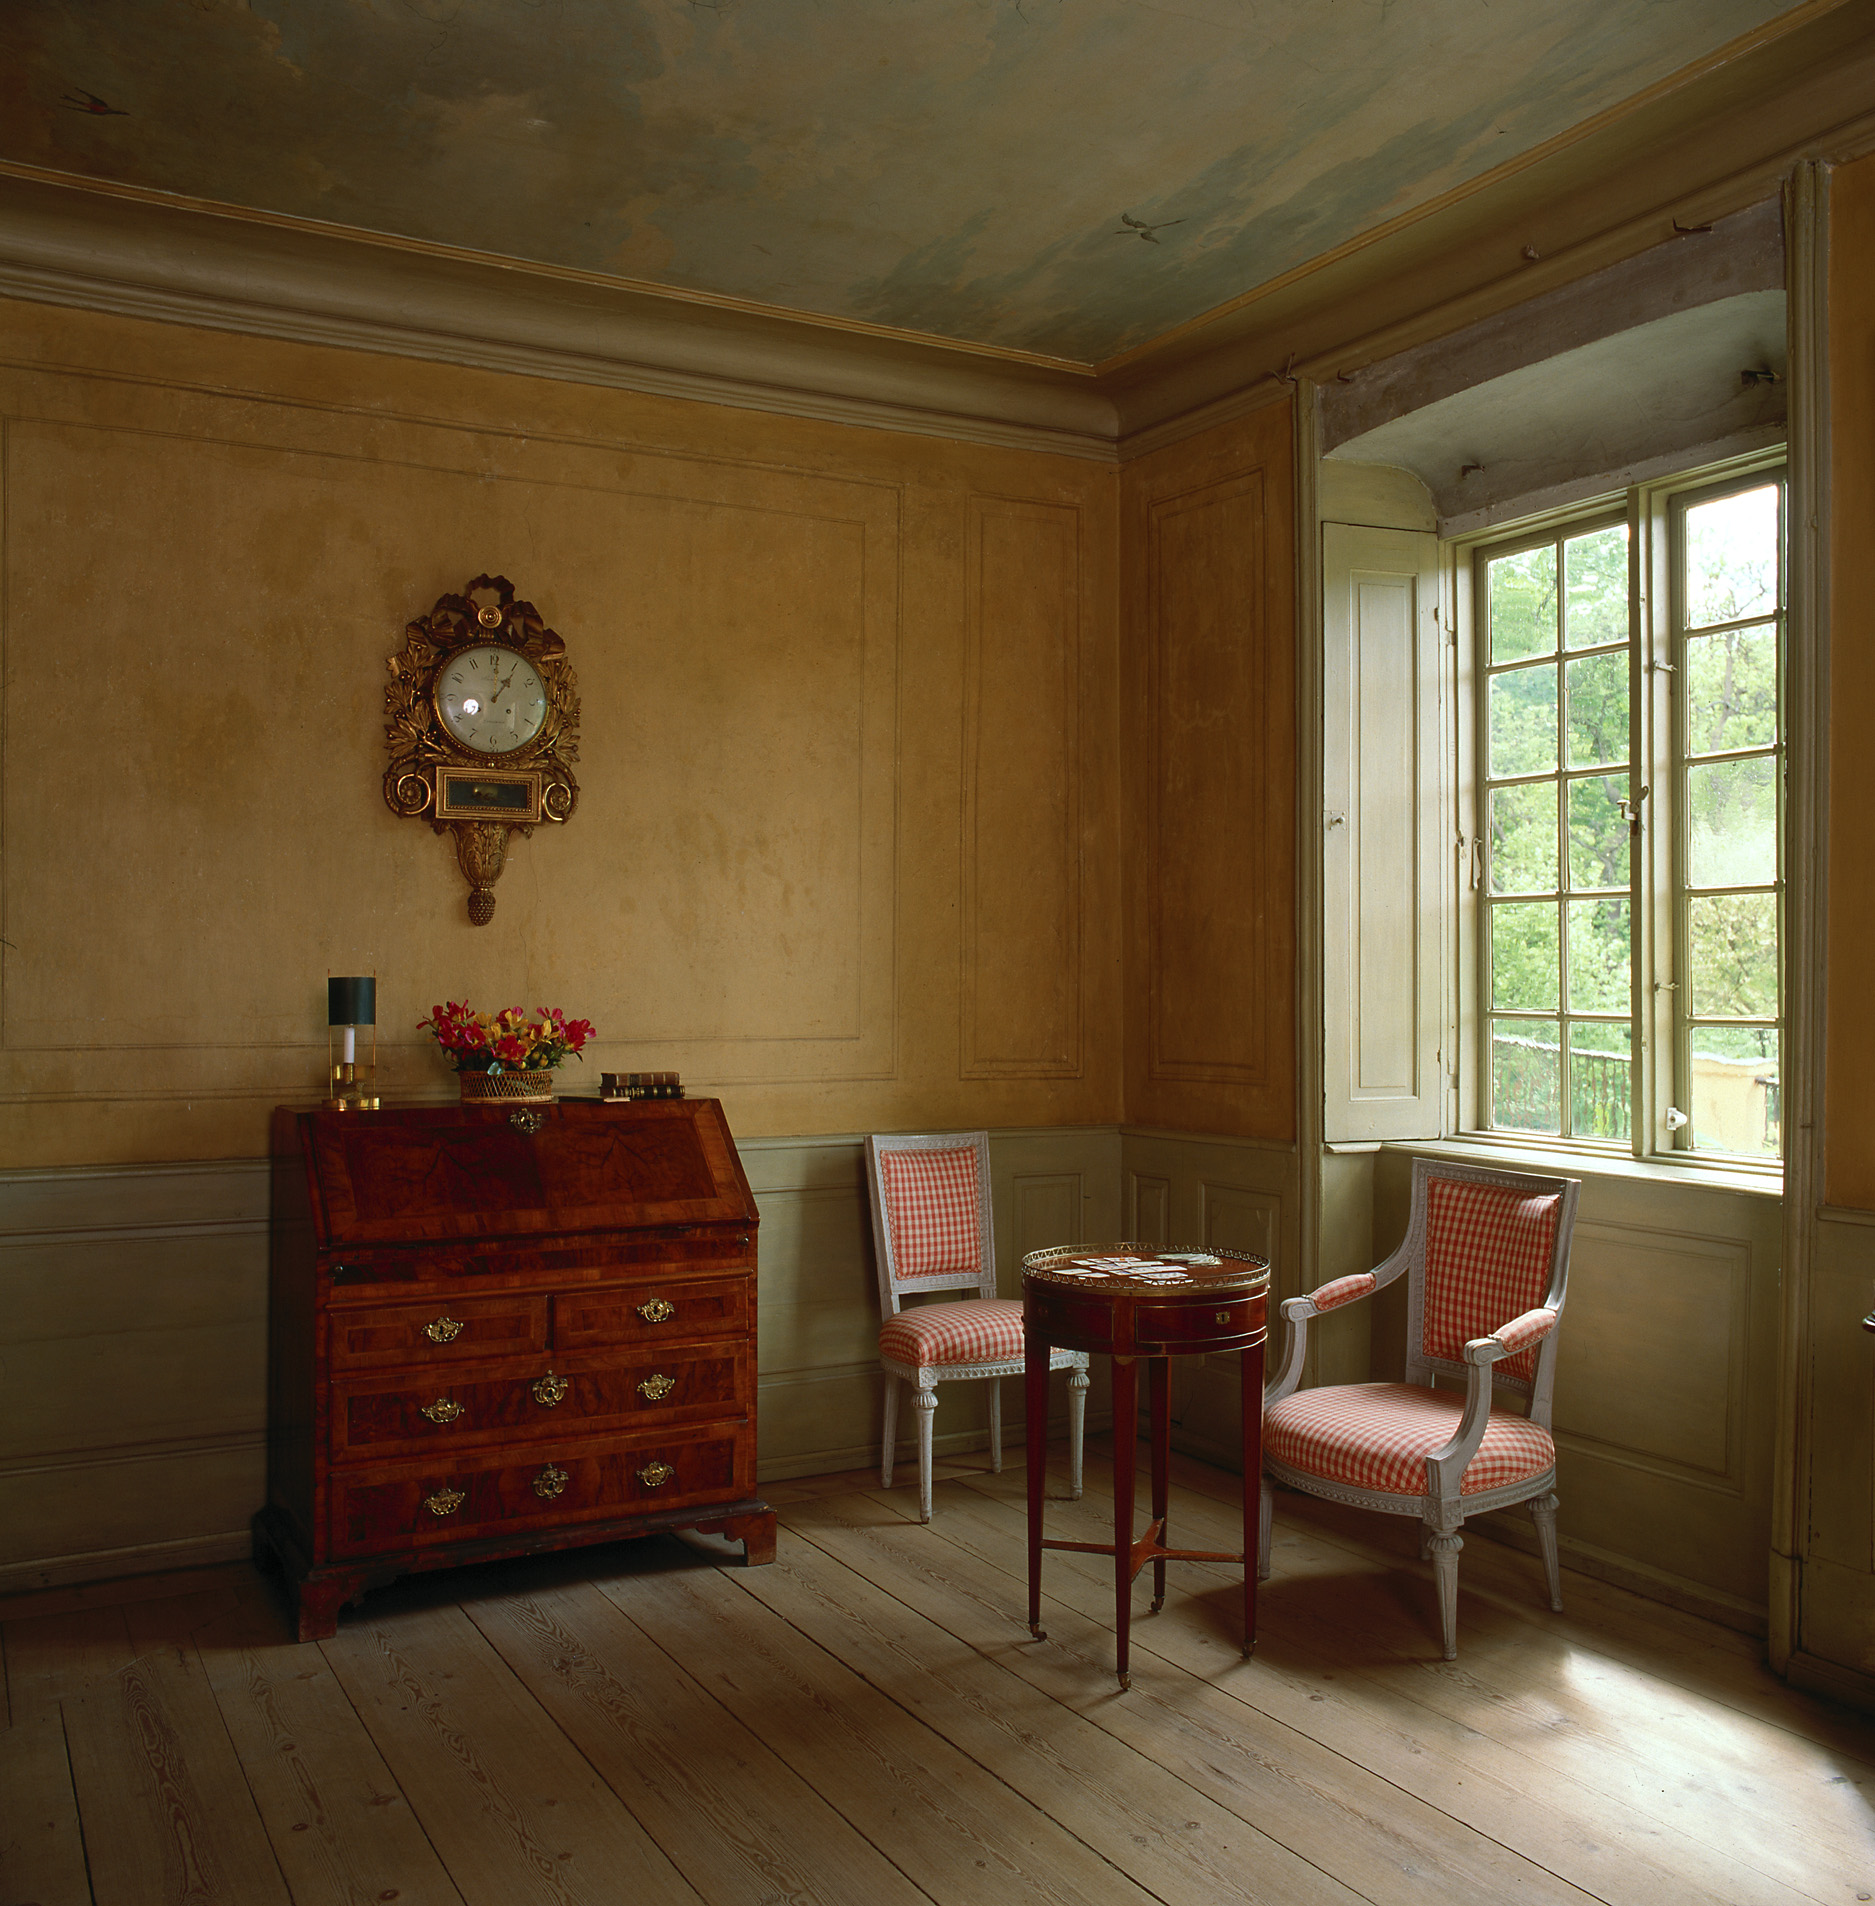
Most of the furniture in Svindersvik has stood there since the late 1700s. After the Grill family, the property had several different owners, until Knut Almgren , founder of KA Almgren Silk Weaving Mill, acquired the property in 1863. Svindersvik stayed in Almgren’s possession until 1949 when the Nordic Museum took over. Information and Pictures From Wikipedia, and Nordiska Museet
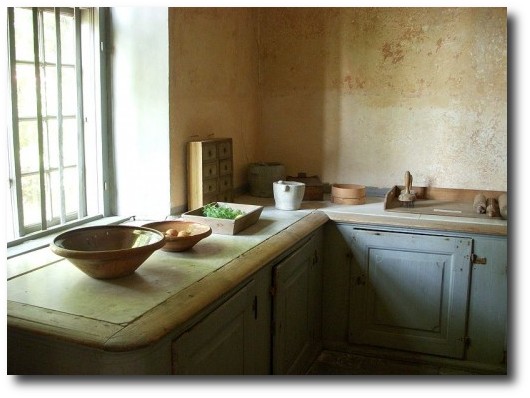
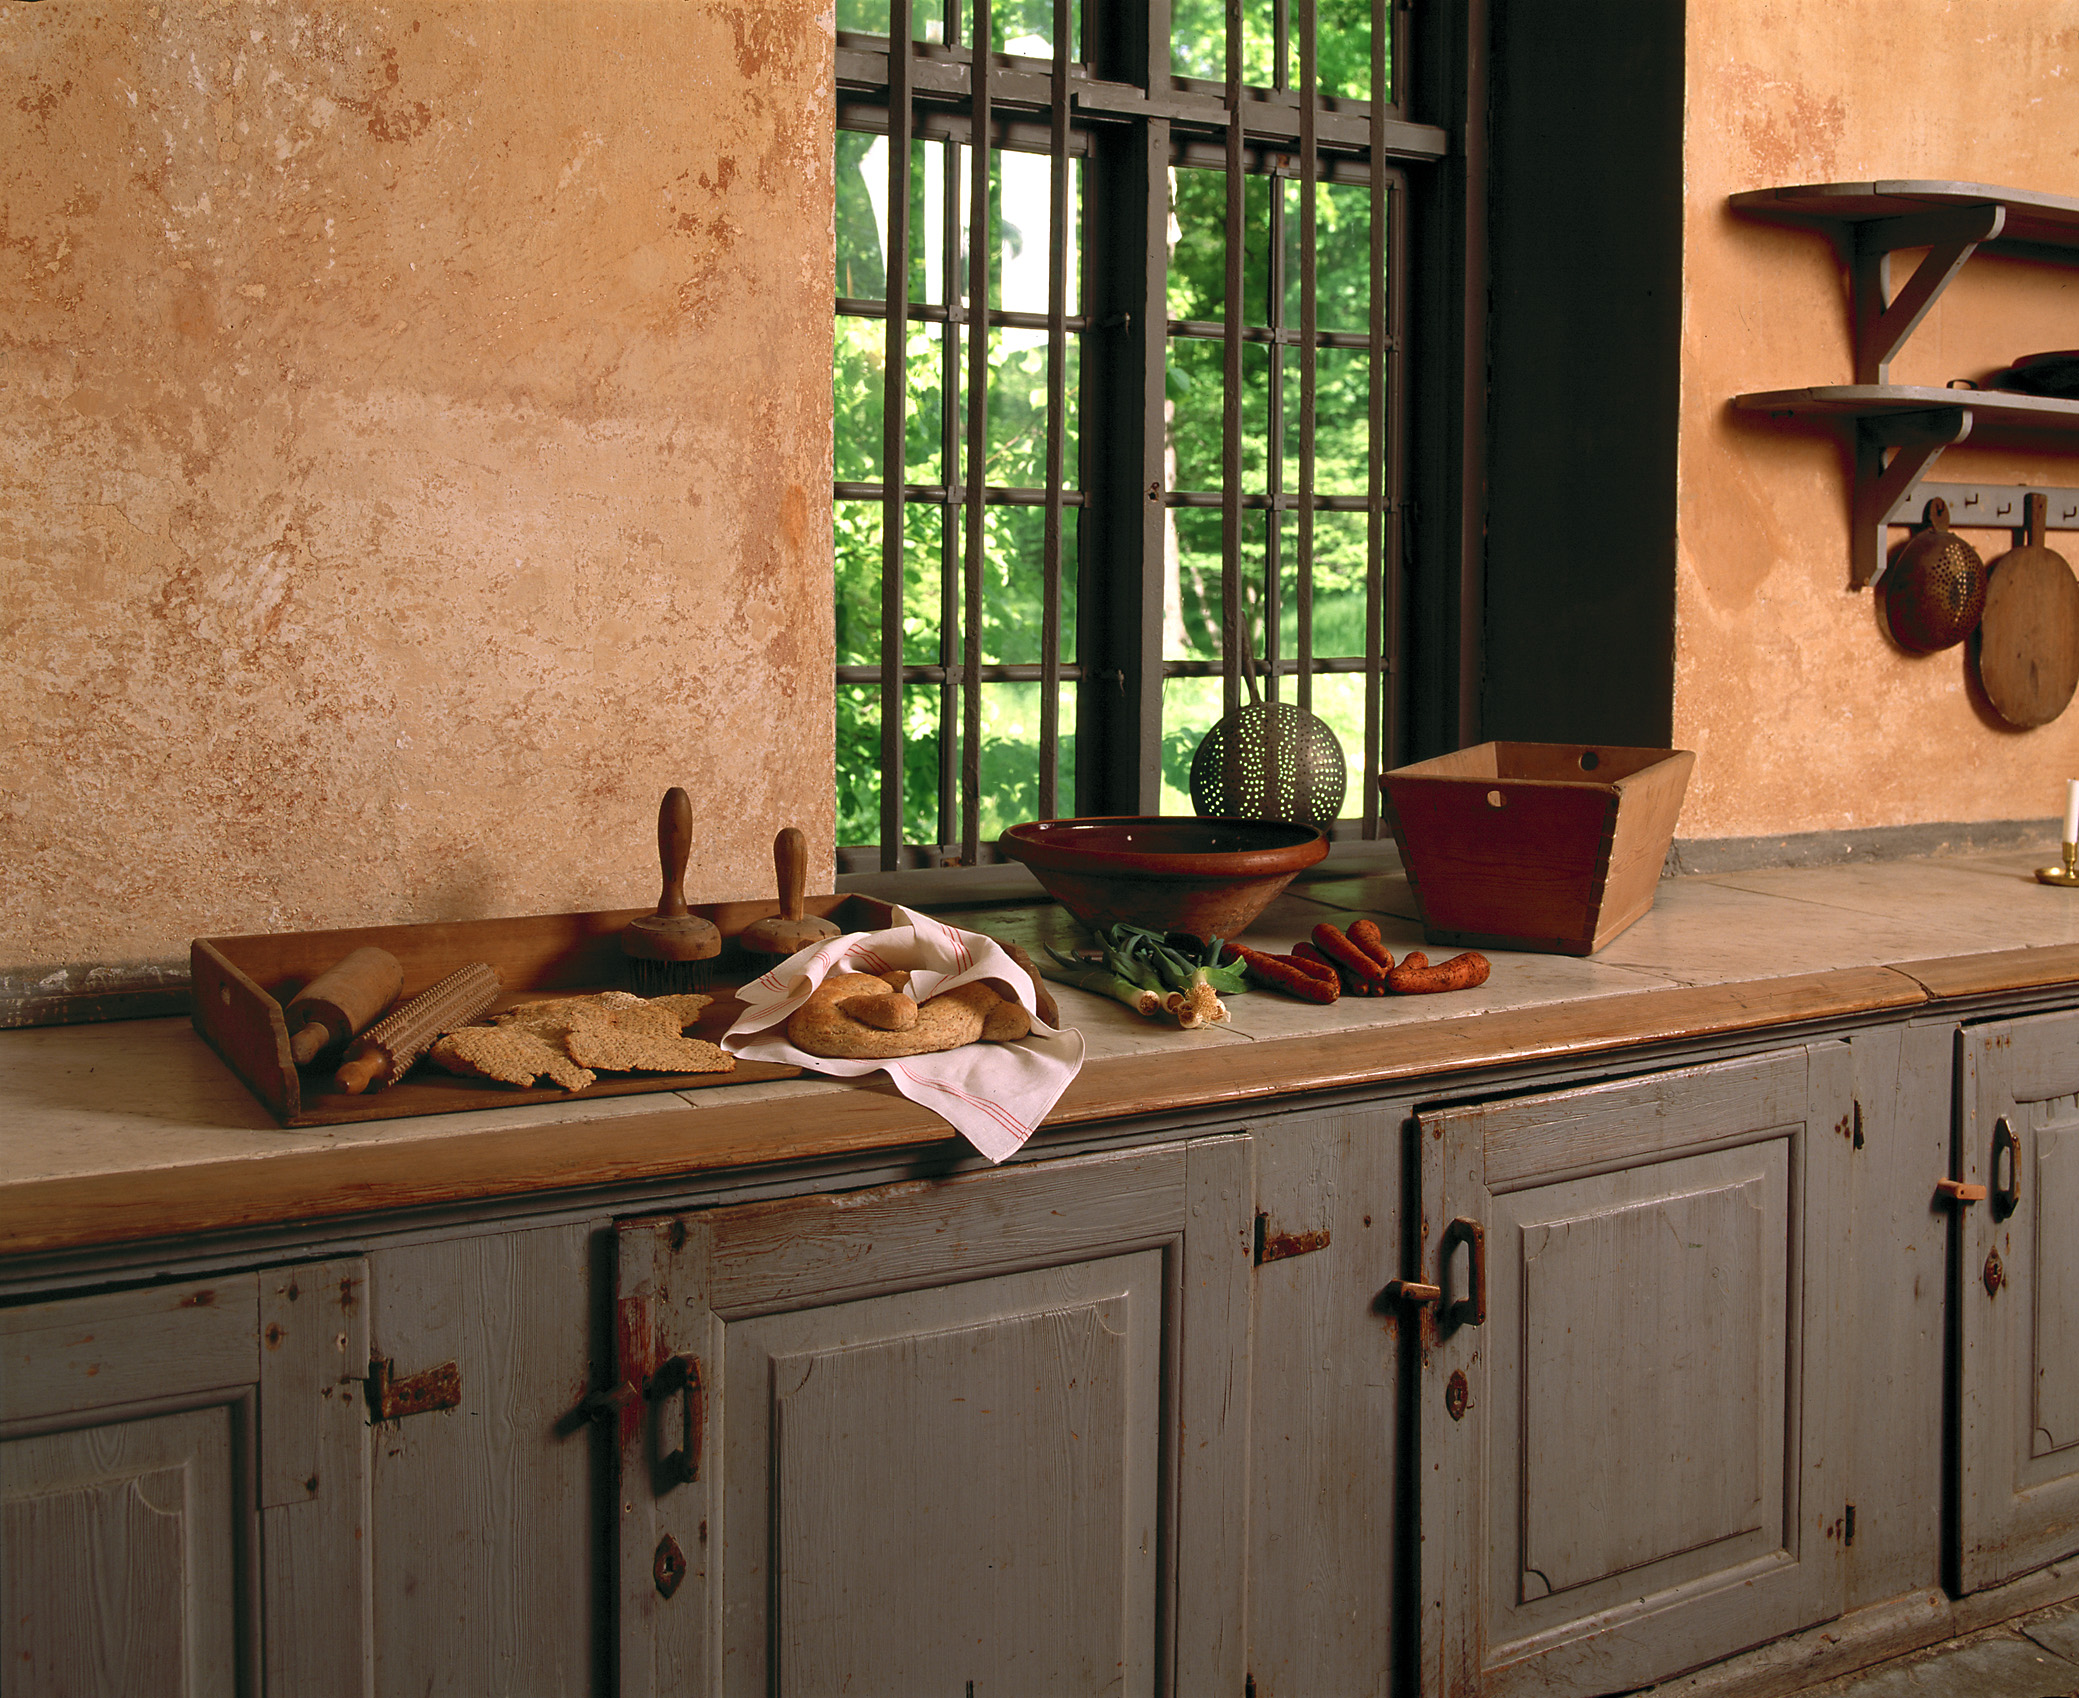
Check out the primitive wall shelves in the kitchen of Svindersvik . The corners are rounded, and pots and kitchen utensils hang below. If you like this look, consider the rack built by Shaker furniture. They have adapted our Shaker Peg Shelf for use as a hanging quilt rack. Although it is designed for quilts, it can be used to hang utensils, or pots from like the picture above.

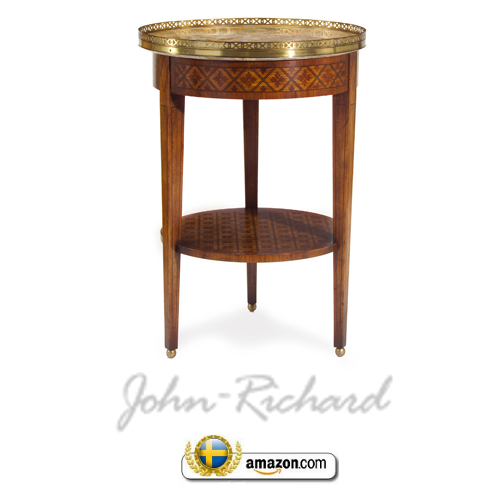
If you are looking for more of a genuine French Louis XVI antique like the table in Svindersvik, look at John Richard’s table in marquetry. This table features the tapered table legs, and a marquetry finish applied by experts. The top has brass details which make this table shine like the jewel it is.


Swedish Gustavian Furniture 18th Century Swedish Decorating


A CLOSE UP LOOK OF THIS Gustavian Setting- Swedish Gustavian Furniture 18th Century Swedish Decorating
Primitive Rack With Dowel Kit
An Interview With Tara Shaw About Her Swedish Furniture Line

(These pieces are no longer on Amazon…sorry)
A few select pieces from Tara Shaw are now being sold through Horchow.
Reminiscent of favorite antiques imported from Europe, Tara Shaw Maison offers reproduction furnishings and decor for the home that will become your new classics. Simple yet elegant, this handcrafted birch Swedish side chair is hand carved of birch wood with a hand-painted finish. 19″W x 13.5″D x 38″T. This terrific chair sells for $1499 from Horchow.
Horchow had an interview with Tara Shaw that was very inspiring:
HORCHOW: What inspired your furniture collection?
TARA SHAW: “Guerrilla antiquing” for 15 years in Europe. II was so difficult, finding one-of-a-kind items and knowing only one person could buy it and enjoy it. I couldn’t find these finishes and styles in a reproduction line – that inspired me to create the pieces I wanted.
HORCHOW: As an interior designer, what are your go-to’s?
TARA SHAW: For fabrics, Dedar; I used their acanthus print in gray and cream for a showhouse bedroom. For paint, Benjamin Moore #925. an ivory that works with
whites or colors; tor high-gloss. “Possibly Pink” from Fine Paints of Europe. For wallpaper, I just launched my own “Grisailles”, based on the grisailles panels in
Tara Shaw Maison.
HORCHOW: Which design era is most inspiring to you?
TARA SHAW: Louis XV! in France and King Gustav II in Sweden. Louis was the father of the straight leg. and both are known for clean lines, pale painted finishes gilded to perfection.

Three distinct chair backs, each featuring elegant curves, intertwine to form the back of this breathtaking Swedish-Rococo-style bench. Reproduced from a European original, it offers a unique seating option formal enough for grand dining rooms yet casual enough for entryways, bedrooms, or other areas.
- Hand carved of birch; no two are exactly alike.
- Seat upholstered in poly/cotton.
- Hand-painted finish.
- 64″W x 20″D x 42″T; seat height, 20″T.
- Imported.

Inspired by a European original, this stately bench features ornate carvings on the apron and legs for Old World charm and antique appeal. From Tara Shaw.
- Frame is hand-carved birch with a hand-painted finish.
- Upholstery is polyester/cotton blend.
- 52″W x 22.5″D x 21″T.
- Imported.
How To Decorate With Yellow For A Historical Look

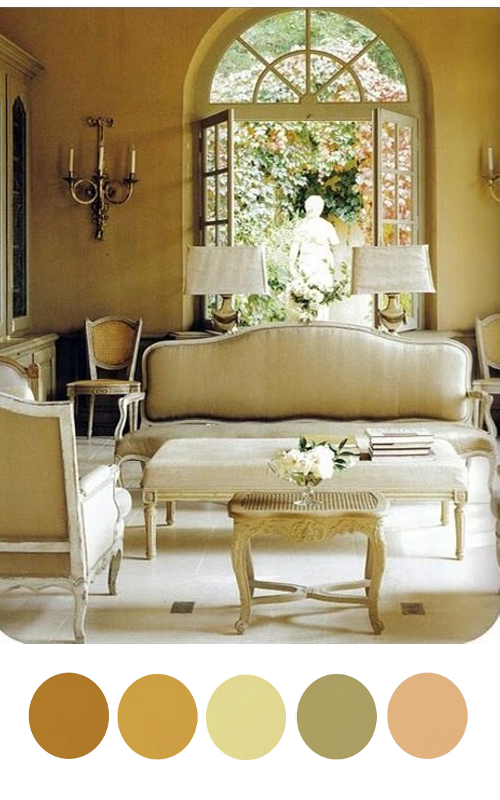
- Swedish Decorating Colors- Blue, Yellow, Navy And Gray- Painting of King Gustav III
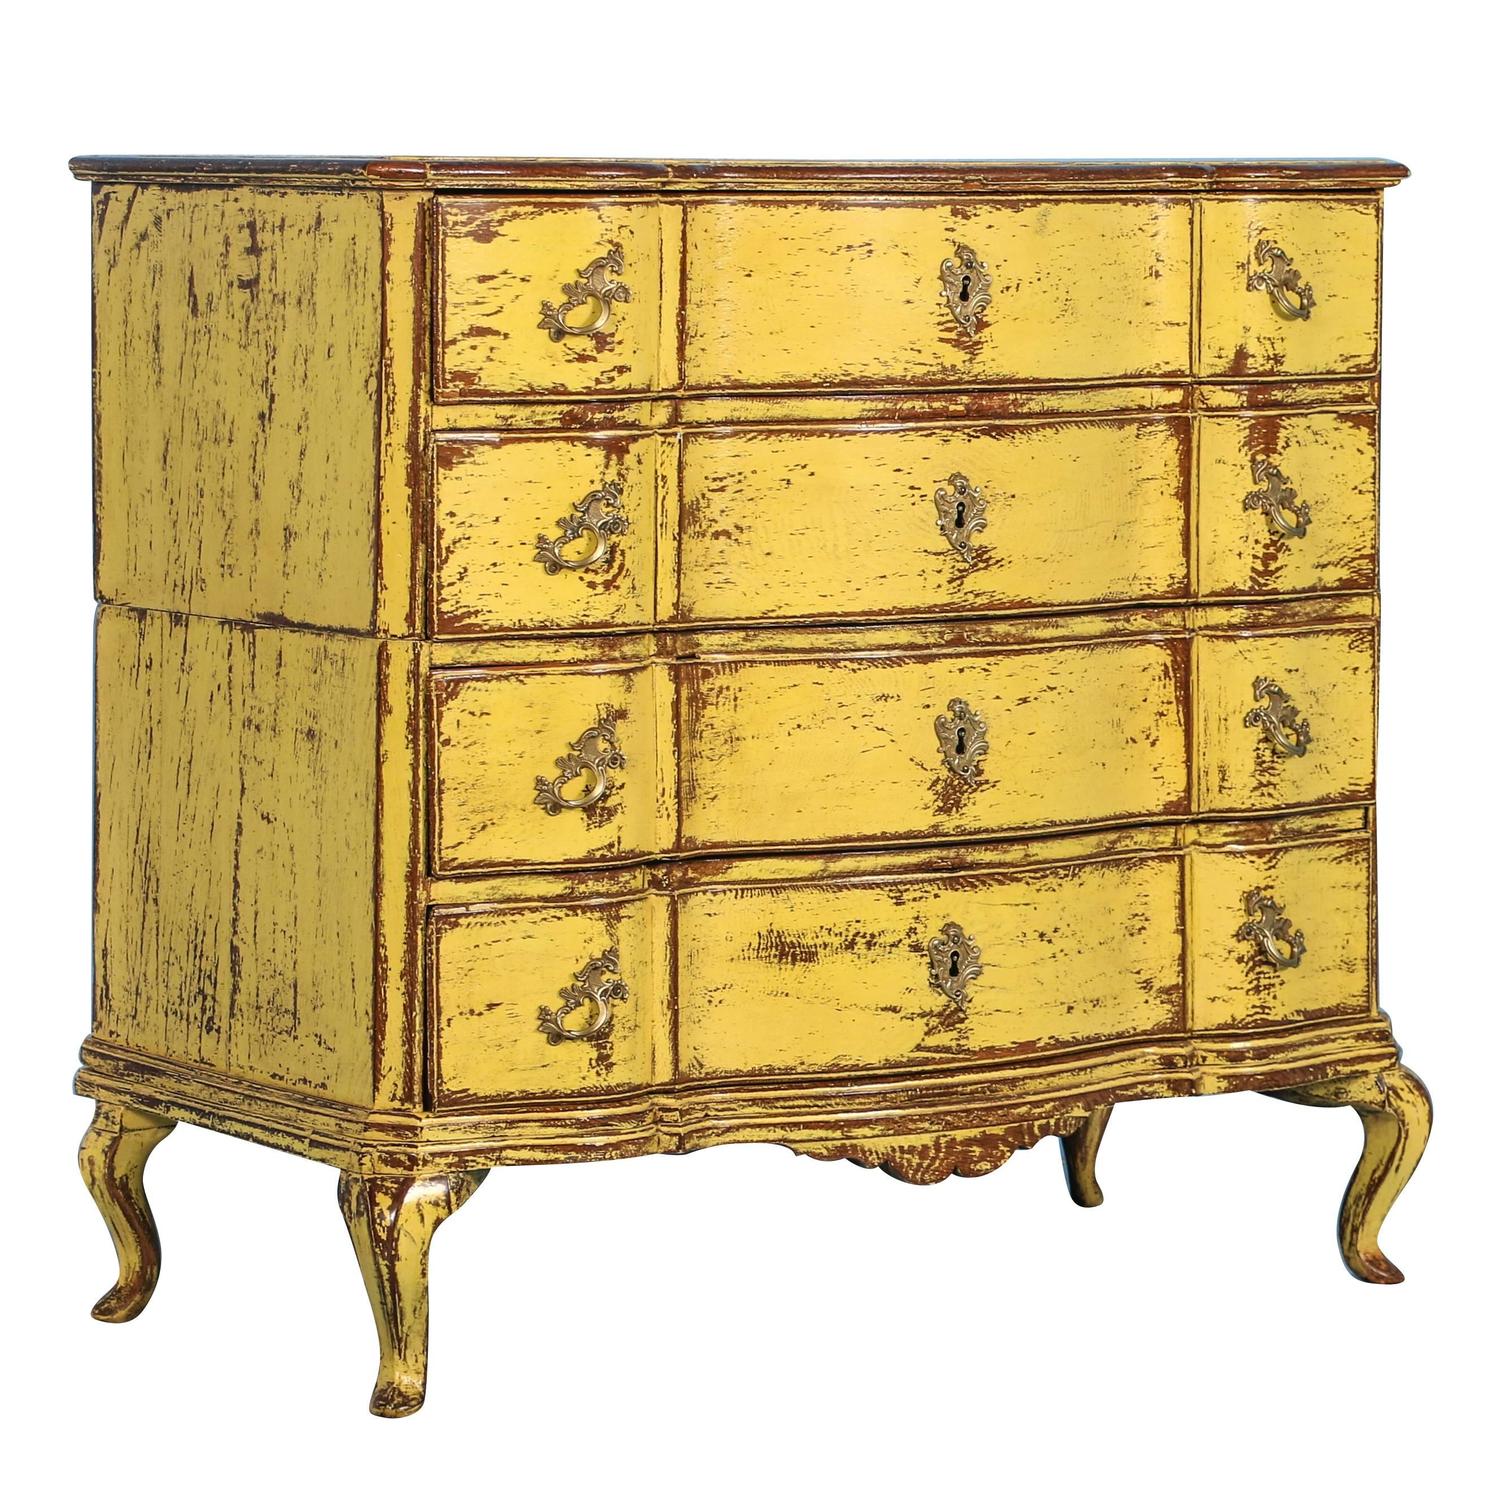
- Antique Yellow Rococo Chest- Scandinavian Antiques 1st Dibs
Yellow along side blue and white are colors that are known to be distinctively Swedish, so when it comes to picking a color for a room around, yellow is a fantastic choice. If you have ever based your home around the darker colors such as red, or black, over time it can be very overwhelming, and just gloomy. Yellow produces the opposite effect. It is enlightening, encouraging, and uplifting.
The color yellow can apply to so many decorating styles, so when considering a period look that is Swedish, here are three tips to keep in mind to make it uniquely Gustavian.
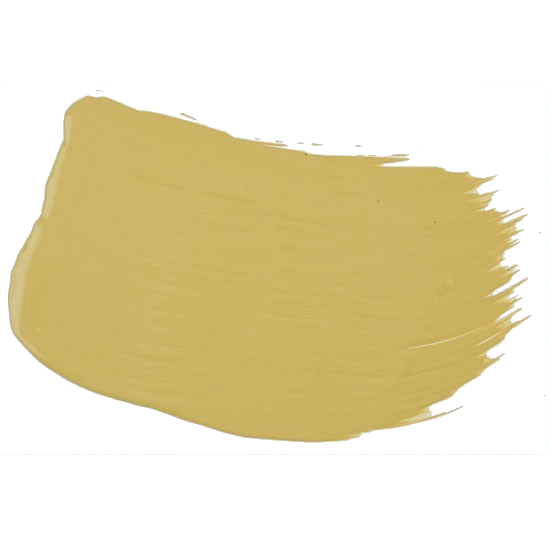
1. Pick the Right Hue– Yellows such as pale yellow or ocher yellow are more historical than high-voltage tones. Brighter tones of yellow can be very fluorescent, which are not at all what you want for a period room. Choose yellows that have a rich brown or slight reddish undertone for the best period looks. Take an ochre yellow and go a few shades darker or lighter on the scale for a perfect tone.
2. Don’t rely on the Paint Chip- A hue that appears just right on the paint chip will usually intensify once it’s on your walls.
In our small town we don’t have a paint store close to us which can match customized colors, so I experienced this very thing when I went to our local hardware store last week for yellow paint. Our local paint store cannot custom match pre-mixed colors, so I had to pick from the selection that was available for sale. The color which was almost right in the store turned out to be very bright on my outdoor table. I added in every can of yellow paint that I had left in my home, and a gallon of dark ochre, and it happened to work out to be the perfect shade for the project I was painting. The shade of ochre works every time I find when I am customizing colors.
With that being said, consider getting a couple samples of paint which cost only 2 or 3 dollars than getting a whole gallon of the shade you think is right. Consider the color you think is right, and try a shade a few shades lighter.
3. Combining 2 different tones of yellows can be quite stunning.
This classic Gustavian room that appeared in “Classic Swedish Interiors,” by Lars Sjoberg, featured on Mentar Mentar Blog shows classic painted paneling. The paneling is a saturated tone of yellow, which is very rich in color. The walls are painted yellow, which appears to be a duled down yellow. The combination is absolute perfection. You can see in this photo, they dressed up this room with a white painted Swedish Mora clock and a black painted french styled desk with a brown leather desk chair. The three tones are perfect color combinations for a Gustavian effect in this yellow based room.
Again the same tones appear in this photograph of the Drottningholm Theatre. Like the leather desk chair in the above picture, you see the same tone of burnt umber on the doors and window frames. White is the second dominant color in this photograph. You can also take tones of the gray marble from the base of the marble statue. The light blue sky is a beautiful accent color.
You cannot go wrong with adding in a couple different shades of yellows. Choose your dominant color of yellow, and add in a few more shades of yellow in the accessories. Neoclassical lamps often feature a pedestal of some sort and a fluted section which can be painted in three tones. Pick a shade of yellow, and combine it with black and gold, or yellow, gray and gold. Paintings also allow you to add in several rich tones of the Gustavian palette. Painted furniture is another way of adding in the just right tone into a scheme.
5. Picking out the right upholstery fabric and throw pillows can go a long way in making your room more period in style. Gustavian decorating often features fabrics that are based on white backgrounds. Picking a fabric that is floral, check or stripe will give you that period style you are looking for. Finding the right fabric can be a true battle, but remember you have so many other elements that can work in your favor to create the Swedish effect.
Picking the right paint tone, along with the right tones for your accent colors will go a long way in recreating a Gustavian home.
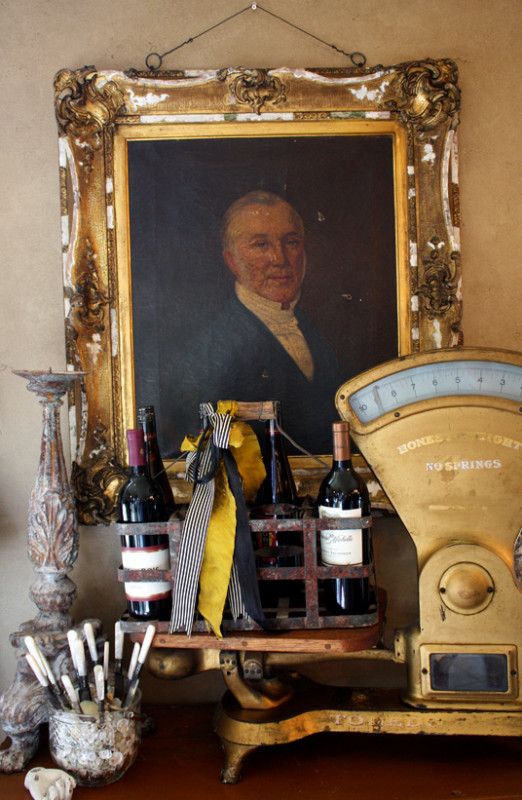
You can see in this photograph a slight yellow tone on the wall, which may be from the camera flash. If you can imagine the wall painted a yellow tone, with layers of gold paintings on the wall, and gold brass accents. The weigh scale has a slightly brown tray holding black bottles, with a very bright yellow ribbon. The various tones of black, yellow, red ( the bottom of the photograph) and navy, seen in the scale itself is the perfect color palette for Gustavian styled decorating.
“I like a buoyant, light-filled house, so I usually use all warm or yellow-based colors. This ocher is really a contemporary yellow shade with an antique resonance. It doesn’t draw attention to itself as, say, bold yellow or even white would. The ocher walls provide support for the exceptional paintings and furniture. Bright-colored walls would visually compete. This shade flatters everyone — it complements every skin tone.” – designer Thomas Jayne
You can see in this photograph of Gustav IV Adolf of Sweden his suit is a brighter yellow against a backdrop of yellow ochre. You can see the painting has a stunning blue sash, and a darker blue jacket, that isn’t quite navy. The brighter yellow, and the peach tones such as the colors in his face would be a great color scheme for a yellow room.
Take some inspiration from the brighter yellow interiors found in the Swedish Chinese Pavilion. The interior featured brighter yellows and bold fabrics on upholstered Swedish chairs.
Here we find a combination of yellow and orange at the Chinese Pavilion. The walls are lined with a light blue paint.
In this picture we find a combination of greens, lighter greens and pastel tones with brighter colored yellow ribbons. Consider a scheme of pastel greens and yellows.
Designer Mary Douglas Drysdale uses brighter tones of yellow in her neoclassical room with Federal antiques. She combines a brighter yellow check pattern in the upholstery and for the window drapes
This ravishing yellow silk gown from 1760 gives off the perfect tone of yellow.
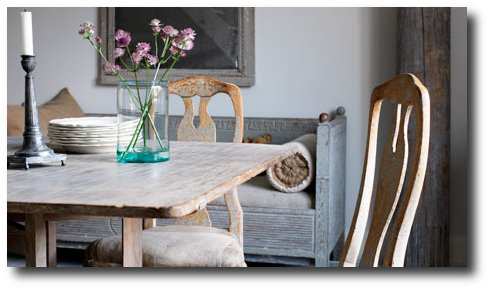
This 17th Century styled room features tones of beige, gray, and natural wood herringbone wood floors and a brightly colored yellow fabric cover. Consider using yellow as your pop of color, such as they did in this room.


Magnus Lundgren’s Swedish Gustavian Home
Skona Hem had a wonderful write up on Magnus Lundgren’s Home. If you LOVE the antique Swedish style, do visit Magnus’s blog, because it is one of the few blogs devoted to Swedish furniture and decorating. His blog is always a real treat for me to read. Magnus has a true love for 1700 Swedish-century furniture. For the past ten years he has filled his home with Baroque, Rococo and Gustavian furniture originating from the years 1750-1810.
He worked closely with a construction company and the overall transformation took just over three months. They installed rough planks and small details such as incandescent lamps with porcelain sockets, electrical sockets and switches. They kept the floors and beams, and instead of putting up drywall in the ceiling and putty, they installed rough plank exterior insulation. Magnus mentions he uses egg tempera and linseed oil for his paint finishes. Check out his beautiful home decorated in Swedish Style.
Magnus Lundgren’s Swedish Gustavian Home
Magnus posted this stunning oil portrait on his blog which is absolutely breathtaking. The colors in this oil painting are the classic colors that are found in Gustavian style.
Locate Hard To Find Danish Antiques From Scandinavian Antiques In Denmark
Scandinavian Antiques began as a wholesale company based in Denmark 25 years ago, with business in Sweden, Germany, Russia, Italy, France and Romania. The company moved to the U.S. in 1994. Over the past 14 years they have become one of the largest European antique dealers in the West, and the largest importer of Scandinavian antiques in the country. The exceptional quality of their antiques is credit to our 2,000 sq ft workshop where skilled craftsmen ensure each piece is tenderly restored before leaving the premises. The purpose of restoring this aged furniture is to preserve its inherent value, original integrity and beauty.
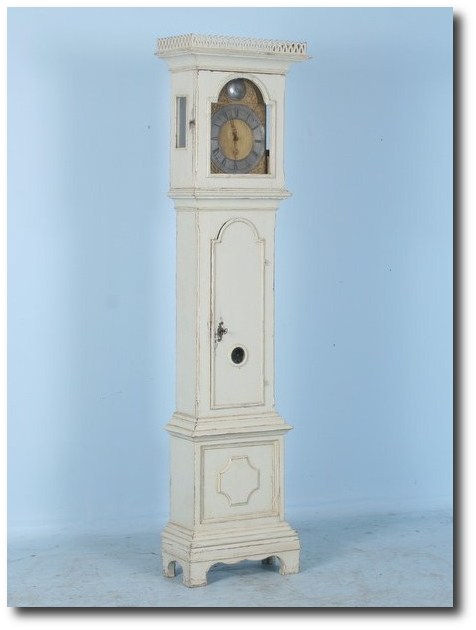
White Swedish Grandfather Clock c.1780 This white Grandfather clock from Sweden and can be restored to it’s fully working condition. It’s original white paint adds a commanding presence to this piece and it is in excellent condition. Scandinavian Antiques has this clock priced at $3,250.00
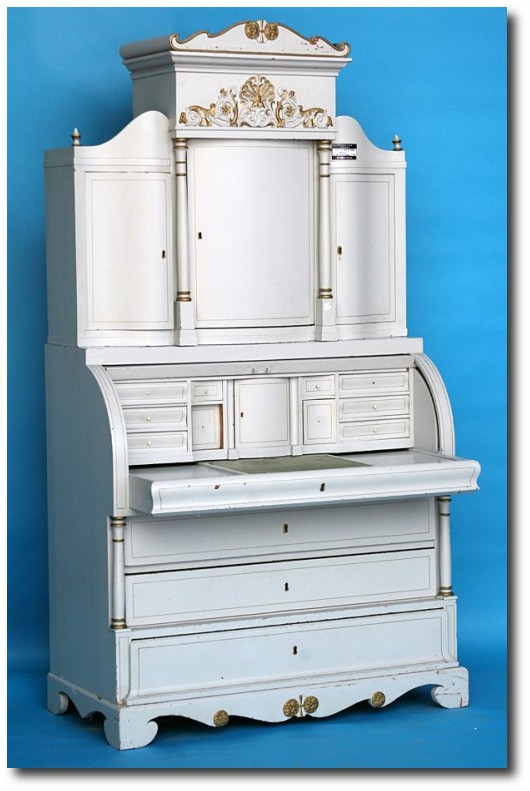
Elegant Pine Country Biedermeier Secretary. Exceptional details highlight this stunning secretary. Gentle curves accentuate the doors and inner drawers. Columns and delicate finials lend a classical touch. The painted finish on this is approximately 100 years old, and can be stripped down to the beautiful Danish pine. When the desk top is extended it becomes 29″ deep. Scandinavian Antiques is selling this Secretary for $5,850.00 or make them an offer.
Antique Danish Black Distressed Chest of Drawers Dresser c.1840 This fantastic chest of drawers boasts four larger drawers for storage and a smaller upper drawer on the top. This dresser has been expertly repainted with the highest quality paints in their studio. It has been done in a manner and fashion of the 1800’s period paint. The distressing brings out it’s original charm. This highly desired painting preserves the piece for generations. Each imperfection makes the piece unique, and brings with it the joy in owning a true one-of-a-kind piece. Scandinavian Antiques allows for customization of paint colors and distressing techniques. They have this chest listed for $3,885.00
This hand painted trunk has maintained its original beautifully worn flower motif in the rosemaling style of the area. The overall color is a light red burnt orange hue and would be a nice pop of color in a home or cabin space. Even the interior of the trunk top has a lovely floral design as well, creating visual intrigue and a ‘surprise” when opened. These treasure chests of the past are perfect as antique home decor. Scandinavian Antiques is selling this trunk for $1,485.00
Antique Danish Pine Green-Blue Chest of Drawers c.1820-1840. This wonderful original 1820’s chest of drawers has been given new life with a lovely green-blue paint. Each imperfection makes the piece unique, and brings with it the joy in owning a true one-of-a-kind piece. The shape and curves of this piece are accentuated with the color and create great visual impact. Large double pulls on each side add to ease of use.


My Best Tips To Doing Upholstery Yourself


Over the last several years I have jumped into upholstery without any experience, and through all the mistakes I am so glad I had the interest to learn. It has allowed me to recover many of the second hand chairs and settes that I have found for an affordable price. Swedish style is certainly a style that I adore, but there is no way we could furnish a whole house buying antiques. Thinking back to the first chair I recovered, I am sure it was sloppy, but I learned my mistakes and moved forward. When it is your home, who cares if you make mistakes. Learning can be a lot of fun, and you get better as you practice. I am in no way a professional, although I have learned a ton over the years that I would like to share with you.
At first, I had no idea what I was doing. It would have helped if I took some classes as soon as I got interested in it, but I decided to take the long drive and learn on my own. Upholstery isn’t something I particularly enjoy, and at times some of the projects I have attempted are simply out of my league, and it can get discouraging, so try something that looks relatively easy at first. I don’t like looking at sloppy upholstery, so in getting it right, sometimes it takes me extra long.
One of the easiest ways to produce a nice looking product is to make sure your material is snug. The last thing you want is loose looking material that isn’t tight along the seams.
When I first started upholstering I simply went down to the local hardware store and bought a T50 staple gun, which worked pretty well, until it broke. I bought another T50, and it worked quite well, but just an hour of work would cause my hands to hurt so hard that I could only do so much upholstery every week. I then bought another manual staple gun which was backwards and broke instantly.
I eventually ran down to the same hardware store and graduated up to a electric staple gun. I sure saw a difference right away. I didn’t have to force my weight on the chair in order for the staple to grip the wood and fabric. It was rather –point, shoot, and it was done. The brand I purchased was the Arrow Pro Electric Staple gun which loaded with the same staples I was used to with the T50 manual staple gun, so I was in my comfort zone. This staple gun worked for the first couple projects, but because it was made out of plastic, then loading compartment broke. It was plastic. SO, again, I invested in yet another staple gun. In fact the exact same brand!!! I knew eventually it would brake again, so I decided to look into getting something more professional.
A friend of mine had an upholstery gun which hooked up to a compressor, so I decided to look into buying a professional upholstery gun and see how different it was compared to the ones I could find at the local Home Depot.
 I ran across the EZE TC-08LN Long Nose Upholstery Staple Gun
 on ebay, and took a chance on it. When it arrived at my home, it sat in the living room for several weeks, until I got around to working with it. I could’t figure out how the gun loaded, so I contacted the ebay seller, hoping to send it back to get repaired. He told me, that these professional upholstery guns load much different than the regular electric guns. You flip them over and they load through the bottom. The first time I used it I couldn’t have been more excited. I literally was jumping up and down, because of the vast difference in the staple guns I had been using up to that date. With a compressor, the sheer power of air forces the staple out where there is no NO work involved what so ever.
I was so used to pulling my fabric as tight as possible and then stapling it, that this gun can do most of that work for you. The ebay seller, said this gun would be so easy to work with, and that I would be excited when I finally saw the difference.
This gun certainly has revitalized upholstery for me that it has become a joy to upholster.
Getting that gun was one of my best decisions, and I would suggest you buy it for some of your upholstery projects.
In the last 3 months we just moved into our very first home, and I had a number of chairs that I have upholstered, although I am wanting to finish up the edges. I have been experimenting with double welting cording, but I have had a really tough go at it.

Brass Plated Upholstery Tacks Nails Trim pack of 100 From The Rusty Anchor
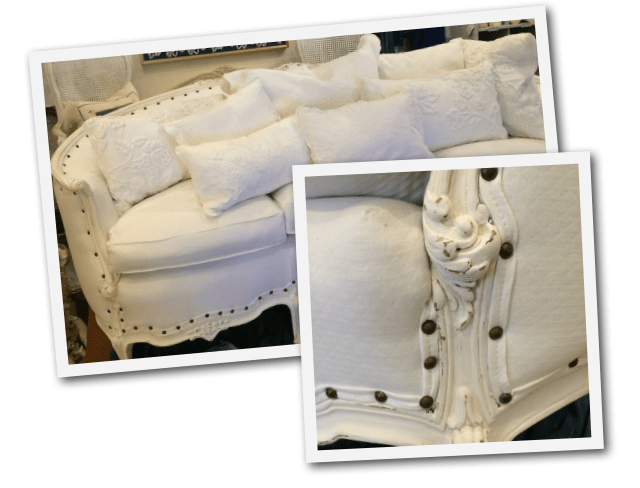 An upholstered sofa by Barbara Gray located at her shop -Etceteras 7503 Girard Ave La Jolla Ca.
In the past I have bought upholstery tack trim, which you can find on ebay by the yards for a very reasonable price. I have done a number of chairs with upholstery tacks, and the results do look very nice. They are a very easy way of covering staples.
In the past I simply sewed up a long strip of fabric which I folded and sewed down the center to create a nice professional appearance. Then, I used hot glue, and glued it in place, and then hammered on upholstery tacks for that professional look.
The upholstery tack trim is very easy to work with and gives your chairs that antique appearance without all the effort of lining each tack up and hammering it into place.
I still use this technique with many of my chairs. Here are a set of chairs I finished when I first started upholstering. I had no idea how to upholster the back, so I left the original leather fabric in place. Sadly the chair seats were torn to threads, so I recovered the seats and used upholstery tacks.
Another great tool that I picked up which I really enjoy is an upholstery tack spacer. You can get one from Kennedy Hardware for just over 10 dollars, and does it ever do a nice job of spacing out the tacks. I have done up my dining chairs with the spacer, and several other chairs, and it looks terrific. I never could get that professional appearance in the past spacing the tacks on my own, and this took is worth the 10 dollars.
For my living room chairs, I really want a professional look with double welt cording. I love the simplistic look that it gives to furniture, and it gives off such a nice appearance. I had no idea how to get the look, so I decided to go to a local sewing machine store which the woman suggested getting a cording zipper foot. At the time I was attending a class on making box cushions and so a cording zipper foot allows your needle to get right near the edge of the cording where a normal sewing machine foot would not. When I discovered this, I again started cheering, because it seemed like I was battling getting as close as I could when I sewed pillows only to fail!! The zipper foot allows you to sew those really nice corded pillows and drapery with cording. It is a must have for sewing with cording.
Naturally I assumed when it came to double welt cording that you sew two cords separately with your zipper foot, and then sew them together.
I started looking on You tube for more instruction on this, when I came across a double welt attachment! I couldn’t believe my eyes, contemplating how much fabric I have wasted!
I then ran across a really great article by Prudent Baby how to sew welting cord. She does a great job of showing step by step how to sew welting cord.
Her article was just the very thing I needed!! She suggested buying a 250 yard spool from Rochford Supply which turned out to be the best deal after looking on ebay.
A 250 yard spool came to $27.94, with about 19 dollars of shipping which came to about $46.97. I purchased my first DOUBLE welting foot on ebay, and I am looking forward to whipping out these chairs, rather than having them sit in our garage!
The other thing I wanted to mention about the EZE TC-08LN Long Nose Upholstery Staple Gun was when it came to stapling on the final double welt cording, it was as simple as you can get. You can pull the cording around the curves of your furniture with ease!! The staples on this gun are so thin, that they can hardly be seen. If you shoot them in the middle of the double welt, they disappear. It truly produces a professional result, and with little time what so ever.
I am looking forward to my new welting cord and welting foot!! ANYTHING to make our lives much easier!