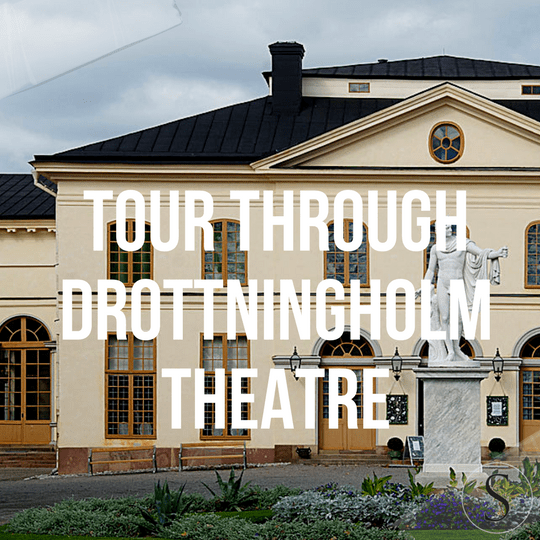
Tour Through Drottningholm Palace, And Drottningholm Theatre
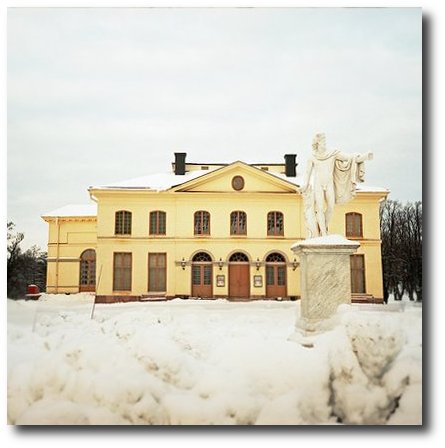
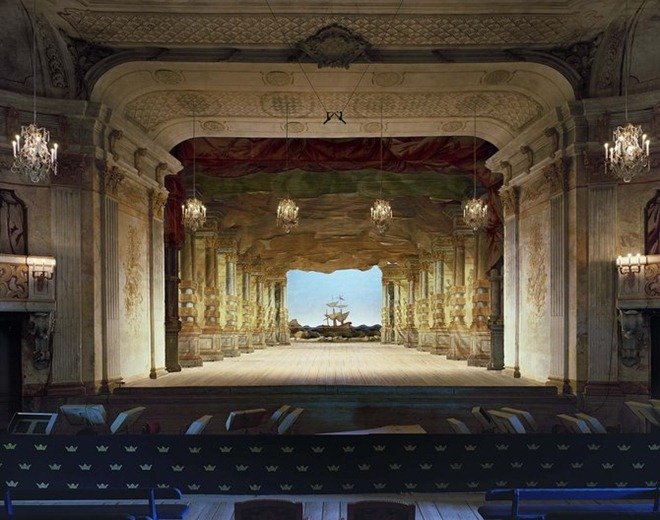
Drottningholm Palace also has a theatre that sits directly beside the palace. The Drottningholm Palace Theatre, or in Swedish called “Drottningholms Slottsteater” is an opera house from 1766. Today it is run by a private foundation, but still functions as a real theatre! The theatre was built for Gustav III by his mother in 1766. Gustav III loved the theatre so much and was often known as the theatre King. In 1792 when he was assassinated, his mother Louisa Ulrika of Prussia decided to close up the theatre at Drottningholm. Then in the 1920s it was rediscovered, and because the theatre had not been used or touched in so many years, almost all the original equipment is still there.
This wonderful group of pictures came from TC4711 on Flicker, and Sim 1 Travels
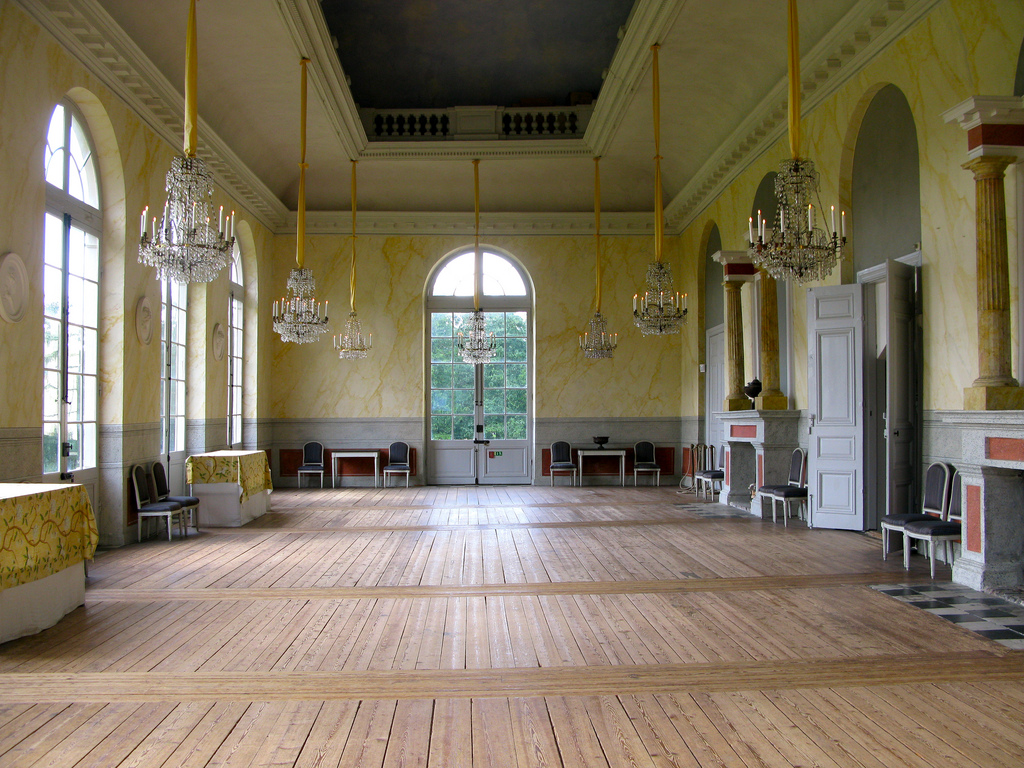
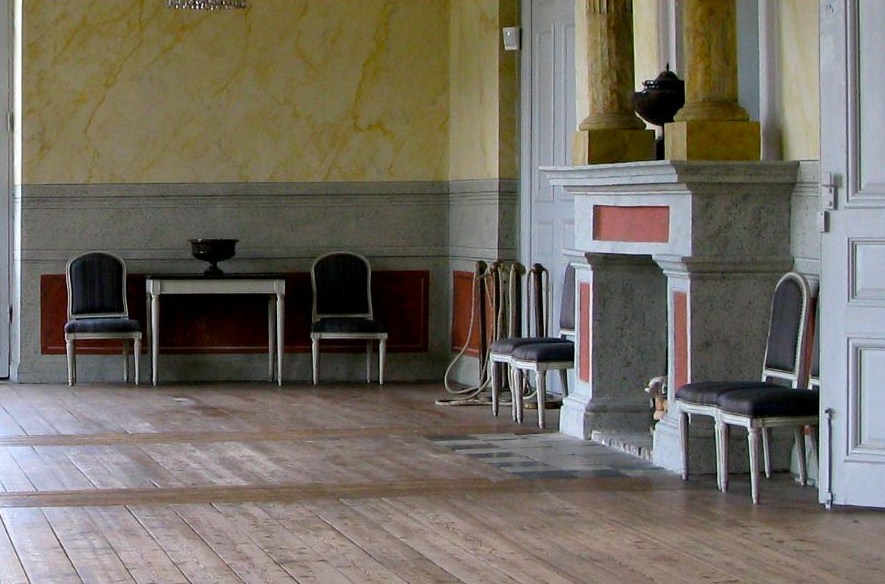
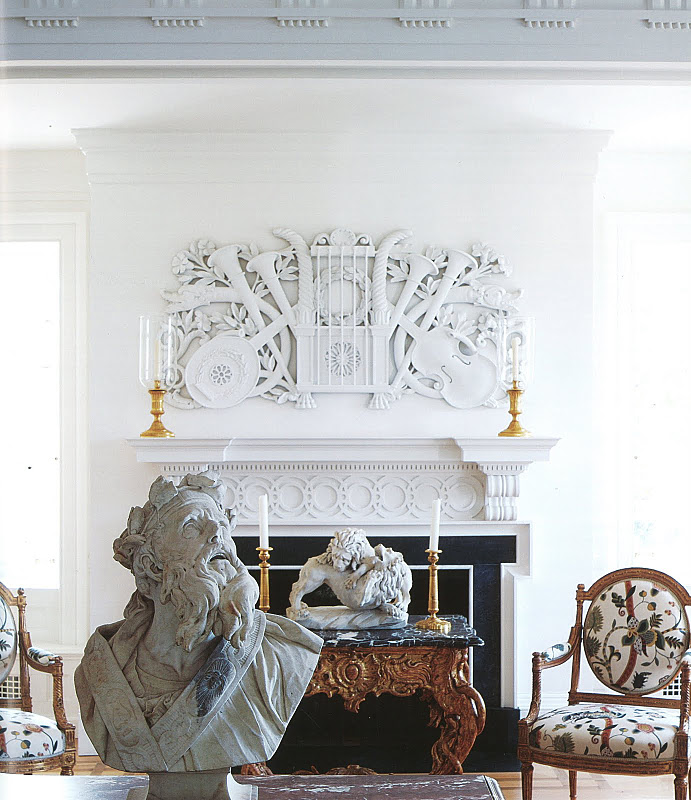
I am so thankful to people like Hansn’s Flicker who have taken pictures for us to view. King Gustaf III had this lobby made as an addition to the Court Theatre in 1791. It was also used for having breakfast. Musicians then sat on the upper floor making the music sound like coming from the heaven painted on the ceiling! When the King was murdered one year later the theatre was closed and it stayed closed for 130 years. Check out the marble finish on the walls. There are so many colors of faux marble wallpaper that you can put up to give the look of a high end interior marble. Add a tinted glaze over top of the wallpaper to mute the overall look so it doesn’t appear to be wallpaper. There are also many free videos on You tube today with Master Painters who show How to achieve these looks. If you are willing to learn, it just takes some practice.
Inside Drottningholm Palace
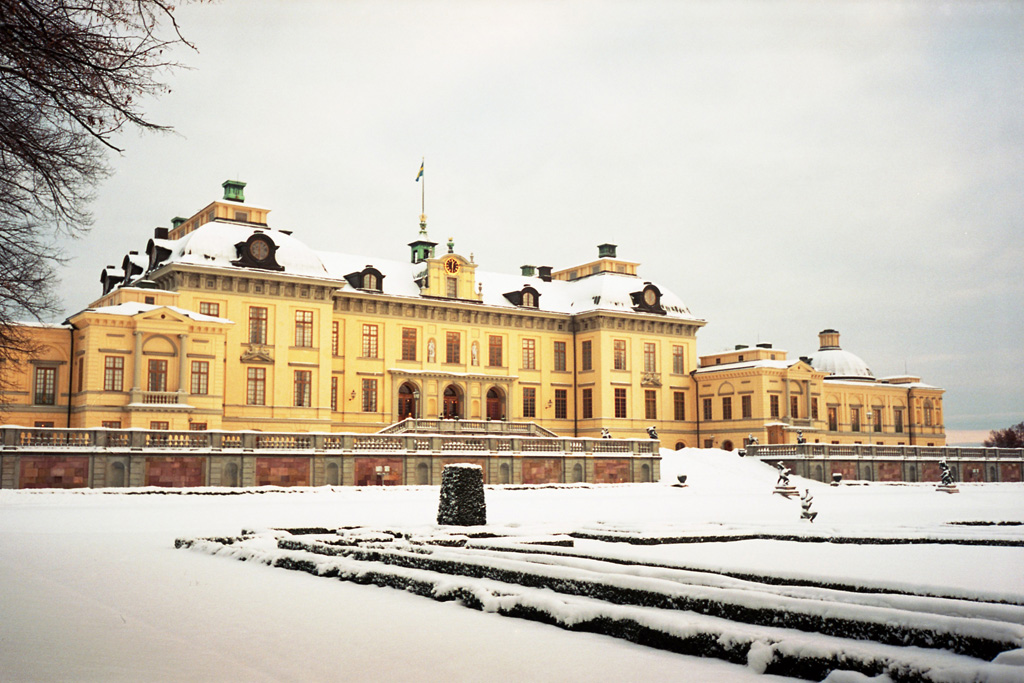
The name “Drottningholm” means “Queens Inlet”, a well chosen name as the palace was built for Queen Hedvig Eleonora and it is located on an inlet of Lake Mälaren. It was built in 1662, after the previous palace on this site was burned down to the ground. Drottningholm is often called the “Versailles of the North” because it compares to the famous palace in France. The Swedish royal palace was constructed in the same time as Versailles, and is built in French Baroque style. The architect Nicodemus Tessin the Elder (and later Nicodemus Tessin the Younger, who completed the work) was clearly inspired by the famous French palace. The palace is smaller than Versailles but equally distinguished in style.
Although there are some differences between Versailles and Drottningholm. Many claim that as beautiful as Drottningholm is, it pales in comparison to the grandeur of Versailles.
Spectators say the gardens and the interiors are nothing in comparison to Versailles when it comes to decorations and details. The Swedish interpretation of the glitzy French style during this time was more natural that showy.
Many people who adore French decorating tend to over time love the Swedish styles so much more. The Swedish interpretation of Versailles was muted rather than being showy. Where France used silk brocade fabric, Sweden used natural linen, where patterned wallpapers were common in France, painted walls were just as rich but more natural.
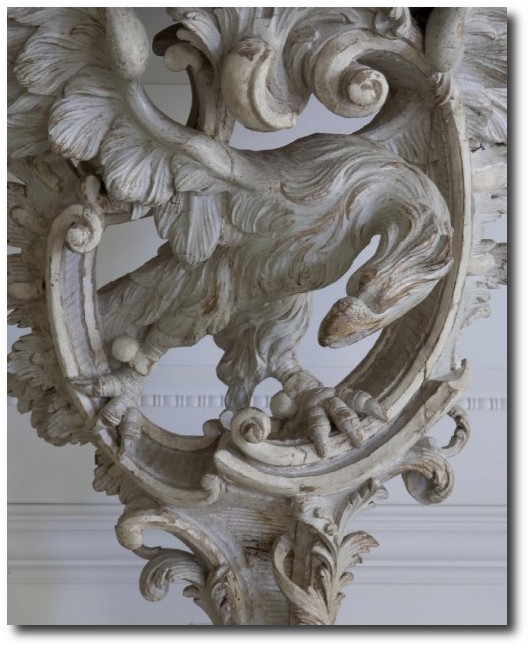
Modestine Blog takes a tour of the Palace and states………”It has been compared to Versailles, a beautiful royal residence away from the bustle of the Capital. Delightful as it is though, it lacks the grandeur of the French palace. The rooms are quite small and the interiors are wood, painted to resemble marble. Trompe l’oeil painting has also been used to excellent effect on the main staircase to give the impression of carvings and bas-relief sculptures, and again within the rooms to create the impression of spaciousness by painting false doors on the walls! There are allegorical paintings, too complicated to understand, tracing the history of the 18th century Swedish rulers. Of particular note is the rococo library room, built by Queen Lovisa Ulrika in the mid 18th century. We have no photos, cameras being forbidden inside the buildings”
The guards outside Drottningholm Palace – Picture Credit Jeremiah Blatz
Unfortunately, photography is NOT allowed inside the palace. Kina Slott is a very colourful place. Many people are amazed by the abundance of colours and how they in a remarkable way blended so well with each other. Bright yellow, orange and greens and pinks are all used in this palace. Inside most tours, you can see the exuberantly decorated bed room of queen Hedwig Eleonora, which took 15 years to complete, a militaristic gallery in baroque style and the impressive library of queen Lovisa Ulrika.
As you approach Drottningholm Palace — the private residence of the Swedish royal family — via boat from Stockholm, you first see the Royal Bath House Picture Credit
The interior of the palace is in early Baroque style of the 1660s and 1670s.
Rooms not to be missed are the beautiful staircase,the Ehrenstrahl Drawing Room and the Hedvig Eleonora’s State Bedchamber.
The library is the creation of Princess Lovisa Ulrika of Prussia. Lovisa Ulrika had quite a few interesting collections, which made Drottningholm a popular spot for leading scientists of that time to visit.
From the windows at the top of the stairs you have a good view over the formal gardens of Drottningholm. The view over the garden is actually the only place where you are allowed to take photos inside Drottningholm.
The formal gardens are the oldest of three garden styles at the palace, and date back to the 17th century and were laid out here by Queen Hedvig Eleonora (who also had the palace built). The garden has very strict lines, dominated by box-hedges and stripes of crushed brick of black granite. There are no flowers in sight though! Lawns, hedges, statues, fountains and ‘manicured’ trees.
The good news is that the gardens are for free! So if you live in Sweden, you can easily pack a picnic basket and a book and enjoy the gardens.
Drottningholm Palace Library
Workshop of King Gustav III.- Picture Credit Check out the color on those walls!
The Billiard Room at Kina Slott, which is also a seperate building. The billiard room is similar in style as the main building and was completed at the end of the the 1760’s. This room was originally used for playing billiards. Today the room gives an impression of how the workshop of King Adolf Fredrik used to look like. It is interesting to know that turning a lathe was a recreation for the royals and the nobility of Europe. And not only Kings would do some handiwork, even the Queen used to work on the lathe! In this room you can see tools and a carpenters bench used in those days. This information and picture was found on Virtual Tourist
Kina Slott consists of more then one building, actually there are quite a few of them. Of course you have to visit the main building, which is by far the most impressive, but you shouldn’t forget to take a quick peek inside the Confidence as well.
The Confidence is a dining room, but not your usual one! The Royal Family could use this private dining room if they wanted to take their meals privately “en confidence” without any servants present. To be able to do this the Confidence was build with a clever mechanism. An ingenious system made it possible to lift a ready-laid table up through the dining rooms floor. Beside the main dining table there are also four side tables, having a similar lifting system.
When the Royal Family was ready to dine, all they needed to do was to pull a handle in the dining room. A bell would ring in the serving region below and the lifting system would bring in the food.
The Guards Tent located in the garden at the Drottningholm Palace (or better known in Swedish the Kina Slott) is a wonderful blue and white striped tent. The tent was built to imitate fabric and yarn tassels. The wonderful tent used to be the quarters for the solders of Gustav III. It was built in 1781 and designed by C.F. Adelcrantz. The idea behind the architecture was to resemble a tent in a Turkish army camp. The tent building certainly has a dramatic and theatrical look that fits into Gustav III’s love for the theatre. The Chateau de Groussay in France was inspired after the 18-century Cooper tents at Hagaparken in Sweden. Both tents almost look identical. Check out this wonderful post by Architectural Watercolors Blog which features 18th century garden tents.
Check out some of the most beautiful pictures from Chasmiller and his travels in Sweden. The architecture is amazing. The pictures of the Gurards Tent are from his website.
From Wikipedia- Hagaparken (“Haga Park”), or simply Haga in Solna Municipality just north of Stockholm, Sweden is a vast and popular nature area, with large parks, lakes, woods and gardens. Within the park is Haga Palace, King Gustav III’s Pavilion, the Chinese Pavilion, the Echo Temple, an older castle ruin (which is not really a ruin as it is the remains of a castle never finished) and several other interesting buildings on the grounds (as the peculiar Copper Tents and also the Butterfly House). Included in the Haga Park is also the Royal Burial Ground of the Swedish Royal family (since 1922), where several members and ancestors of the present Swedish royal Bernadotte family rest. Hagaparken has historically been favoured by Swedish royalty, especially Gustav III who founded it and developed it 1780-1797, and by the famous troubadour Carl Michael Bellman, a contemporary of Gustav III, who is much associated with Haga due to the lyrics of his compositions, poems and his writings. The song Fjäriln vingad is entirely dedicated to the park.
The Sultan’s Copper Tents, originally three buildings for the palace guard, designed by the painter Louis Jean Desprez and built during 1787 to 1790. Desprez proposed that all the façades of the buildings should be designed as three Turkish tents, clad in decoratively painted copper plate. However, tent façades were only built on the side facing the main lawns, which still gives the desired illusion of a sultan’s encampment on the edge of the forest.
The middle tent was destroyed completely by fire in 1953. The front of the tent was rebuilt during 1962 to 1964 under the leadership of palace architect Ragnar Hjorth. The buildings behind the tent facades were rebuilt in 1977-1978, following plans by palace architect Torbjörn Olsson. He turned the stable yard, formerly open, into a tent room with a ceiling. Today the middle copper tent is home to the Haga Park Museum. The tent to the east houses a restaurant and the one on the western side is accommodation. The copper tents are a national monument and protected under law.
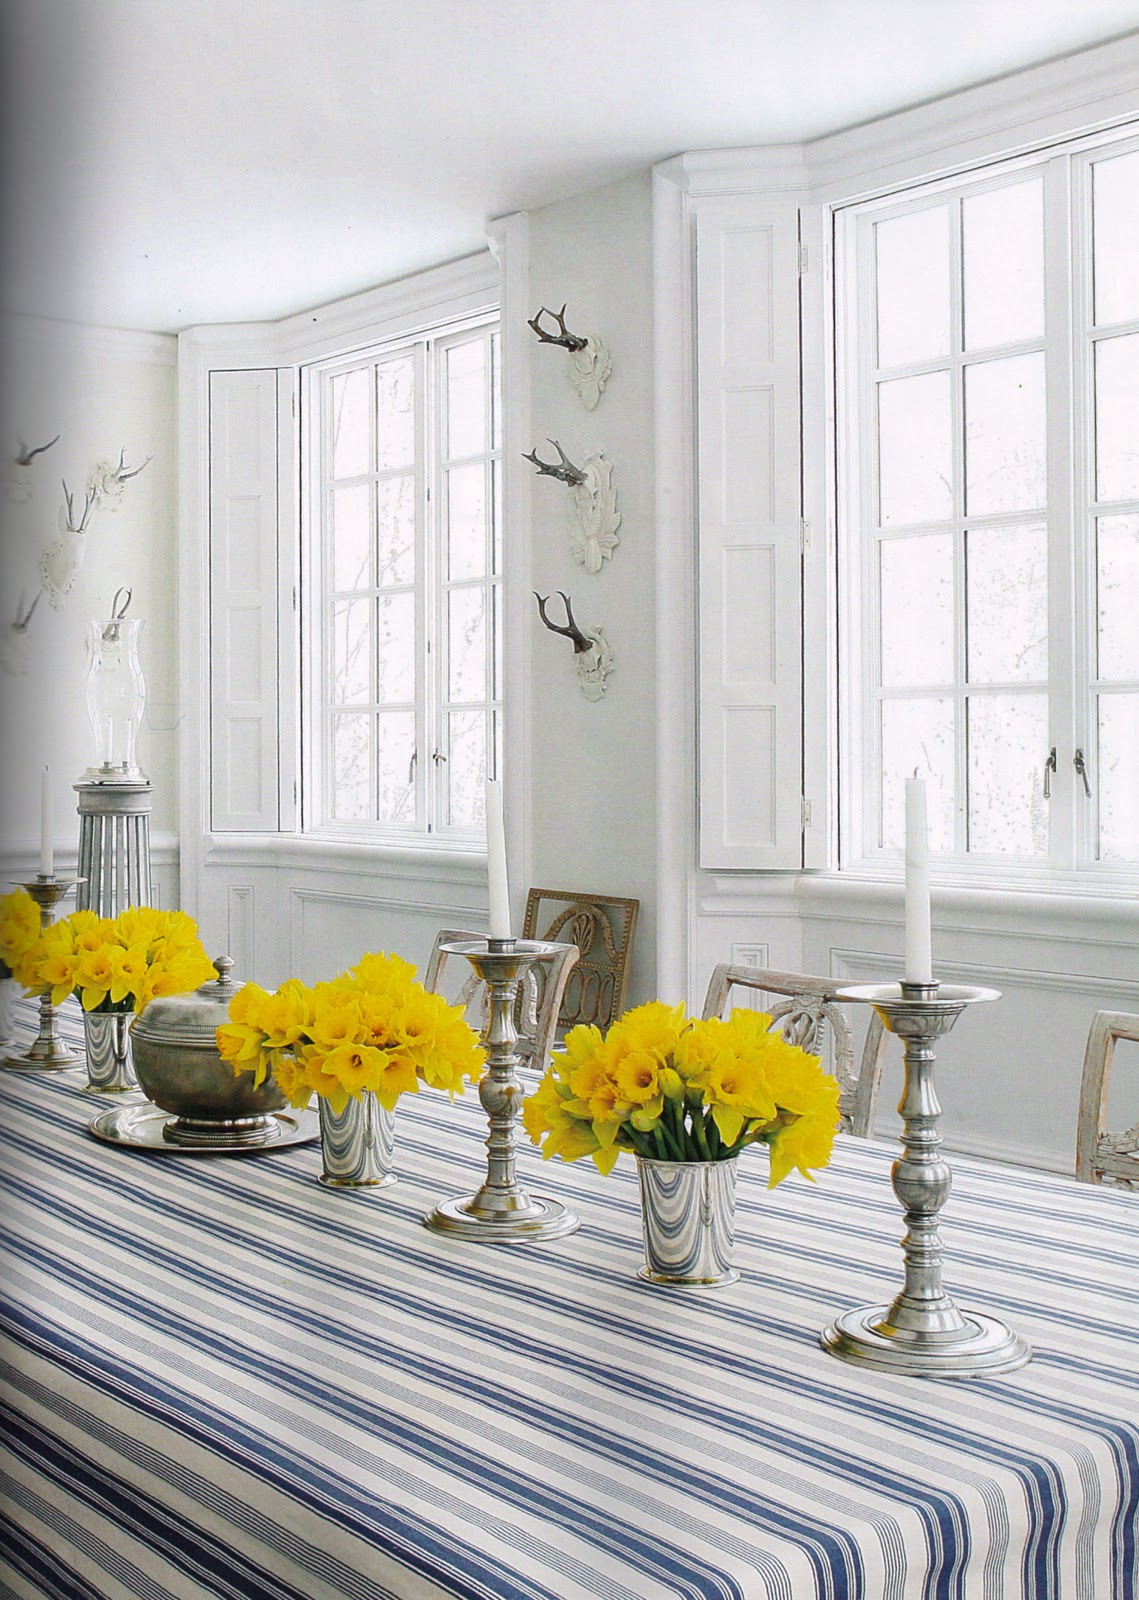
Peak of Chic posted this stunning picture of Tented Room at Charlottenhof. Take some inspiration from this room and create a Swedish themed room with blue and white striped walls, and drape your fabric to look like these classic old world tents
A person could spend weeks looking through the many beautiful pictures on Ye Olde Fashion. If you enjoy sewing, and the history of fashion, this site is definitely for you. It details just the best fashion from many centuries. If you are good at sewing and want to be inspired for some new patterns, look at this site, as she has a really great eye for spotting only the best fashion through the decades and centuries.
Stripes were more or less absent from early-18th century fashion which trended heavily towards anything large and flowery. The floral trend eventually transitioned to vines which simplified to a mix of wavy stripes and flowers by mid-century, as seen in this 1760s robe à la française

Book Review: The Swedish Wooden House by Lars Sjoberg

The Swedish Wooden House by Lars Sjoberg and Ingalill Snitt shows magnificent castles, impressive mansions and simple farmhouses. The beauty and decay in all these houses are an important part of our heritage. The Swedish Wooden House journeys through Swedish architectural history and a rich source of inspiration for all who appreciate the beauty of the ancient buildings.
All these pictures were captured by Ingalill Snitt’s website. You can buy this book on amazon for under $25-30 dollars, and the same as ebay.
Among the buildings shown are Sörby mansion, with its intact eighteenth-century painted-linen wall coverings; the numerous residences of the De la Gardie family, including Läckö Castle, founded as a bishop’s stronghold in the thirteenth century; Gunnebo, a lavish wooden interpretation of an Italian villa built for wealthy merchant John Hall; and several buildings associated with the great Swedish botanist Carl Linnaeus: Råshult, his childhood home; Sveden, the site of his wedding; and Hammarby, his adult home, complete with study, lecture pulpit, and collection cabinet. A celebration of a centuries-old design history as well as a source of design inspiration, The Swedish House captures the special qualities of a unique building practice.
Deserted farmhouses and unpainted wood houses, churches, and historic country estates are the focus of this engaging study of Swedish domestic architecture since the 17th century. Traditional designs, construction techniques, custom fittings, and renovations are examined, with an emphasis on interior decoration, furnishings, and various Continental influences. Examples range from humble rural structures to the renovated S rby mansion, with its painted 18th-century linen wall coverings and tile stove. Residences of the botanist Carl Linnaeus are featured, including his estate of Hammarby, with its study, lecture pulpit, and collection cabinet. Evocative, “certain slant of light” photos exquisitely capture exteriors in every season as well as interior details. An earlier, well-received collaboration by Sjoberg (curator, National Museum, Stockholm) and Snitt is The Swedish Room. Site maps, a bibliography, and an index would have enhanced this publication, but because there is so little in English on traditional Swedish residences, this work is recommended for collections of all levels.-Russell T. Clement, Northwestern Univ. Lib., Evanston, IL
The Swedish (original) edition is titled “Swedish wooden houses” which is quite an essential piece of information for a buyer. That’s what’s linking the humblest farmers hut with a grand manor in this book. The emphasis is on interiors and a few are more than slightly deteriorating into a romantic peeling-paint-and-wallpaper inferno, but mainly it’s a fair selection of different types of rooms. Exteriors are also presented and I think there is a good balance. Photograps are excellent as always when Ingalill Snitt provides them.
ByM. Keane (Massachusetts) This review is from: The Swedish House
Sjoberg is the quintessential art historian and his book captures the history and soul of Swedish architecture beautifully. The photos and related text guide you through a brief history of the traditional houses and building styles found in Sweden. By looking thoughtfully at the photos, you’ll get a clear view of how these houses are constructed and why they are still standing today after years of abandonment and neglect. If you ever visit Sweden (and go beyond Skansen in Stockholm), you’ll see these “silent houses” throughout the countryside. Sjoberg brings them back to life with his deep understanding of their history and relevance to the 21st Century.
I’d hoped for more “Swedish” and “House.” The compositions of aged paint and abandoned objects in natural light are beautiful, but not necessarily “Swedish.” It’s mostly rooms. With some shots of fenestration, it contains only about 20 large photos showing the exterior of a whole “house.”


Re-Create Carolyn Roehm’s Famous Aspen Lodge For Less
Carolyn Roehm has long been noted as one of the top interior designers in the industry. What makes her book A PASSION FOR INTERIORS– a bit different than the hundreds of decorating books on the market is her ability to stage antiques well.
She uses very minimal modern furnishings, and arranges her designs around exceptional period antiques. This book explores the best of antique designs in my opinion- Regency, Empire and Swedish. Her focus is always neoclassical and classical architecture which is found in all three designs.
Of the three homes in PASSION FOR INTERIORS, her New York apartment is designed around a neoclassical style, showing high end empire and regency furnishings, while the second home is focused around colonial furnishings and decorations. Designs often found in American colonial style often features bright upholstery and paint finishes typical of architect Robert Adam. American colonial borrows much from British furniture and has many classical elements woven through the designs. The most interesting of the three homes is the third home -Westbury. This home is a friend’s residence in Aspen, and is fashioned after 18th century Swedish design.
- Wall Mounted Resin Gazelle Horns Dark Wood Plaque
- Lazy Susan Wall Mounted Resin Gazelle Horns Ecru Wood Plaque
- Cabela’s European Mount Moose Trophy
- Pine French Provincial Signboard
- African Wildlife Elephant Wall Trophy Statue Figurine Décor
- Beth author of Zesty Nest Blog features some wonderful pictures of the Westbury, as this home was featured in the November / December issue of Veranda Magazine. Westbury is flooded with light from 78 windows. White walls, limed wood, and gray painted furniture is all characteristics of the Gustavian style. Splendid Sass Blog shows a few more pictures of the bedroom and breakfast nook.
- PASSION FOR INTERIORS shows over 300 photographs of intricate decorative details, museum quality antiques and inspired rooms she has completed over the years, and a great investment for your library.
Picture Credits:
Kevin Sharkey walks us through A Passion for Interiors by Carolyne Roehm. Roehm. He features 46 pictures from Roehm’s book.
New York Social Diary features a large amount of pictures of her classical inspired home in New York. This home is generously decorated with high end Empire / Regency furniture.
Crown Publishing features a generous preview of 19 fabulous pictures from Passion For Interiors.
- 3 Pcs Round Bowl with Fleet – Antique Silver Finish
- Antique Style Silver Gold Bird
- 15.75″H WOW!! Stunning 3 Tier Nickel Trays
- Christmas Holiday Glass Cloche and Matching Plate Decor
- Red Striped Cotton Linen Placemats Set of 4
- Red Striped Cotton Linen Table Cloth with Flatware Pockets
- Aluminum Silver Pedestal Cake Plate Stand
- Symphony Crystal Footed Centerpiece Bowl
- Symphony 11″ Crystal Footed Bowl
- CRYSTAL AND SILVER COVERED FOOTED CANDY DISH – crystal candy dish
- Empire Sterling Plain Border Footed Salt & Pepper Set
- Empire Pewter Bulged Footed Baby Cup
- Andrea by Sadek 8″ W Silver Plated Pedestal Cake Stand
- Zodax Palais Royal Grand Cafe Pewter-Finish Serving Dish
- 11 Oz Footed Gravy Boat
- Zodax Palais Royal Grand Cafe Pewter-Finish Serving Tray
- Zodax Palais Royal Grand Cafe Pewter-Finish Footed Centerpiece Bowl
- Zodax Palais Royal Grand Cafe Pewter-Finish Serving Pitcher
- This Carved Wood Bench by Lazy Susan gives a very rustic appearance to any Swedish designed room. This bench measures 33.5 x 18 x 32.5 inches.
- Lazy Susan Carved Wood Candelabra
- Lazy Susan Carved Wood Candleholder
- Lazy Susan Carved Wood Hurricane, Small
- AzureGreen Brass Chamberstick Tapered Candle Holder
- Brass Chamberstick
- Dentil Door Pediment
- Brass Chamberstick Candlestick Holder for 1/2 Slim Candles
- Columns White Urethane Column Half-Round
- Door Pediments White Urethane foam, Door Pediment
- Door Pediments White Urethane foam, Door Pediment Urethane
- 10″ Classic Antique Style Architectural Fireplace Greek Wall Door Pediment
- Office Candlestick, Pewter
- Classic Cast Iron Birds Grapes Architectural Wall Door Pediment
- Candlesticks Green Brass, Candlestick Antique Green
Neoclassical Decorating -One pattern unifies four different style chairs-PASSION FOR INTERIORS


Best French Metal Accessories For Your Home
French Iron Rustic Teal Blue Cafe Chair – $216 On Amazon
Metal acessories can be a great addition to a home decorated around the Swedish styles.
Birdcages:
Birdcages can be a functional piece of furniture being that it can house a bird while looking beautiful at the same time. Birdcages date back for centuries. Birdcages can be the ultimate accessory in a designers tool box as the furniture can be painted any color to fit a room colors. Chinoiserie styled painting is quite beautiful and can add to the beauty as well as adding a stand to match the birdcage. Swedish Stencils can also be a way of adding a country folk appearance to a wood birdcage stand.
Metal Stands:
Metals stands can add a rustic element to your home. Simply paint it, and use them as a plant table through out the year. Metal can add a whole new element to your home, and it naturally looks great when it is a bit older and the paint is slightly worn. In case you wanted to update some worn out metal, consider spray paint that is formulated for metal. Here are my favorite colors:
Rust-Oleum Royal Blue– Perfect colors for a Swedish Home.
Rust-Oleum CREAMY ALMOND– Lovely Color- I never can find the spray at the store.
Rust-Oleum , Gloss Sail Blue– I have never seen this color in the stores.
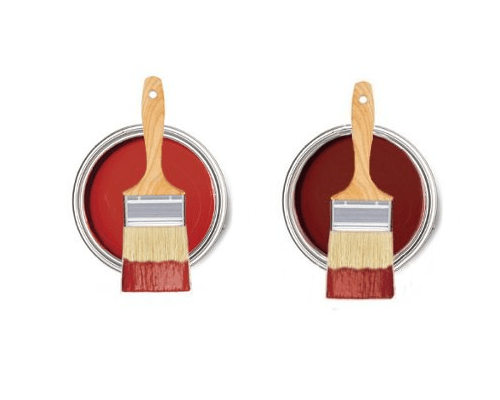
Rust-Oleum Gloss Carvinal Red– This is a new color too. Our stores in Virginia, Washington and Washington State don’t have it. Red is a classic Swedish Color.
Rust-Oleum Paint in Heritage Red– Another color I don’t see in the stores in an oil based spray.
Stops Rust Gloss Fern- This is a bright moss green. Perfect for a traditional Birdcage color.

Elegantly designed European-styled outdoor table with jet black metal top $1016 Amazon
47.5 Inches High Metal Floor Bottle Rack $269 on Amazon
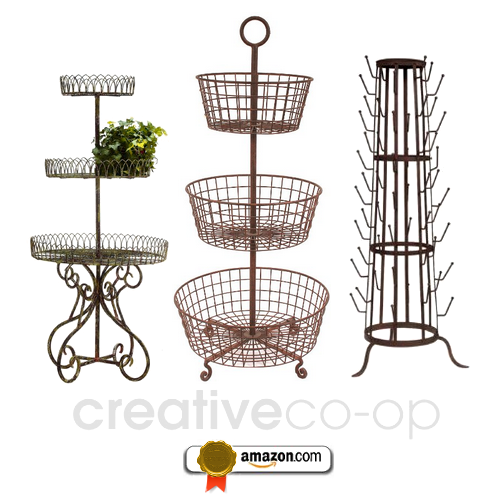
Creative Co-Op Rust Metal 3-Tier Basket $56 On Amazon
Creative Co-Op DA1638 Metal 3-Tier Standing Baskets, Green $136 On Amazon

Creative Co-Op Metal Vintage Laundry Basket with Wheels $165 Amazon
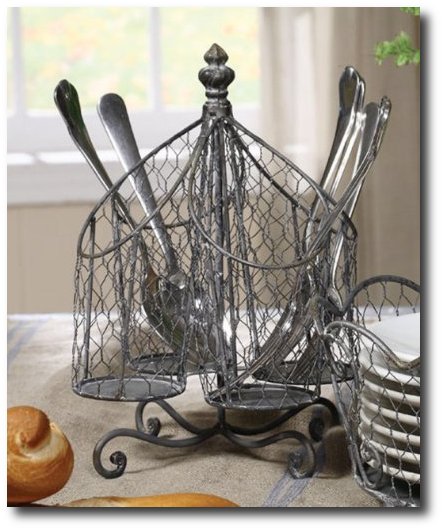
Shabby Cottage Chic Wire Cutlery Silverware Caddy $23 Amazon

Vintage Reproduction French Art Nouveau Metal Rocking Chair $708 On Amazon
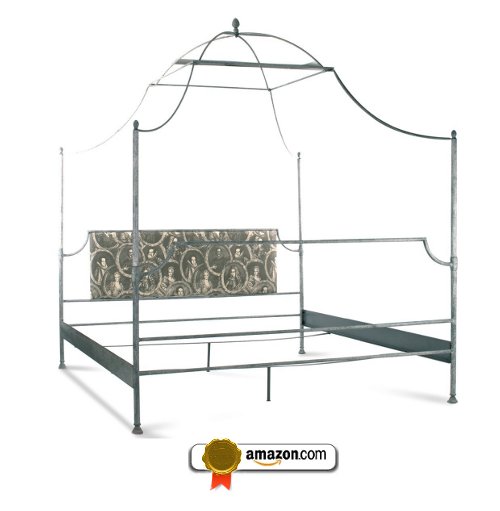
Dalton French Country Rustic Metal Old World Canopy Bed- King $3108 Amazon

French Country Three Tier Iron Bird Cage $204 On Amazon
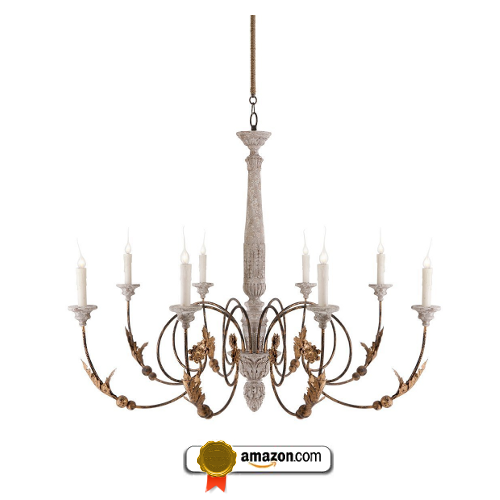
Pauline Large French Country 8 Light Curled Iron Arm Chandelier $1320 on Amazon
Falu Red- A Prominent Color In 17 and 18th Century Sweden
 The color red has been distinctive color in Sweden in the 17 and 18th centuries. Falu red (pronounced “FAH-loo”, in Swedish Falu rödfärg) is the name of a Swedish, deep red paint well known for its use on houses, barns and cottages. The paint originated from the copper mine at Falun in Dalarna, Sweden. During the 17th century Falu red was commonly used on smaller wooden mansions with the intention to imitate buildings with brick facing. In the Swedish cities and towns, buildings were often painted with the Falu red until the early 19th century, when many began to oppose the paint.
It was then that other colors were introduced such as yellow, white and the beautiful lighter pastel colors that you see in historical architecture in Sweden. Houses and buildings in Scandinavia are usually painted white or yellow. Red paint was the cheapest, so many of the barns and outbuildings in the countryside were painted red.
Only the noble buildings of the farm were painted in other colors. Falu red saw another surge in popularity in the countryside during the 19th century, when farmers began to paint their houses in the beautiful saturated paint color. Falu red is still widely used in the Swedish countryside to this day due to its effectiveness in preserving wood. Incorporate a little bit of red in your Swedish decorating to get an authentic Nordic look. A wood side chair or commode would look terrific in this color!
Falu red during manufacturing may range in color depending on how much the oxide is burnt. The colors can range from dark red almost borderline black to a bright, light red. The paint itself consists of water, rye flour, linseed oil and residue from the copper mines of Falun. The residue contains silicates iron oxides, copper compounds and zinc. The color to the left in pot is a very accurate hue of the Falu red .
– 18th century architecture Sweden, Stockholm.
– A lovely country Swedish Red house. An iron oxide based wood preserver was used on the timbers.
– A lovely red painted house near Trollesund.
Swedish Red Mike Downey On Flicker
 18th Century Home From Country Living Magazine
18th Century Swedish Manor House Lars-Sjoberg Featured on Trouvais Blog
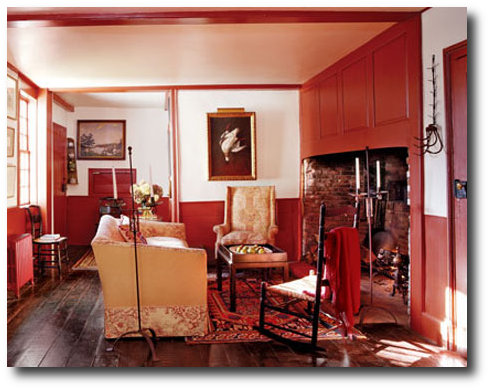
Colonial Red Painted Panelling By Thomas Jayne Featured at Home Beautiful
 Dione Herself sold an outstanding late 19th century French Bergere chair that would have worked really nicely with a Swedish styled decor. The chair was upholstered in a red check fabric, while the frame looked to be either painted or white washed.
Check fabric is one of the staples of Swedish decorating. Red along with shades of blue and yellow have always been classic choices for Swedish textiles. If you are looking to do a large project with check fabric, look at NY Fashion Center Fabrics, as they carry fabric in the bolt. A 25 Yard Bolt in red and white gingham checked fabric is $162. Raggedy Ann & Andy sells a brightly colored Flannel ngham fabric in blue. Online fabric store also sells a larger print gingham red fabric.
Red has always been distinctively Swedish. A simple red chair amongst a muted gray background can be powerful all on its own.
Incorporating authentic Swedish colors such as red into your Swedish decorated home can really bring forth a more authentic antique Nordic look.
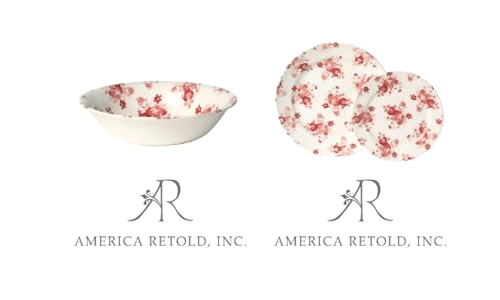
America Retold has stunning Swedish looking dinner ware in a red floral chintz pattern that would look remarkable up on a plate rack.
Their collection is limited to three pieces; a serving platter which sells for $26.49, a bowl which sells for $12.99, and a dinner plate that sells for $10.49. This set can be grouped with other white table ware, or pair it with glass, pewter, copper or brass for a very regal effect.
America Retold also sells a set of 4 mini dessert cloches that might work just perfect for your dinner parties serving mini 3 tier cakes.
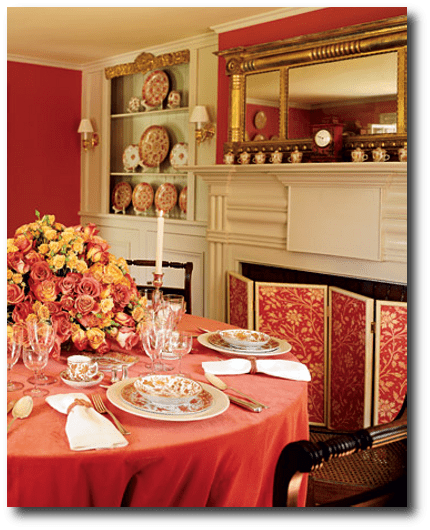
This lovely pictured featured in Martha Stewart Magazine shows an orange Fitzhugh-pattern Chinese-export porcelain inspired the dining-room color scheme. The painted walls match the deepest tone on the china. A quince-colored velvet tablecloth and sunset-hued fabric on the folding screen highlight the richness and depth of gold-tinged reds. This room is based around Federal style decorating, and includes a terrific Empire gold mirror that really makes the space extremely rich!
A Louis XVI-style chest From Charles-Emile Moinat
Villa D’Este Town & Country Red Swedish Looks
Red Gustavian Chair Featured on Karina Gentinetta Blog, Check out this beautiful red Swedish Gustavian Style Dining Room Found Here

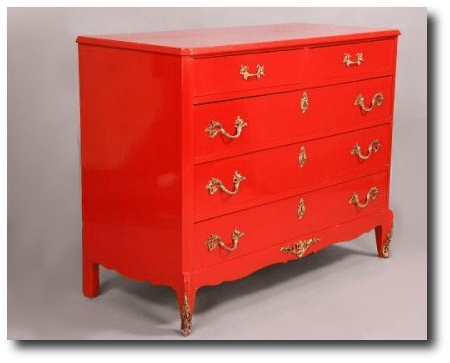 Swedish Furniture Ideas- French Commode Lacquered Red From Live Auctioneers

English Tea Tables : A Must Have Statement Piece In An Outstanding Swedish Room
Tripod tables were designed originally to serve tea. Some were designed to tilt like the pie table which could then be folded up and stored away. You would think the tripod table is English in origin because they have been traditionally associated with England and North America, but it was also popular in other areas of the world as well.
It is not uncommon to find tripod tables in Swedish interiors because they were executed in Scandinavia, Germany, The Netherlands, and France. Dutch painters were known to decorate the oval tops of these three legged tables with landscapes starting in the late 17th century, and this following survived well into the 19th century. In the late 18th century the English style became extremely fashionable, and cabinet-makers in Sweden, Denmark and The Netherlands executed furniture in this style.
- Scandinavian Design by Lars Bolander withHeather Smith MacIsaac
- Swedish Painted Tilt Top Candle Stand From Rhonda Eleish and Edie Van Breems
- Swedish Furniture & Decorating Ideas- London-Townhouse By designer Katrin Cargill


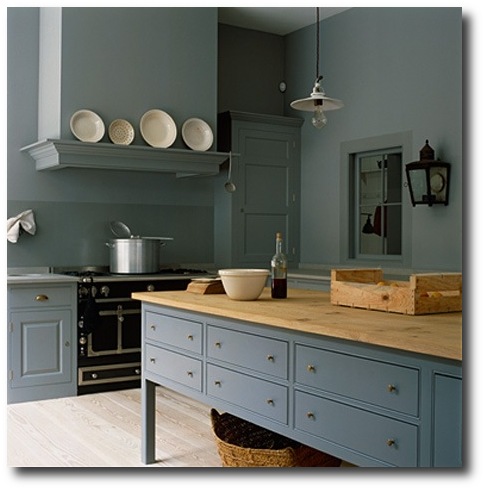
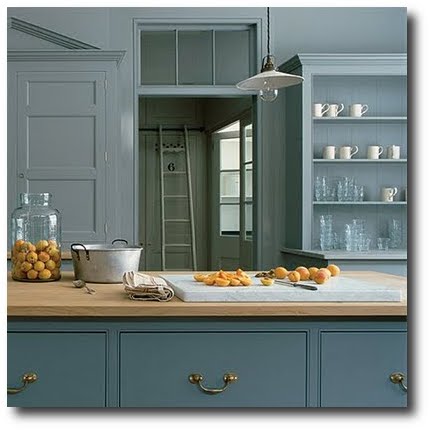
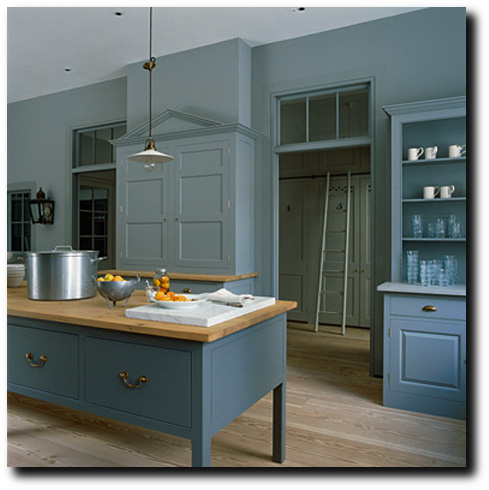
Stunning European Paint Colors For Painted Kitchen Cabinets
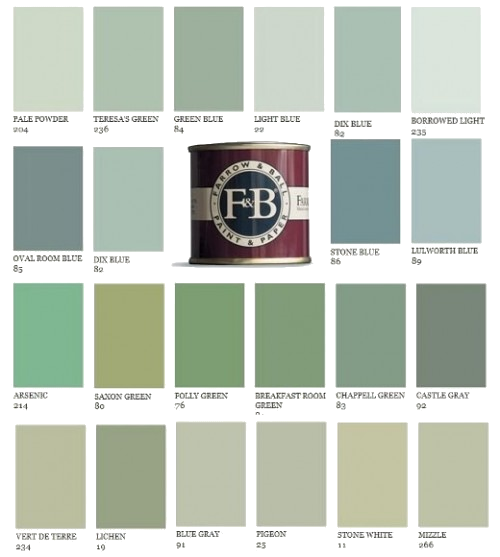
The Beautiful colors found in the Farrow and Ball Paint Line
Plain English Kitchen Designs in the UK shows some beautiful kitchens painted in various blues. The kitchen featured lovely English styled cabinetry with recessed cabinet doors. Recessed doors allows the door to be painted as well as the capability to match wall colors because the cabinet face blends seamlessly with the overall cabinet design.
Consider painting your walls a shade darker or lighter than your kitchen cabinets. In the pictures you can see out into another room which is within the same color groups. The natural wood floors breaks up the use of blue in these rooms. The color yellow is also very Swedish and plays off the blue quite nicely. The brass hardware is a nice pop compared to silver which would blend into the blue tones.
Cover Stain in Oil has been my go-to-paint for several years now. It is one of the best discoveries when I used to paint furniture as my full time hobby. Coverstain IS NOT your typical oil paint. It goes on smoothly, than most other oil brands. If the mixture is a bit thick, add a small amount of paint thinner to the paint. The overall finish is levels out when it dries, and it dries to a flat finish which is incredibly unusual for a oil paint.
The best thing about this paint is you can get it tinted almost any lighter color. I have been purchasing my paints at Ace Hardware as we live in a smaller town, and they have been able to tint the paint vibrant colors, and darker shades. If I want something darker, I simply buy a quart size of satin oil paint at my local Sherwin & Williams and mix it in to darken it up.
In addition to the unusual features of this paint, it can be sanded down when it fully dries. The paint dries to the touch within about 3 hours, but I wouldn’t suggest sanding it down. I usually sand my furniture after day 3. The next day you can sand it down, but I find I run through sand paper quickly because the paint is still not fully cured. Because this paint dries flat, you can add any color over top of it, and it doesn’t have to be oil based. What I would suggest is have Cover Stain tinted the color that is close to your ideal choice, and add your ideal color over top. If you do choose to spray this paint on to your cabinetry, PLEASE buy an industrial heavy mask with air filters. I cannot stress that point more.
Plain English Kitchen Designs in the UK
Plain English Kitchen Designs in the UK
Plain English Kitchen Designs in the UK
Plain English Kitchen Designs in the UK
Plain English Kitchen Designs in the UK www.remodelista.com
Plain English Kitchen Designs in the UK
Plain English Kitchen Designs in the UK www.remodelista.com
Butler sells a terrific butter yellow console table that gives a unique Swedish impression. The first time I saw this table, I got so excited as the color and style are so close to Swedish styled furnitre. The soft blue floral set on the butter yellow are both typical Swedish cloors. The Artist’s Originals line is sold through Butler and is a collection of highly desired fine furniture hand-painted by accomplished artists. This stunning table is made from wood construction and features a single drawer. This table is entirely hand painted, and measures 32” H x 35” W x 16” D.
The console table would fit right into the Martha Stewart’s home in Connecticut. The butter yellow is very simular to historical paint colors.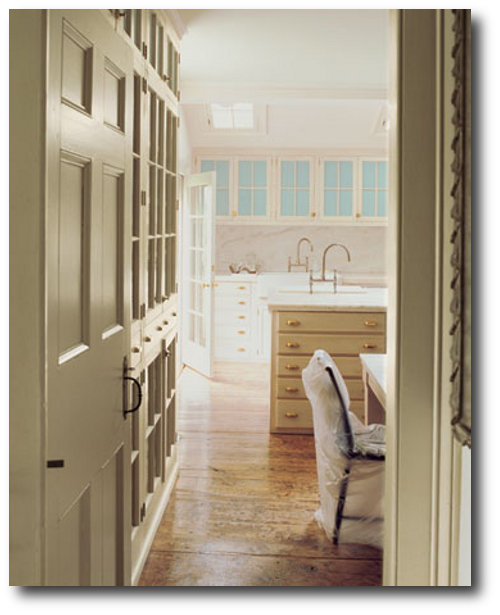
Martha Stewart’s Previous Home In Connecticut , Turkey Hill
 Martha Stewart’s Previous Home In Connecticut , Turkey Hill
Martha Stewart’s Previous Home In Connecticut , Turkey Hill
Martha Stewart’s Previous Home In Connecticut , Turkey Hill


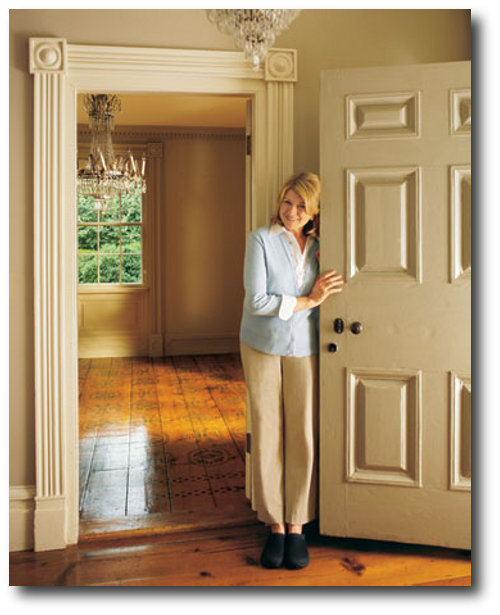
6 Tips For Painting Plaster Wall Finishes

The impact of a well-executed faux finish becomes immediately apparent in interiors inspired by 17th- and 18th-century design. Many of the rooms shown here feature a Venetian plaster finish—an effect created using layered paint and, in some cases, plaster. Historically, paints were far more translucent than what we use today, allowing light to pass through layers of pigment and creating remarkable depth and movement on the walls. These early finishes were likely achieved with mixtures of linseed oil and natural pigments, producing surfaces that feel rich and alive—qualities rarely replicated by modern, high-coverage paints.
Today, walls are often completed in two coats and considered finished, but Venetian plaster techniques offer an opportunity to restore that sense of depth and craftsmanship. A variety of Venetian plaster products are now available at most hardware stores and can be custom-tinted. Some mimic polished marble with a subtle sheen, while others resemble the softly textured plastered walls found throughout historic European homes.
The Venetian plaster finish featured in Better Homes and Gardens is an excellent example of an advanced application. Lighter tones near the top of the wall blend more naturally, while deeper hues toward the bottom anchor the space. Upon closer inspection, you’ll notice the use of a sponge to introduce texture, adding visual interest without overwhelming the surface.
Working with lighter color palettes also helps open up a room and creates an interior that remains comfortable and livable over time. Consider undertones of peach, soft orange, or warm beige for a timeless effect. Always practice this technique before committing to your walls—especially with textured finishes—since correcting mistakes often requires sanding back to bare plaster. I’ve learned firsthand that this process can be messy and extremely time-consuming.
How to Achieve a Venetian Plaster Finish
This finish is created by troweling on thin layers of paint using at least three related hues. Paint alone will not produce the desired effect; a pliable texturizing medium must be mixed into the paint. Many hardware stores sell Venetian plaster compounds that can be tinted to your chosen colors and mixed directly into your paint.
For the most authentic result, use:
-
One pale hue
-
One medium hue
-
One darker hue
All within the same color family.
Apply the paint randomly, avoiding the urge to wipe excess paint from the trowel—this irregularity is what creates depth. Use different trowels to vary the size and flow of the markings, preventing repetition and patterning.
The most important step in any faux finish is the final glaze. A lightly tinted glaze applied over the entire wall unifies the colors and adds softness and depth. This step is often overlooked, but it acts almost like a gentle blur, minimizing imperfections and blending transitions seamlessly. Glaze is semi-transparent by nature, which allows the layers beneath to show through beautifully.
I recommend purchasing glaze that is not pre-tinted. This gives you greater flexibility for future projects, rather than being locked into a single color. A simple rule of thumb is to mix equal parts paint and glaze, leaning slightly heavier on the glaze for softer results. For the final coat, I often roll the glaze onto the wall evenly.
Experiment to find what works best for your space and technique. I’ve had excellent results using Ralph Lauren glaze products in the past. That final glaze coat truly transforms the surface. When decorating in the spirit of the 17th and 18th centuries, Venetian plaster is one of the fastest and most effective ways to bring authenticity, depth, and cohesion to a room.


Restoration Hardware’s Gustavian Collection

Restoration Hardware never fails to impress. For some time now, they have been featuring french furniture, but have offered a line of Gothic, Modern, Colonial and Gustavian lines. There are just a few handfuls of companies who reproduce classic furniture and Restoration Hardware is one of them.
Give a person the choice of something freshly painted, and something aged with patina, they will always choose the piece that has a bit of history. Many people would rather choose something classic looking, that opt for a new design. Antiques are seen over and over in the magazines, but finding them is a different story. Magazines showcase antiques because they are often rare, and more interesting than our modern furniture, and they always offer a fresh look that isn’t seen too often.
It is nice to see a company produce an antique design with some integrity. Their Gustavian chair priced at $179 is cross between both the Swedish and French style in the 18th century. The chair is made of solid oak and has a curved top rail, shield back and comfortably upholstered seat on smoothly hand-turned, tapered legs. The French Louis XVI table is priced between $1295 – $1795 depending on the size. Gustav III brought over the french designs from France when he spent some time in Paris and Versailles, which is why most of the Swedish furniture is based on the Louis XVI styles. Hooray to Restoration Hardware, we know you have many fans!
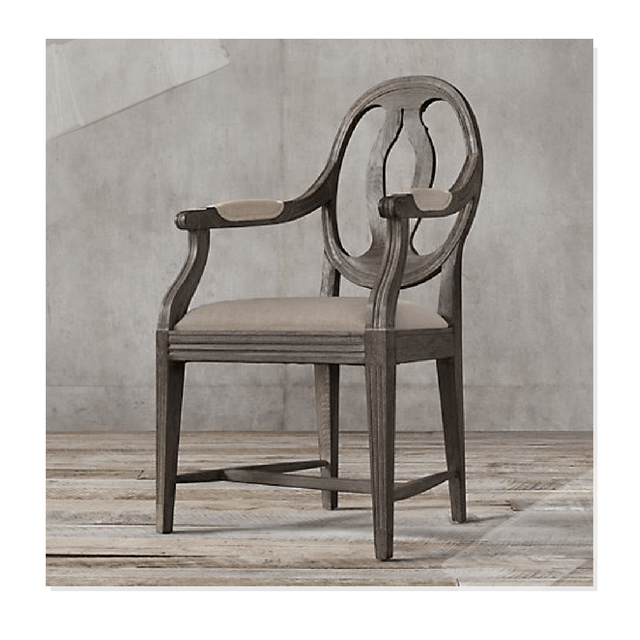
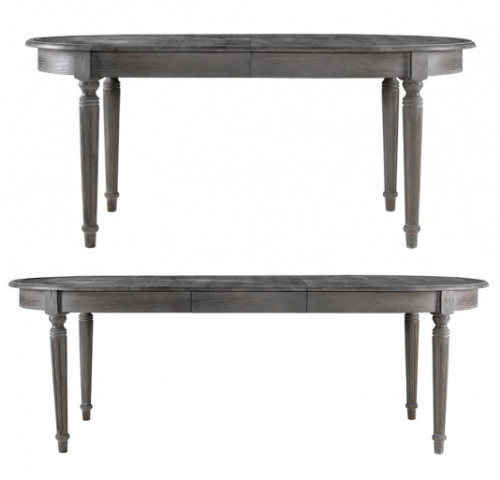
Gustavian Medallion Collection | RH
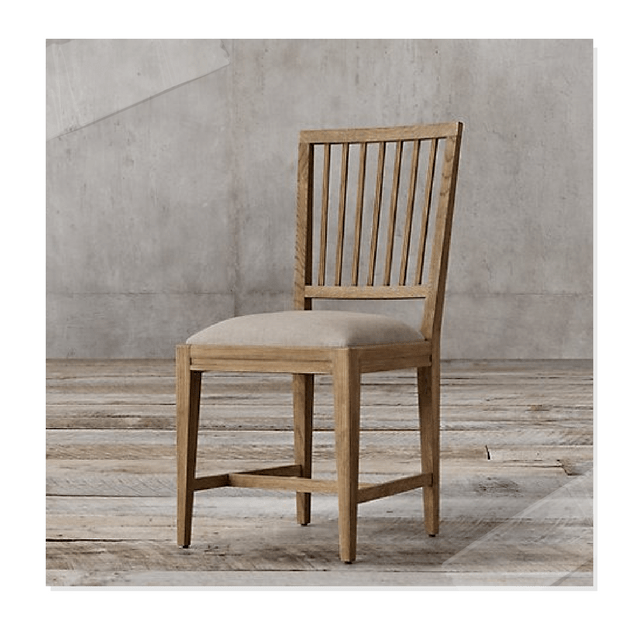
Gustavian Spindle Back Collection

Restoration Hardware’s Gustavian Collection- French Empire Fluted Leg table

Restoration Hardware’s Gustavian Collection- French Empire Fluted Leg table

Restoration Hardware’s Gustavian Collection- French Empire Fluted Leg table

Restoration Hardware’s Gustavian Collection- French Empire Fluted Leg table

Restoration Hardware’s Gustavian Collection- French Empire Fluted Leg table

Restoration Hardware’s Gustavian Collection- French Empire Fluted Leg table
Louis Philippe Chests- A Dresser Style That Can Be Made Over To Look Expensive

I stumbled across a fantastic blog called Life in The Fun Lane the other day and I was pleasantly surprised. Don’t we all want to be in the fun lane in life? Everyday armed with a smile and jetting on the highway of happiness? Holly Baker is the author of this splashy blog, which includes pictures of her home renovations in more than a few pages of her blog.
At first glance, you can tell she has incredible taste, but you will also notice that she also isn’t afraid of getting her hands dirty as she includes several painted furniture makeovers in her own home.
After browsing through her home pictures I couldn’t help but notice the Louis Philippe chest in her home. Being a furniture painter myself, I knew these chests didn’t come with industrial pulls, and the builders options for this chest are always white, and black and cherry veneer.
So it was a nice surprise to look at her version of this terrific chest. As you can see, she took off the traditional bail pulls, and instead put on door pulls.
In the past, I have loved the way these industrial pulls have looked, but they never looked quite right on my furniture. Combining the rustic look of gray and steel just goes hand in hand.
- Ace Hardware sells 5 handles in a kit for only $12 dollars which is a bargain price.
- Stanley Hardware Utility Pull, Nickel #750098
- Utility Door Pull, in Black
- Stanley Home Designs Utility Cabinet/Door Pull, Polished Brass
- Utility Door Pull, in Zinc
- Utility Door Pull, in Black
- National Mfg. Galv Utility Door Pull
- 10 Label/card Holder Black Plated 3 1/2×1 1/2 W/screws
- 25 Label/card Holder Nickel Plated 5/8×2 1/2 W/screws
- 25 Label/card Holder Brass Plated 5/8×2 1/2 W/screws
- Card Holders (no pull) 1-1/2” x 3-1/2”, 2-Pack
- Label Holder 1/2” x 2-1/2”, pair
- Styles inspiration – 3 5/32″ long label holder in faux iron
- Label Holder 1-3/8″ X 2-5/8″ Satin Nickel W/ Pull LQ-PN1052M-SN-C
- Knape & Vogt Label Holder 2in Plus 1in
- 25 Nickel Plated Card Holders 1×1-5/8 Inches W/#2×1/4″ Screws
The Louis Philippe furniture collection features good looks with lovely clean lines and a bit of detail. If you are after a streamlined chest, this might be for you. The first time I came across a (modern) Phillipe Dresser, I just had to get it. I used to paint furniture and resell it. I personally have had the chance to buy the 6 drawer Louis Phillipe dresser twice, in addition, I have also sold a pair of the nightstands. All three sets were painted black, as all of the furniture was bought used, so they had scratches that needed to be sanded out. From my experience, let me tell you about these chests…..
The Advantages:
If you are looking for a really nice looking dresser, with classic looks, this dresser certainly pleases the eyes. It has very attractive lines, and a bit of detail in the molding around the top of the dresser.
- Powell Louis Philippe Cedar Chest
4pc Full Size Bedroom Set Louis Philippe Style in Antique White Finish
Louis Phillipe Black Bedroom Chest - 4pc Full Size Sleigh Bedroom Set Louis Philippe Style in Black Finish
Computer Desk with Hutch Louis Philippe Style in Cherry Finish
Coaster Louis Philippe Style Night Stand, Cherry Finish
The Drawbacks:
This set is made of selected hardwoods and veneers. The only draw back to these chests are they are made of composite woods, which means they are not made of solid wood. This dresser is good for staying in one place and not being moved around. I moved the dressers that I had painted, and although they didn’t damage them, it wasn’t good for them either.
This dresser does not hold up well to wear over the years. In fact, if you were to accidentally drop the chest while you were bringing it into your home, it would dent it permanently. This is what happened to one of the nightstands. We accidentally dropped it, and it bent the corners of the wood. While most chests made of solid wood would scratch, these chests would be permanently damaged. In addition, you would NOT want to put these chests in moist conditions. The wood on the drawers would expand. These sets are heavy, but the quality of wood is not so great.
These dressers operate on sliders. If you have seen an Ikea dresser, you know what I am talking about. Vintage and antique dressers often have middle support sliders, and wood separating the drawers. The modern day dresser doesn’t even use plywood, they use something similar to cardboard. I cannot remember off the top of my head what separated these drawers, but I believe it was the metal gliders. The draw back to these metal gliders is the drawers slip off of them so easily. On another note, they glide in and out, and function with modern smooth cabinetry.
If you are the sort of family that moves around A LOT, forget about this set, because it will get damaged over time. If you are intending to buy it once, and keep it in the same spot, it really is a great deal for the price point. It is one of the nicer dressers around for the price, but the construction isn’t top quality. For a little more than $300, it is a very nice looking dresser, you have to agree~
- A stunning solid wood antique
- Antique German Louis Philippe Chest- Bonnin Ashley Antiques
- Acme 25505 Louis Philippe Antique Chest –FlatFair.com
- French Custom Louis Philippe Style Desk -WOW!! Fireside Antiques


