Stylish Looks For Slip-covering Your Furniture
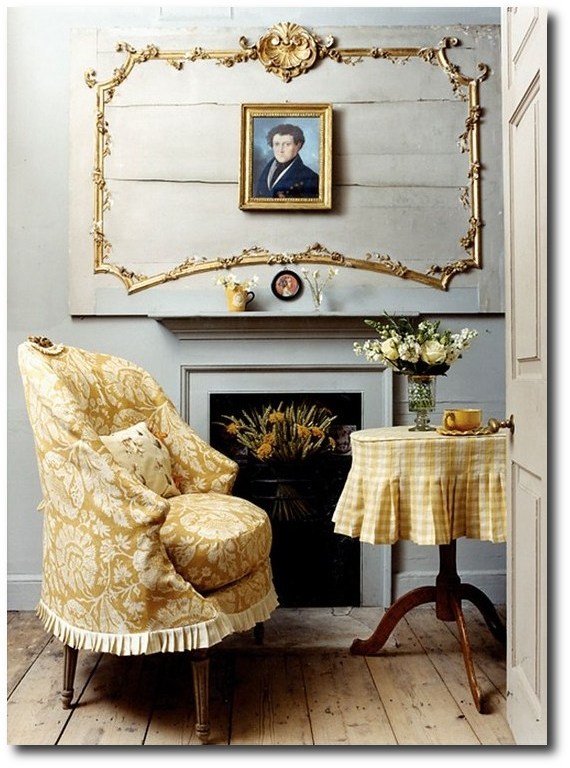
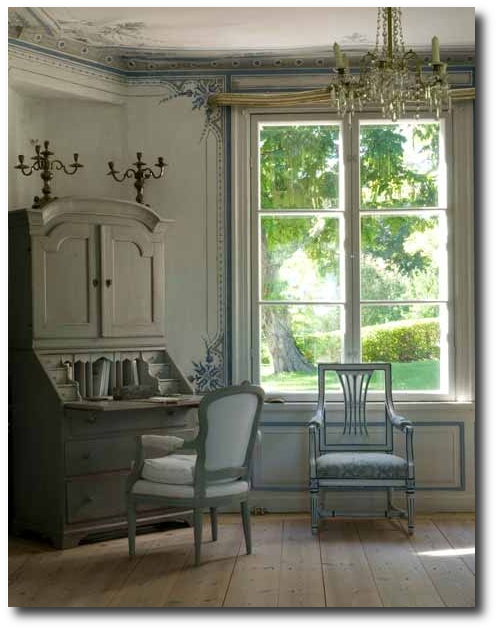
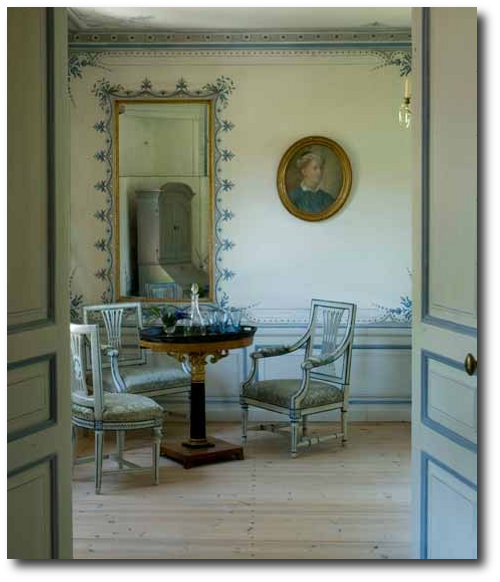
 Veranda May June 2012
When you think of slipcovers, you may have memories of the 80’s clunky furniture covered with slipcovers that were tied with over-sized bows and small scale stuffy florals with outdated colors. Interior design took a tumble in the 80’s and 90’s, however, interior design directions haven’t ever looked so good as they do now. Today, we are seeing an emergence of the simple raw materials become exciting again. Old weathered barns, which were once eyesores, fetch quite a bit of money, as the wood is recycled and reclaimed furniture fetches top dollar. Simpler interiors and quality materials have become a new way of life, as people throw away the cheap products mass produced overseas and opt for natural, raw, rustic and antique goods. Those who follow the design trends for the home aren’t shopping at the big box stores for their furniture, but rather they are after the unique looks which merge with their individual styles.
Slipcovers have a long history in interior design, because they offer change and functionality in the home. In the 18th century, the slip-cover had become a design tool for wealthy homeowners, who wanted a change from season to season. Slipcovers were made for furniture,and often coordinated with drapery. Slipcovers have always posed some challenges, mainly that they can be ill-fitting and poorly made. Wrinkled seats and sagging backs produce a careless appearance that gives a lax impression in even the most orderly room. Making slipcovers can be complicated, as they need to fit furniture well, just as a sharply made tailored suit can define a beautiful figure. If the slipcovers are made poorly, the lines of the furniture can be completely lost.
Slip-covers also posed some challenges with seasonal changes. Many would find the covers too tight, or too loose in different seasons. To compensate this, linen covers were made a bit larger, which could stretch with summer’s humidity and heat. The material would then have enough shrink for the change in the dry air for the winter. These difficulties are overcome by accurate measurements, and carefully following the lines of the chair when the pattern is made. Allowing several inches of material for tucking at the back and under the arms, a slipcover can be comfortable throughout the seasons.
Several Professional Tips
– One famous London upholsterer puts a strip of wood across the back of the seat before tucking the material in, to give added firmness.
– Elaborate detailing such as French pleating, cording, ruffles and special buttons add a customized look to any piece of furniture.
– Heavy linen, and cotton canvas have been popular as natural slipcover choices. The French tickings and cotton damasks make great bed covers, drapery and slipcovers. Consider using unbleached muslin with which also can be dyed in soft shades of blue, green, or yellow. Gingham and simple checks can give your room a Swedish, gustavian flair. Stripes lend a sophisticated touch to any room, and wear well, and are especially easy to launder. Chintz florals are quite attractive to look at, and do a terrific job of keeping the dust out and soil out than other fabrics. Chintz is the most expensive by far, and the most effective material for slip covers. The bold patterns of birds, flowers, and medallions of contrasting colors make it a pattern that is lovely to look at year around.
– Gathers, and wide flat box-plaits add interest to the bottom of slipcovers. These details can be used just below the seat of the chair, probably on a line with the upholstery or seat frame. This style works particularly well with French chairs with beautifully designed cabriole legs which are so decorative in themselves that they do not need to be concealed.
– Consider combining plain fabric colors with a few stripes, and some delightful flowered patterns.
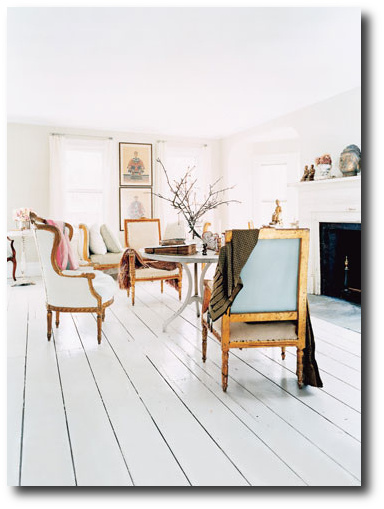
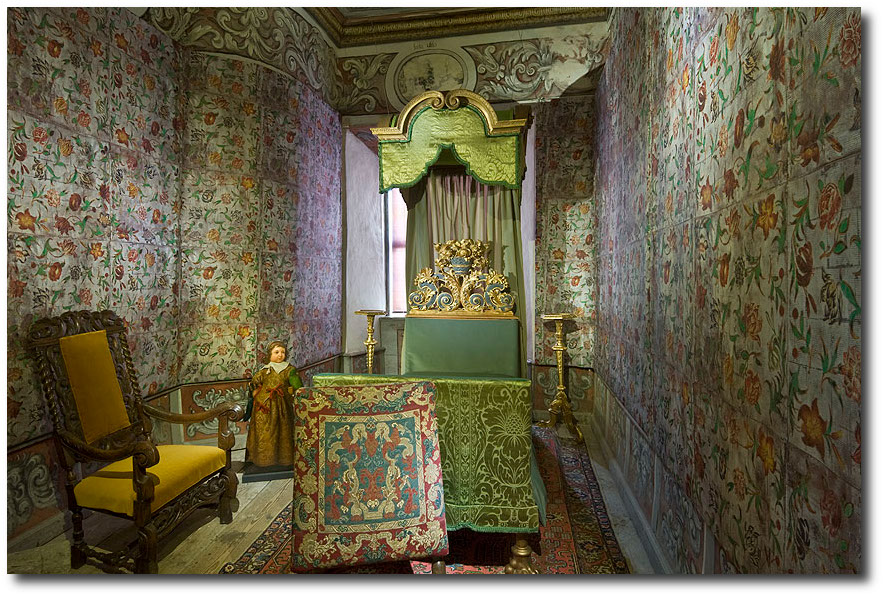
Pamela Pierce – Swedish Chair Natural Fabrics
Swedish Chairs With Linen Slipcovers from Biskops Garden

Dining room slipcovers by Donna Jenkins
Stephen Sills’s Holiday Decor – Veranda.com
Slipcovers From brucebarone.com

1.Stunning Wingchair Slipcovered –thebrownshed.com
2. Slipcovers From store.theseasidestyle.com
3.customslipcoversbyshelley.blogspot.com
4. Slipcovers Featured on brabournefarm.blogspot.com
Slipcovers In Neutral Fabrics

1, 3, 4 Unknown – 2. Slipcovers Featured on stylecourt.blogspot.com
 1.Heavy Ruffling From nineandsixteen.blogspot.com
2. Upclose Detail Of French Ticking –michellefritz.blogspot.com
3. Stunning Louis XVI Chair in Pink From Rachel Ashwell
Classical Slipcovers At Monticello. Photography by Charlotte Moss.
Thibaut Ad
Green Gingham Sofa –Tilly’s Cottage

1. Green Gingham Slipcover- Country Home
2.Green Desk Chair Slipcover – flickr.com
3. French Ticking Slipcover- pinkwallpaper.blogspot.com
4. Slip-covered toile Chair – Cathy Kincaid
Slipcover Your Headboard! Martha Stewart
A slipcovered chair, photographed by Russel Sadur.

Dropcloth Slipcover – The Twice Remembered Cottage
Image from Country Home

1.Tips On Making Slipcovers With Drop Cloths- missmustardseed.com
2. Checked Linen Gathered Slipcovers- cotedetexas.blogspot.com
3.Paula & Erika Table Covers etsy.com
4. Knife Pleats Around A Sink- countryliving.com

Jackie Von Tobel- Jackie Blue Home Blog

1.Slipcover With A Beautiful Large Bow- beekeeperscottage.com
2. Beautiful Mahogany Gray Painted Chair With A Toile Slipcover- whendecorating.blogspot.com
3. How To Make Slipcovers- honeybearlane.com
4. Pleated Slipcover- thecottagejournal.com
Slipcovers Over A French Sofa – peekingthruthesunflowers.blogspot.com
French Flour Sack Linen Tablecloth-Jeanne dArc Living Blog

Designer Kelley Proxmire
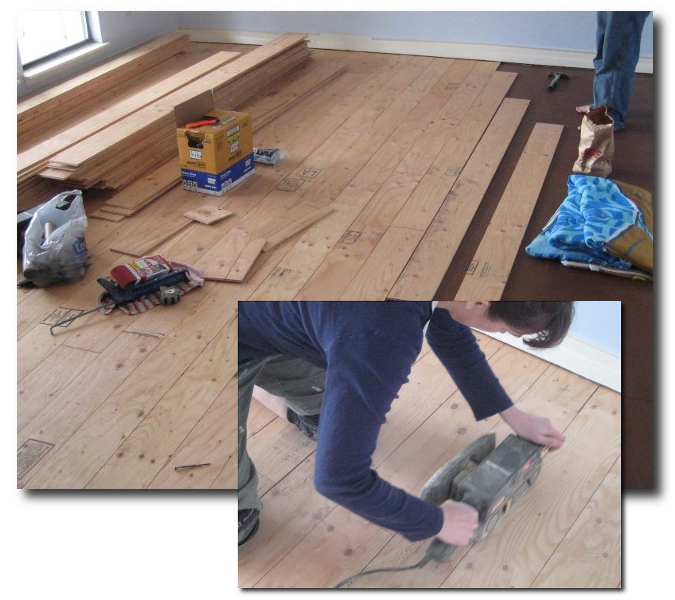
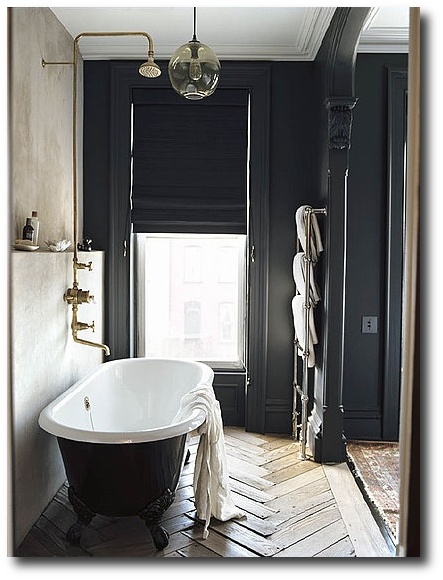
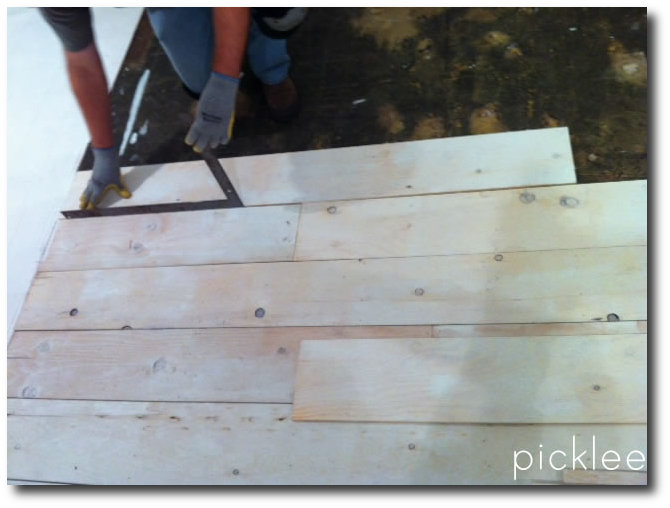
Plywood Plank Flooring, A Swedish Design Must Have – Part 4
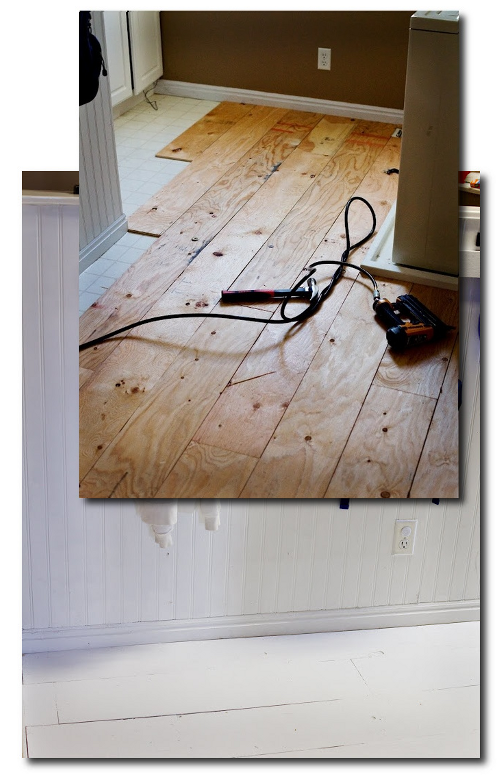
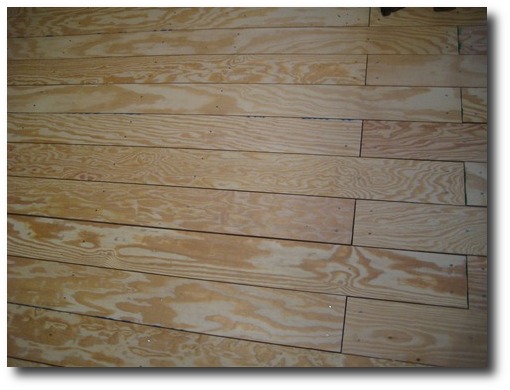
I stumbled across a DIY trend out there where people are cutting their own “planks” out of plywood. It seems rather unusual at first, but the results really surprised me. You get the look of real wood flooring which you can sand, paint, stain, varnish, or white wash, for fractions of the cost.
“We tore up nasty old carpet, then cut grooves in the plywood that was under the carpet to replicate plank flooring with a skill saw – and used a dremel to get closer to the walls. This worked better than the router which was recommended in the web article I got this idea from. We stained and then did three coats of poly. Everyone’s amazed that this isn’t ‘real’ plank flooring! We varied the width of the planks, using a 2×4 as a guide.”
There are a couple of links I want to share that might move you in the direction of considering this look.
1. Layers Of Learning Blog Flooring Transformation
Layers Of Learning Blog posted absolutely stunning photos of a room that they used plywood cut into 6″ strips of wood.
They mention in their article that plywood floors allowed them to transform their WHOLE house because of the low cost of the materials. This certainly a reason to consider this option. Many people can only afford a couple rooms with the other options. Plywood is so inexpensive, that you can do it yourself, and it is affordable.
Plywood gives you the option to cut wide planks with real grain. For those of you who want the REAL thing, this would be an affordable way of getting the look for less.
Buying plywood allows you to do one room at a time. It doesn’t matter if your project takes you a couple months to a year to complete, because plywood is practically the same from store to store. The finishing process allows you to dent, distress, and apply paint or stain which unifies the space.
Another plus to plywood floors is if something is spilled on the floors, which ruins several boards, all they would have to do is rip up the damaged boards, and replace them with the same finishing paint, stain or varnish!
Here are some of their costs:
Living room – 20′x13′ which equals 260 square feet.
$13.97 each on 9 sheets of 11/32″ “CD” grade plywood = $125.73, See the rest of the break down on their blog Layers Of Learning Blog
Here are some of their tips to consider.
Don’t Buy the Premium Brand Of Plywood
“There are different grades of plywood. “A” grade is the nicest, it comes with one very clean and sanded side. This is not what we went with because, as the guy at Lowe’s said, we can sand it ourselves and save big $$$. A sheet of “A” grade plywood costs about $28 in our market, but a sheet of “C” grade plywood is only about $14.”
Let The Wood Adjust To The Temperature Of The Room
” After the plywood is cut, stack it in the room where you’ll be laying it for a couple of days.”
2. Quarry Orchard Blog
Quarry Orchard Blog also put together a beautiful floor made from Plywood. In their “Plywood To Plank Flooring Tutorial“
They decided to tackle a redoing the room above their garage with a square footage of approximately 533. They decided to go with 6 inch strips that were all 8 feet long. They were shocked that it only took them an hour and 45 minutes to cut the sheets into the planks.
A Couple Tips From The Quarry Orchard Blog
– They started with the first board and squared it with the wall, leaving a 1/16 inch gap between the first board and the wall.
– Be sure to use a nail punch to make sure that the nails at least flush with the flooring.
– Clean up the look by being sure the nails are all in line and evenly spaced. Have a helper that can measure and mark the wood. They measured every 16 inches for each nail. Consider making a jig to help with the measuring and marking for where the nails are to go. This will enable you to line up the previous board and mark rather than measure for every single nail.
Check out the final pictures of this room! What a transformation!
A Break Down Of Their Material Costs:
16 sheets of 15/32 pine plywood @ $16.49 per sheet
9 gigantic tubes of Liquid Nail @ $4.75 each
10 lbs of cut nails (ordered from Tremont Nail Company) @ $69.63 (includes s&h)
4 gallons of Varathane polyurethane @ $37.46 per gallon
2 quarts of stain @ $9.99 each

3. Tidbits From The Tremaynes Blog
For their stunning transformation they used 4×8 sheets of plywood; cut into 8 inch strips, and laid it like a regular hardwood floor. They used an old nailgun, some pennies to space out the wood, for the old farmhouse-style look. The cost was $60. Fabulous!!
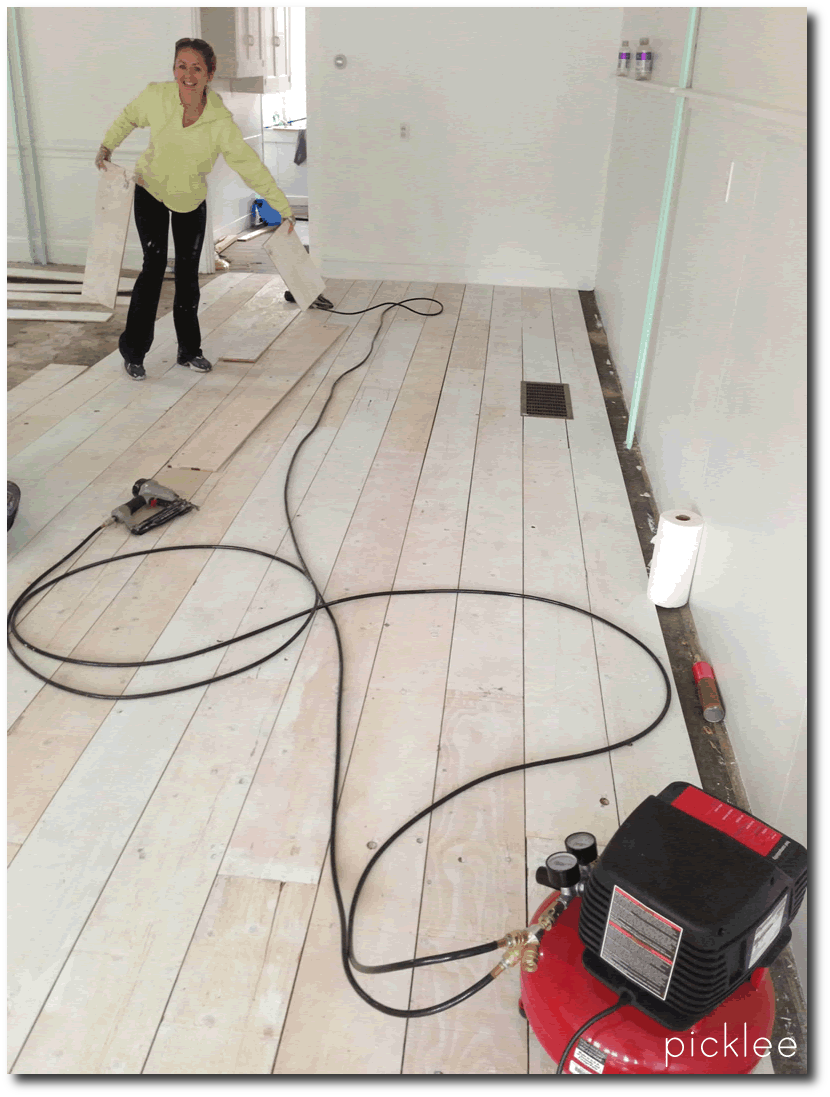
About to open a shop in Newport, RI, store owner Jordan decided to tackle the outdated carpet flooring that came with the shop. Being that the shop was a historic home built in the early 1700′s, she wanted something more period appropriate.
She decided to go with the standard 1/2″ thick 4′ x 8′ sheets at a cost of just under $20 each. In order to have zero waste, she chose to have the boards cut into 8 inch by 8 foot lengths, giving her six planks per sheet of plywood.
When she got back to the shop, she laid them out, and sanded all rough edges and splinters, and decided to white wash them before nailing them down. She mixed up 1/4 CeCe Caldwells Simply White Chalk Paint and 3/4 water. She then used a roller attached to a broom handle to apply a coat of the white washed paint to all of the planks.
After all the planks were dry, her fiance Brett, started working on nailing the planks to the flooring. They used Bostik flooring adhesive to the backs of the plywood planks, which were then laid into place and nailed into the floor. Brett used 1 1/2″ nails and shot them in on an angle. The nails were spaced out about every 12″, placing two all along either side of each plank. Brett used a metal straight edge for a spacing guide, which gave the perfect distance between planks. As Brett went on nailing down the boards, he used a table saw to cut some of them into different lengths so that the boards would have more of a staggered look.
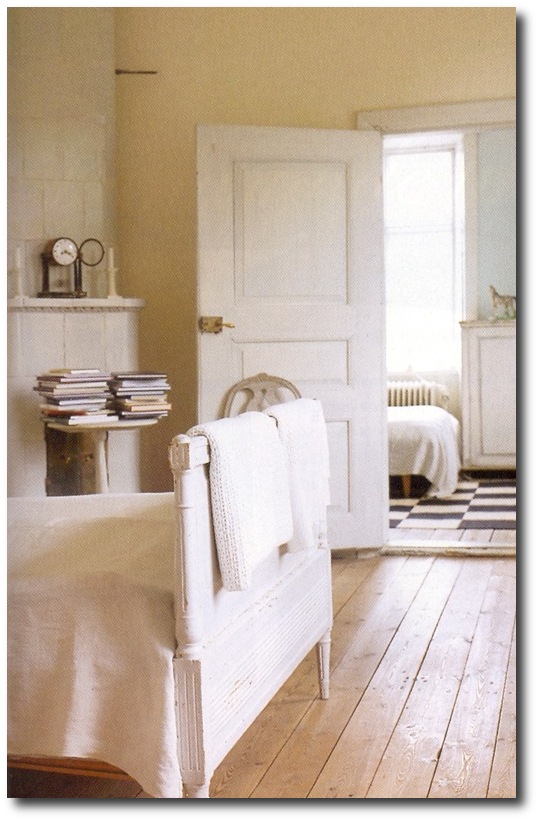
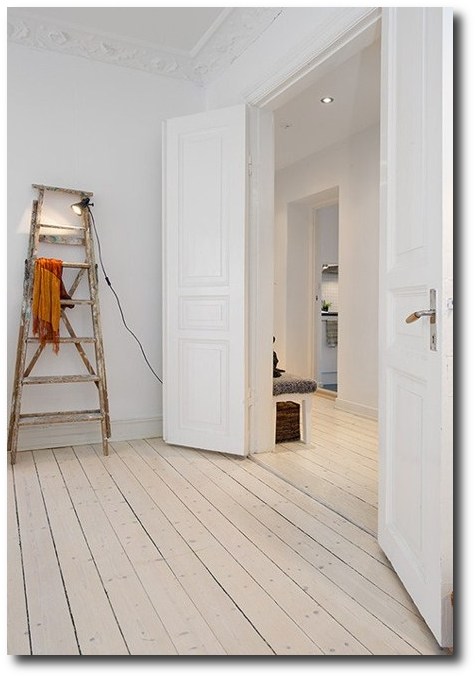
Some Additional Period Looks To Give You Inspiration:
- Stunning Antiques With White Washed Flooring- Unknown Source
- THE SWEDISH ROOM by Lars Sjoeberg and Ursula Sjoeberg,
- Photographs by Ingalill Snitt
- Classic Swedish Home With Wood Flooring- Painted White Gustavian Bed
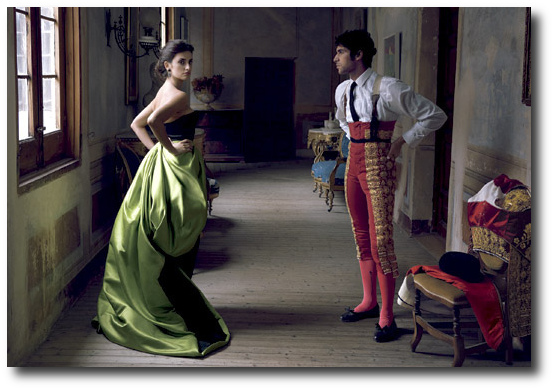
- Beautiful Planked Wood Floors White WashedCayetano Rivera Ordóñez & Penelope Cruz in Armani Privé – Made in Spain
- Photographed by Annie Leibovitz for US Vogue December 2007
- Distressed Wood Flooring- Make your plywood floors aged with translucent glazes
- Herringbone floors add personality in Jenna Lyons Brooklyn Townhouse.

![]()


The Romantic Baroque Style: Part 2 King Gustav Vasa

Gustav I of Sweden, born under the name Gustav Vasa (12 May 1496– 29 September 1560), was known one of the most powerful kings in Swedish history.
Gustav was the son of a Swedish senator and of a noble family whom played a prominent part in aristocratic politics of 15th-century Scandinavia. He was raised in the courts of Sweden, and participated in the fighting against Denmark. In fact, the connections his family had with the royalty at the time, supplied Sweden with three regents.
Gustav fought in the army of Sten Sture the Younger against Christian II of Denmark in 1517–18. Sweden at that time was a part of a union consisting of the Nordic countries (Denmark, Norway, Sweden and Finland), but the union was a mess in many ways. The Danish king, Christian II tried to dismantle the union by using brute force. King Christian attacked Sweden in 1520, and the Swedish Regent was killed. It was then that Gustav found himself held hostage in Denmark, but later returned to Sweden when the King promised to show leniency towards those nobles who wanted to fight back.
The Danish king, Christian II then called a “friendly” meeting with all of the officials, but Gustav chose to stay home. Gustav found himself spared because of that decision. Christian II rounded up the nobles, and bishops and had them beheaded in the Great Square in Stockholm. Gustav’s father, brother-in-law and uncles were murdered, together with about 75 other men in a mass execution known as “the Blood-bath of Stockholm”.
The Vasa family lands were confiscated, and most of Gustav’s family were imprisoned. Instead of hiding or running, he rose to the occasion and started fighting back by engaging the people of Sweden to rise up for their country. He started sowing the seeds of rebellion against Christian II . The army of Denmark pursued him, but he managed to escape which many tales of these adventures are told today. He managed to receive backing from the Hanseatic League, which also wanted the Danish king weakened. This union allowed him to gather together a sizeable army, and in 1521 he was elected Regent of Sweden. This army then attacked the Danes in several engagements, and step by step managed to oust the Danish king.
Gustav pushed through to establish Sweden’s independence, and his leadership through this time may have been what was responsible for his election as king. In 1523, at the age of 27, Gustavus was elected King of Sweden. He set about reforming the country, using methods inspired by rulers like Henry VII and Henry VIII of England.
Gustav made Sweden an independent state and gave his country, for the first time in a century, nearly 40 years of stable and intelligent government. Gustav managed to unite Sweden, and also laid the foundation for Sweden’s professional army that was to make Sweden into a regional superpower in the 17th century. He managed to shape the foundation for modern Sweden.
Beyond those great achievements, he ranks among the heroes of Swedish history because of his struggle to turn Sweden from a Catholic country to a Renaissance state with a Protestant church. This was by far some of the hardest wars many countries had to battle.
In the documentary A Lamp In The Dark: Untold History of the Bible, goes into great detail the tremendous struggle individuals had to endure throughout the Middle Ages. I highly recommend watching this documentary on You tube to gain a better appreciation for the battle against the Catholic church.
The Catholic church was against having the bible in the hands of the common man, and threatened imprisonment and death to any persons who disobeyed their rule. Valiant warriors of the faith in England such as John Wycliffe, William Tyndale, Martin Luther, considered the cost for the sake of sharing the Gospel that salvation IS through Jesus ALONE, not through works, or anything else. They rejected the notion that the Catholic church set forth such as “sacrament” which individuals had to confess their sins to a priest instead of through prayer to our heavenly father to forgive our sins. (1 John 2:1-2)
The Catholic church positioned itself in control of individuals souls (salvation), and even went as far to ask money from people whose loved ones had died whom could be removed from “Purgatory” (Hell), which they taught every believer goes first, which was contrary to scripture. The Catholic church’s sheer dominance made them extremely wealthy because of the vast amount of people willing to paying money to remove their loved ones from the “Purgatory”, and this allowed the Catholic empire to throw their weight around in many countries. Believers also fought ideas brought by the Catholic church that the Pope was Yahweh himself on earth, stated by Pope Leo XIII, Pope Innocent III, and Pope Boniface VIII, which contradicted scripture. Once the common people were able to read the Bible, through the Protestant Reformation, they could hold the Catholic church accountable by the scriptures themselves.
Gustav fought hard to ensure the triumph of Lutheranism (named after Martin Luther), and the suppression of Roman Catholic customs. Gustav Vasa has been known as the founder of modern Sweden, and the “father of the nation”. Gustav looked up to Moses, whom he believed to have also liberated his people and established a sovereign state. Gustav I’s breaking with the Catholic Church is virtually simultaneous with Henry VIII doing the same in England; both kings acted following a similar pattern.
To understand the Baroque period, a person must take into account the religious and political tensions at the time. The Catholic church during this time was a very powerful entity and one of the biggest customers of of art. During the seventeenth century artists were being asked by the Catholic Church to create pieces of art which then could transend a message through which could be then understood by the uneducated common people.
The Catholic Church through this time was going through some major changes known as the period of ‘Counter – Reformation’ which began with institutional changes within the Catholic church as we discussed earlier. The clergy recognized that they could communicate through art by using the more theatrical ‘Baroque’ interpretation of religious themes. The Church buildings were designed and decorated in such a way which the Catholic church itself was trying to build it’s own empire kingdom apart from the Kingdom of God which we are told through the bible was the bodies of his people, not buildings and objects.
The mass amount of wealth church accumulated through using the very word of God in deceptive ways allowed them to buy thousands of paintings, thousands of statues, and buildings that were the best of the best through this time period. They owned the nicest buildings, and the most beautiful art across Europe, so it was no wonder why their style at the time became the design that many copied in architecture, interior design and so forth.
The upper classes ALSO loved to show off their wealth and saw this new style as rich, and unreachable for the common folks, so they embraced it, hoping to stand out. Wood carvings appeared lavish, and obviously was a style that many of the peasants could not afford. Baroque art and architecture was one approch they used to wave their money for the world to see.
From Italy, Baroque quickly spread to essentially every country in Europe. Each country incorporated its own customs and heritage with Baroque. Some were more extravagant and others more conservative with the design style. In Italy we saw tremendous detail in the furniture, where as in Sweden we saw more of a refinement with the style. The overblown carved details were softened, and mimimized. During the middle of the 16th century the Baroque Era gradually gave way to the Rococo, and this wave of style change hit each country at a different time in history.

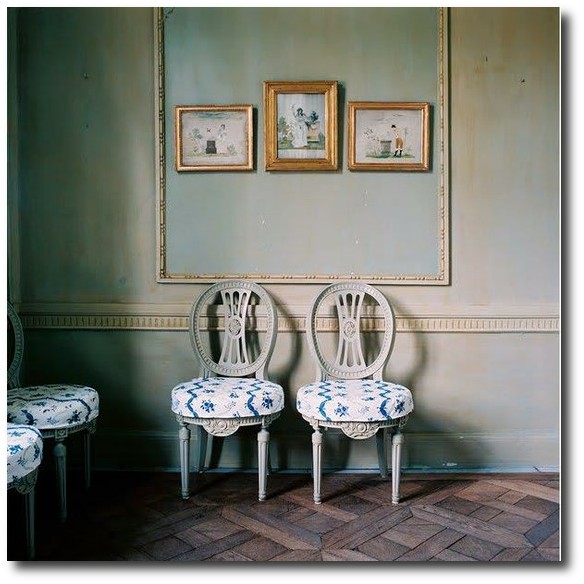
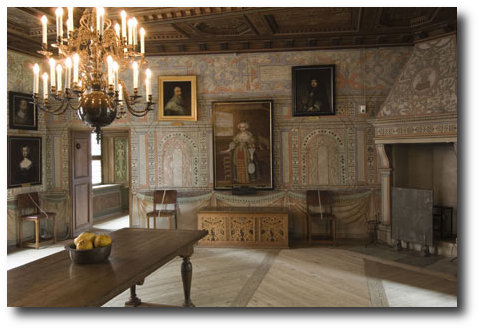
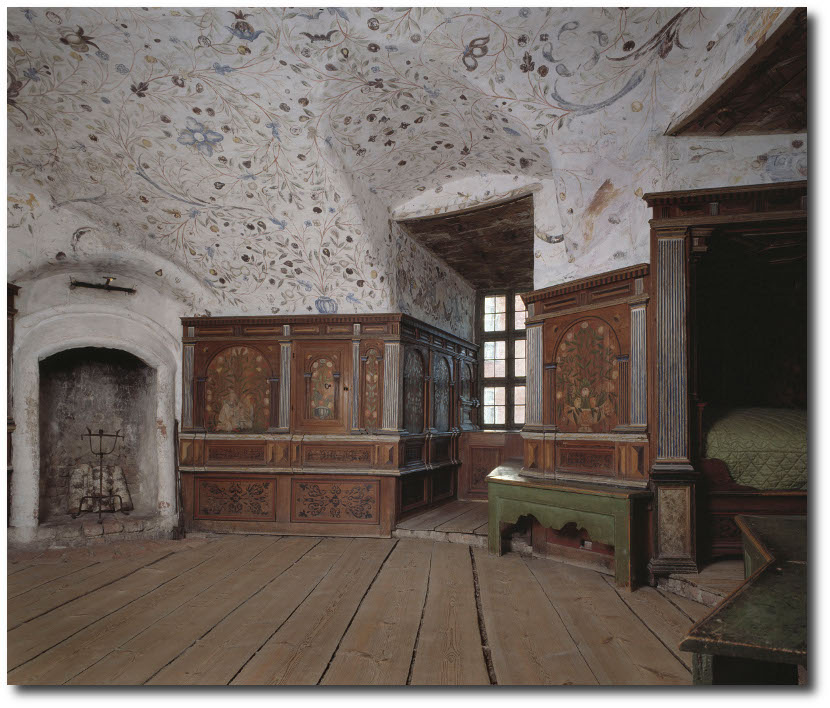
Gripsholm Castle belongs to the famous castles in Sweden.
This view shows how kings slept in the chamber of Charles IX.
Gripsholm Castle, Stockholm – Home of King Vasa And The Royal Family
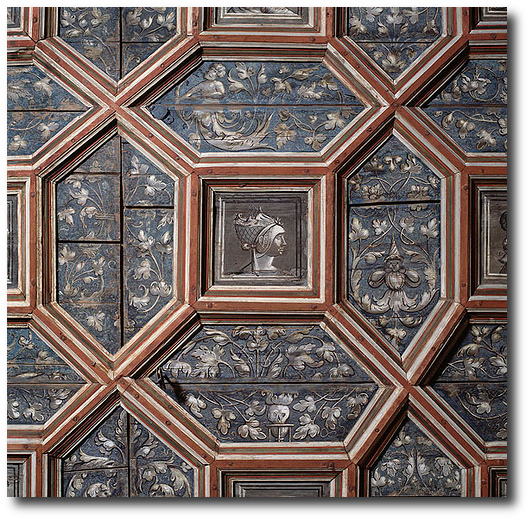
Gripsholm interiors – Roof decorations National Museum Stockholm’s Flicker
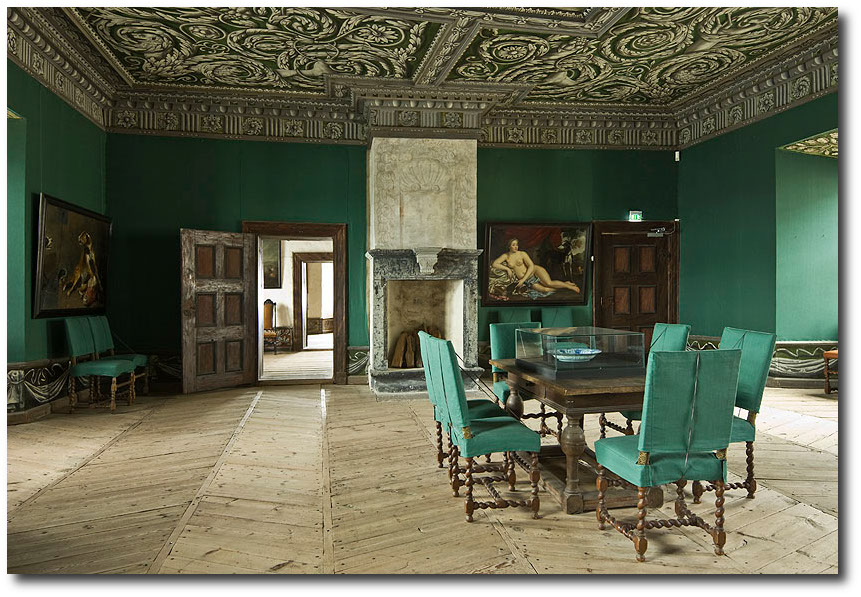
Swedish Baroque Style Seen in The Linnaeus House -Elmar Eye’s photostream
National Museum Stockholm’s Flicker
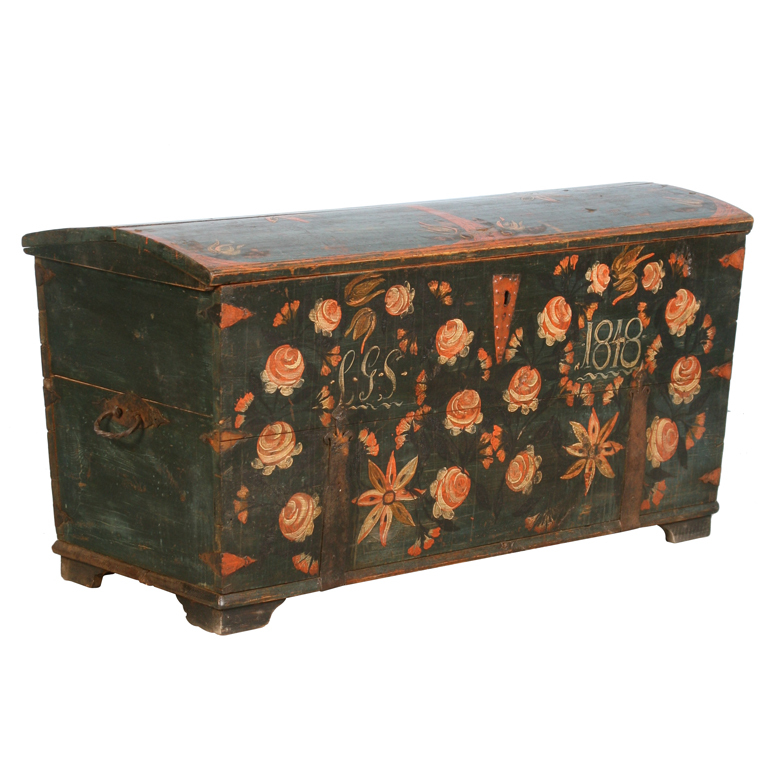
Antique Original Painted Swedish Trunk, dated 1848 From Scandinavian Antiques
The reign of continued with Gustav’s sons Eric XIV, John III, John’s son Sigismund, and finally Gustav’s youngest son Charles IX.
Under Eric XIV the Reformation in Sweden proceeded on the same lines as during the reign of his Gustav Vasa, retaining all the old Catholic customs not considered contrary to Scripture.
After 1544, when the Council of Trent had formally been declared, the new teachings set forth by the Catholic church became obvious to that the Christian Bible, and the Catholic church were quite different. In fact, The Catholic Church created horrible laws at the Council of Trent that made it a death sentence for anyone who said the bread and wine used in Holy Communion were only symbolic. Sadly this entire history of the Catholic church has been covered up. Today the laws set forth in the Council of Trent still stand, and are upheld by the current Pope. The Popes during Vatican II Council have accepted the entire ratification of the entire council on this decree (Council of Trent, Session 13 Chapter VIII, Contradicting Hebrew 9:27-28; 10:11,12, 15)
King Gustav Vasa went on to publish a bible in Swedish for the people of his country. If he attended the “the Blood-bath of Stockholm” perhaps Sweden wouldn’t have Yahweh’s holy word, and perhaps never knew what Yeshua (Jesus) did on the cross for them. The Swedish Bible was published in 1540-41. The men behind the translation were Laurentius Andreae and the Petri brothers Olaus and Laurentius. Of them, Archbishop Laurentius is regarded as the main person. However, had the work not been commissioned by the Swedish King Gustav Vasa, who had in effect broken with the Pope in Rome in the 1520s, the work would not have been possible. The Bible follows the German version by Martin Luther from 1526 closely, not only in language, but in the fonts used and the typography as a whole. The Danish version, printed a few years earlier, also did this.
Charles Spada’s Normandy Home- See Part 1 and Part 2
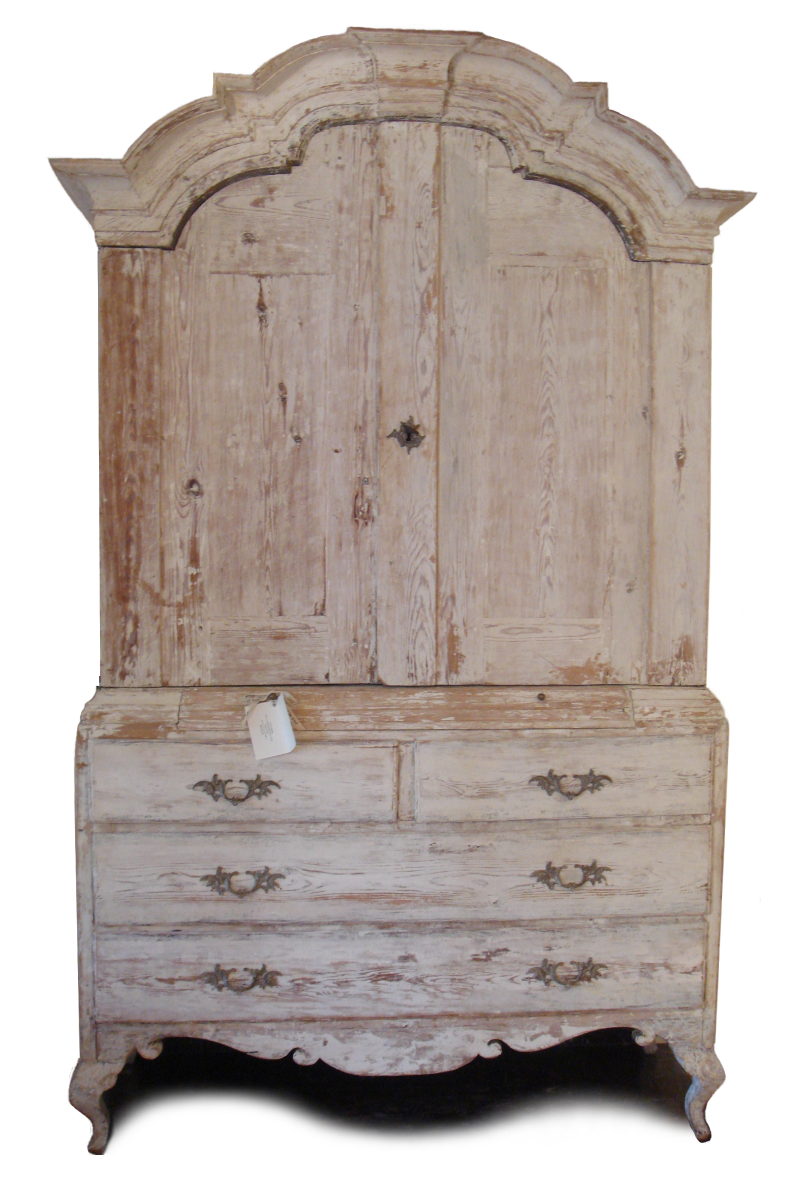
Painting Swedish Looking Furniture – 3 Tips / Part 3
 Picture Credit Habitania Work Rooms
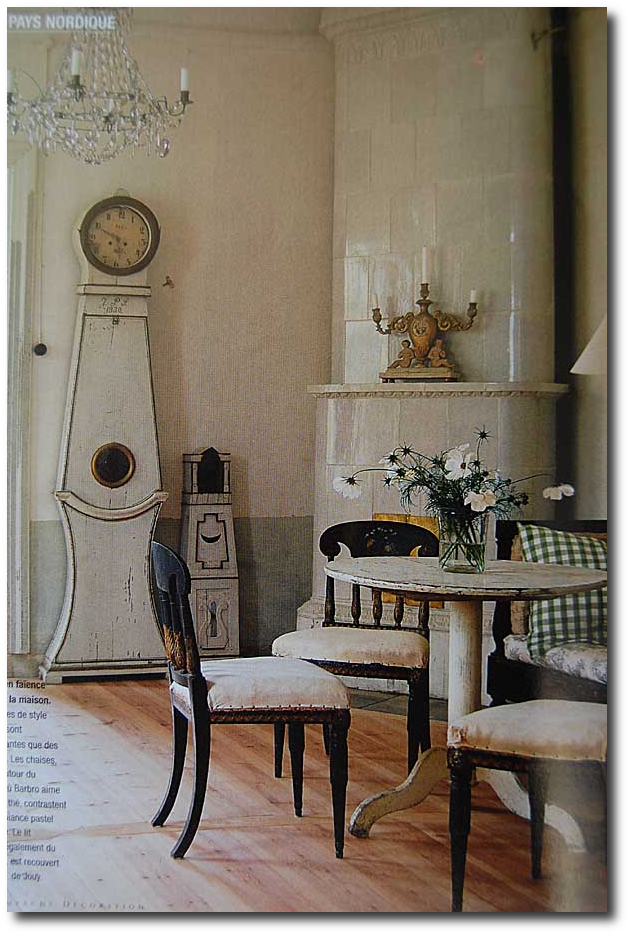
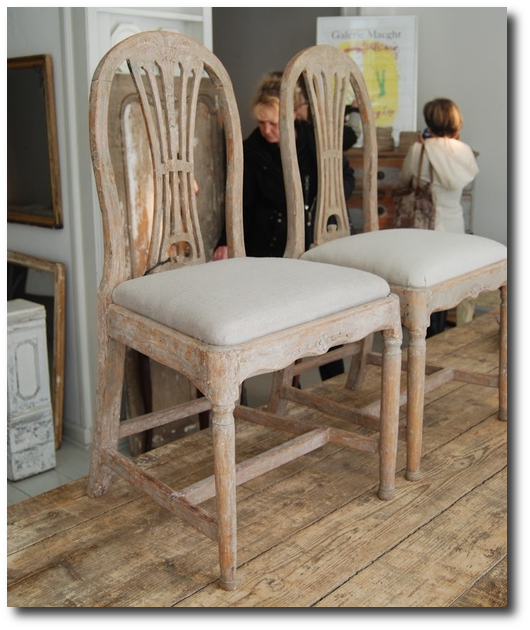
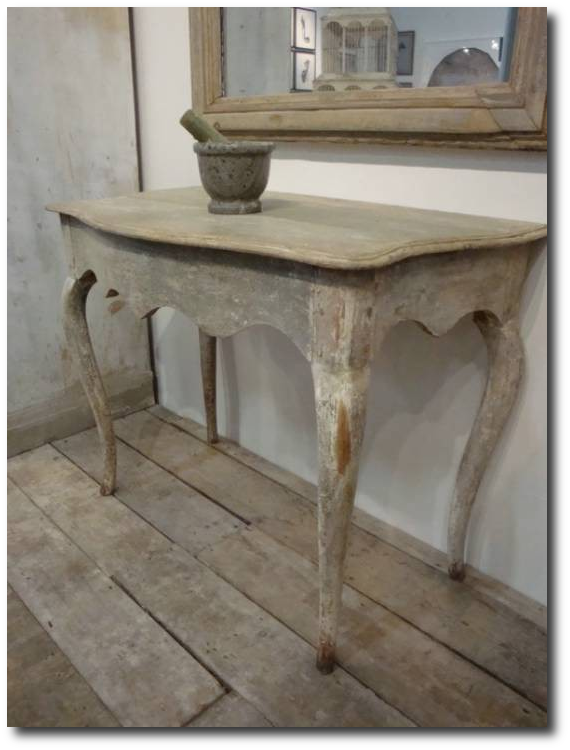
As we discussed in Part 2, Accent furniture, such as Gustavian chairs, smaller tables, drop leaf tables, stools, and benches can be brought into the home, and used instead of the larger scaled furniture that we are used to today to achieve that Swedish Gustavian look.
Another element that draws people to the historical Swedish look is the painted furniture. There is an art to getting the rich patina that is seen on true antique furniture found in Sweden. Almost anyone can find vintage French furniture in their area which can be distressed using a number of techniques to give it a historical appeal.
In this early post I wrote, I describe some of the paint techniques I have used to achieve great white painted furniture.
Here are some of my best tips to getting realistic Swedish painted finishes……
1. Work with colors that are muted. If you have ever mixed paint before, think about the colors that are produced when black or white paint has been added to a color. In the 17th and 18th century, there was a limited color palette available, so black and white paint was added to an existing color to produce a shade that was darker or lighter. On one of my pinterest boards, I compile some colors that will give you ideas of ranges of hues that are very appropriate. Annie Sloan has a wonderful range of colors which all are muted, yet vibrant paint shades which I suspect were based off the French style that she is so attracted to. She has put together a fabulous palette of colors which would work in any French or Swedish styled home.
Don’t ever work with colors with really bright pigments. I cannot blame anyone for being confused as there are thousands of shades of paint to pick from. The furniture should look aged, and color appropriate for the century you are after. I guarantee you, getting a really nice finish on a piece of furniture doesn’t have to be complicated.
2. Strip Or Sand To Get Down To Bare Wood.
A raw wood piece of furniture is always the best to work with. Although finding a piece of furniture that is untouched with paint rarely happens. Starting off with a piece of furniture that is not painted is ideal, but if it does have paint, consider comparing the the color you have picked out to the color the furniture is painted in currently.
Would you mind having the original color showing through?
If not, consider spending the time stripping off the paint. A perfect strip job isn’t necessarily if you plan on re-painting it, but enough of the paint removed will give you a new wood surface to work off of.
I have seen black painted furniture with distressing showing white beneath, and it doesn’t look great. A base color of red looks terrific with black painted furniture, or just plain wood. If you don’t want to strip the furniture, (as it is a lot of work) consider giving a good deep sanding to the furniture, especially to the areas you plan on distressing.
Often times if stripping the furniture is something I don’t wish to do, I sand the furniture quite well as a first step, paint it in the color I plan on working with, and then sanding it again as a third step. This allows me to touch up the original paint color that shows through, while leaving some of the distressed areas that show off the wood. It is a lazy way of getting the finish, but the results are quite nice.
If you plan on doing multiple shades such as the chest below, consider colors that work really nicely together. White works nicely as a top color.

Swedish Distressed Chest From Atelier September
Distressing gives your piece of furniture a depth, which is often seen in Swedish antiques. I am not afraid of roughing up my furniture, and I am not afraid of altering an antique. Many antique dealers caution people from painting furniture, because it does loose the natural patina, and because of that, it often looses the value. This is a wise piece of advice to those people who are looking to “invest” in heirlooms for the value.
If you always wanted a white distressed cabinet, paint it, and don’t be afraid to do so. My motto is that you have to first love the piece, because after all, it is in YOUR home. Your children may have a totally different style in mind for their own home, so do what makes you happy, rather than looking at furniture as items to pass down to family.
I used to sell used furniture for a hobby, and always ran into the problems with paint sticking properly. Either you tore off your arm by sanding the heck out of every piece, or you ran the risk of the paint peeling later on, which lead me to use oil paint. Not every oil paint brand is the same. Some brands are so hard to work with, that they will make you pull your hair out. It is almost impossible to find oil paint in a finish that is either flat or eggshell. You won’t find glossy Swedish antique furniture, so don’t use it on your furniture. The look should either be eggshell, or satin.
Cover Stain By Zinsser is a fantastic oil primer which I discovered by accident, and almost was beside myself when I discovered how well it performs. You can buy this at Home Depot and almost every Hardware Store, and the best part of this paint is that it is TINTABLE in almost all the lighter shades of paint samples such as Behr, Martha Stewart, and so forth.
High Hide Odorless Oil Primer without Sanding – Odorless Primer
I bought the paint, because I couldn’t send out a piece of furniture which would later peel. I wanted a paint that could stick to anything and not scratch. Oil based paints are not environmentally friendly. The trade off with this paint is that it has a heavy smell which disappears after it has dried. You will need to use a paint respirator, and I emphasize that recommendation.
The most surprising aspect to Zinsser’s Coverstain Primer is that it is not a thick paint. It is rather thin, and goes on like spreadable butter. You rarely need an additional layer of paint, because it is oil after all, and isn’t like water based paints. Oil paints tend to self level as they dry, leaving almost no brush marks. Oil paints do cover well, and hold up wonderful. Unlike other oil paints, which can take up to a week to cure, this Coverstain dries to the touch in 3 hours, and cures over night.
The other reason why I recommend this product, is that it is sand-able. Almost every other oil paint brand I have tried doesn’t sand very well, and often leaves the finish needing an extra coat. Because Zinsser’s Coverstain dries flat (matte) sanding blends in rather nicely. In the past, I often added two coats of the tinted primer, and then sealed it with a Polycrylic water-based sealer.
Polycrylic is one of the best finishes to use on white based furniture, because it doesn’t yellow over time, like polyurethane does. With the polycrylic, I would apply it with a brush, and then with a damp white cotton wash rag, I would just wash it off. This would give me a seal to the paint color, while at the same time, maintain the flat, or eggshell finish that I enjoyed.
Another tip I would recommend is to buy a good quality angle paint brush for water based paints. I have used these with my oil paints, and my brush sits in paint thinner for weeks, and it is still not damaged. Regular chip brushes are ok, and inexpensive enough to throw out, but a good quality brush won’t leave paint strokes. Someone suggested to me to invest in an expensive brush, and I pass on those words of wisdom.

Swedish Accent Chair With A Fabulous Paint Finish $506
18th Century Buffet, circa 1760 Jane Moore Interiors in Houston
Picture Originally Featured on Indulge Decor Blog

Stunning Swedish Styled White Painted Accent Chair
Neoclassical Swedish Styled Accent Chairs Sold In Pairs $983
3. Glaze Your Furniture With Brown Glaze…..
Glazing is so easy, it takes minutes. If you can wipe your table after dinner, you have the skills to glaze! It is that easy. A glaze is a translucent binder which paint pigment is added to the mixture to produce a translucent color. You can buy glaze mixed together at your local hardware much like ordering paint, or you can buy glaze alone and mix in paint yourself.
Buying brown glaze already mixed will go a far way if you paint furniture for a living. I used it on all my painted pieces, including my white furniture.
Blend & Glaze Decorative Painting Liquid
Ralph Lauren Faux Technique Glaze
I have discovered that glaze can be applied in two ways. You can apply it with a paint brush, let it stand for 3 minutes, and take it off with a slightly damp rag. With white furniture, even though you may feel you removed a lot of the glaze, the little bit that is left gives your furniture that slight change in color.
With flat finished white furniture, I give some wise words of wisdom. Add a coat of polycrlic before you glaze. You could even dilute the polycrylic with a slight bit of water, OR, just brush on a very small amount on to your furniture, such as dry brushing techniques. The reason for this, is that your furniture can turn a shade of brown, which is not what you are after. White furniture will have a hue of brown, but you don’t want the glaze to STAIN the paint.
Another trick is to work with a creamy white, not a bright modern white. Your whites should always have undertones of brown or green in them. When glazing white furniture, if the finish is flat or eggshell, you will need to work fast in pulling off that glaze. If the finish is satin, you will have a bit more time.
For painted furniture such as blue, or darker paint colors, glaze can be added, and it makes a world of difference. Often times I just paint on the glaze, such as you would just dry brushing the furniture. I use the term “dry brushing” as your paint brush isn’t loaded with paint. A small amount is necessary to make a dramatic difference. A brighter colored blue, will be muted when brown glaze is added, so experiment with brighter paint shades with brown glaze, you might be surprised what beautiful finishes can be achieved.
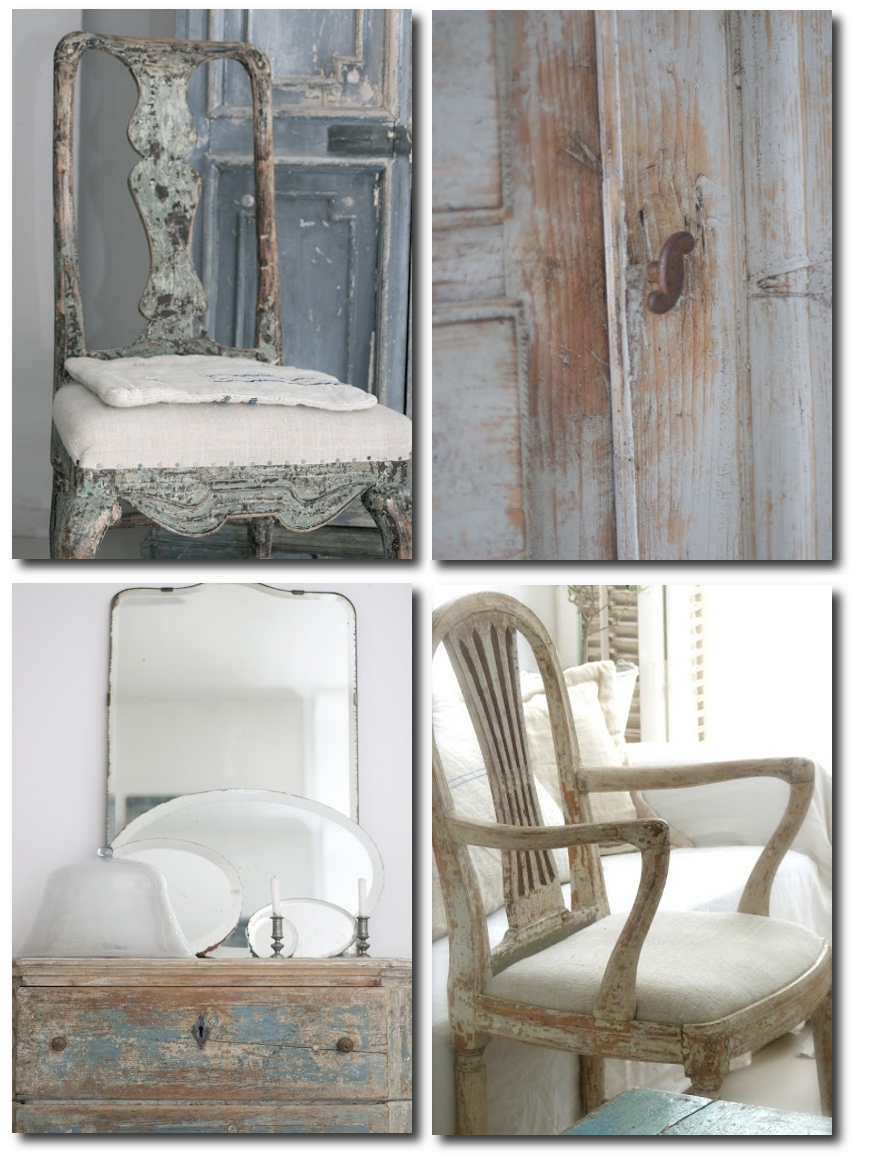
These Swedish chairs were likely scraped down to the original paint
Look how nice white upholstery looks with gray paint.
Originally featured on Romantiskahem.blog
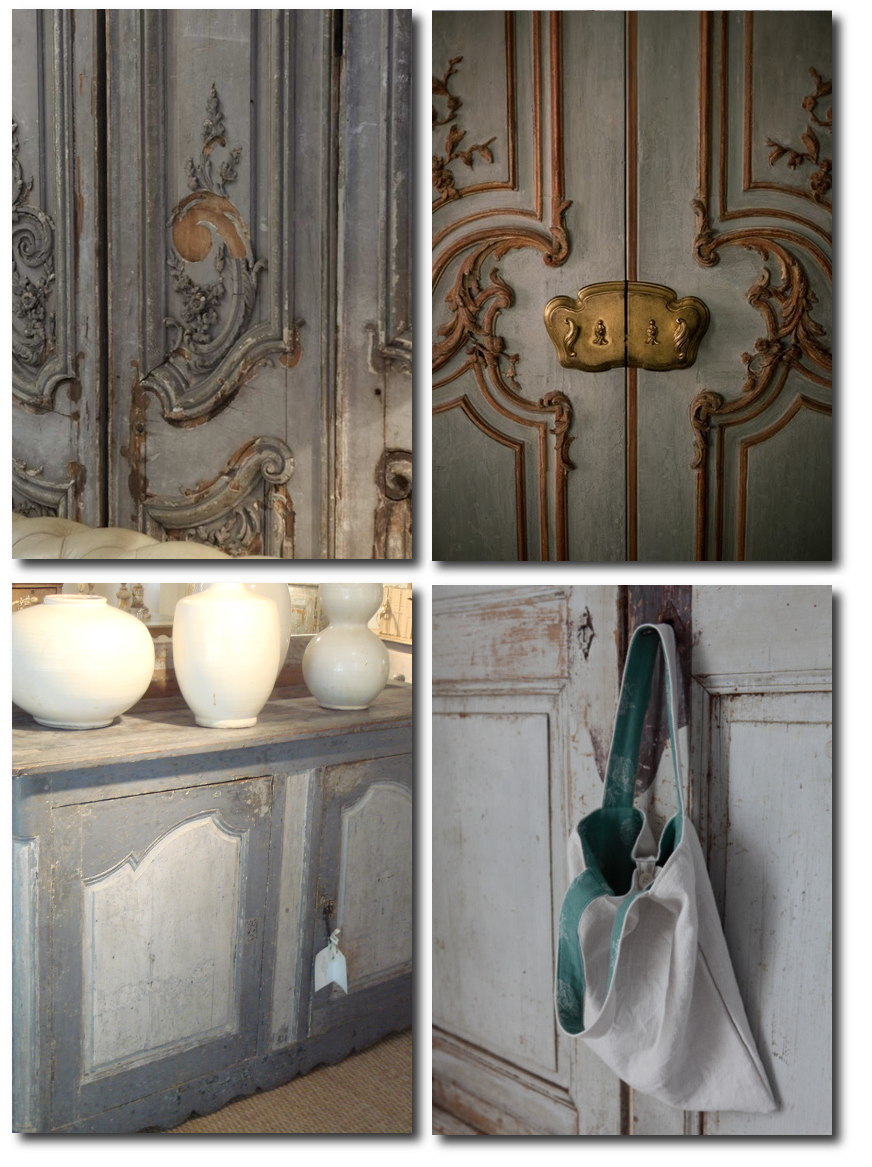
This beautiful console table featured on The Paper Mulberry Blog, originally from Appley Hoare Antiques

Tara Shaw Swedish Chest- Coach Barn Now Sells Tara Shaw’s Collection

Reproduction Swedish Tub Chairs From Amazon $775

Swedish Distressed Chest From Atelier September
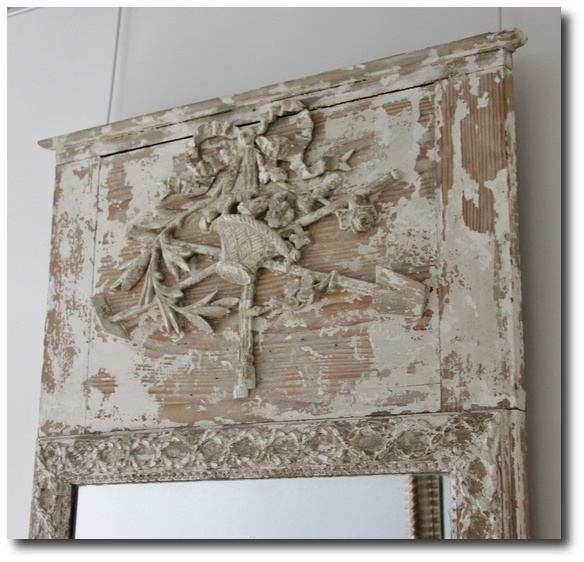
A Stunning Trumeau Mirror From Tone on Tone Antiques,
Featured on Henhurst Interior Blog

Swedish Aged Paint Finishes From Antiqbr Blog

An extravagant painted sofa in terrific blue gray paint with painted ormolu
From Tone on Tone Antiques Featured on Featured on Henhurst Interior Blog
Swedish Aged Paint Finishes From Antiqbr Blog
A Few Previous Articles Of Interest
- – White Painted French Furniture– The French Provincial Furniture
- –25 Ideas Of How To Incorporate Orange, Pink and Coral Into Your Home- The French Provincial Furniture
- – Ideas For Embellishing Painted Furniture– The French Provincial Furniture
- –French Provence Red Check Textiles– The French Provincial Furniture
- –Distressing Painted French Provincial Furniture

27 Breathtaking Swedish Wall Clocks

Find Cartel Clocks On Ebay- See it here
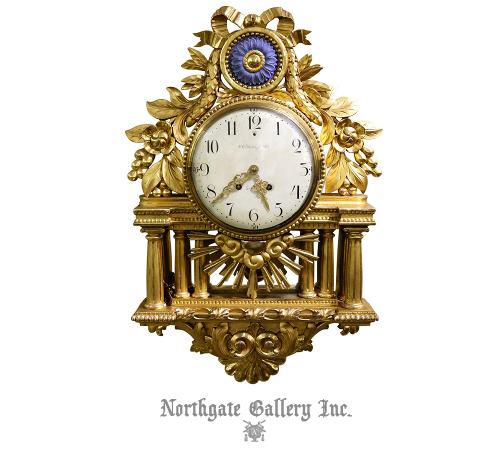
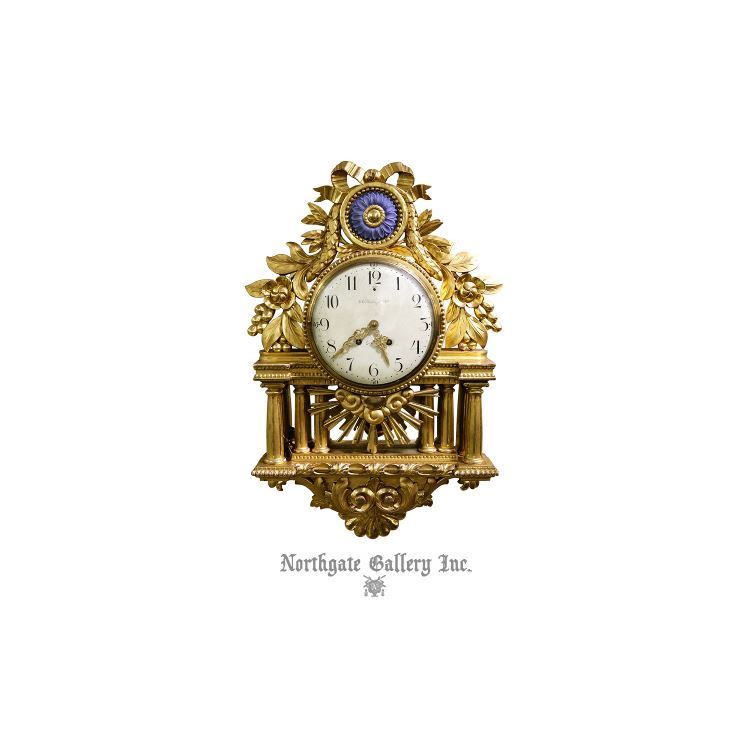
A Continental Gilt Wood Cartelle Clock, C. L. Malmsjo & Co., Goteborg-
A Continental gilt wood cartelle clock, C. L. Malmsjo & Co., Goteborg, late 19th century, 8-day bell striking movement by Lenzkirch, painted enamel dial, Arabic numerals, within an ornate pierced and carved case with laurel leaf decoration and a ribbon cresting, signed dial and movement – Northgate Gallery Inc.
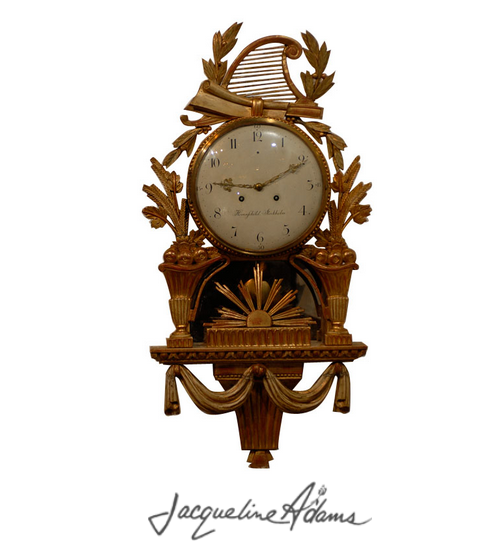 18th Century Swedish Giltwood Cartel Clock –Jacqueline Adams Antiques
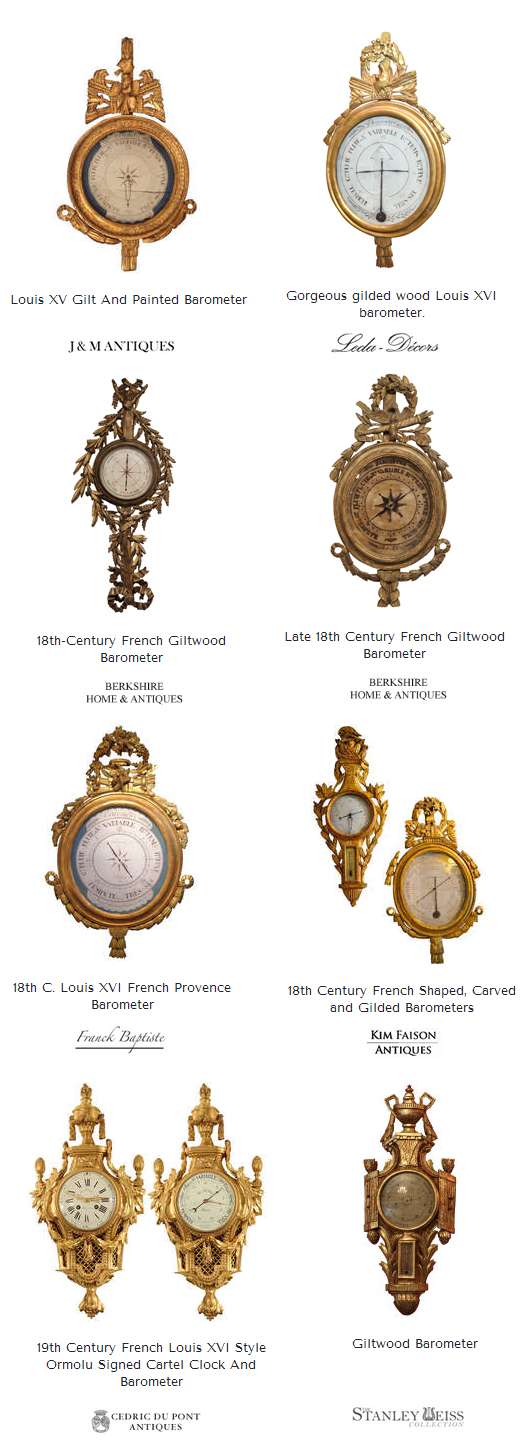
18th Century French Giltwood Barometers

Swedish Painted Grandfather Clock Talisman London
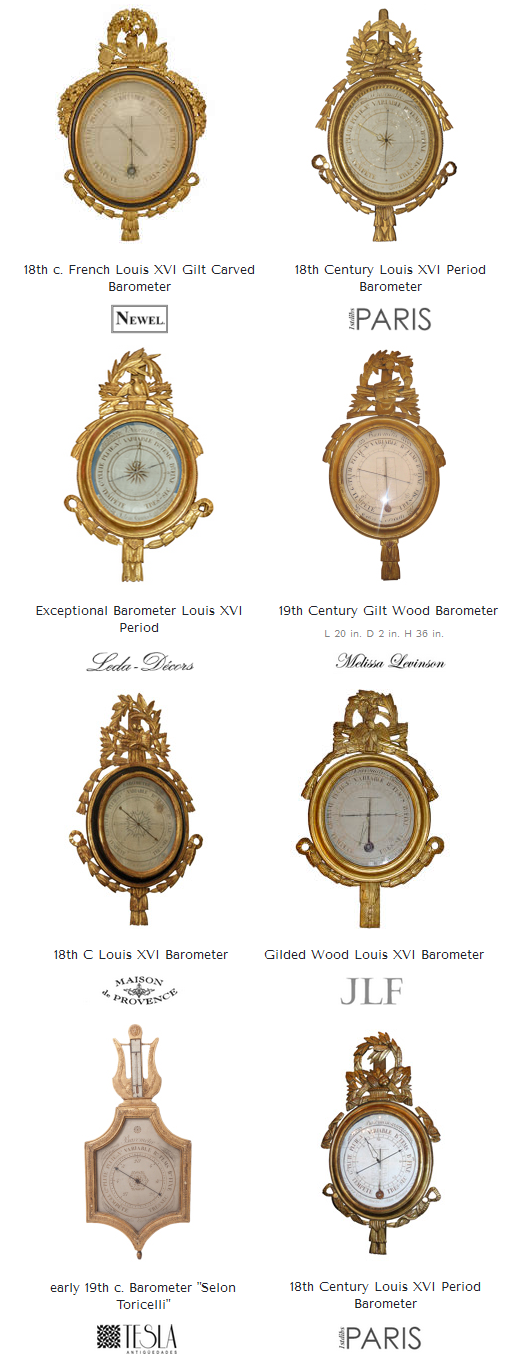 18th & 19th Century French Giltwood Barometers
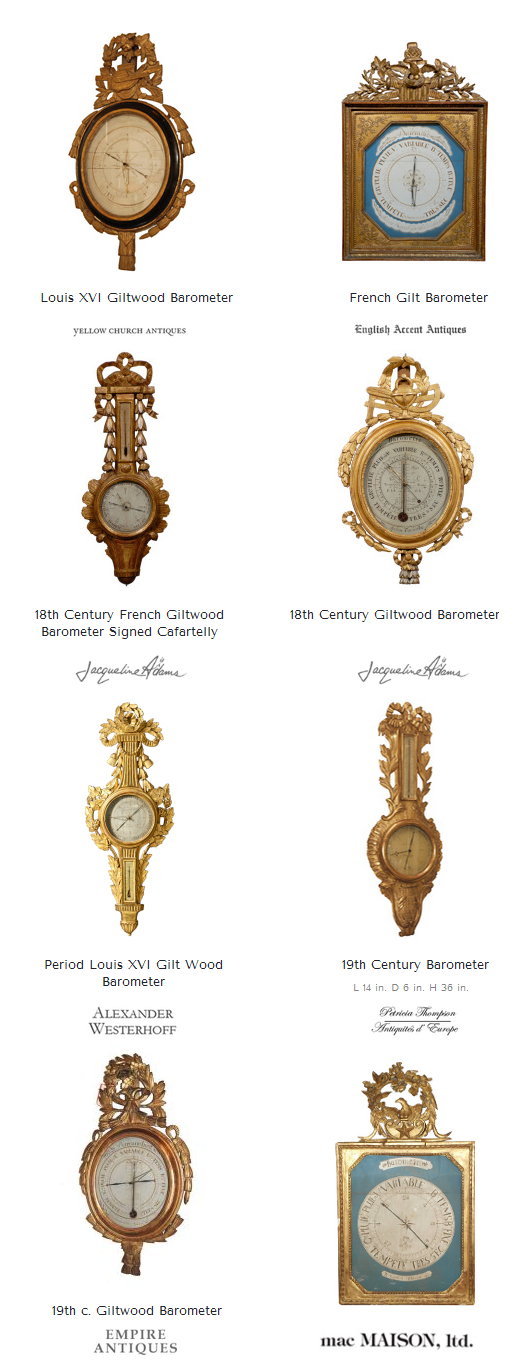 18th & 19th Century French Giltwood Barometers
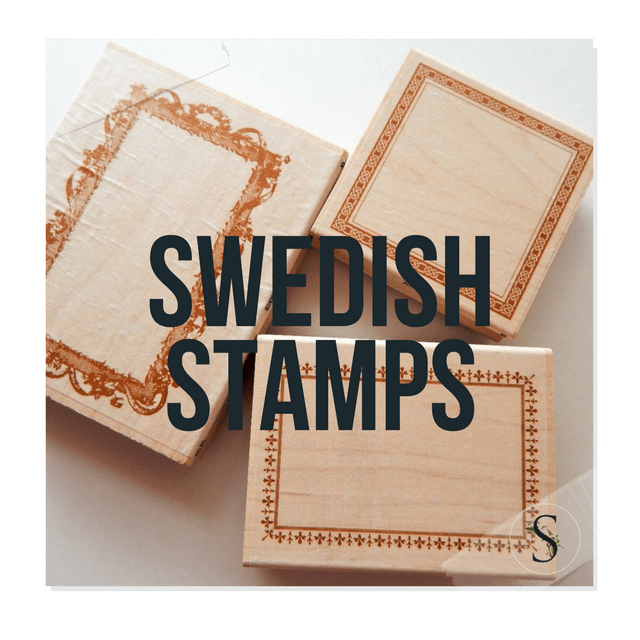
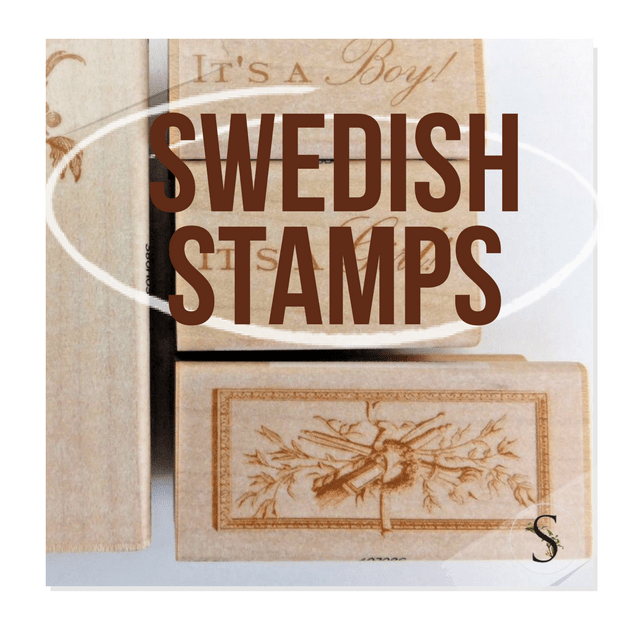
70 Rococo Swedish Stamps For Home or Business Use
Set Of Anna Griffin Lot Of Stamps – Original Listing Here

I never considered picking up stamps until I stumbled across the stamp collection of Anna Griffin. If you love the elegant floral, ribbon and swag pictorials often associated with the times of Rococo romance and Swedish architecture, furniture and art, then consider adding these prints to your own home or business. You might get inspired to make over your pantry cabinet, or hand write your name in your library book collection. There are endless ideas that you can use with beautiful stamps. Make your own holiday cards, stationary, or note pads around the house. Here are 70 of the very best stamps and accessories that can work with the Gustavian Rococo theme.
1. Scrap-booking is exploded in recent years. While there is millions of ways to dress up your family photo albums, some of the simplest designs are the most classy. Martha Stewart uses old fashioned black and white pictures with silver labels. Get this same look for less on the pages of your photo albums with stamps and photo corners. If your album is on cream paper, consider cutting out labels with the same cream paper, and using decorative stamps to add captions.
1. Circular Cartche Anna Griffin 3/4″ x 3 3/8″ x 1/4″ $8.32
2.Rose Motif – 3/4″ x 1 5/8″ x 3″ $5.96
3. Plumes Motif 3/4″ x 3-3/8″ x 3-1/4″ $8.32
4. Lovely Floral Stamps – Set of 7 Designs $7.39
-EK Success Tools Punch, Journal Plate $11
Look at this picture of the EK Success Photo Labels Punch. Don’t you want that for your albums?
2.Add beautiful labels to your flower pots. Why not? I have added lion ring pulls to my planter pots which I can hang tags, or ribbon from. Paint your planting containers and use tags and matching stamp ink in a coordinating color. Consider adding tags with written names of the flower, and details of when to plant it, how long it takes to germinate. Be sure to use clear tape over the tags, which you can then cut to simulate the look of formal lamination. Make every detail of your home personalized and pretty
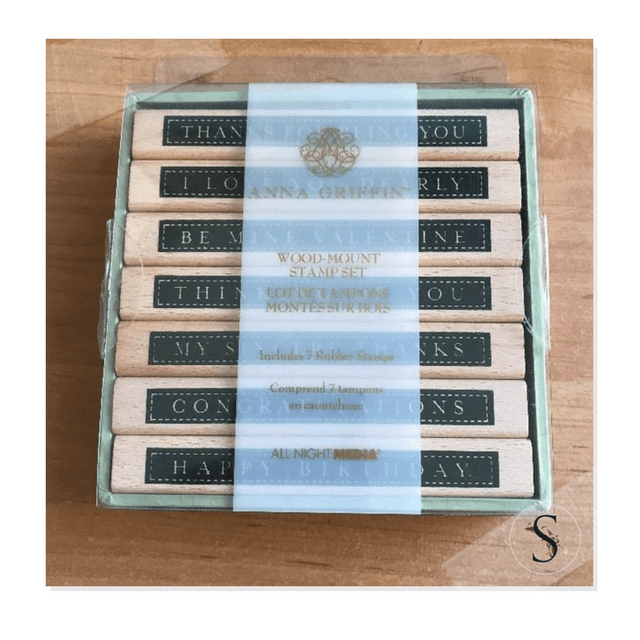
Set of 7 Anna Griffin Wood Mount Stamps (Words & Phrases) Found On Ebay Original Listing Here
Home Storage Identification
4. Dress up your storage boxes and pantry baskets with custom tags. Who says you cannot paint cardboard storage boxes with flat latex paint? I do! Find coordinating card-stock that matches your boxes and tag your storage.
In this post “26 Ways To Organize Your Organize Your Kids Room With Shoe Boxes” we show you how easy it is to organize with banker boxes and shoe boxes for a neat and tidy storage room and garage.
5. Use round plain sticker labels such as those from Kraft to custom stamp your own labels that you can add your beautiful handwriting to.
-Avery High Visibility 2 1/2 Inch Diameter White Labels 300 Pack
-Avery Removable Labels, 3 x 4 Inches, White, 80 $6
-Avery Square Labels, 2 x 2-Inches, Pack of 120 $8
Anna Griffin Ornate Frames Rubber Stamp Lot –Original Listing Here

Oval Cartouche Wood Mount Rubber Stamp Original Listing Here
Beaded Brass Cartouche Stamp Original Listing Here
Wedding Wreath Stamp Original Listing Here
Small Business Use
5. There are more small businesses that ever. There has been an explosion of small niche businesses at antique flea markets, and antiques nationwide. Instead of tagging your merchandise with plain tags, use it as an opportunity to brand yourself. While people may not be able to see the face behind the product, your specialty items look ten times more expensive with beautiful packaging.
-This photography studio uses a stamp on the back of their photo envelopes.
-This company uses little burlap bags, with stamping.
–Inexpensive paper bags can be dressed up.
-This site offers CUSTOMIZED stamps from any graphics on your computer.
-Look how beautiful this photography or scrapbooking business looks with stamping
-Look how a simple round punch can be dressed up.
-Dressing up your packaging doesn’t have to be complicated. Look how beautiful this salvaged ribbon looks.
-Reconsider using wide popsicle sticks with stamping.
-Natural jute twine is a perfect way of adding a natural touch with your tags for your merchandise.
-Here we see a square tag dressed up with a custom square stamp. The whole package looks so much prettier.
-Here we see a ice blue round punch dressed up with a beautiful company stamp.
Make Your Own Tags:
Don’t spend money on tags, when you can make your own tags at home.
-EK Success Tools Punch, Real Estate Sign 4.3 x 3.3 x 6.5 inches $15
-Extra Large Merchandise Tag 3-1/8-Inch-by-2-1/8-Inch $20
-EK Success Tools Punch, For Sale Sign, 4.3 x 3.3 x 6.5 inches $14

1.Beaded Brass Cartouche– 3-1/8″ x 4-1/8″ $8
2.Oval Cartouche– 3 1/8″ x 4 1/8″ $8
3.Georgian Cartouche-3/4″ x 2-3/8″ x 3-1/8″ $6
4. Wedding Wreath – 2 1/2″ x 1″ $5.21

1.Ribbon and Swag Cartouche 3-3/8″ x 3-1/4″ $8
2.Romantic Cartouche 3/4″ x 3-3/8″ x 3-1/4″ $8
3. Ornate Motif Stamp 2-1/8″ x 4-3/8″ $6
4.Swirl Motif– Perfect for a banner on stationary $6

1.Floral Garland -1-1/8″ x 2-1/2″ $5 (This would be a great pair above any of the plain frames above) , (Beaded Brass Cartouche, Oval Cartouche)
2.Large Blossom Motif 3/4″ x 2 3/8″ x -1/8″ $6
Bottom Row:
1. Medallion Motif Round 3/4″ x 3-3/8″ x 3-1/4″ $8
2 Square Medallion Motif -3-3/8″ x 3-1/4″ $8
3.Feather Fleur de Lis 1-5/8″ x 2″ $5.21
4.Old World Styled Bell with a Bow $6.64
Other Beautiful Stamps From Anna
– Anna Griffin Clear Stamp Sets – In The Garden – Ideas For Stationary $7.39
-Anna Griffin Brass Stencil – Swag Ornament $2.52
-Anna Griffin Clear Stamp Sets – With Gratitude– Ideas For Cards $7.39
-Anna Griffin Clear Stamp Sets – Borders- Perfect For Invitations, Weddings Stationary Set of 4 borders $12
Anna Griffin Margot Collection – Vine Border 1-5/8″ x 4-3/8″ $6.64
–Basket Motif Stamp – 3 3/8″ x 3 1/4″ $8.32
-Anna Griffin Fanciful Alphabet $7.39 Use With A Ruler For Perfect Lines
-Stamp Set – Salutations– Perfect For Envelopes or Cards $11.34
-A Set of 14 Wedding Stamps Lettering $11.34
–Perfect Border For Wedding Invitations. Flip it upside down and you have a large border for the top of an invitation $7
–This border would look great with two borders paired on either side of a center stamp.
-Again create a banner for your invitations or cards with this floral border, which has more of a garden theme. $6
-This scroll border was designed to make long scrolls. $6
-Anna Griffin Collection Punches – Wedding Bow $7.56
-Anna Griffin Brass Stencil – Wreath Border $2.52
Swedish Scrap Booking Paper From Anna
Anna Griffin – 12 x 12 Ivory Flocked Paper – Grey $2
Anna Griffin – Willow Collection – 12 x 12 Flocked Paper – Blue Damask $1.59
Anna Griffin – 12 x 12 Flocked Paper – Floral – Blue $2
Anna Griffin – 12 x 12 Grey Flocked Paper – Platinum $2
Anna Griffin – Willow Collection – 12 x 12 Flocked Paper – Blue Damask $1.59
Anna Griffin Paper 12″x 12″ Willow Stripe Blue $10
AnnaGriffin Paper 12″x 12″ Francesca Floral Green .59 cents
Anna Griffin Paper 12″x 12″ Carmen Yellow Quatrefoil
Anna Griffin Paper 12″x 12″ Francesca Flowers Taupe
Anna Griffin 12 x 12 Flocked Paper – Floral – Green $2
Anna Griffin – 12 x 12 Blue and Grey Flocked Paper – Green $2
Anna Griffin – 12 x 12 Gold Flocked Paper – Blue $2
Anna Griffin – Fleur Rouge Collection – 12 x 12 Flocked Paper – Blue Damask $2
-Anna Griffin – 12 x 12 ivory Flocked Paper – Damask
How To Make Your Own Stenciled Grainsack / Burlap Pillows
Picture – Restoration Hardware
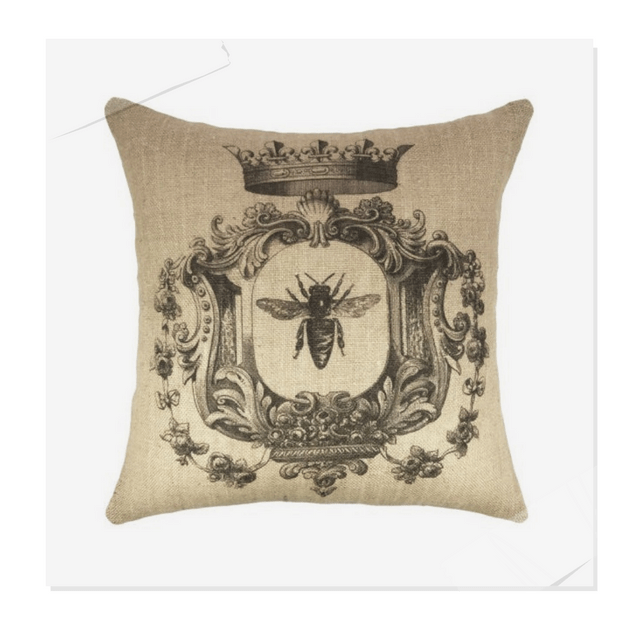

French Pillows From Overstock On Ebay
Grainsack pillows have gained tremendous popularity in the last several years that we are seeing them everywhere from Restoration Hardware to Pottery Barn. These old world pillows have a rustic edge to them, with a bit of a classic 17th century French appeal to them. Why pay a hundred dollars or more for one of these pillows when you can create your own for less. With so many stencils available on ebay, it couldn’t be easier. Ebay is one of the best places to find old antique French fabrics that you can create your own drapery, bedspreads, and throw pillows. Get the genuine look and customize it for your homes individual colors. Here are a couple ideas below to get the very hot grainsack and burlap pillows in your home for less……
Create these stunning pillows for yourself…..
Here are pictures that have inspired me……..
-Vintage and Antique Burlap on EBAY
– Bolster-shaped pillow with a wreath
–Shabby Chic Charming Blog shows you how to do this yourself with a printer.
-Here we see an all natural pillow with a ruffle edge. The stenciling doesn’t have to be clear in order for it to be very lovely.
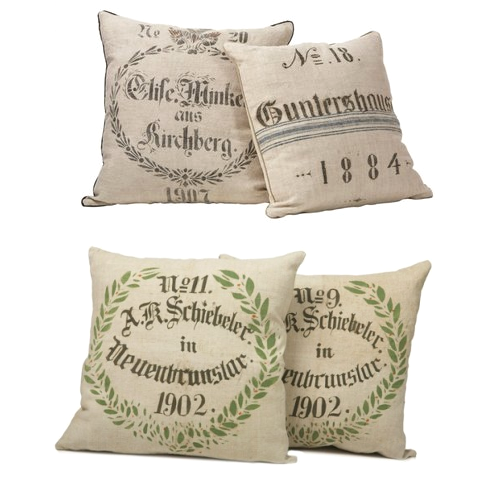
-A little bit of color goes a long way. This antique German grain sack pillow by Melissa Neufeld shows how lovely these pillows can look on a bed, or on a sofa for a primitive appearance.
-If blue is your favorite color, you have to look at these pillows. The top right pillow looks to have the picture stencil in blue, and the vertical stripe in a different shade of blue. Both colors combined with charcoal make such an impact. Make Your Own Grainsack Pillows – From Doesn’t Cost The Earth Blog
-Kymberly Frasier has combined her passion for antiques, textiles and design into
exquisite one-of-a-kind pillows and upholstery for her company, 3 Fine Grains.
-These cushion slip covers simply sit on the chairs and provide protection to your upholstered furniture. They could be very easy to stencil without committing to stenciling the fabric on your chairs and upholstery. It is as easy to change it out if you want to go in a different direction in several months.

 Plain Stuffer Pillows
–Square Sham Stuffer Pillow – 18×18″ (Large) $5.50
-12×18 Cluster Fiber Pillow Form Insert $13.35
-Bolster Sham Insert Stuffer Pillow – 8″x24″ $19
-Decorative 100% Linen Pillow Covers (Gray Set of 2) $49
Decorative Stencils For Pillow Stenciling
– Border Stencils In The Wind Border Stencil-
-167 – Classic Garland Stencil Library $31
– Alphabet Stencils On Ebay
-AD7 – Adam Cartouche Stencil Library
-AD8 – Adam Cartouche No 2 Stencil Library
– Tassels and Vines Stencil– Victoria Larsen
–Alphabet Stencils From The Stencil Library
–Victoria Larsen Architectural Stencils That Can Be Used in Other Ways
–Martha Stewart Stencils On Ebay
-Round Medallion Stencil $2.49
–Tulip Vine Stencil From Victoria Larsen Stencils
-Simply Stencils- Set of Three Foliage Stencils
–Ring of Roses Pattern: 7.5″ x 7.5″ $12
-Designer Decorating Stencil Script Numbers $13
-ER40A – Garland Stencil Library
– Wreath Stencils on Ebay
–Country Vine Wreath Stencil
-TR20 – Gustavian Stencil Library, ALL Gustavian Stencils From Stencil Library
–Borders Stencil – 3 Patterns Victoria Larsen
-Decorating Fabric: Print, Stencil, Paint and Dye Over 100 Fabulous Projects
Linen Fabric By The Yard
-56” Wide Vintage French Feedsack Beaudelaire Jacquard Black , BLUE, Charcoal Fabric $30
-56” Wide Vintage French Feedsack Duboise Script Jacquard Chocolate, RED, $30
-58” Wide European Linen Fabric Oatmeal By The Yard $14
-56” Wide Vintage French Feedsack Claudine Stripe Blue , BLACK Fabric $25
-58” Wide European Linen Fabric Cream By The Yard $14
-58” Wide European Linen Fabric Elephant By The Yard $14
-58” Wide European Linen Fabric Ice Blue By The Yard $14
-54” Wide Robert Allen Linen Duck Natural Fabric By The Yard $12
-9-Feet x 12-Feet Canvas Drop Cloth Perfect For Drapes $22
-46” Wide Stretch Linen Blend Stripe Ecru Fabric By The Yard $11
-46” Wide Stretch Linen Blend Stripe White Fabric By The Yard $11
Chocolate Burlap Chateau Marmont Pillow Slip by TheLetteredHome on Etsy
Vintage Grainsack Pillow Triple Red Stripe by jillbent on Etsy
 Old World Grain Sack Natual Stenciled Pillows From Dan Marty Designs
Dan Marty Grainsack Pillow with Laurel Design Seen On The Duchess Of Corbin Blog L.A.’s Dan Marty is often credited with helping fuel the feedbag/burlap decorative trend. Marty’s furniture was upholstered in burlap and feedbag instead of pricey fabrics.
1. Pillow Decor – Quality Guarantee Red, Brown $70
2. Pillow Decor – Cacao Bean Red Print Throw Pillow $70
3. Pillow Decor – 1907 Airmail 24×24 Throw Pillow $89, Postcard To Paris $89
4. Pillow Decor – Tulips 20×20 Decorative Throw Pillow $49
5. Pillow Decor – Wading Birds 20×20 Throw Pillow $70
6. Pillow Decor – Bird on Branch 20×20 Throw Pillow $70
1. Pillow Decor – Rustic Floral Green Throw Pillow $49
2. Pillow Decor – White with Green Spring Flower and Ferns $34, Green with White Spring Flower and Ferns $28
3. Tommy Bahama Designer Boutique Throw Pillow Covers $40
4. Pillow Decor – Rustic Floral Orange Throw Pillow $49
5. Pillow Decor – Fire Coral Orange, Blue,
6. Pillow Decor – Sea Coral in Orange, White, Blue, Red $40
Additional Interesting Pillows
-Dwell Studio Masala Bedding in Citrine Standard Pillows $60, Citrine Sheet Set Queen $208
–Coral Red Scroll Print 22″ Wide Throw Pillow $60
-Judy Ross Textiles Vines Printed Linen Coral Pillow $135
-Outdoor Throw Pillow in Blue Coral – Frontgate $119
-Croscill Home Mikasa Italian Countryside King Pillow Sham $39
-Provence French Laundry Square Toss Pillow, Linen/Red $21