Wood Plank Flooring, A Swedish Design Must Have – Part 1
Wood floors are one of the most recognized design feature of the Swedish Gustavian look. Rustic planked wood is a top choice for flooring in the design industry. Wood floors are easy to maintain, and they are associated with the utmost quality and taste. Hardwood flooring will outlast carpet in any competition making it a smart investment.
If you have children or pets, carpet gets dirty. Pets that come in and out of the house bring dirt back into the home, and over time, the carpets become soiled. In this situation, carpeting only looks good after they are shampooed. While I am not here to beat up carpet, as there are many styles of carpet that are elegant choices, wood flooring maintains better over the years. Even if you decide to go with one of the less expensive wood alternatives, you are assured that this look is easier to maintain than carpet.
It wasn’t until the Baroque Era began, that wood flooring became an option for the home. Before 1625, most European houses continued to have dirt floors. Wealthy families utilized elm or oak boards which were held on joists. Once wood floors gained popularity, it became known as a more affluent design choice. Throughout the 17th and 18th century wood flooring flourished. Solid wood plank flooring, was installed in many homes, and many trend setting homes painted their floors. Upscale homes installed the richer designs such as parquet and marquetry wood patterns. Wood flooring today is still the most desired flooring, surpassing stone flooring.


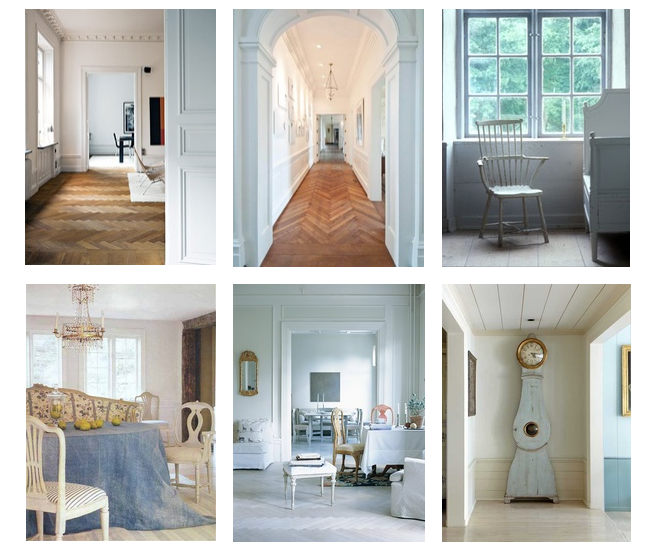

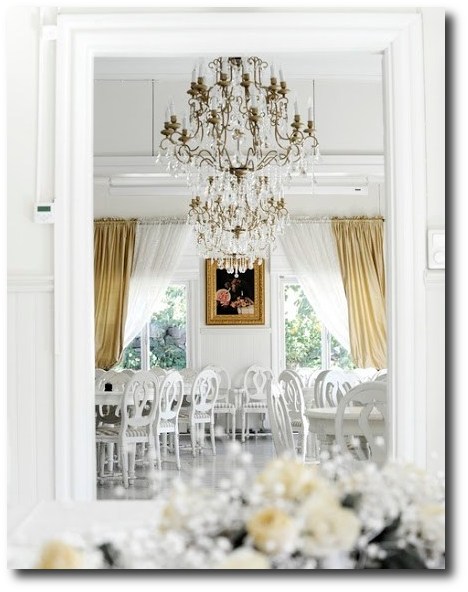
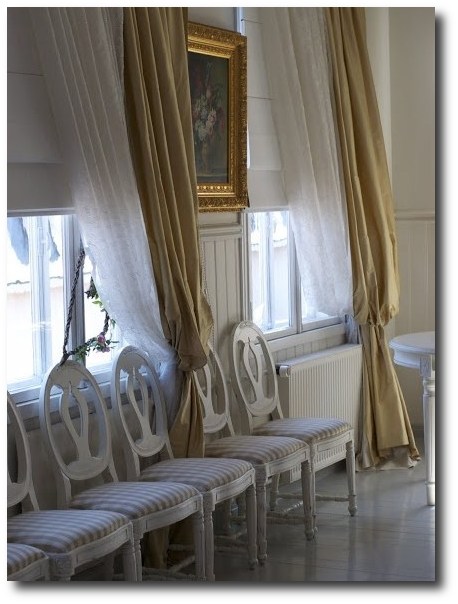
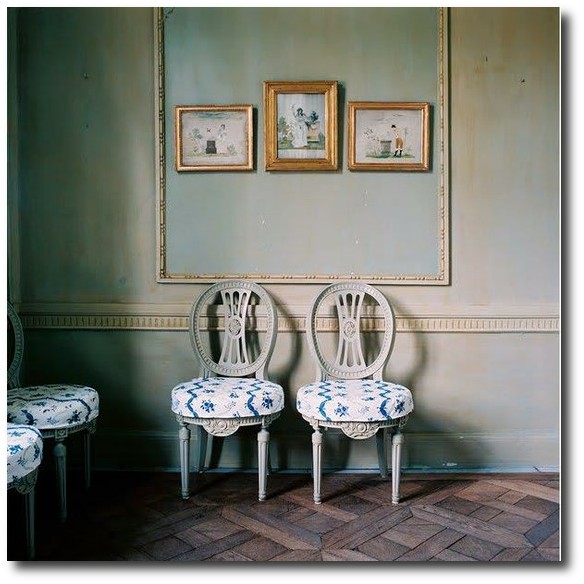
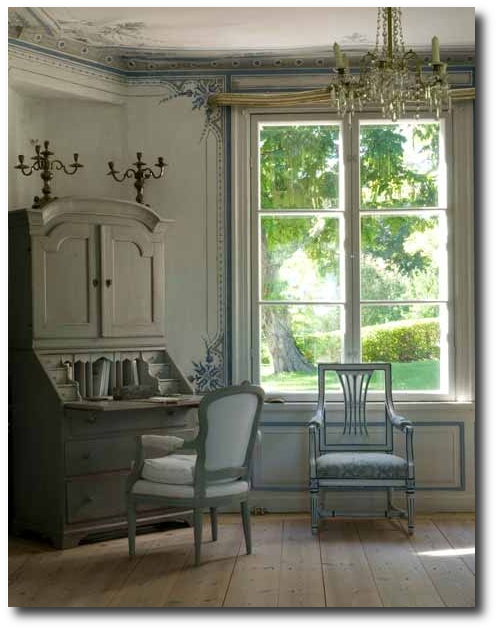
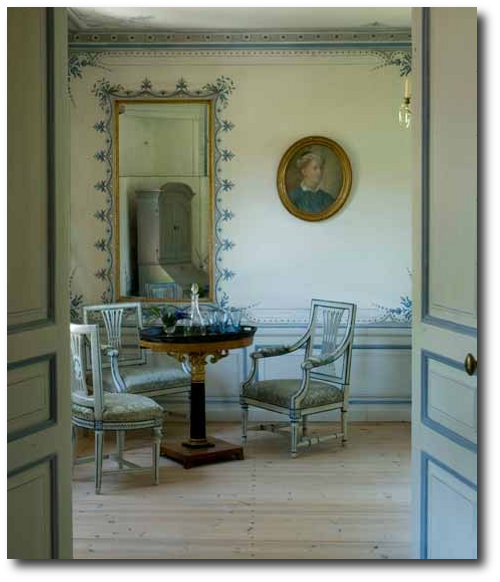
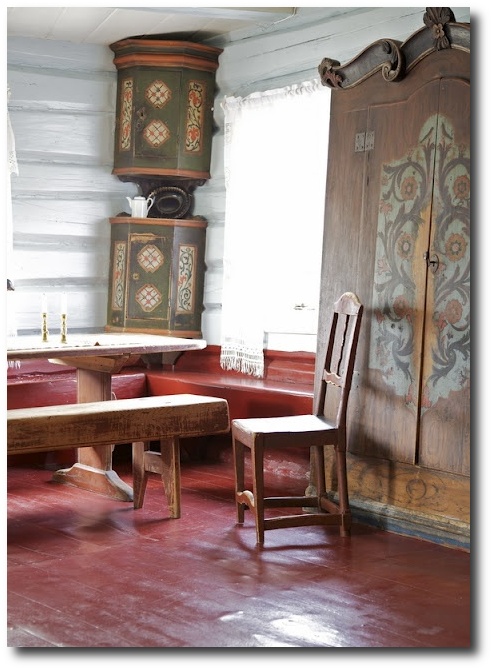
Svartsjö Palace In Sweden

Svartsjö Palace In Sweden

Svartsjö Palace In Sweden
Plywood Plank Flooring, A Swedish Design Must Have – Part 4
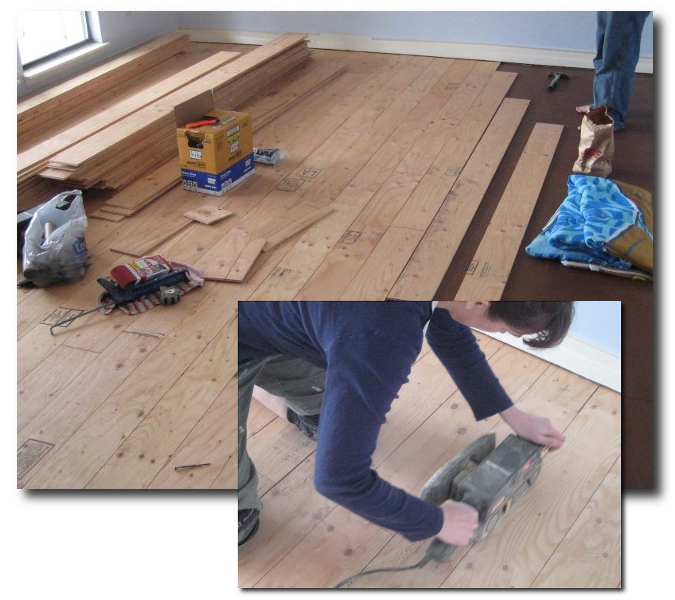
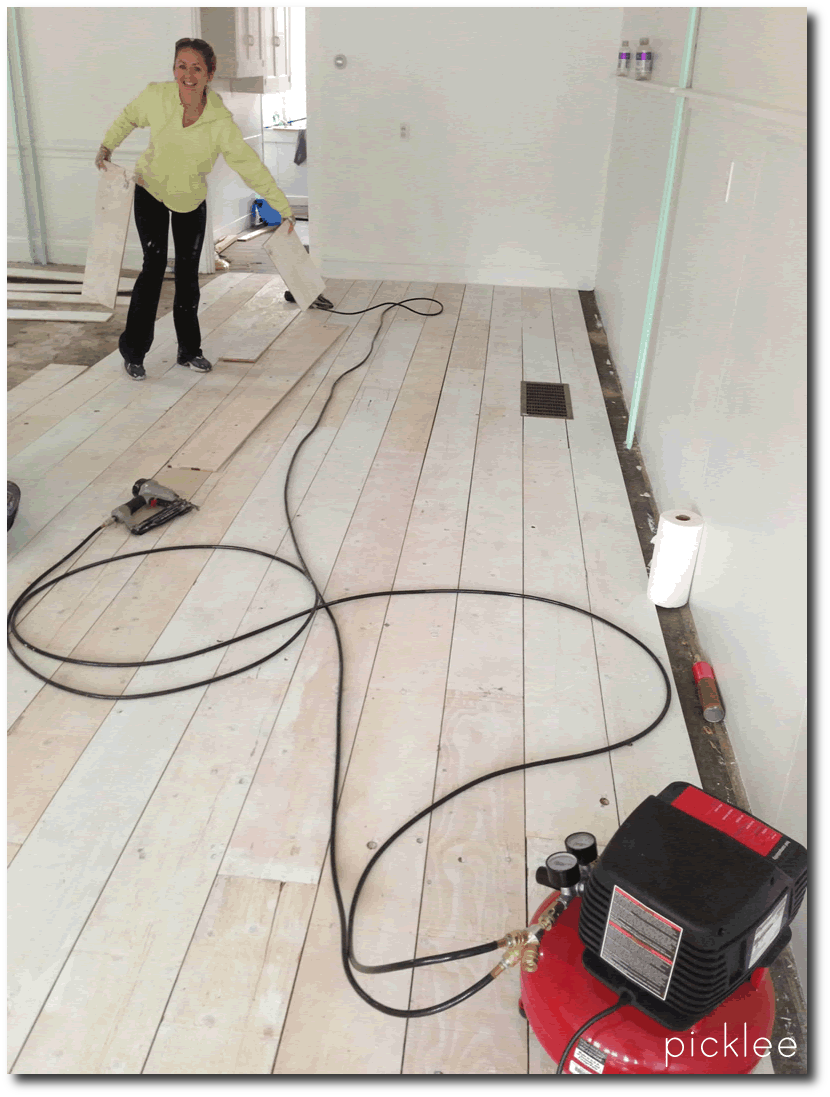
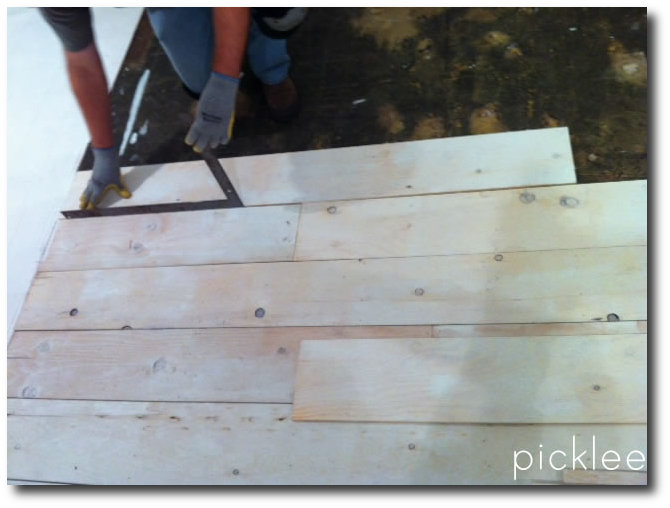
I stumbled across a DIY trend out there where people are cutting their own “planks” out of plywood. It seems rather unusual at first, but the results really surprised me. You get the look of real wood flooring which you can sand, paint, stain, varnish, or white wash, for fractions of the cost.
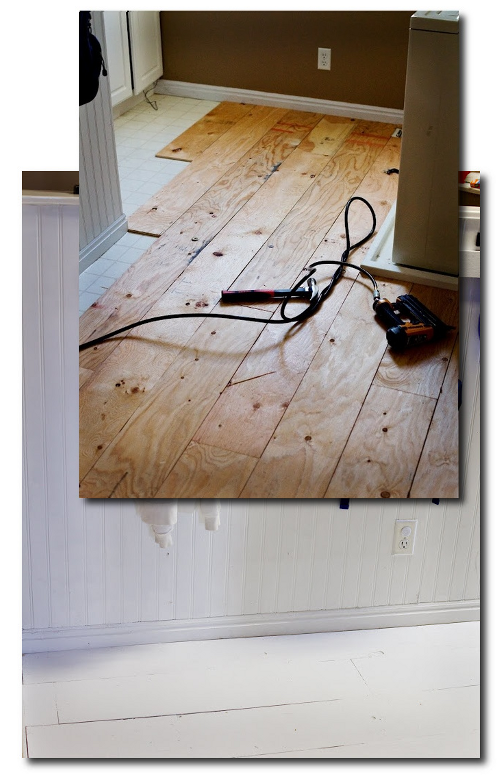
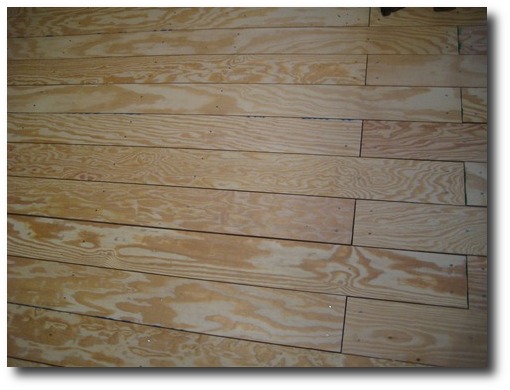
“We tore up nasty old carpet, then cut grooves in the plywood that was under the carpet to replicate plank flooring with a skill saw – and used a dremel to get closer to the walls. This worked better than the router which was recommended in the web article I got this idea from. We stained and then did three coats of poly. Everyone’s amazed that this isn’t ‘real’ plank flooring! We varied the width of the planks, using a 2×4 as a guide.”
There are a couple of links I want to share that might move you in the direction of considering this look.
1. Layers Of Learning Blog Flooring Transformation
Layers Of Learning Blog posted absolutely stunning photos of a room that they used plywood cut into 6″ strips of wood.
They mention in their article that plywood floors allowed them to transform their WHOLE house because of the low cost of the materials. This certainly a reason to consider this option. Many people can only afford a couple rooms with the other options. Plywood is so inexpensive, that you can do it yourself, and it is affordable.
Plywood gives you the option to cut wide planks with real grain. For those of you who want the REAL thing, this would be an affordable way of getting the look for less.
Buying plywood allows you to do one room at a time. It doesn’t matter if your project takes you a couple months to a year to complete, because plywood is practically the same from store to store. The finishing process allows you to dent, distress, and apply paint or stain which unifies the space.
Another plus to plywood floors is if something is spilled on the floors, which ruins several boards, all they would have to do is rip up the damaged boards, and replace them with the same finishing paint, stain or varnish!
Here are some of their costs:
Living room – 20′x13′ which equals 260 square feet.
$13.97 each on 9 sheets of 11/32″ “CD” grade plywood = $125.73, See the rest of the break down on their blog Layers Of Learning Blog
Here are some of their tips to consider.
Don’t Buy the Premium Brand Of Plywood
“There are different grades of plywood. “A” grade is the nicest, it comes with one very clean and sanded side. This is not what we went with because, as the guy at Lowe’s said, we can sand it ourselves and save big $$$. A sheet of “A” grade plywood costs about $28 in our market, but a sheet of “C” grade plywood is only about $14.”
Let The Wood Adjust To The Temperature Of The Room
” After the plywood is cut, stack it in the room where you’ll be laying it for a couple of days.”
2. Quarry Orchard Blog
Quarry Orchard Blog also put together a beautiful floor made from Plywood. In their “Plywood To Plank Flooring Tutorial“
They decided to tackle a redoing the room above their garage with a square footage of approximately 533. They decided to go with 6 inch strips that were all 8 feet long. They were shocked that it only took them an hour and 45 minutes to cut the sheets into the planks.
A Couple Tips From The Quarry Orchard Blog
– They started with the first board and squared it with the wall, leaving a 1/16 inch gap between the first board and the wall.
– Be sure to use a nail punch to make sure that the nails at least flush with the flooring.
– Clean up the look by being sure the nails are all in line and evenly spaced. Have a helper that can measure and mark the wood. They measured every 16 inches for each nail. Consider making a jig to help with the measuring and marking for where the nails are to go. This will enable you to line up the previous board and mark rather than measure for every single nail.
Check out the final pictures of this room! What a transformation!
A Break Down Of Their Material Costs:
16 sheets of 15/32 pine plywood @ $16.49 per sheet
9 gigantic tubes of Liquid Nail @ $4.75 each
10 lbs of cut nails (ordered from Tremont Nail Company) @ $69.63 (includes s&h)
4 gallons of Varathane polyurethane @ $37.46 per gallon
2 quarts of stain @ $9.99 each

3. Tidbits From The Tremaynes Blog
For their stunning transformation they used 4×8 sheets of plywood; cut into 8 inch strips, and laid it like a regular hardwood floor. They used an old nailgun, some pennies to space out the wood, for the old farmhouse-style look. The cost was $60. Fabulous!!
About to open a shop in Newport, RI, store owner Jordan decided to tackle the outdated carpet flooring that came with the shop. Being that the shop was a historic home built in the early 1700′s, she wanted something more period appropriate.
She decided to go with the standard 1/2″ thick 4′ x 8′ sheets at a cost of just under $20 each. In order to have zero waste, she chose to have the boards cut into 8 inch by 8 foot lengths, giving her six planks per sheet of plywood.
When she got back to the shop, she laid them out, and sanded all rough edges and splinters, and decided to white wash them before nailing them down. She mixed up 1/4 CeCe Caldwells Simply White Chalk Paint and 3/4 water. She then used a roller attached to a broom handle to apply a coat of the white washed paint to all of the planks.
After all the planks were dry, her fiance Brett, started working on nailing the planks to the flooring. They used Bostik flooring adhesive to the backs of the plywood planks, which were then laid into place and nailed into the floor. Brett used 1 1/2″ nails and shot them in on an angle. The nails were spaced out about every 12″, placing two all along either side of each plank. Brett used a metal straight edge for a spacing guide, which gave the perfect distance between planks. As Brett went on nailing down the boards, he used a table saw to cut some of them into different lengths so that the boards would have more of a staggered look.
Some Additional Period Looks To Give You Inspiration:
- Stunning Antiques With White Washed Flooring- Unknown Source
- THE SWEDISH ROOM by Lars Sjoeberg and Ursula Sjoeberg,
- Photographs by Ingalill Snitt
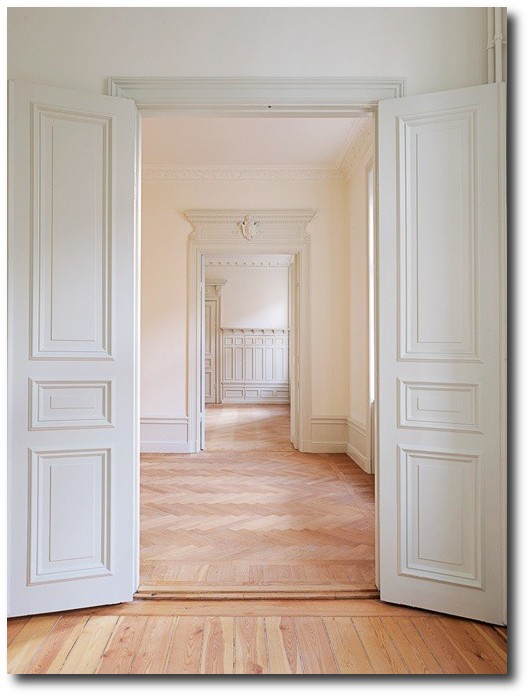
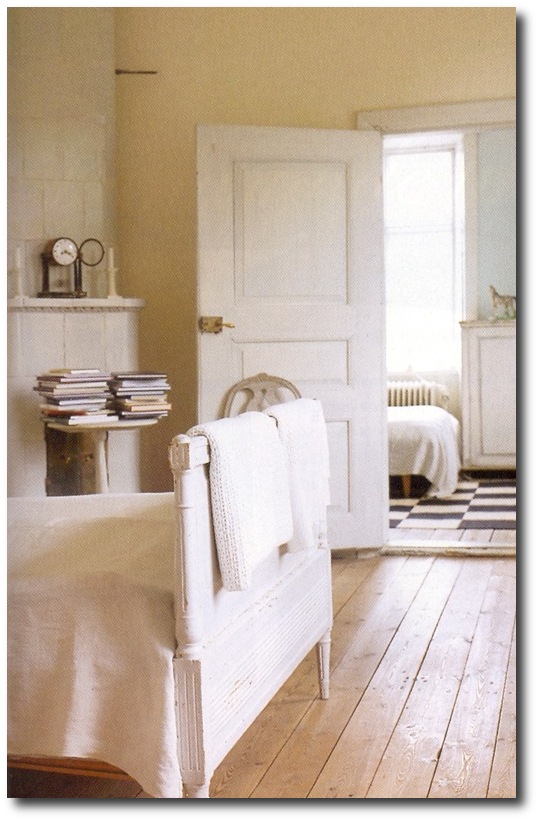
- Classic Swedish Home With Wood Flooring- Painted White Gustavian Bed
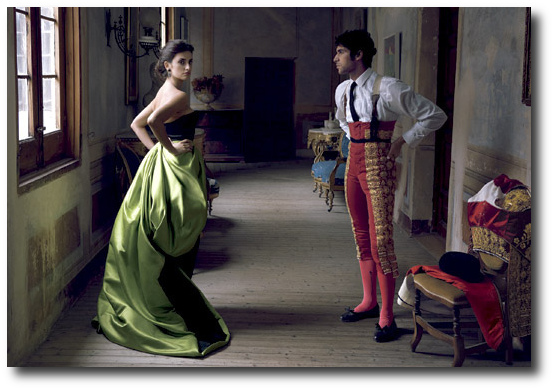
- Beautiful Planked Wood Floors White WashedCayetano Rivera Ordóñez & Penelope Cruz in Armani Privé – Made in Spain
- Photographed by Annie Leibovitz for US Vogue December 2007
- Distressed Wood Flooring- Make your plywood floors aged with translucent glazes
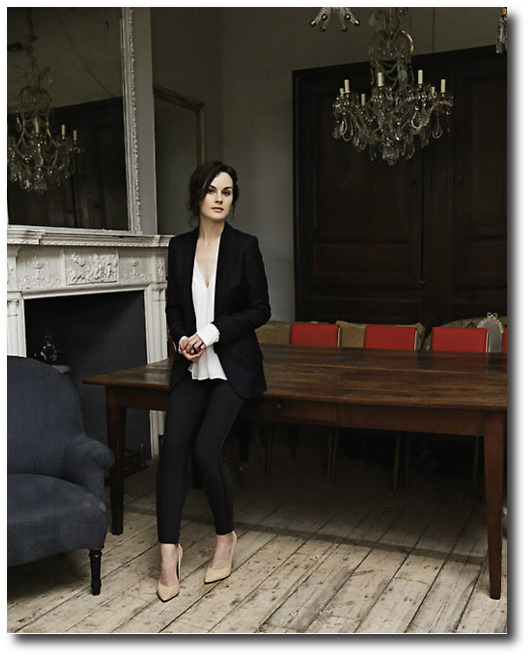
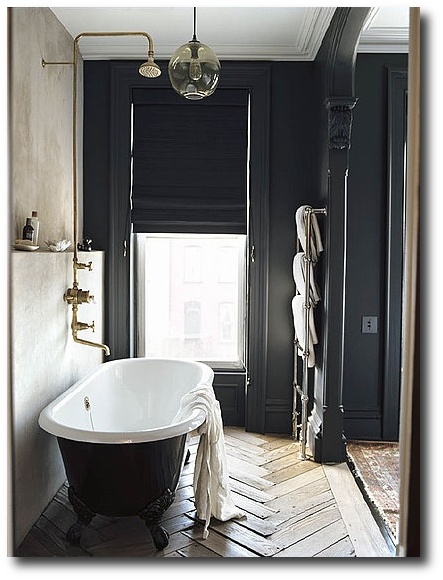
- Herringbone floors add personality in Jenna Lyons Brooklyn Townhouse.

![]()


Painted Wood Flooring, A Swedish Design Must Have – Part 5
Painted wood floors are making a come back, and we believe that painted floors will become even more popular than we see today. In the past, finer homes installed decorative parquet floors and inlaid patterns. In the 17th and 18th century paint also was the means to create these decorative patterns on the floor, many which mimicked parquetry. Painted wood floors made it possible for more light to enter into the home, as the winter season in Sweden was quite dark. Rustic unfinished wood over time, darkens, and painting the wood just seemed like a practical approach of having a brighter home without spending a bundle.
Raw wood accepts paint so much nicer, and allows the paint to distress beautifully over time. Sanding wood, allows the paint to soak into the wood, compared to painting over varathane floors which may scratch easier with foot traffic. Homeowners with existing floors often have to carefully think carefully about how they go about re-finishing their wood floors,because the process can be pretty involved. Refinishing wood floors can seem more labourous than painting, and often times it is. Sanding wood floors can be a time-consuming task.
There are a couple steps that cannot be skipped and we list them out below:
1. Prep
This involves removing your furniture from the room. Once you start belt sanding the floors, there will be dust everywhere. It can be a bit time consuming sealing off the house with drop cloths, or plastic tarp, but it is necessary for a great finish.
2. Sanding
The most time labourous part by far is sanding. Using a belt sander will kick up a ton of saw dust, and cleaning up the dust, which ends up everywhere becomes a tedious job. Sanding an entire floor can take up to 4 hours or several days depending on the size of the room.
Renting industrial professional tools saved my husband and I a lot of time when we refinished parquet floors in a rental in Virginia. Drum sanders are large machines that can handle large floors, and are very easy to operate. Drum Sanders can be rented at around $40 to $50 per day. I would highly recommend it than using a small scale sander that you can buy from a Hardware store.
Most homeowners choose to rent the specialty equipment and then purchase the more standard tools at their local hardware stores. Edge or orbital sanders are terrific for sanding the edges of the floor that the drum sanders cannot reach. A handheld power tool lets you tackle the tight corners, and are worth purchasing outright from Home Depot or Amazon. They allow you tools for additional furniture projects in the future.
3. Staining, or Painting
While everyone in the design community has their favorite paint brands, I would highly suggest going with a oil based paint. Oil holds up longer and has a tougher finish than any water based brands.
I would highly suggest sanding your room down to its bare wood, before painting. Painting over an existing paint is always possible, but the extra work pays off when the paint naturally distresses over time, which shows the wood through rather than an unsightly under color.
Sanding down to the natural wood also allows you to pickle the floors. White washed floors in my opinion are much nicer than painting the floors, because the wood gives the room a bit of depth and natural appeal.
In this post I show a photo of the Behr Wood Stain that is highly recommended. The stain is available in a number of colors, and evens out nicer than just paint that is mixed with water. Behr has a number of colors available that are off white, gray, beige that would work nicely with the Swedish interior schemes. Mixing paint with a bit of water or stain work rather nicely.
Many people suggest applying paint with a professional paint brush which gives a smooth finish, rather than with a roller, which creates a stippled finish. Today you can purchase smooth rollers which can be used with extension pole to apply paint. Rollers are inexpensive ranging from $4 to $7 per pack. A pole will be anywhere from $5 to $40, depending on length and material.
You can choose a variety of different approaches with your paint choices….
If you decide to work with an existing painted floor, a great oil based primer is “Coverstain by Zinsser” This paint can be tinted almost any lighter color, dries very fast, and can be mixed with most other oil paints. Coverstain is in fact a primer that will adhere to almost anything, and would be a fantastic choice for the floors.
One gals review of Coverstain -“Zinsser oiled based primer is like gold”
(Please note that Kilz or Coverstain primers should never be used on concrete floors. Go to Lowes or Home Depot, and buy stain or paint made just for concrete floors. Concrete stain doesn’t flake off on concrete like paint does)
As a top coat on your wood floors, you can purchase a Water-based polyurethane clear varnish, to seal in the tinted paint, or purchase water based, or oil based paint for your top coat. I have tinted this paint many shades of gray, blue, green and yellow. It is marvelous on furniture. This primer dries flat, allowing almost any other paint to be applied to it. It serves as your primer and your base paint, allowing you to just then seal the color in with a water based sealant.
If you are working with a previous painted floor, floors need to be sanded for the paint to stick properly. The worst is when you skip sanding, and the first time you move a furniture piece only to have the paint come off in sheets, or scratch. You will have regretted not sanding.
Sand first, and then paint the floors with a paint formulated for the flooring. We had painted our deck with paint formulated for the outside, and we are so glad we spent the extra money, because rain or snow, the paint hasn’t chipped.
4. Sealing
Polyurethane is an oil based sealant, that is NOT suggested for lighter colored paints. If you use this over your floors, in a week or a matter of days, the floors will have a tinge of yellow. You might then have to consider re-painting your white floors.
Polyurethane works perfect on unpainted wood, or on darker paint colors such as red, navy, black and so forth. A water based varnish is required for lighter based floor colors such as light gray, white, or cream.
You’ll have to wait 6 hours for each coat of polyurethane sealant to dry. It is recommended that most floors require at least 3 coats to achieve best results, and many professionals suggest 24 hours in between each coat of urethane. It also takes up to 3 days before you can move furniture back into the room and walk on the floors again.

Onni Hotelli Kuvia Picture Credit Ranskalainenpatonki.blogspot

Onni Hotelli Kuvia Picture Credit Ranskalainenpatonki.blogspot
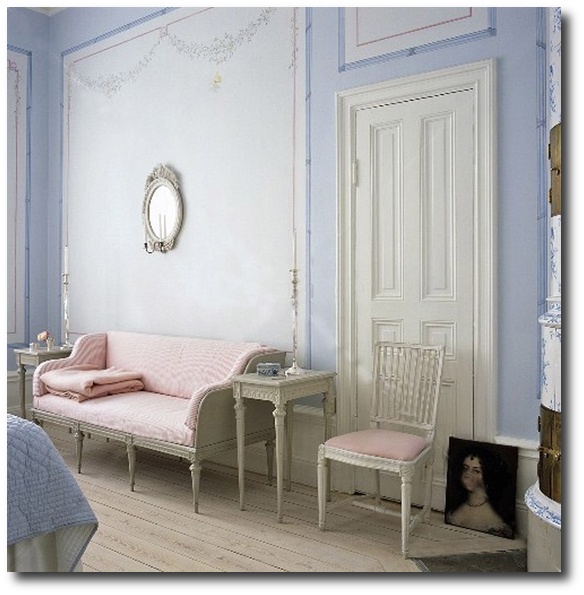
Belle Maison Corbeille Bed- Featured in Swedish Decorated Room With Painted Floors

Blue Painted Wood Stairs
A Colonial Floor Makeover by Sara Kate
Sara Kate and her husband painted their summer house floors in an oil paint. Here are some of their remarks……..
“Moving the furniture was easy, the problem was working with the paint. I made a big mistake in laying the second coat on too thick and painting on a rainy day. The humidity and the thickness caused the paint to wrinkle, clot and appear dull and matted. I had to work hard to undo my mistake.”
They suggest using a Polyurethane based porch and floor enamel. After cutting the edges with a
brush, roll on a thin coat with a 1/4 inch roller. Keeping the heat on insures the paint will dry fast. He then suggests to roll at least two more thin layers and allow at least 24 hours between coats
Here are a couple of tips from the comment section of the article.
“Three simple lessons from eveyone’s paint woes: 1)PRIME- Frankly, no one wants to do this but priming is not a paint company scam – especially on a floor. Primer is NOT paint (anyone who’s had the lowly job of brush cleaner -such as I- can tell you that primer is much harder than paint to clean out of a brush. Pros, in my experience, will often designate some brushes for primer only). Think of it as glue that will hold the paint onto whatever’s beneath it. (and, yeah, tinting the primer is a nice trick and the paint store should do this). 2)PATIENCE. I assume you are all painting with a gloss finish. 24 hours minimum on this. 3) Relax with the dusting! Dust falls. Your sweet new floors are gonna trap some dust as they dry. “
“An alkyd paint dries overnight, but takes 28 days to cure to maximum hardness.”
“A response to a fainted floors in a rental apartment- I know you didn’t want to put down a rug to lighten the floor, but how about painting a floor cloth? You can get a large canvas drop cloth from a home improvement centre, Paint it with any kind of paint you want. After it is dry, put at least 2 coats of polyurethane sealer on, letting dry completely between coats. You are in control of the design, you don’t have to worry about putting the floor back to a rental state because you can lift the cloth and take it with you!”
“Katherine – A Painter – To those who asked about painting various surfaces, and those who asked about primer: Sanding and primer are twin keys to getting paint to adhere to almost any surface. Start with a clean surface — remove grease, wax, and anything chalky. If there’s any gloss or if you’re concerned about adhesion, do a light sanding with 150 0r 200 sandpaper. On a floor, you can use a floor sander with a screen… available at a rental shop. All you want to do is de-gloss so the primer has something to hold onto. (If you’re going over polyurethane, you have to scuff it up diligently, because poly doesn’t want to stick to anything.) Then prime with any of the primer-sealers that mention “excellent adhesion” on the label. Kilz, BIN, Bullseye… these are a few of the big names. A water-based primer-sealer is fine. If you’re making a drastic color change, look for a primer that is int0 tint-able, and tint it in the direction of your final color, but not necessarily matching the final color. The only time you will have a problem is when the surface is already painted and the existing paint isn’t adhering well. There isn’t much you can do about that, short of removing that old paint.”
“Red paint is difficult because red pigments are transparent therefore they need many more coats to give a good coverage – the purer and clearer the red the more transparent it is – burgundy reds and terracotta reds will cover better as they have other pigments in them which are not transparent”
“When I stained my concrete, I got the acid at B. Moore. Instead of painting concrete, stain it instead. Staining is much prettier. B.Moore has many colors of concrete stains. Regarding the wood floors, they are worth so much more sanded and stained. To cut the cost, only hire out the sanding, and do the staining and sealing yourself. You will save at least half. I discovered this myself when some floor guys failed to return to finish my floors. I had only paid a small deposit, and they had finished the sanding. When I realized how easy and cheap it was going to be to finish the floor myself, I was thrilled they had deserted me.”
“All kinds of great coatings for all different applications (floors, countertops, faux stone/granite, etc.) are available at ArmorPoxy.com. I’ve used several of their products and all with great success. Particularly fabulous is the “For Dummies Bath Refinishing Kit”. You can use it on your tub, sink, tile, etc. and it makes everything look like brand new white porcelain. It’s truly amazing and easy to use. I did my bathroom more than 2 years ago and it still looks amazing….”
Another interesting comment-
“Concrete can be a tricky beast, especially in a basement or former garage that might have dampness or oily spills on the floor. You’ll have to clean and degrease the floor thoroughly, and if it has a very smooth, shiny surface you’ll need to etch it with muriatic acid to give it some tooth. There are special primers for concrete floors–use one. It really will make a difference. I painted the workroom floor in my basement without using a concrete primer, and the mineral salts in the concrete came up through the paint. I then had to strip away as much paint as I could, re-prime with concrete primer, and re-paint in order to fix the problem. Don’t be me. Use the primer the first time, and save yourself the headache.
Plywood, chipboard, and particle-board subfloors are easy to paint–sand the rough spots, prime, paint. Use an oil-based primer suitable for raw wood in order to keep stains from rising up through the paint.
If you think you might want to change the color every few years or so, don’t apply a water-based polyurethane, as it will keep future layers from sticking as well. Just paint the floor, touch it up as needed, and repaint as desired. The higher the paint gloss, the better it holds up, so use either high-gloss or semi-gloss, rather than urethane.
Use oil-based primers, yucky as they are. They block stains far better than latex primers, and provide better adhesion. Given how much wear a floor takes, and how much work it is to re-paint, do it right the first time. You can use latex paint over them, and subsequent paint jobs will not have to be re-primed (unless you’ve worn through to bare wood, but spot-priming will take care of that). If you have a really stubborn rust or dye stain that bleeds through oil-based primers, pigmented shellac will usually kill it (it’s the one thing that keeps the Calcimine often used as an interior finish in old houses at bay, and that stuff is pure evil).
 Swedish Flooring Looks From Domino Magazine

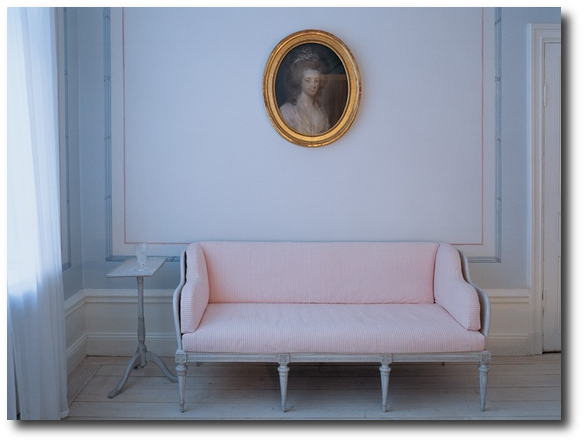
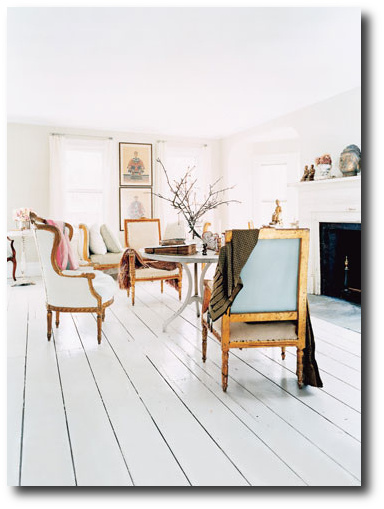
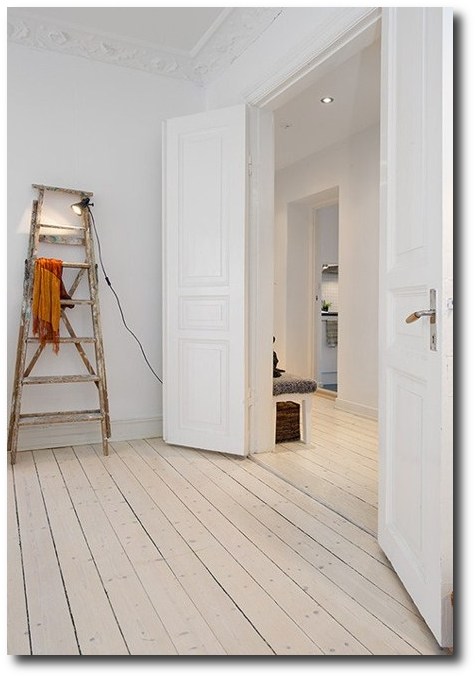
Swedish Interiors With White Painted Wood Floors
 Swedish Interior With White Painted Floors