5 Faux Wall Painting Techniques That Are Easier Than You Think
If you are wanting depth to your walls, here are some of the very simple faux finishes you can do yourself.
Start by selecting a color theme for your room. In this post you will see a variety of color examples from pale blue, to lighter warm yellows and lighter greens.
Working with glaze, crackle finishes, and distressing techniques can make your furniture appear older than it is. Likewise, layering paint on your walls will also create depth and give you that old world look we all have fallen in love with. Here is how to do it…..
1. Ragged Finishes
Color washes are finishes that are produced with rags and paint.
Color washing is usually is achieved by a using rags which attach to a roller.
The trick to achieving this finish is to work with translucent glaze. Don’t attempt this finish with solid paint. Using a glaze mixture of (half glaze, half paint), paint is applied over a previously painted wall. The effect it produces a subtle textured finish.
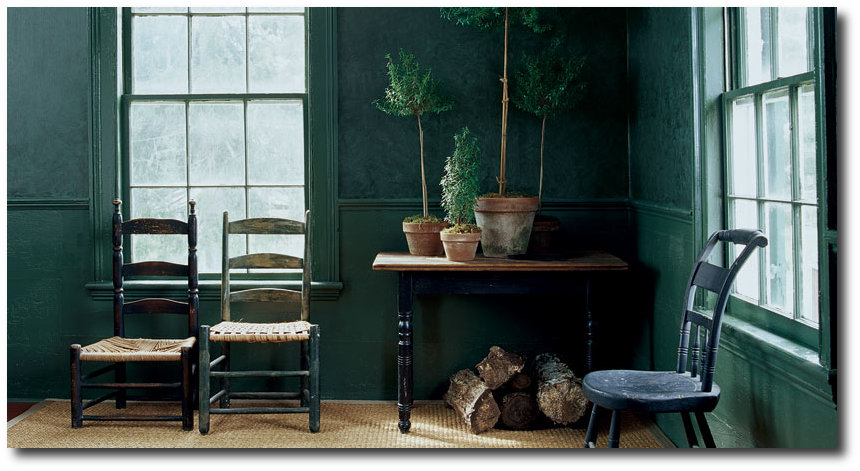
A Primitive Effect Using Green, seen on www.ralphlaurenhome.com
Notice the whole wall isn’t ragged, just a small portion of it. Also painted furniture in the same tones are paired in this room to join together the various looks.
Keep All Tones In The Same Color Family
- One tip that I have learned through ragging finishes is to have the glaze mixture matched to be a few shades darker or lighter than the wall color. If you decide to do three colors, keep the tones quite close in color. The overall effect will be soft, and subtle.
Glaze + Paint For A Final Top Coat
- Another trick I have learned is to go over your entire project with a layer or two of glaze mixed in with a small amount of paint. The entire effect of the tinted glaze dulls the look slightly, and hides the roller effects. The idea behind this is to make your work appear subtle. You want to keep people guessing as to what you used to complete the finish.
2. Dry Brushing
Brushed finishes, is an effect which is achieved by dipping your brush into paint, and then removing most of the paint, on a rag. The small amount of paint allows you to add a very soft effect over a previous layer of paint.
The effect depends much on the brush you use. If you use a badger softening brush which tends to be very large and soft, it will produces a soft effect with paint.
I have used this effect with an old broom handle. The bristles are thicker, and harder, and produces lines than a soft shading.
Again, mixing together paint + glaze will allow you to get the look of an additional layer with a faux effect, and you may not have to wipe off the excess paint.
- In this picture, this effect can be achieved by using a dark brown artists oil paint. Most of the paint must be removed from your brush to achieve this look. This look can be achieved using brown artists oil paint over a muted orange base coat, slightly brushing the which highlights some of the raised details.
- Achieve depth to your furniture by applying a lighter coat over top of a painted finish. As you can see with this look, a lighter shade of green-gray is applied over a darker shade of green. This look could be achieved by dry brushing.
3. Sponge Finishes
Sponged faux finishes are those which a paint mixture is applied with a sea sponge.
Sponge painting is still the best and most frequently used mediums when it comes to classic faux finish painting.
Using a sponge, you can use multiple glazes layered over solid paint which gives the illusion of great depth.
Ideally, like most finishes, you want to start with a base coat, and build on it using a glaze mixture. The overall effect should be soft and serene.
Sponging can also be used on furniture to give an old world Swedish look.
In the past, I would use a base coat of brown, and then after it was dry, I would apply a base of oil paint in butter yellow and use a rag, or a textured paper towel to remove the paint. Within just a few minutes of applying the paint, I would remove it, and the oil paint which was wiped off on the rag I would then slightly dab here and there, on the furniture to create a very soft effect, making it seem as there was more layers to the paint finish. After it was dry, dry brushing with the same oil paint was used to blend in the textured effects.
4. Faux Leather
Terrific faux effects can be produced using a very heavy garage bag. Again working with a wall that has been painted, apply a layer of a glaze mixture on the wall. More than half glaze to paint.
Tape the wall in rectangular sections and apply the glaze in the taped area.
Next apply a heavy weight garbage bag to the wall allowing the folds to be pressed into the wall using your arms and hands.
Take the garbage bag off, and the folds of the bag produces a beautiful faux finish.
This is a very easy way to create a classy effect on the walls.
– Great Article- How To Faux Paint
5. Stenciling
Stenciling can be very powerful if it is done right.
Create your own stencils using a stencil cutter which is a fine heated tip that cuts through the plastic blank stencils with precision. Lay a piece of glass in between the stencil and the pattern, and cut away.
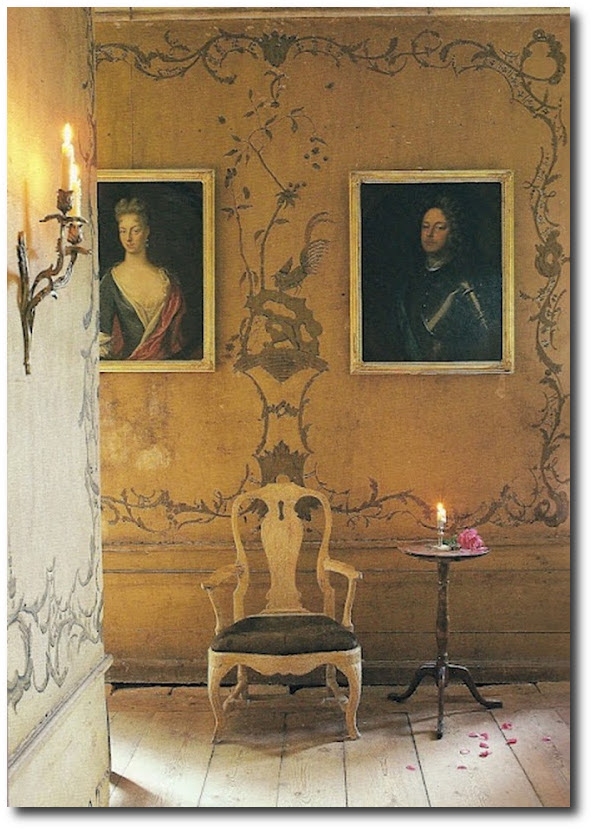
17th and 18th Century stenciling has always been the very best model of inspiration.
Here are a few very well done Swedish stenciled homes:
– Book Review: Jocasta Innes Scandinavian Painted Furniture
–Ted and Lillian Williams chateau in Normandy, France
-Neoclassical White Stenciled Walls-Petit Trianon
-Antique Original Red Hand Painted Trunk with Rosemaling Floral Motif
-This photo shows a great example of wall framing simply made by stencils and paint
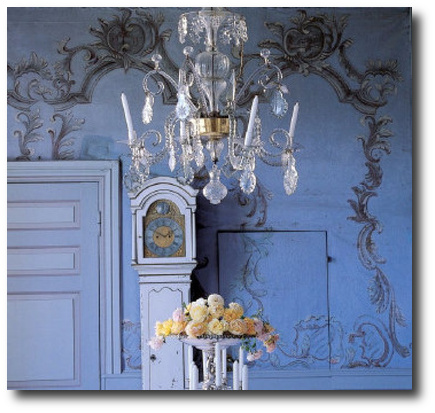
-Here we see a stunning Rococo design stenciled, or hand painted on the walls for a distinct Swedish look.
6. Complicated Faux Finishes – Marble, Tortoise Shell, Walnut Woods
Not all faux finishes are easy. Some of the advanced finishes are rather difficult. To get an idea of a master faux finisher, check out Pierre Finkelstein. He is the author of The Art of Faux– The Very Best Book for advanced faux finishes. He focuses on the advanced finishes such as Marble, Granite, lapis and malachite, and everything in between.
Marble and any stone for that matter can be painted to produce the high end looks that are often seen in expensive mansions and castles. Faux marble can be painted on to columns, trim, doors, crown molding, and fireplaces.
Anyone can learn these finishes with practice and the right guidance.
Check out my inspirational “faux” gallery in the Swedish and French Decorating Group.
Book Friday: Scandinavian Design On Martha Stewart
Magnus Anesund | Söderberg Agentur
Lars Bolander’s Scandinavian Design
Lars Bolander’s Scandinavian Design Found on US Interior Designs Blog
Faux Marble Bombe Chest- Ebay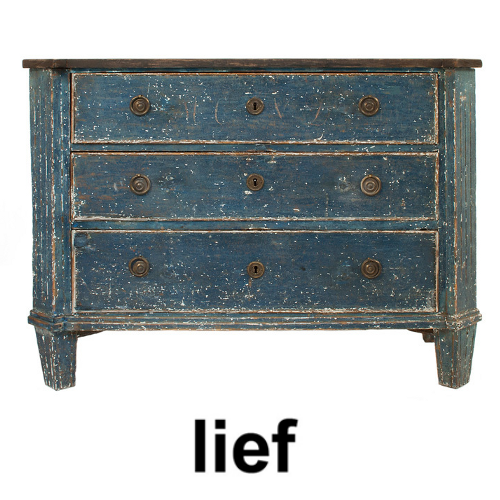 Three drawer Gustavian Chest in a worn black and blue patina- Lief
Lars Bolander’s Scandinavian Design Found on The Essence Of The Good Life Blog
Swedish Interiors- Judith Miller
Antique Swedish canape – Augustus Brandt
Swedish Interiors- Judith Miller
La Cuisine… Before And After,Two Maisons.com
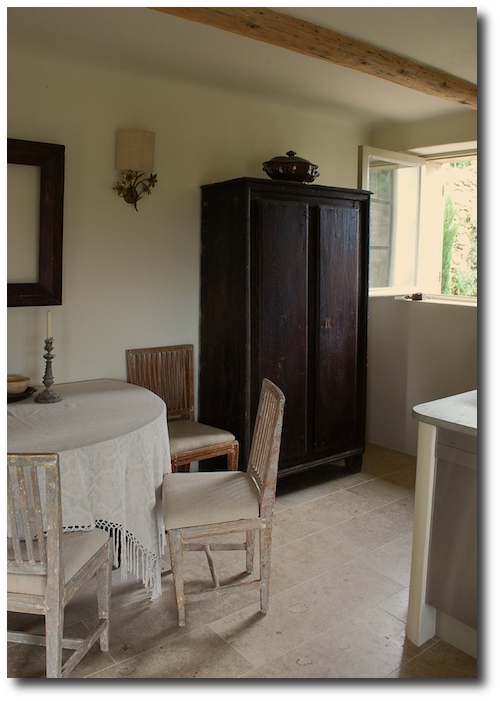
“Dishes are stored in an 18th century armoire from Uzes, very simple, sober lines. It’s a brownish purpley color that I also have in some of the pottery scattered around from the Alsace region of France. (The purpley brown glaze was created using magnesium.) Antique Swedish chairs and French Directoire table that we can extend to feed a crowd.”
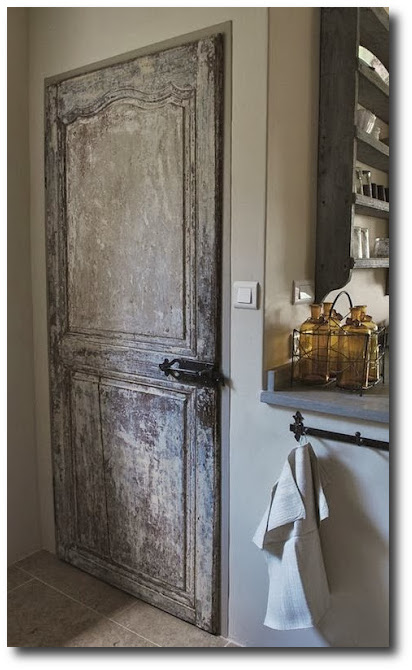
La Cuisine… Before And After,Two Maisons.com
“I scraped the paint off of an 18th century door to use on the pantry, inch by tiny little inch.”
Swedish Design – Seen On lamaisonfou.blogspot.com/
Swedish Gustavian Decorating Ideas- Primitive Faux Wall Painting
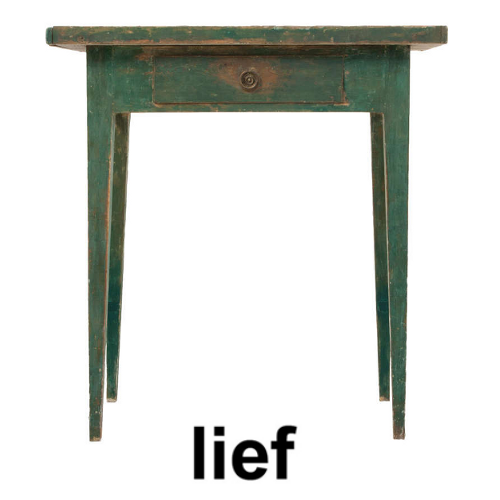
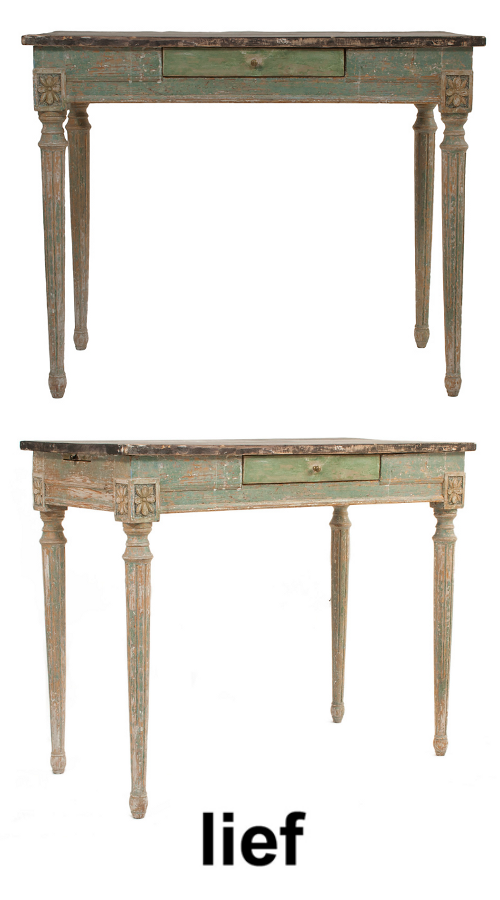 Small Gustavian Desk in a worn green and black patina – Lief
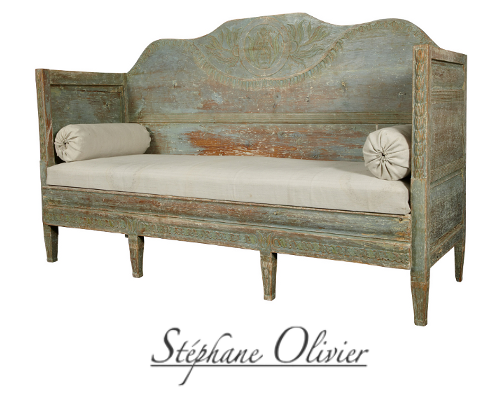 Gustavian Pale Green Swedish Sofa With Tall Back Stephane Olivier
The Houses of Veranda – ALL the Best Houses Featured in Veranda Magazine $37
The Houses of Veranda – ALL the Best Houses Featured in Veranda Magazine $37
Architectural Digest, Southern Accents, Veranda and others all regularly feature homes that have faux finishes on everything from walls to furniture. Paint finishes have evolved since the 80’s when faux finishing was given a bad rap. With many interior magazines featuring upscale 17th and 18th century European homes with extravagant antiques there has been even more of a push towards painted faux finishes to achieve the same look for less.
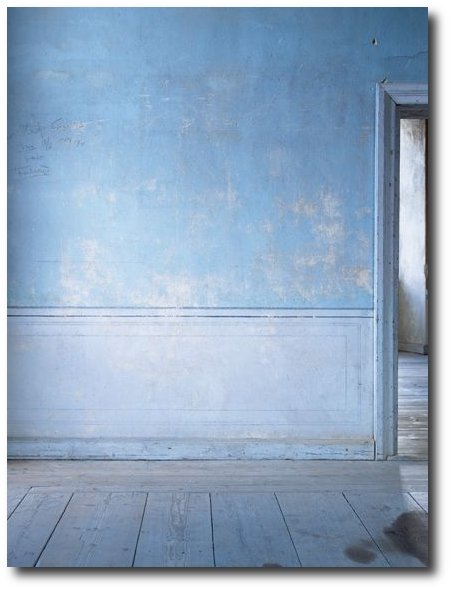
Faux finishes can be applied to almost any surface. Paint has been used since the earliest of times to transform walls, ceilings and furniture, and today it is being used on cabinetry, floors, ceilings, walls and all types of solid furniture.
The most popular decorative finish techniques include sponging, ragging and to the harder techniques such as marbling and wood graining. The above finish was likely paint rubbed into raw wood. Multiple layers of blue which are then sanded down to produce the effect above.
Swedish Paint Finishes Lars Sjoberg
 Gustavian Side Table with one drawer in a worn green and black patina
A very soft faux finish using two colors
Lindsay McCrum’s Chicks with Guns on Juxtapoz.com
Bunny Mellon’s Garden At Her Oak Spring Estate in Upperville, Virginia
Bunny Mellon’s Garden At Her Oak Spring Estate in Upperville, Virginia
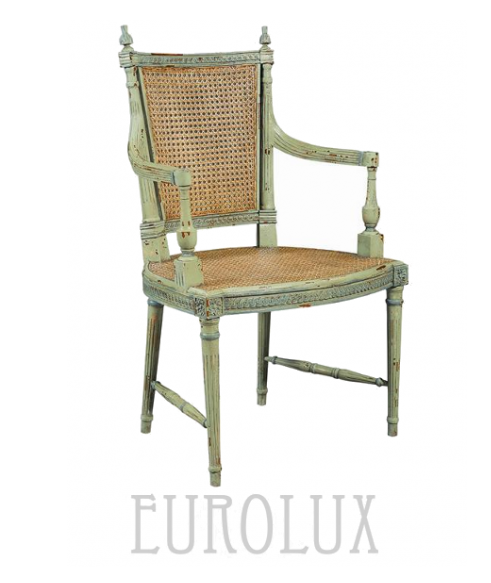 Chair From Eurolux Antiques $1,001.00
Vreta Uppsala Sweden Taken By Eric Boralv’s Flicker
Scandinavian Bedroom Featured on Decorology Blog Originally Seen on Scandinavian Chic
I ran across Pbc Style Blog featuring larger pictures of this estate I was excited to find out more about this home. The Mount is classical revival in style, complete with formal gardens. Wharton designed it herself, based on the ideas she outlined in The Decoration of Houses. The house is located in the Berkshires, more specifically, Lenox, Massachusetts, and Wharton drew inspiration for its design from Belton House, a 17th century Palladian-style English country house.
Borrow this look by painting molding in a color that stands out. Here we can see that molding can really speak volumes and add so much personality into a room
Layer two greens to get the look of this headboard. Dry brush a lighter green to produce a layered effect.
Decorating Using Green From World Of Interiors Featured on Trouvais Blog
Outstanding Mural Finishes, obviously completed by a very talented painter.
Photographs from Will Pryce – photographer based in London Will Pryce Photos
Louis XVI Style Square Table with Marble Top Bella Cottage
Hand-Painting Faux Marble Photography by Pieter Estersohn