Carl Gustaf Tessin

In the region of Bettna there are Manor houses abound, the most famous being Åkerö, beautifully positioned on the shores of lake Yngaren. The old mother tree to the famous Åkerö apple still stands in the gardens.    The castle has its own apple variety. The parent tree was planted in 1759 and still stands in the park and gives fruit every year.  Buildings have been on the property since the 1200s.  Several of the farm’s owners have belonged to Sweden’s most distinguished noble families;  Natt och Dag, Tott, Sture and Bielke.

In the mid 1500’s  a castle was built with turrets and towers that are depicted in Dahlberg’s “Suecia Antiqua”.  A part of the palace was burned a hundred years later and never refurbished.

The members of the Tessin family have been important in Swedish history. Nicodemus Tessin the Elder arrived there in 1636 and, alongside Jean de Vallée, became the country’s leading architect. His most famous work is Drottningholm Palace, which was completed by his son, Nicodemus Tessin the Younger, an even more significant architect whose major work is the Royal Palace in Stockholm. Nicodemus the Younger’s son, Carl Gustaf Tessin, was formally in charge of completing the Royal Palace, but was more noted as a diplomat and politician than as an architect. Carl Gustaf was one of the founders of the Hat Party and became one of the 1700s most important politicians with titles such as councilors, top Marshall and the Office of the President, the latter equal to the prime minister.

Carl-Gustaf Tessin purchased Åkerö in 1748.   Carl-Gustaf Tessin was then superintendent of the Royal Palace . The architect Carl Harleman was good friends with Tessin, and when CG Tessin wanted to retire from political life, they settled on the land and hired Carl Harleman. Harleman then designed the main building and proposed two wings. The result was one of the most beautiful rococo seats were filled with art treasures of Europe’s leading artists. As ambassador in Paris and during trips to Italy and Vienna had CG Tessin acquired a sound knowledge of architecture and art.

 Åkerö manor is beautifully surrounded by water from all sides. Beautiful maples, ash and linden trees are planted all around. Wall paintings, mirrors, door lintels, floors and countless antiques fill the space of the castle. .  The National Museum has a large part of Tessin’s art collection at the Royal Library in Stockholm. Nowadays, concerts are put on at Åkerö Manor in cooperation with Södermanlands Music & Theater.

There are not many pictures of Akerö, just these three below

Akerö in Södermanland, Sweden- Picture 1

Akerö in Södermanland, Sweden- Picture 2

Akerö in Södermanland, Sweden- Picture 3

Books Available on Amazon:

Nicodemus Tessin the Elder: Architecture in Sweden in the Age of Greatness

Nicodemus Tessin the Elder was an architect, gentleman, and founder of the artistic dynasty that was immensely influential at the Swedish court in the seventeenth and eighteenth centuries. He was architect to the crown, to the nobility, and to the city of Stockholm, and he supplied buildings for a wide range of functions, from palaces to banks, courthouses, and fortifications. His unusually extensive travels in the Netherlands, Italy, France and Germany provided him with a comprehensive picture of contemporary European architecture, which he drew on as he synthesized a new group of buildings that would attract
international attention as models for princely architecture. His productivity required a new approach to architecture, and he was part of the first generation of architects in northern Europe to develop the architectural studio, distinguishing the design process from the business of building, and in the
process recreating himself as the modern architect.

Essays on Scandinavian History

This book examines important aspects of the history of Sweden and its Nordic neighbors between the later eighteenth and the beginning of the twenty-first century. Historian H. Arnold Barton has selected thirteen of the numerous essays  he has published over the past forty years on the history of Scandinavia.

This is a companion volume to Barton’s The Old Country and the New, an essay collection on Swedish emigration and the Swedes in America. Included here are studies of the special significance of the eighteenth century in Sweden’s history and culture, the relationship of King Gustaf III to the eighteenth-century Enlightenment, the impact of the American Revolution in Sweden, and Gustaf III’s ambitions in the East Baltic region. Also detailed are the king’s early reaction to the French Revolution and his efforts to
organize a European coalition to crush it, a reassessment of the reign and internal reforms of Gustaf IV Adolf, and the Swedish succession crises of 1809 and 1810.

In addition, Barton examines the increasing tension between the Pan-Scandinavian movement and the rising Finnish national movement. He deals with the historians of the Danish Agrarian Reforms of 1784-1814, parallel developments in Finland and Norway between 1808 and 1917, the discovery of Norway abroad, Swedish national romanticism, and Sweden’s transition from a warfare state to a welfare
state, now exemplifying the rational and humane ideals of the twentieth century.

Essays on Scandinavian History highlights important topics in the history of the Scandinavian region, which has remained all too little known outside the Nordic lands themselves, while also offering broader perspectives on Europe since the mid-eighteenth century. Twelve keyed-to-text illustrations, a bibliography of Barton’s publications on Scandinavian history, essay endnotes, and an index augment this work.

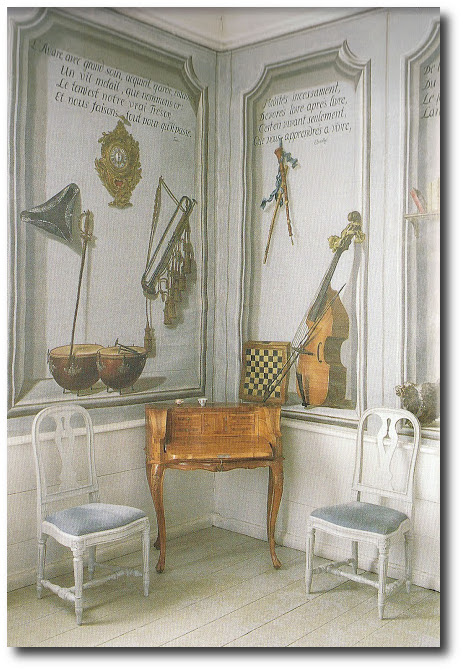
A ‘musical’ Trompe l’oeil in one of the rooms of Akerö in Södermanland,

Sweden with a Rococo “Bonheur du Jour” Picture Credit –La Pouyette Blog

Gustavian Trågsoffa, via Skona Hem

Wood floors are one of the most recognized design feature of the Swedish Gustavian look. Rustic planked wood is a top choice for flooring in the design industry. Wood floors are easy to maintain, and they are associated with the utmost quality and taste. Hardwood flooring will outlast carpet in any competition making it a smart investment.

If you have children or pets, carpet gets dirty. Pets that come in and out of the house bring dirt back into the home, and over time, the carpets become soiled. In this situation, carpeting only looks good after they are shampooed. While I am not here to beat up carpet, as there are many styles of carpet that are elegant choices, wood flooring maintains better over the years. Even if you decide to go with one of the less expensive wood alternatives, you are assured that this look is easier to maintain than carpet.

It wasn’t until the Baroque Era began, that wood flooring became an option for the home. Before 1625, most European houses continued to have dirt floors. Wealthy families utilized elm or oak boards which were held on joists.   Once wood floors gained popularity, it became known as a more affluent design choice.   Throughout the 17th and 18th century wood flooring flourished.  Solid wood plank flooring, was  installed in many homes, and many trend setting homes painted their floors.  Upscale homes installed the richer designs such as parquet and marquetry wood patterns. Wood flooring today is still the most desired flooring, surpassing stone flooring.

Gustavian Trågsoffa, via Skona Hem

 Gustavian Trågsoffa, via Skona Hem

Gustavian Trågsoffa, via Skona Hem

Gustavian Trågsoffa, via Skona Hem

Pine Plywood | Design Build Love

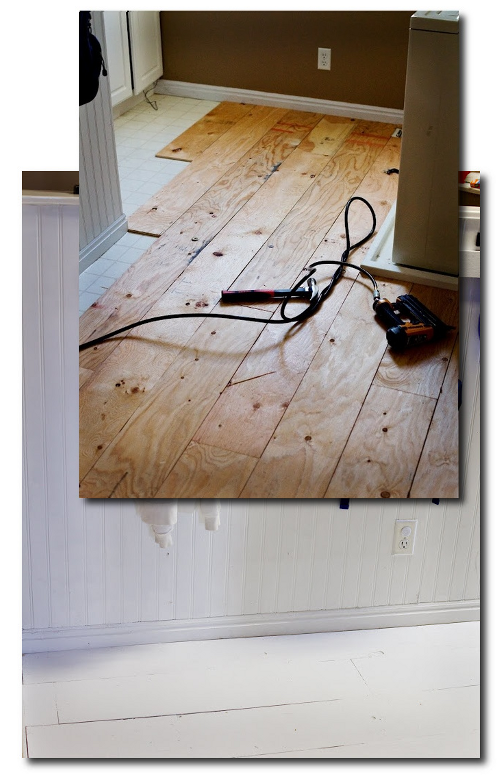
I stumbled across a DIY trend out there where people are cutting their own “planks” out of plywood.  It seems rather unusual at first, but the results really surprised me.  You get the look of real wood flooring which you can sand, paint, stain, varnish, or white wash, for fractions of the cost.

“We tore up nasty old carpet, then cut grooves in the plywood that was under the carpet to replicate plank flooring with a skill saw – and used a dremel to get closer to the walls. This worked better than the router which was recommended in the web article I got this idea from. We stained and then did three coats of poly. Everyone’s amazed that this isn’t ‘real’ plank flooring! We varied the width of the planks, using a 2×4 as a guide.”

There are a couple of links I want to share that might move you in the direction of considering this look.

1.  Layers Of Learning Blog Flooring Transformation

Layers Of Learning Blog posted absolutely stunning photos of a room that they used plywood cut into 6″ strips of wood.

They mention in their article that plywood floors allowed them to transform their WHOLE house because of the low cost of the materials.  This certainly a reason to consider this option. Many people can only afford a couple rooms with the other options.  Plywood is so inexpensive, that you can do it yourself, and it is affordable.

Plywood gives you the option to cut wide planks with real grain.  For those of you who want the REAL thing, this would be an affordable way of getting the look for less.

Buying plywood allows you to do one room at a time.  It doesn’t matter if your project takes you a couple months to a year to complete, because plywood is practically the same from store to store.    The finishing process allows you to dent, distress, and apply paint or stain which unifies the space.

Another plus to plywood floors is if something is spilled on the floors, which ruins several boards, all they would have to do is rip up the damaged boards, and replace them with the same finishing paint, stain or varnish!

PLY Wood Floors By Layers Of Learning Blog

Here are some of their costs:

Living room – 20′x13′ which equals 260 square feet.

$13.97 each on 9 sheets of 11/32″ “CD” grade plywood = $125.73, See the rest of the break down on their blog Layers Of Learning Blog

Here are some of their tips to consider.

Don’t Buy the Premium Brand Of Plywood

“There are different grades of plywood. “A” grade is the nicest, it comes with one very clean and sanded side. This is not what we went with because, as the guy at Lowe’s said, we can sand it ourselves and save big $$$. A sheet of “A” grade plywood costs about $28 in our market, but a sheet of “C” grade plywood is only about $14.”

Let The Wood Adjust To The Temperature Of The Room 

” After the plywood is cut, stack it in the room where you’ll be laying it for a couple of days.”

2. Quarry Orchard Blog

Quarry Orchard Blog also put together a beautiful floor made from Plywood.  In their “Plywood To Plank Flooring Tutorial

They decided to tackle a redoing the room above their garage with a square footage of approximately 533.  They decided to go with 6 inch strips that were all 8 feet long.  They were shocked that it only took them an hour and 45 minutes to cut the sheets into the planks.

A Couple Tips From The Quarry Orchard Blog

– They started with the first board and squared it with the wall, leaving a 1/16 inch gap between the first board and the wall.

– Be sure to use a nail punch to make sure that the nails at least flush with the flooring.

– Clean up the look by being sure the nails are all in line and evenly spaced. Have a helper that can measure and mark the wood. They measured every 16 inches for each nail. Consider making a jig to help with the measuring and marking for where the nails are to go. This will enable you to line up the previous board and mark rather than measure for every single nail.

Check out the final pictures of this room!  What a transformation! 

A Break Down Of Their Material Costs:

16 sheets of 15/32 pine plywood @ $16.49 per sheet
9 gigantic tubes of Liquid Nail @ $4.75 each
10 lbs of cut nails (ordered from Tremont Nail Company) @ $69.63 (includes s&h)
4 gallons of Varathane polyurethane @ $37.46 per gallon
2 quarts of stain @ $9.99 each

3.  Tidbits From The Tremaynes Blog

For their stunning transformation they used 4×8 sheets of plywood; cut into 8 inch strips, and laid it like a regular hardwood floor.  They used an old nailgun, some pennies to space out the wood, for the old  farmhouse-style look.  The cost was $60.  Fabulous!!

4.  The Picklee Blog
About to open a shop in Newport, RI, store owner Jordan decided to tackle the outdated carpet flooring that came with the shop.  Being that the shop was a historic home built in the early 1700′s, she wanted something more period appropriate.
She decided to go with the standard 1/2″ thick 4′ x 8′ sheets at a cost of just under $20 each.   In order to have zero waste, she chose to have the boards cut into 8 inch by 8 foot lengths, giving her six planks per sheet of plywood.

When she got back to the shop, she laid them out, and sanded all rough edges and splinters, and decided to white wash them before nailing them down.  She mixed up 1/4 CeCe Caldwells Simply White Chalk Paint and 3/4 water.  She then used a roller attached to a broom handle to apply a coat of the white washed paint to all of the planks.

After all the planks were dry, her fiance Brett, started working on nailing the planks to the flooring.  They used Bostik flooring adhesive to the backs of the plywood planks, which were then laid into place and nailed into the floor.  Brett used 1 1/2″ nails and shot them in on an angle.  The nails were spaced out about every 12″, placing two all along either side of each plank.  Brett used a metal straight edge for a spacing guide, which gave the perfect distance between planks.  As Brett went on nailing down the boards, he used a table saw to cut some of them into different lengths so that the boards would have more of a staggered look.

Onni Hotelli Kuvia Picture Credit Ranskalainenpatonki.blogspot

Painted wood floors are making a come back, and we believe that painted floors will become even more popular than we see today. In the past, finer homes installed decorative parquet floors and inlaid patterns. In the 17th and 18th century paint also was the means to create these decorative patterns on the floor, many which mimicked parquetry. Painted wood floors made it possible for more light to enter into the home, as the winter season in Sweden was quite dark. Rustic unfinished wood over time, darkens, and painting the wood just seemed like a practical approach of having a brighter home without spending a bundle.

Raw wood accepts paint so much nicer, and allows the paint to distress beautifully over time. Sanding wood, allows the paint to soak into the wood, compared to painting over varathane floors which may scratch easier with foot traffic. Homeowners with existing floors often have to carefully think carefully about how they go about re-finishing their wood floors,because the process can be pretty involved.   Refinishing wood floors can seem more labourous than painting, and often times it is. Sanding wood floors can be a time-consuming task.

There are a couple steps that cannot be skipped and we list them out below:

1. Prep

This involves removing your furniture from the room. Once you start belt sanding the floors, there will be dust everywhere. It can be a bit time consuming sealing off the house with drop cloths, or plastic tarp, but it is necessary for a great finish.

2. Sanding

The most time labourous part by far is sanding. Using a belt sander will kick up a ton of saw dust, and cleaning up the dust, which ends up everywhere becomes a tedious job. Sanding an entire floor can take up to 4 hours or several days depending on the size of the room.

Renting industrial professional tools saved my husband and I a lot of time when we refinished parquet floors in a rental in Virginia. Drum sanders are large machines that can handle large floors, and are very easy to operate. Drum Sanders can be rented at around $40 to $50 per day. I would highly recommend it than using a small scale sander that you can buy from a Hardware store.

Most homeowners choose to rent the specialty equipment and then purchase the more standard tools at their local hardware stores. Edge or orbital sanders are terrific for sanding the edges of the floor that the drum sanders cannot reach. A handheld power tool lets you tackle the tight corners, and are worth purchasing outright from Home Depot or Amazon. They allow you tools for additional furniture projects in the future.

3. Staining, or Painting

While everyone in the design community has their favorite paint brands, I would highly suggest going with a oil based paint. Oil holds up longer and has a tougher finish than any water based brands.

I would highly suggest sanding your room down to its bare wood, before painting. Painting over an existing paint is always possible, but the extra work pays off when the paint naturally distresses over time, which shows the wood through rather than an unsightly under color.

Sanding down to the natural wood also allows you to pickle the floors. White washed floors in my opinion are much nicer than painting the floors, because the wood gives the room a bit of depth and natural appeal.

In this post I show a photo of the Behr Wood Stain that is highly recommended. The stain is available in a number of colors, and evens out nicer than just paint that is mixed with water. Behr has a number of colors available that are off white, gray, beige that would work nicely with the Swedish interior schemes.  Mixing paint with a bit of water or stain work rather nicely.

Many people suggest applying paint with a professional paint brush which gives a smooth finish, rather than with a roller, which creates a stippled finish. Today you can purchase smooth rollers which can be used with extension pole to apply paint. Rollers are inexpensive ranging from $4 to $7 per pack. A pole will be anywhere from $5 to $40, depending on length and material.

You can choose a variety of different approaches with your paint choices….

If you decide to work with an existing painted floor, a great oil based primer is “Coverstain by Zinsser” This paint can be tinted almost any lighter color, dries very fast, and can be mixed with most other oil paints. Coverstain is in fact a primer that will adhere to almost anything, and would be a fantastic choice for the floors.

One gals review of Coverstain -“Zinsser oiled based primer is like gold

(Please note that Kilz or Coverstain primers should never be used on concrete floors. Go to Lowes or Home Depot, and buy stain or paint made just for concrete floors. Concrete stain doesn’t flake off on concrete like paint does)

As a top coat on your wood floors, you can purchase a Water-based polyurethane clear varnish, to seal in the tinted paint, or purchase water based, or oil based paint for your top coat. I have tinted this paint many shades of gray, blue, green and yellow. It is marvelous on furniture. This primer dries flat, allowing almost any other paint to be applied to it. It serves as your primer and your base paint, allowing you to just then seal the color in with a water based sealant.

If you are working with a previous painted floor, floors need to be sanded for the paint to stick properly. The worst is when you skip sanding, and the first time you move a furniture piece only to have the paint come off in sheets, or scratch. You will have regretted not sanding.

Sand first, and then paint the floors with a paint formulated for the flooring. We had painted our deck with paint formulated for the outside, and we are so glad we spent the extra money, because rain or snow, the paint hasn’t chipped.

4. Sealing

Polyurethane is an oil based sealant, that is NOT suggested for lighter colored paints. If you use this over your floors, in a week or a matter of days, the floors will have a tinge of yellow. You might then have to consider re-painting your white floors.

Polyurethane works perfect on unpainted wood, or on darker paint colors such as red, navy, black and so forth. A water based varnish is required for lighter based floor colors such as light gray, white, or cream.

You’ll have to wait 6 hours for each coat of polyurethane sealant to dry. It is recommended that most floors require at least 3 coats to achieve best results, and many professionals suggest 24 hours in between each coat of urethane.  It also takes up to 3 days before you can move furniture back into the room and walk on the floors again.

Onni Hotelli Kuvia Picture Credit Ranskalainenpatonki.blogspot

If the Renaissance history is of interest to you, chances are you will love Baroque style.  It is a design style isn’t that commonly seen in magazines, because the antiques are harder to find.  If you are thinking about a design that is different and unique, this is certainly it!  Baroque style originated in the 1600s in Italy before spreading throughout the rest of Europe. It originated in Rome, where the style was representative of the Catholic church, and was later adopted in the court of Louis XIV at Versailles.  From there, the style spread to The Netherlands and Britain, and went on for almost two entire centuries, and became a less dramatic by the time the end of the 1700s.

Baroque didn’t go out of fashion suddenly. Rococo style was adopted, beginning in France in the late 1720s, especially for interiors, but the Baroque style continued to be used in architecture and interior design until the clean lines of Neoclassicism became the dominant style in the later 18th century.

Baroque style is a very ornamented style.  Characteristics of this furniture are heavy, grand, theatrical, elaborate, and often rich in molding.  The furniture is often very heavy detailed, did we say very heavy detailed?  It is common to find baroque pieces which are intricately hand carved, such as turned legs and twisted columns. Louis XIV style is considered to the most identified example of Baroque style.

Baroque furniture is often larger in size.  Canopy post beds are a good example of this.  They were often grand with an excessive amount of carving. Cabinets, beds and chairs are all common pieces of furniture made in the Baroque style.

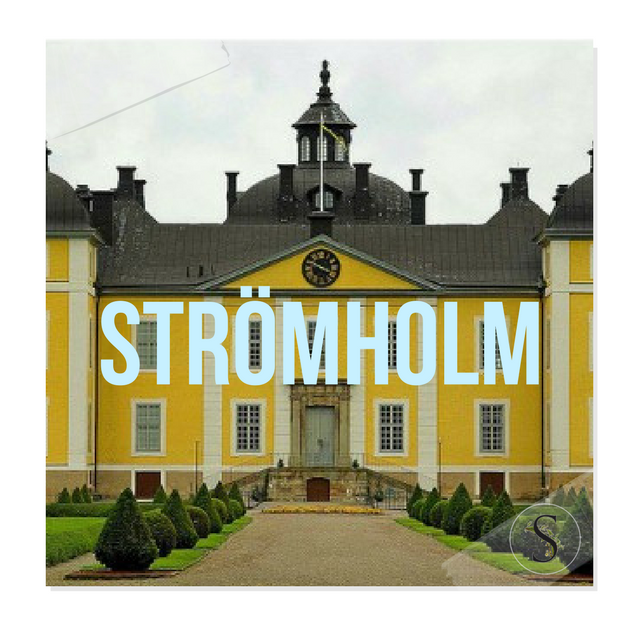
Sweden’s Strömholm’s yellow palace embraces the baroque style.  This palace is a perfect mix between the baroque style with a Swedish flavor that is not at all Italian.  Strömholm is located on the largest of three islands in the Kolbäckså river delta at Lake Mälaren. King Gustav Vasa had a farm on the property during the 1500’s.  In 1560 the current castle was built between 1669 and 1681 for Queen Hedvig Eleonare. Strömsholm palace is one of the countries best examples of Baroque style.  The Palace has royal interiors that are well preserved.

Additional Furniture To Admire

– A Swedish Baroque Table with Original Paintwork 1720s

-A mid 18th Century Swedish baroque drop-leaf table with its original blue paint

-A Swedish Baroque Centre Table circa 1750

-In Love With Swedish Baroque Mirrors

-Swedish Baroque drop-leaf table with original paint- Dienst + Dotter Antiques Picture 11

– Swedish Tray Topped Tea Table. Scraped to original blue paint. Beautifully shaped top with edge molding.Balustra shaped base on three legs.

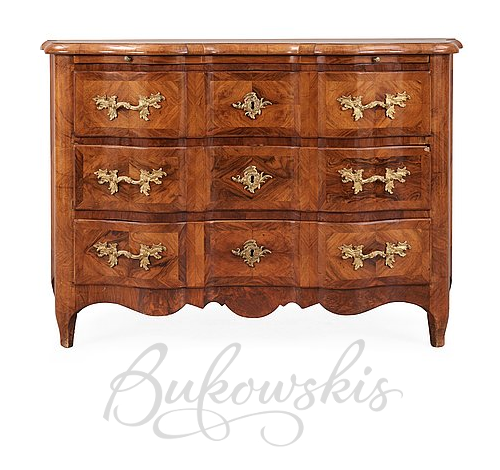
A Swedish late Baroque 18th Century commode, attributed to J. H. Fürloh.

The Dienst’s Home

A Baroque Wing Chair Upholstered In Gray Linen, sits beside a Baroque Chest

In Sweden, the Middle Ages lasted for approximately 500 years, until Gustav I of Sweden seized power in 1523. Most all of the buildings were constructed out of timer, until the 12th century, where stone became the predominant building material for the construction of the churches. Lund Cathedral, and Husaby Church are excellent examples of this style. The Gothic style brought brick to Sweden as a new fashionable building material, and many of the cathedrals were fashioned out of brick, while others were made of limestone. 1,500 of Sweden’s 4,000 churches from the Middle Ages survive from this period. The 13th century city walls around Visby are some of the best-preserved medieval city walls in Europe, and in fact, the street layout of Stockholm’s Old City still can be seen designed with a medieval flavor.

Sweden rose to a great Power in the 17th century, the privileged class and government began to build again. The idea of the architect and designer was established and the profession developed. During this time works of Simon De la Vallée and Nicodemus Tessin the Elder became well known in Sweden. The work of Nicodemus Tessin the Younger moved the architectural development in Sweden during this time into High Baroque, such as Stockholm Palace.

As we discussed in Part 1, a notable example of the Baroque style in Sweden was seen in Strömholm. In part 2, we discussed King Gustav Vasa, whom was the ruling power at the time, and how the Catholic church dominated the design circles which influenced art across Europe and abroad. In Part 3, we discussed both Skokloster & Steninge Palace as striking examples of the Baroque style, which architect Nicodemus Tessin the Younger was responsible for. In part 4 and 5 we hope to inspire you to achieve this look in your own home looking at an example of a collector of Swedish antiques and what they did for their own home working with Baroque Swedish antiques in particular.

Jill Dienst’s owner of Dicost + Doner specializes in Scandinavian antiques from the 17th century to the mid-20th century.  Jill Dienst’s passion for collecting for her own home over the years paved the way for her success as an antique dealer.   Before opening up her own business, Jill Dienst spent decades at some of the finest institutions in the art, which allowed her to gain an appreciation for antiques and design world.

All images and information from Martha Stewart.

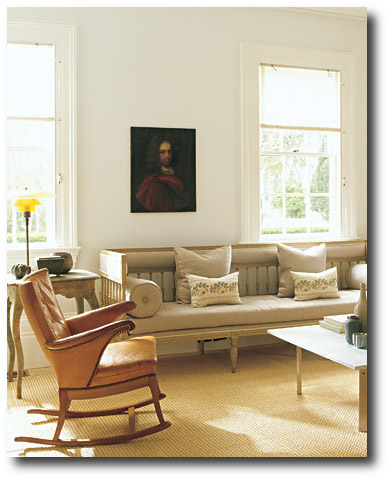
The centerpiece of the living room is a Gustavian sofa, which has been
upholstered in plain linen.

Mid-twentieth-century pieces by Danish designer Poul
Henningsen are mixed into the room

The simple, roll-up window shades are the same kind used in Swedish manor
houses, but these are made from a sheer fabric.

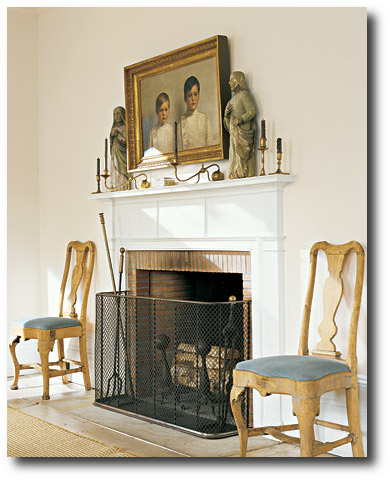
The living room walls and mantel were painted slightly different variations of
the same color. 

The painting is a 1911 portrait of Swedish boys in school uniforms sit above the mantel.

The statues came from a rustic church in southern Sweden.

The candlesticks work beautifully with the gilt portrait of the Swedish boys

The Dienst’s home is an excellent example of a home decorated around the Baroque themes with a distinct Scandinavian design. The Baroque styles originate in Italy so most commonly we see examples of this style from that region, but rarely from the north or the south or any other region for that matter. In addition, the Dienst’s home is designed around some of the very best Swedish antiques making their home inspirational to all who are hoping to project this style for their own homes.

With so many modern variations of this style, there is no right or wrong when it comes to decorating and color. In fact, you may find that many top designers tend to embrace color to an extreme when working with the Gothic / Renaissance interiors. Many modern professional styled homes set around the Baroque period style tend to favor brighter colored interiors which do give the really primitive styled furniture a modern, updated look. Hot pinks, cobalt blues, reds and bright yellows mixed with the Baroque antiques give rooms a very premium designer feel.

You’ll also find that Baroque furniture is also painted in a plethora of colors. Painted furniture in hues of purples, blues, greens, reds, yellows, oranges can then be matched up with paint colors that work with the original paint on the antiques.

Fresco wall painting can also capture the picturesque look into a room. Stuccoing it can add that castle appeal that are seen in the ancient stone buildings. Many of the Swedish Baroque castles featured elaboate walls covered in wallpaper. Choose wallpaper with a colorful, detailed, motif pattern can still fit into the Baroque schemes.

While many people like to keep the windows rather minimal, study the designs to see what appeals to you best. Windows have been known to be one of the main characteristics of Baroque designs. Consider buying heavier draperies made from velvet, damask or silk which can be hung in a modern way. With this approch, your home can look updated using the right styles of fabrics without it looking like a museum.

Flooring, can truly make a break a room all on its own. Paint can transform a room without much cost, so I always suggest that any budget should be spent on flooring, and a few carefully chosen period antiques. Sweden has been known for its vast forests, so it made sense that flooring was made from wood. You simply cannot go wrong with pine flooring. Pine flooring also allows you to get away with vibrant paint shades on the wall, and almost any wallpaper pattern.

Baroque styled interiors rarely used rugs or carpeting. Rooms in the Baroque era usually used geometrical-patterned wood flooring.  Besides parquet flooring, you can also use marble and stone floor tiles that were also used during that period. Make your own stone for the floor or walls using concrete molds. There are a variety of shapes and styles making period stone features inexpensive to produce at home.

Baroque furniture is typically large and heavy. With the modern bedrooms being much smaller in size, plan the furniture out before purchasing to make sure everything will fit to the bedroom. Consider investing your bedroom budget on a bed. A canopy bed with ornate carving and tall posts from which you can hang drapery would be an ideal choice.

Chairs upholstered in Ceylon et Cie’s Ikat print collection

Upholstered chairs are an easy way to match up patterns that match the drapery, bed canopy and the color of the wall. The bedding should match the theme of the drapery, wallpaper, upholstery, and the bed canopy. Ikat patterns have become tremendously popular in the last several years. There are so many different versions of this ethnic, bold weaving style that is likely one of the oldest patterns in existence. Get some examples from Kelli Ford & Kristen Fitzgibbons.  Look for combinations of colors paired with white. Indigo and ocher and vibrant contrasting colors would be a great choice for a Baroque interior.

Period styled decor will also strengthen the overall design. Consider a combination of candlesticks and lamps. Choose a heavy crystal chandelier with both brass and glass to enhance the Baroque feeling. Add ceramic vases and bowls with floral oriental patterns to enhance a room that has color, or lack of color. Invest in large scale paintings or very heavy mirrors with ornate gilded frames.

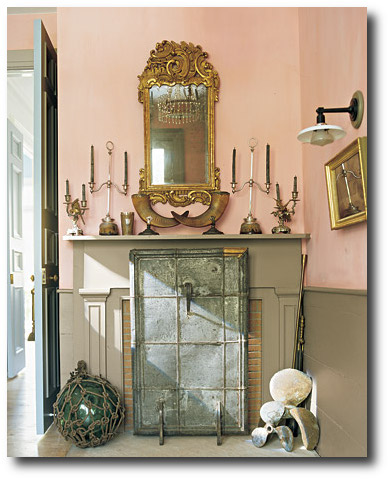
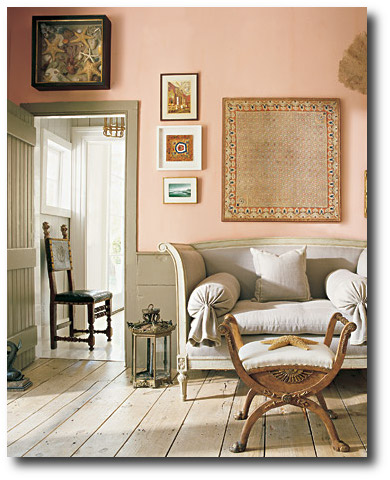
In the two pink rooms, Dienst’s small parlor off the entry features an early-baroque spark screen. The mirror is Danish rococo, and the crystal chandelier it reflects is Gustavian. Brass propellers complete the look. Gray wainscoting and bare floors soften the vivid color of the walls, which are adorned with an array of small paintings, sea fans, and a framed collection of starfish. The Gustavian settee is upholstered in linen, the stool is from the mid-nineteenth century, and the side chair is baroque. A mid-twentieth-century Danish lamp stands on the floor by the settee.

Reclaimed Wood Dining Table From A Tyner Antiques 

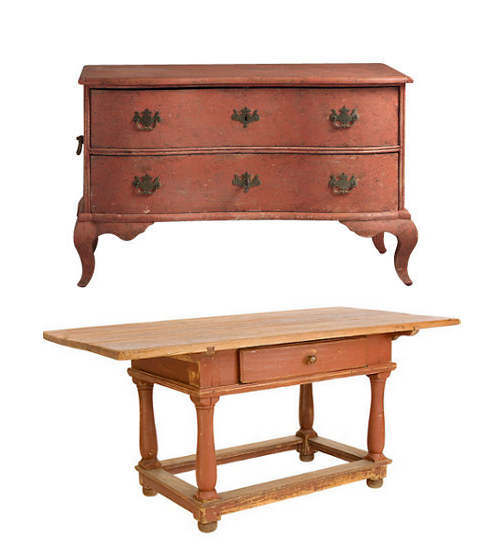
A.Pair of Swedish Baroque Commodes

B. A late-18th-century Baroque Swedish table with center drawer. Original red paint.

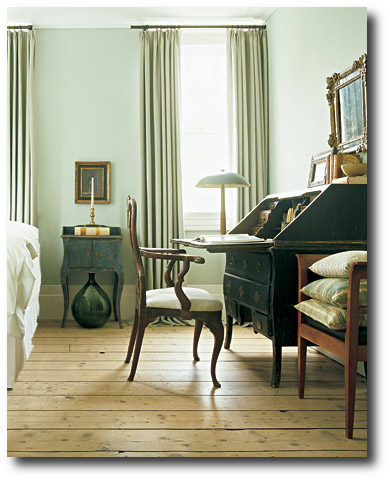
A black painted baroque Swedish desk sits in a guest bedroom.

The small side cabinet is rococo, and
the lamp is Danish.

Swedish Baroque Table From the 18th Century

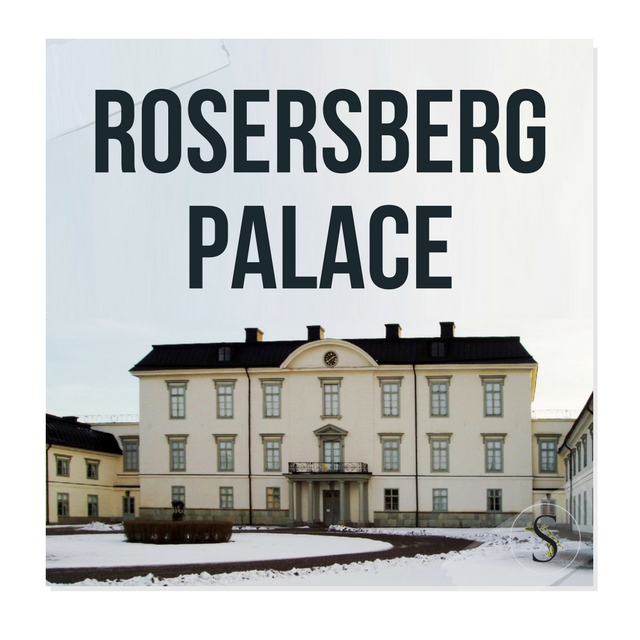
Rosersbergs Slott From Lennatt Durehed Photography

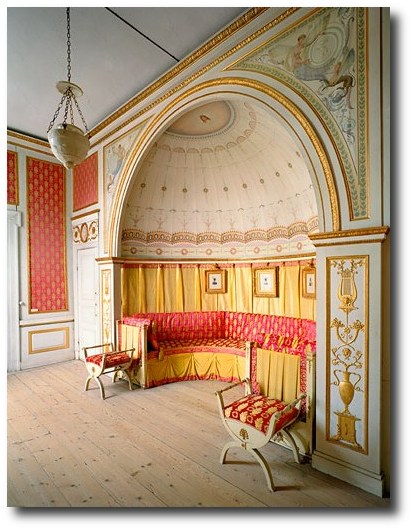
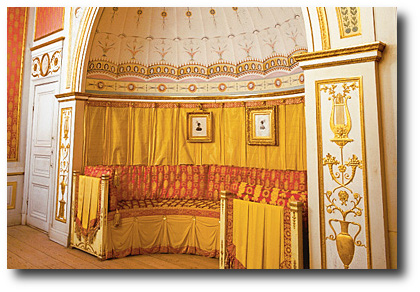
Corridor and Niche at Rosersberg Palace From Corbis Images

Rosersberg Palace (Swedish: Rosersbergs slott) is one of the Royal Palaces of Sweden. Situated on the shores of Lake Mälaren, on the outskirts of Stockholm, it was built in the 1630s by the Oxenstierna family and became a royal palace in 1762.  It was then that the state gave it to Duke Karl (later Karl XIII), the younger brother of Gustav III of Sweden.

Today at Rosersberg the rooms remain almost untouched from the 1795-1825 period.  The interior takes you back in time to the authentic royal interior from the turn of the 19th century.

The second half of the 17th century, the Renaissance Palace became to be dated.  Chancery President Bengt Oxenstierna acquired the estate, and renovated the home in the Baroque style that was fashionable at the time.  He sought out the country’s leading architect, Nicodemus Tessin the Younger, and new wings were added to the building.  The tall Renaissance gables were taken down and the exterior of the building was updated with a new hipped roof.

Then in 1747, Rosersberg was acquired by Baron Erland Broman.  More alterations to the buildings were directed by one of the country’s most prominent 18th century architects, Jean Eric Rehn.  On Broman’s death in 1757, the property was acquired by the State.

The property was then placed at the disposal of the young Duke Karl (later King Karl XIII) of Södermanland.

When Duke Karl (XIII) moved in around the 1760s, he modernized the palace in late Gustavian style. The interiors at Rosersberg Palace differ from the Gustavian style interiors of other royal palaces in Sweden. At Rosersberg the style has been known to trend after the Empire style.  The palace combines the two styles: Neo-Classicism and the “Empire style”.  Get some ideas from this beautiful castle for your own home.

Sweden’s Rosersberg PalaceFrom Flicker

Pair of Louis XVI carved and painted Fauteuils. Having oval backs, carved flower crest and apron on stop fluted legs.

Pair Classical Pate-sur-pate Vases Urns & Lids From Vintage Views Ebay

A Swedish Empire Sofa with Classical Gilt Detailing Upholstered by Talisman circa 1790